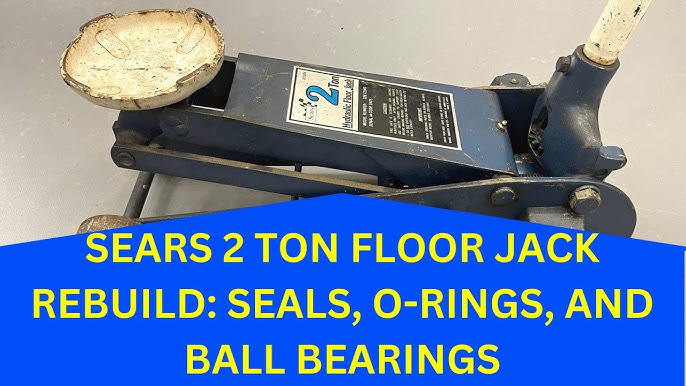
If your Sears floor jack isn’t holding pressure or is leaking fluid, the problem might be worn-out seals. Replacing these seals can save you money and extend the life of your jack.
In this guide, you’ll learn exactly how to replace seals on your Sears floor jack quickly and safely. By following simple steps, you’ll get your jack working like new again and avoid costly repairs or replacements. Keep reading to take control of your floor jack maintenance and get the job done right.

Credit: www.youtube.com
Tools And Materials Needed
Replacing seals on a Sears floor jack requires specific tools and materials. Having the right items ready makes the job easier and safer. This section lists the essential tools and recommended replacement seals you will need.
Essential Tools
- Wrench set for loosening bolts and nuts
- Screwdrivers, both flathead and Phillips
- Pliers for gripping and pulling seals
- Rubber mallet to gently tap parts into place
- Seal pick or small flat tool for removing old seals
- Clean cloths to wipe surfaces and remove dirt
- Hydraulic jack oil to refill after seal replacement
- Safety gloves to protect your hands
Recommended Replacement Seals
Use seals designed for Sears floor jacks to ensure proper fit. Look for high-quality rubber seals resistant to hydraulic oil. Common seal types include:
- O-rings for cylinder and piston seals
- Backup rings to support the O-rings
- Dust seals to keep dirt out
Choose seals that match your floor jack model number. This ensures you get the correct size and thickness.
Credit: www.youtube.com
Preparing The Floor Jack
Preparing the floor jack is the first step to replace its seals properly. This step ensures the jack works safely and smoothly after repair. Taking time now prevents problems later. Follow clear steps for a clean and secure start.
Safety Precautions
Wear gloves to protect your hands from grease and sharp parts. Use safety glasses to avoid injury from dirt or debris. Work on a flat surface to keep the jack stable. Keep children and pets away from your workspace. Do not rush; careful work avoids accidents.
Cleaning The Jack
Remove dirt and old oil from the jack’s surface. Use a rag soaked in mild detergent or degreaser. Wipe all parts, focusing on areas around seals and moving parts. Dry the jack thoroughly to prevent rust. Clean tools and workspace to keep everything organized.
Removing The Old Seals
Removing the old seals from your Sears floor jack is a key step in keeping it working well. Worn-out seals cause leaks and reduce the jack’s lifting power. This section guides you through the process of removing these seals safely and clearly.
Start with careful preparation. Clean the jack to avoid dirt entering the system. Gather the right tools and set up a clean workspace. Patience and care will make the job easier and prevent damage.
Locating The Seals
Find the seals inside the jack’s hydraulic system. Usually, they are near the pump and cylinder areas. Check the jack’s manual for exact locations. Look for rubber rings or gaskets. These parts keep the hydraulic fluid from leaking out.
Inspect the seals for cracks, tears, or wear. Old seals often look dry or cracked. Mark their positions before removing to help during reassembly.
Disassembling Components
Remove any covers or guards blocking access to the seals. Use the right tools to avoid damaging parts. Carefully loosen bolts or screws holding the components together.
Take the components apart gently. Keep track of all small parts like springs and washers. Use containers to hold screws and bolts. Pull out the old seals using a seal puller or flat tool, avoiding damage to the metal parts.
Clean the area around the seals once removed. This prevents dirt from entering the system during reassembly. Prepare the space for installing new seals.

Credit: www.amazon.com
Installing New Seals
Installing new seals in your Sears floor jack is a key step to keep it working well. Properly placed seals stop leaks and maintain pressure. This helps the jack lift heavy loads safely and smoothly.
Take your time with this part. Wrong placement can cause damage or poor performance. Follow the steps carefully to ensure each seal fits just right.
Positioning The Seals Correctly
Start by cleaning the seal grooves and surrounding areas. Dirt or old grease can stop the new seals from fitting properly.
Check each seal for damage before installing. Replace any seal that looks cracked or worn.
Place the seals gently into their grooves. Use light pressure to avoid bending or tearing them.
Make sure the seals sit flat and even. Uneven seals can cause leaks or make the jack hard to operate.
Double-check that you put the seals in the right order. Some jacks use different seals for each part.
Reassembling The Jack
After the seals are in place, carefully put the jack parts back together. Do not force any pieces; they should fit smoothly.
Check that all bolts and screws are tight but not over-tightened. Too much force can damage the seals.
Fill the jack with the correct hydraulic fluid. The right fluid helps seals last longer and work better.
Test the jack slowly. Look for leaks or any unusual sounds.
Repeat the process if you find any problems. Proper assembly ensures the jack’s safety and strength.
Testing The Floor Jack
Testing the floor jack after replacing the seals is very important. It helps to confirm the jack works safely and properly. This step ensures no leaks or faults remain. A well-tested floor jack gives confidence during use.
Checking For Leaks
Start by inspecting the floor jack for any fluid leaks. Look around the seals and the hydraulic cylinder. Small drops or wet spots mean the seals might not be tight. Pump the jack slowly and watch for leaks again. Any sign of fluid loss needs fixing before use.
Ensuring Proper Operation
Next, test the jack’s lifting and lowering actions. Pump the handle and check if the jack lifts smoothly. The jack should hold the weight without dropping. Lower the jack carefully to see if it descends steadily. No jerking or sudden drops should occur. Smooth operation shows the seals and parts work correctly.
Maintenance Tips
Maintaining your Sears floor jack seals extends its life and ensures safe use. Proper care helps avoid leaks and keeps the jack working smoothly. Follow these simple tips to keep your floor jack in top shape.
Regular Inspection
Check the seals often for cracks or wear. Look for oil leaks around the jack’s base. Inspect the rubber parts for any hardening or damage. Early detection stops bigger problems later. Clean the jack after each use to spot issues easily.
Seal Longevity Practices
Keep the jack clean and dry to protect the seals. Store the jack in a cool, dry place. Avoid exposing seals to harsh chemicals or extreme heat. Lubricate moving parts with the right oil to reduce wear. Replace seals quickly if you notice damage or leaks.
Frequently Asked Questions
How Do I Know When To Replace Sears Floor Jack Seals?
Check for oil leaks or loss of hydraulic pressure. If the jack won’t lift or holds pressure poorly, seals likely need replacing. Regular inspection helps catch seal wear early and ensures safe jack operation.
What Tools Are Needed To Replace Sears Floor Jack Seals?
You need a wrench set, screwdrivers, pliers, seal kit, hydraulic fluid, and clean rags. Having a repair manual specific to your model is also helpful. Proper tools ensure a smooth and safe seal replacement process.
Can I Replace Seals On My Sears Floor Jack Myself?
Yes, with basic mechanical skills and proper tools, you can replace seals yourself. Follow step-by-step guides carefully to avoid damage. DIY replacement saves money and extends the jack’s life if done correctly.
How Long Does It Take To Replace Floor Jack Seals?
Typically, seal replacement takes 1 to 2 hours depending on experience. Cleaning parts and carefully reassembling the jack are key steps. Taking your time ensures a leak-free and fully functional floor jack.
Conclusion
Replacing seals on your Sears floor jack keeps it working safely and well. Regular seal checks stop leaks and improve jack performance. Follow the steps carefully for the best results. Take your time and use the right tools. A well-maintained floor jack lasts longer and lifts better.
Now, your jack is ready for many jobs ahead. Simple care makes a big difference. Keep it clean and check seals often. Your safety depends on a good floor jack.