Imagine coming home to a perfectly lit room without lifting a finger. Setting up a light switch timer can make this your new reality.
If you’ve ever wanted to save energy, boost your home’s security, or simply add convenience, learning how to program a light switch timer is the key. In this guide, you’ll discover easy steps to take control of your lighting, even when you’re not around.
Ready to transform your space and simplify your life? Let’s get started.
Choosing The Right Timer Switch
Choosing the right timer switch is important for easy and effective control of your lights. The right switch saves energy and fits your daily routine. Different types of timer switches serve different needs and settings. Understanding compatibility and key features helps pick the best one for your home.
Types Of Timer Switches
Mechanical timer switches use a dial to set on and off times. They are simple and cost less. Digital timer switches offer more options and accuracy. You can set multiple on/off times easily. Smart timer switches connect to Wi-Fi and work with apps. They let you control lights from anywhere.
Compatibility With Your Fixtures
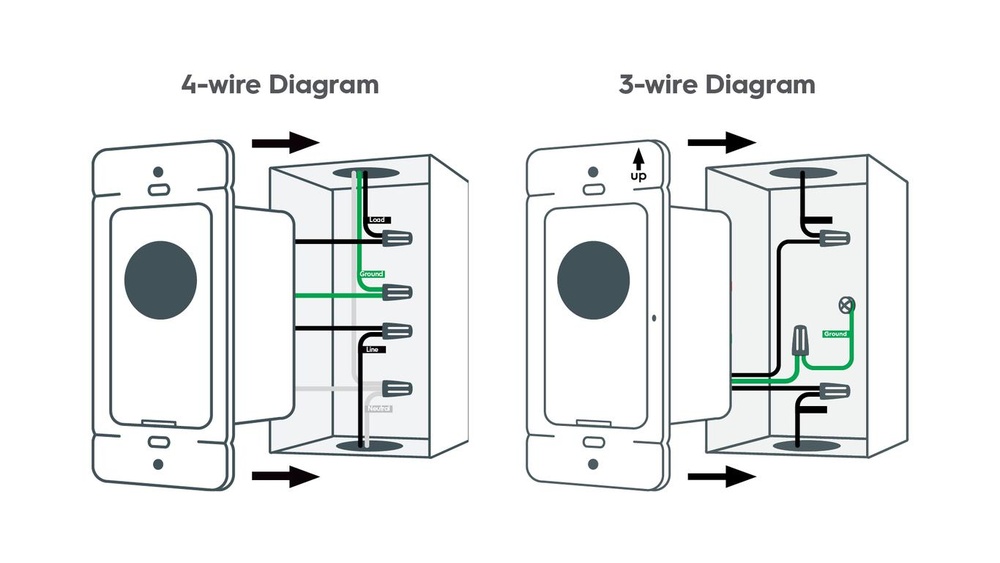
Check if the timer switch works with your light type. Some switches support LED, CFL, or incandescent bulbs only. Make sure the timer matches your home’s wiring system. Some need a neutral wire, others do not. Choose a switch that fits your fixture’s voltage and load capacity.
Key Features To Consider
Look for easy programming options. Clear displays and buttons help set times quickly. Battery backup keeps settings during power outages. Consider manual override to turn lights on or off anytime. Energy-saving modes reduce electricity use. Choose a timer with reliable build quality for long use.
Tools And Materials Needed
Programming a light switch timer is simple with the right tools and materials. Having everything ready saves time and effort. It also keeps the process safe and smooth.
Essential Tools
You need a screwdriver set to open the switch panel. A voltage tester helps check if wires carry electricity. Wire strippers prepare wires for connections. Pliers assist in bending or holding wires. A small flashlight is useful for dark spaces.
Safety Equipment
Wear insulated gloves to protect from electric shocks. Safety glasses shield your eyes from dust and sparks. Use a sturdy ladder if the switch is high on the wall. Always switch off the main power before starting work.
Additional Supplies
Have electrical tape to cover wire connections. Use wire nuts to secure wire ends. Keep the light switch timer device ready for installation. A notepad and pen help note wiring details for future reference.
Preparing For Installation
Preparing for installation is the first step to program your light switch timer correctly. It ensures safety and helps avoid mistakes. Taking time to prepare makes the process smoother and faster.
Turning Off Power Safely
Start by switching off the power at the circuit breaker. This stops electricity from flowing to the switch. Use a voltage tester to check if the power is off. Never skip this step to avoid electric shock.
Removing The Existing Switch
Remove the wall plate covering the switch with a screwdriver. Unscrew the switch carefully from the electrical box. Pull the switch out gently to see the wiring behind it. Keep the screws safe for later use.
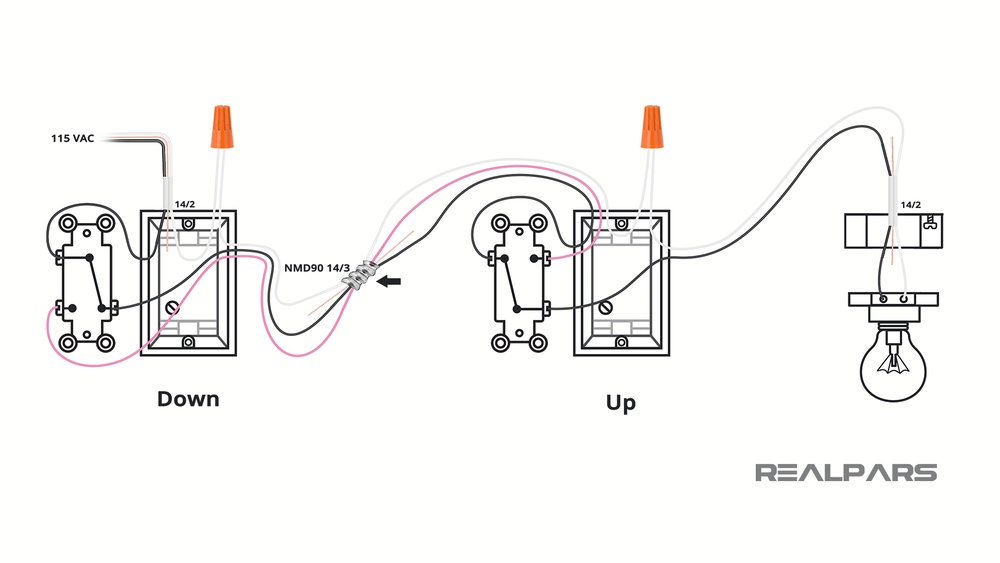
Checking Wiring And Connections
Look at the wires connected to the switch. Check for loose or damaged wires. Make sure the wires are properly attached to the terminals. Tighten any loose connections before installing the timer switch.

Credit: www.youtube.com
Installing The Timer Switch
Installing the timer switch is an important step to control your lights automatically. This part requires care and attention to detail. A proper installation ensures safety and smooth operation of your timer switch.
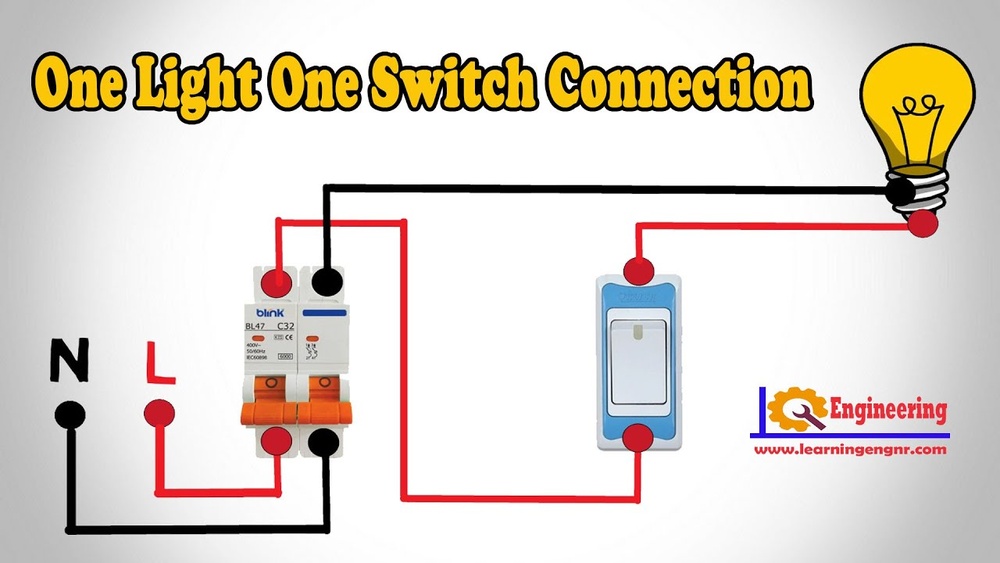
Connecting Wires Correctly
First, turn off the power at the circuit breaker. Use a voltage tester to confirm no electricity is flowing. Remove the old switch carefully, noting how wires connect. Match the timer switch wires with the house wires by color. Usually, black is live, white is neutral, and green or bare is ground. Use wire nuts to secure each connection tightly. Double-check all connections before moving forward.
Securing The Switch In Place
Push the wires gently into the electrical box. Align the timer switch with the screw holes. Use a screwdriver to fasten the switch firmly. Make sure it sits flush against the wall. Avoid over-tightening screws to prevent damage. Attach the switch cover plate to finish the installation.
Restoring Power And Initial Testing
Turn the circuit breaker back on to restore power. Watch for any flickering or unusual sounds. Follow the timer switch instructions to set the current time. Test the switch by setting different on and off times. Confirm the lights turn on and off as scheduled. Adjust settings if necessary for perfect operation.
Programming The Timer
Programming the timer on your light switch allows you to control when your lights turn on and off automatically. This feature helps save energy and adds convenience to your daily routine. Follow these simple steps to program your timer correctly.
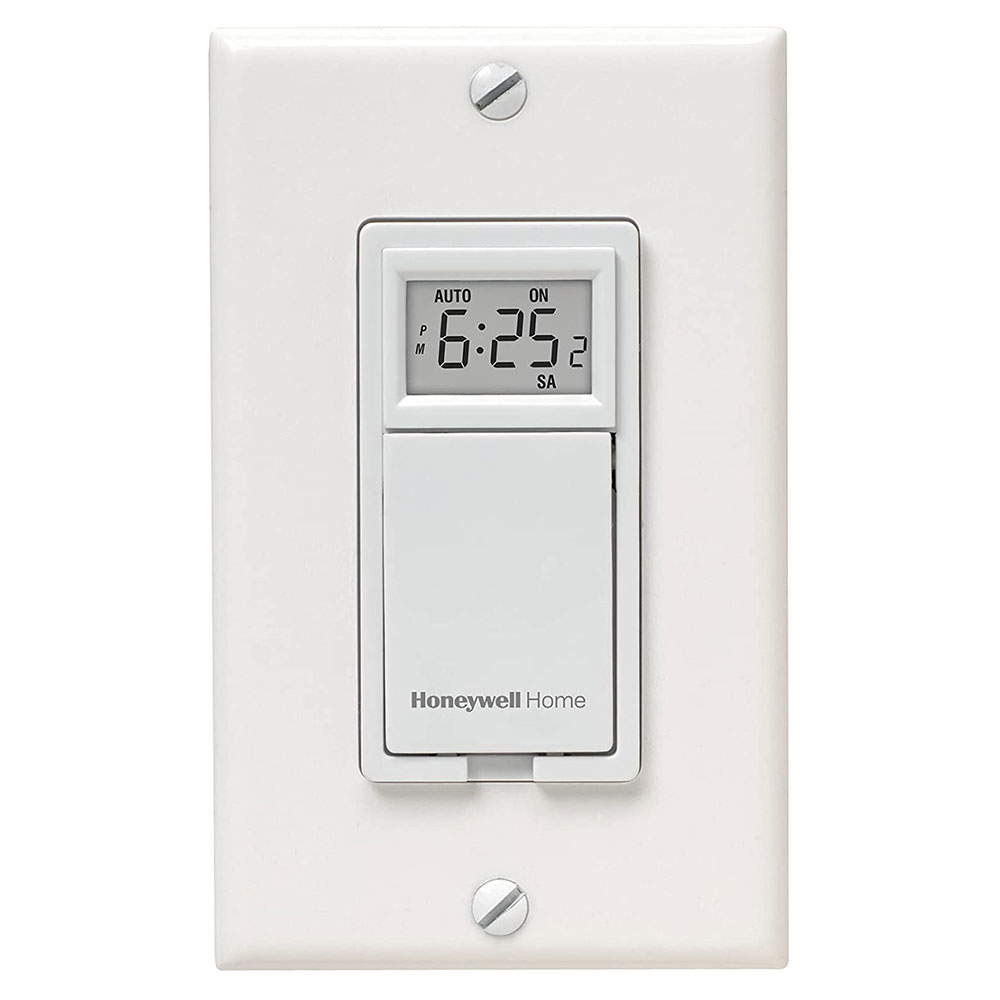
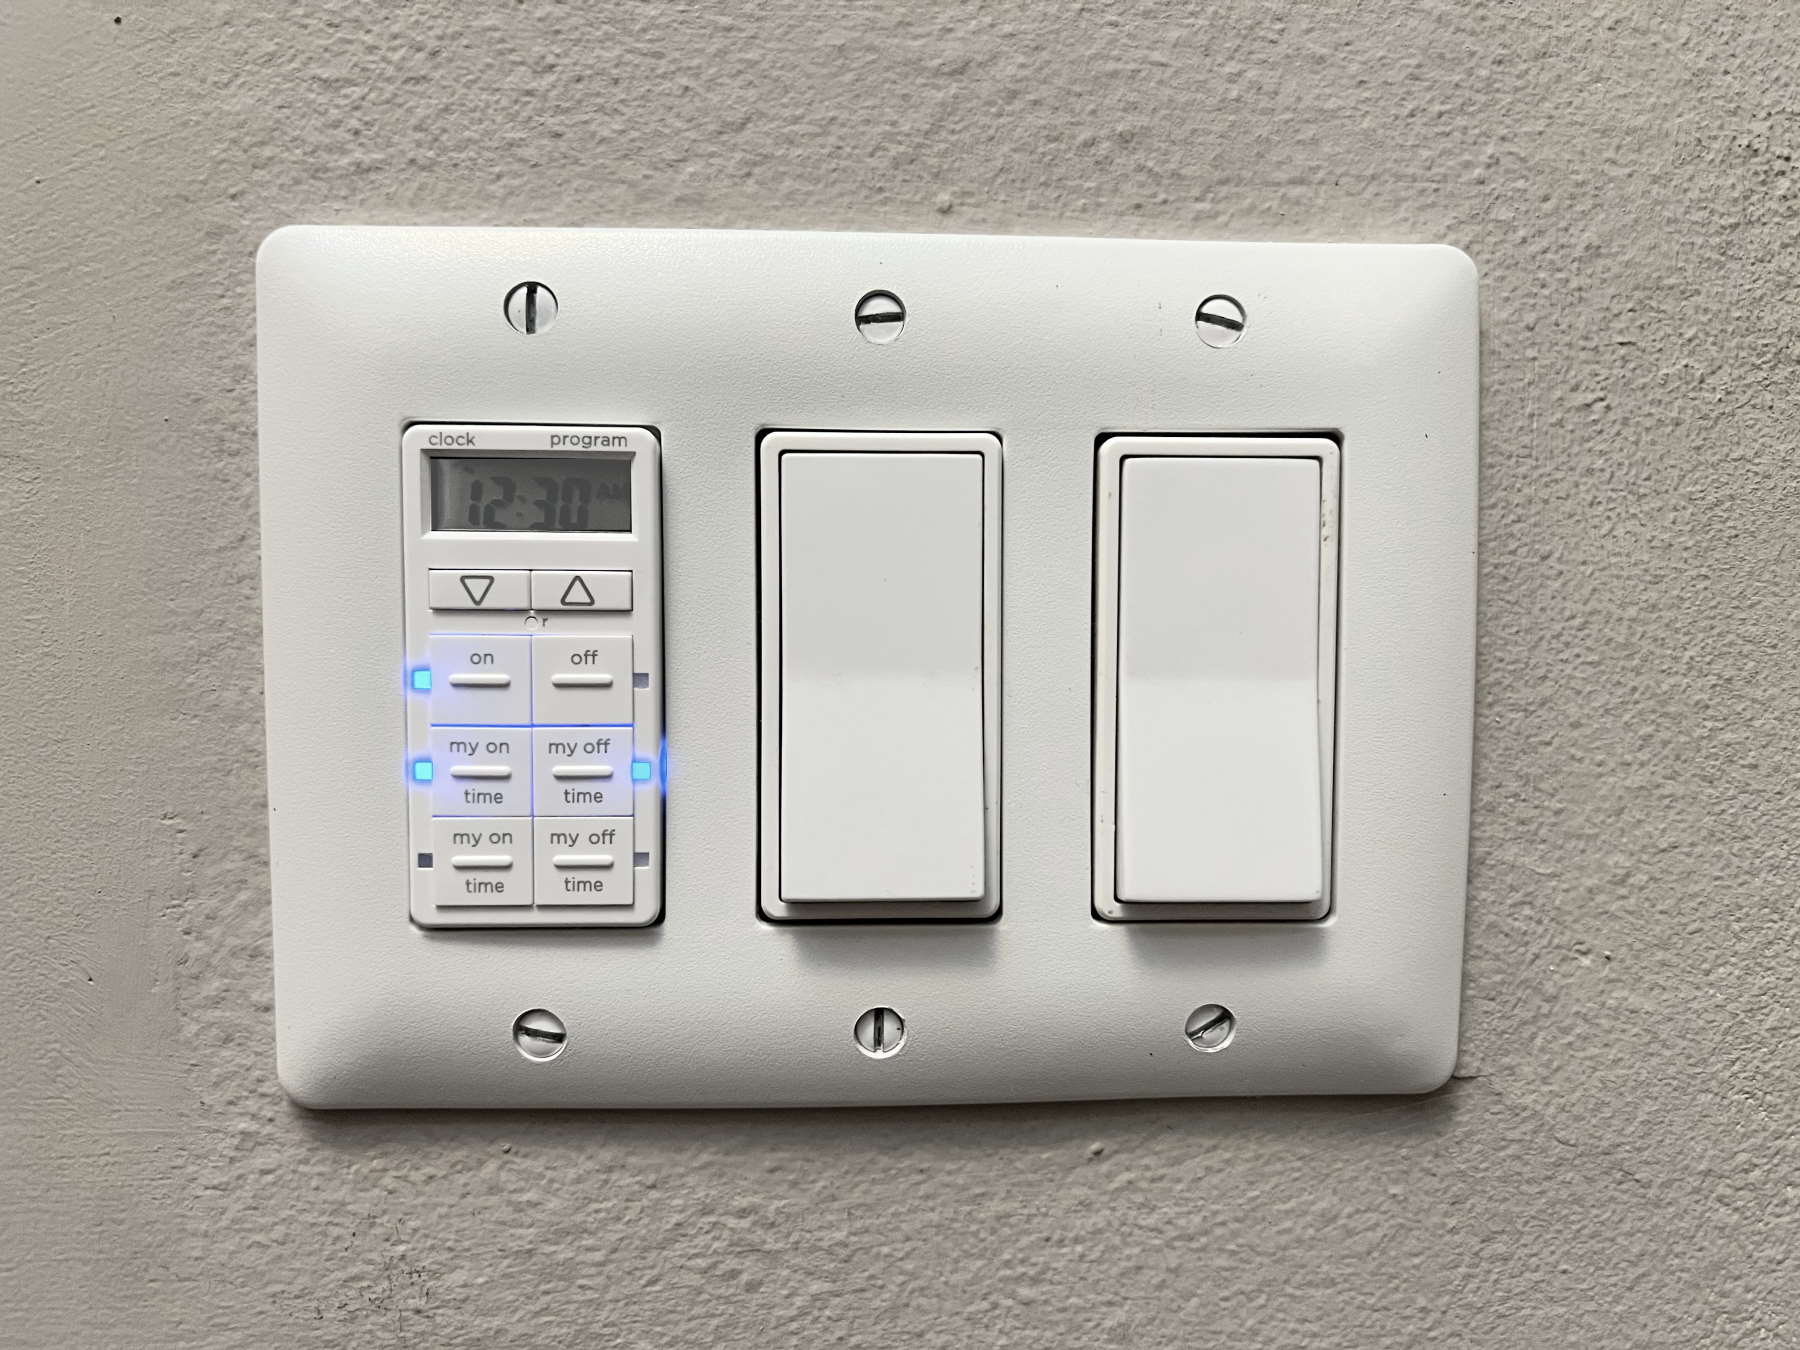
Setting The Current Time
Start by setting the current time on the timer. Find the clock or time button on your device. Press it and use the arrow keys to set the hour and minutes. Make sure to select AM or PM if your timer uses a 12-hour format. Confirm the time by pressing the clock button again or the OK button. Accurate time setting is essential for the timer to work properly.
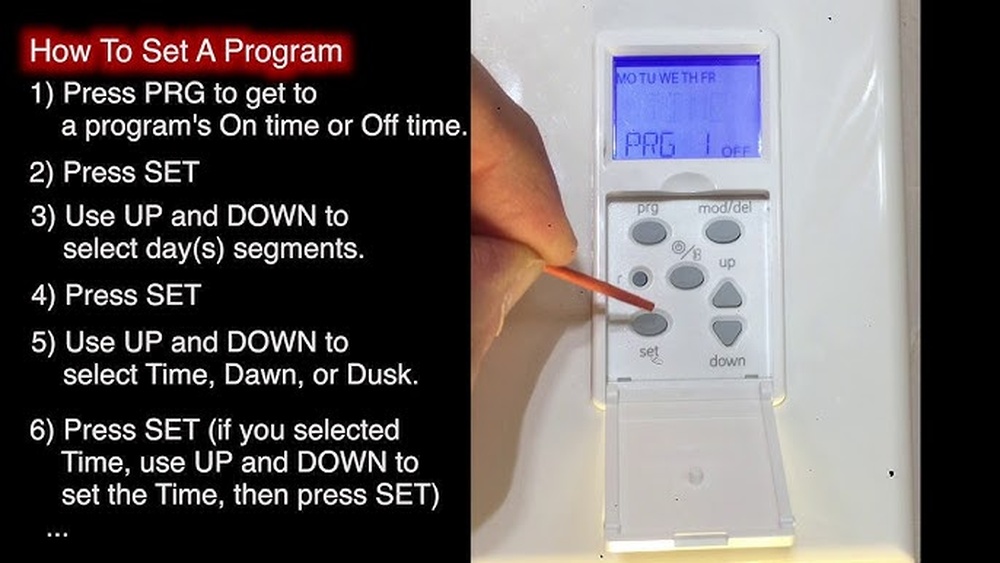
Configuring On And Off Schedules
Next, set the times you want your lights to turn on and off. Press the program or schedule button to enter this mode. Choose the first ON time by adjusting the hours and minutes. Save the setting and move to the OFF time. Repeat this process for each daily schedule you want. Most timers allow several ON/OFF settings per day.
Adjusting Advanced Settings
Some timers offer extra options like countdowns, random modes, or multiple day settings. Use these features to customize your lighting schedule. For countdown mode, set a timer to turn lights off after a set time. Random mode helps make your home look occupied when you are away. Check your timer’s manual for details on these advanced settings.
Smart Control Integration
Smart control integration makes light switch timers easier to use. It lets you control lights from anywhere using your phone or voice. This adds comfort and saves energy by automating your lighting schedule. Follow these simple steps to connect your timer to smart controls.
Connecting To Wi-fi
Start by turning on your light switch timer. Find the Wi-Fi settings on the device or its app. Choose your home Wi-Fi network and enter the password. Wait a few seconds for the timer to connect. A solid light or notification will confirm the connection. Ensure your Wi-Fi is stable for smooth operation.
Using Mobile Apps
Download the timer’s official app from your app store. Open the app and create an account if needed. Add your timer by following the on-screen instructions. Use the app to set schedules and timers easily. You can turn lights on or off remotely at any time. The app also offers notifications for your device status.
Voice Control Setup
Check if your timer supports voice assistants like Alexa or Google. Open the voice assistant app and link it to your timer’s app. Use simple commands to control the lights, such as “Turn on the living room light.” Voice control works best when the timer is connected to Wi-Fi. This hands-free option adds convenience to your daily routine.
Troubleshooting Common Issues
Programming a light switch timer can sometimes cause problems. These issues may stop your timer from working right. Troubleshooting helps fix these common problems fast. Understanding the cause makes it easier to solve the issue.
Switch Not Responding
Check if the switch has power. Make sure the circuit breaker is on. Press the buttons firmly. Sometimes dirt or dust blocks contact. Clean the switch gently with a dry cloth. Reset the timer by turning it off and on again. If the switch still does not respond, try a different timer or switch.
Incorrect Timing
Verify the time and date are set correctly. A wrong AM/PM setting can cause errors. Check the timer’s manual for the right programming steps. Make sure the timer is set to the correct mode. Confirm the on and off times are accurate. Adjust the timing and test it again after changes.
Connectivity Problems
For smart timers, check the Wi-Fi connection. Move the switch closer to the router if the signal is weak. Restart the router and the timer device. Update the timer’s firmware using the app. Ensure the app is compatible with your phone. Reinstall the app if the connection fails.
Credit: www.honeywellstore.com
Maintenance Tips
Maintaining your light switch timer is key for smooth operation. Proper care helps avoid malfunctions and extends its life. Simple maintenance tasks keep your timer reliable and efficient.
Regular Testing
Test your light switch timer regularly. Set it to turn on and off at different times. Check if it follows the schedule accurately. This helps find problems early. Fixing issues quickly keeps your timer working well.
Firmware Updates
Check for firmware updates from the manufacturer. Updates improve timer performance and security. Install updates as soon as they are available. This keeps your device up to date and safe from bugs.
Cleaning And Care
Clean the timer’s surface gently with a dry cloth. Avoid using water or harsh chemicals. Keep the area around the timer free of dust. Dust can cause the timer to stop working properly. Handle the device with care to avoid damage.
Credit: www.thefrugalnoodle.com
Frequently Asked Questions
What Tools Are Needed To Program A Light Switch Timer?
You need a screwdriver, voltage tester, and the timer switch manual. A stable ladder helps reach high switches. Ensure power is off before starting. These tools make programming safe and easy.
How Do I Set The Current Time On A Timer Switch?
Press the “Clock” button, then use arrow keys to adjust hours and minutes. Confirm with “Set” or “OK. ” Setting the current time ensures accurate scheduling of the timer.
Can I Program Multiple On/off Settings On One Timer?
Yes, most timers allow multiple on/off schedules. Use the “Program” button to add different time slots. This feature customizes your lighting for various needs throughout the day.
Is It Safe To Install A Timer Switch Myself?
Yes, if you follow safety guidelines. Turn off power at the breaker, use a voltage tester, and follow instructions carefully. If unsure, consult a professional electrician to avoid hazards.
Conclusion
Programming a light switch timer saves energy and adds convenience. You control when lights turn on and off automatically. This helps reduce electricity bills and keeps your home safe. Follow simple steps to set the timer correctly. Test the timer to make sure it works well.
With practice, programming becomes quick and easy. Try it today and enjoy better lighting control. Small changes make a big difference.