Is your floor jack leaking or not holding pressure like it used to? The problem might be worn-out seals.
Replacing seals on a floor jack can save you money and extend the life of your tool. In this guide, you’ll learn simple, step-by-step instructions to fix your jack quickly and safely. Keep reading, and you’ll have your floor jack working like new again in no time.
Tools And Materials Needed
Replacing seals on a floor jack needs the right tools and materials. Using proper items makes the job easier and safer.
Having everything ready prevents interruptions during the repair. It also helps to avoid mistakes that damage the jack.
Essential Tools For Seal Replacement
Gather a wrench set to remove bolts and nuts. A flathead screwdriver will help pry out old seals. Use needle-nose pliers to handle small parts carefully. A clean rag is important to wipe away dirt and oil. Also, a hydraulic jack pump tool might be needed to test the jack after repair.
Materials Required For The Job
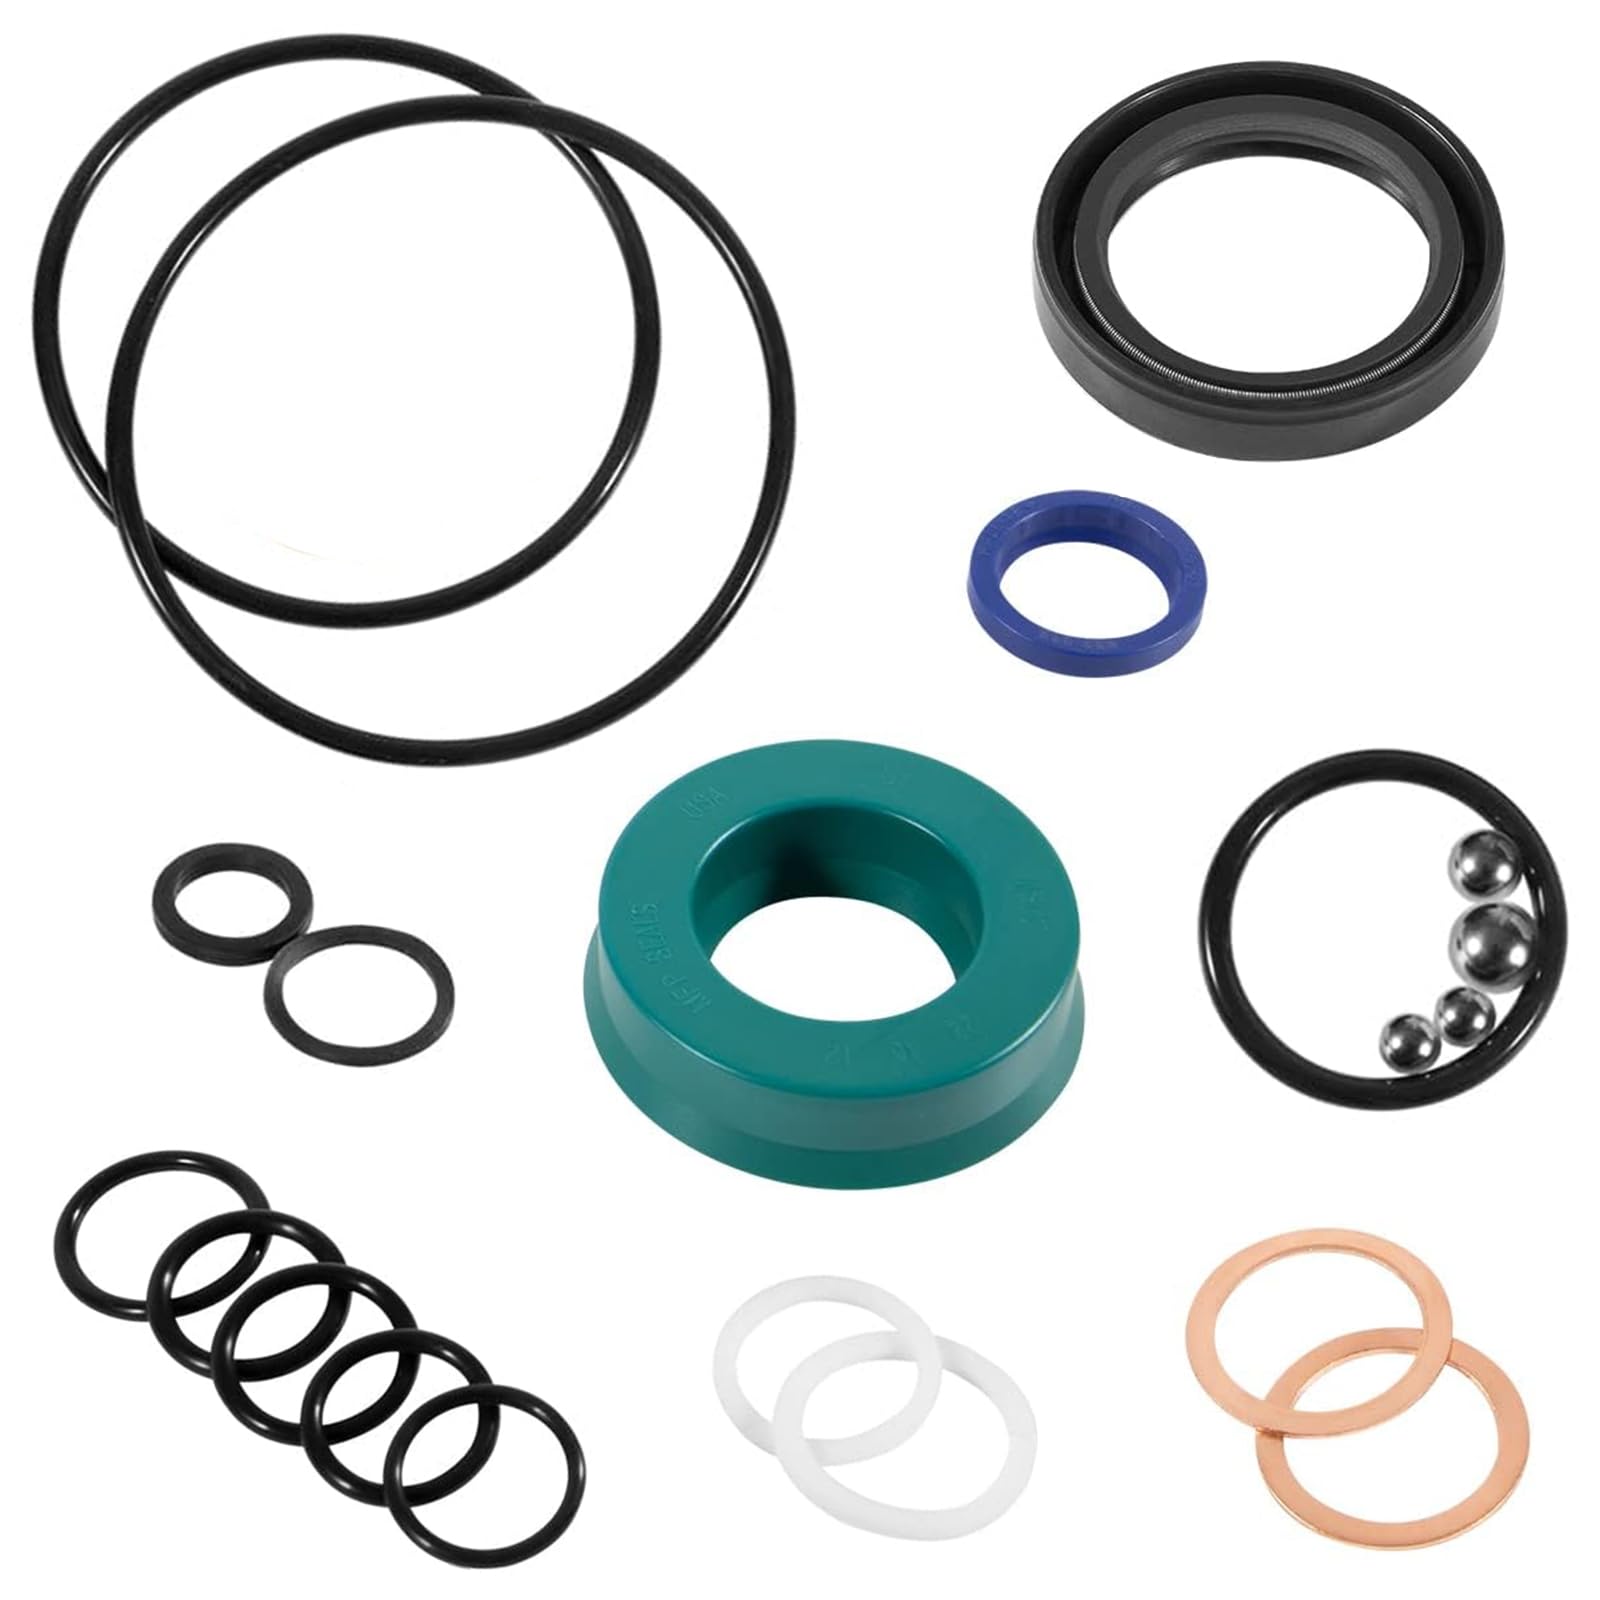
Buy replacement seals that fit your floor jack model exactly. Hydraulic fluid is necessary to refill after seal installation. Use a seal lubricant to ease the fitting process. Keep a container ready to catch any leaking fluid during the work.
Safety Gear And Workspace Setup
Wear gloves to protect your hands from oil and sharp parts. Safety glasses keep your eyes safe from splashes. Work in a clean, well-lit area. Use a sturdy workbench or table to hold the jack steady. Good lighting helps spot small seal parts easily.
Preparing The Floor Jack
Preparing the floor jack is the first step to replace its seals. This step helps you work safely and ensures the jack works well after repair. Taking time to prepare the jack makes the seal replacement easier and faster. Follow simple steps to get the jack ready before you start.
Safety Precautions
Always wear gloves and safety glasses. The jack may contain hydraulic fluid that can irritate skin or eyes. Work in a flat, open space to avoid accidents. Make sure the jack is cool and not under pressure. Lower the jack completely to release any pressure inside. Keep children and pets away from the work area. Proper safety helps avoid injuries and damage.
Cleaning The Jack
Remove dirt and grease from the jack’s surface. Use a clean cloth and a mild cleaner. Wipe around the seals and moving parts carefully. Cleaning prevents dirt from entering the jack when you open it. This step protects the internal parts from damage. Dry the jack completely before starting the repair. A clean jack makes the seal replacement smooth and effective.
Locating The Seals
Locating the seals on a floor jack is the first step in replacing them. These seals keep the hydraulic fluid inside the jack. They stop leaks and help the jack lift heavy loads safely.
Seals are small but very important parts. Knowing where they are helps you remove and replace them properly. This guide breaks down where to find these seals on your floor jack.
Understanding The Floor Jack Components
A floor jack has several parts. The main parts with seals are the hydraulic cylinder and the pump. The cylinder holds the fluid and moves the lifting arm. The pump pushes the fluid into the cylinder.
Seals sit between moving parts. They prevent fluid from escaping under pressure. Seals are often rubber or synthetic rings.
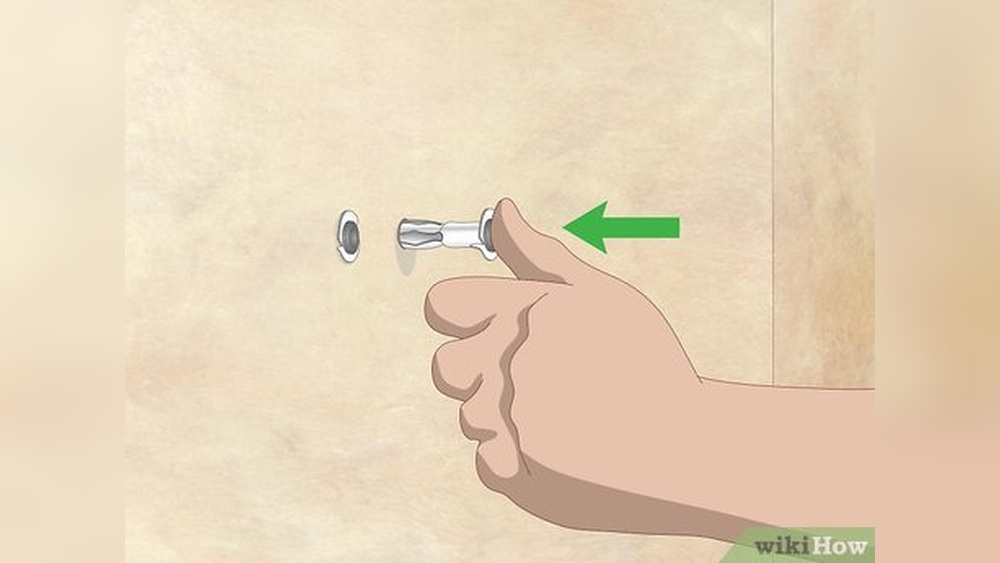
Locating The Hydraulic Cylinder Seal
The hydraulic cylinder seal is inside the cylinder tube. It fits around the piston rod. This seal stops fluid from leaking when the jack lifts.
To find it, remove the jack’s cover plate. Then slide out the piston carefully. The seal will be near the end of the piston rod or inside the cylinder wall.
Finding The Pump Seal
The pump seal is near the base of the jack. It seals the pump piston or plunger. This seal keeps fluid from leaking out when pumping.
Remove the pump cover to see the seal. It looks like a small ring or gasket around the pump parts.
Identifying Other Seals
Some jacks have additional seals on release valves or connections. These seals help maintain pressure and prevent leaks.
Check all valve areas and joints for small rubber seals. Replace any seals that look worn or cracked.
Removing Old Seals
Removing old seals from a floor jack is a key step in its repair. Old seals wear out and cause leaks or loss of pressure. Careful removal helps avoid damage to other parts. Follow clear steps to take out these seals safely.
Disassembling The Jack
Start by lowering the jack completely. Drain any hydraulic fluid into a container. Use wrenches to remove bolts and screws. Carefully take apart the jack’s main body. Keep track of all parts and their order. Lay them out on a clean surface for easy access. This step exposes the seals inside the jack.
Extracting The Seals
Look closely to find the worn seals in the cylinder. Use a flat screwdriver or seal puller. Gently pry the seals out without scratching metal surfaces. Avoid using sharp tools that might cause damage. Clean the area around the seal seat with a soft cloth. Removing all seal residue ensures a good fit for new seals.
Inspecting Components
Inspecting the components of your floor jack is a crucial step before replacing seals. This process helps identify worn or damaged parts that may affect the jack’s performance. Thorough inspection ensures safety and efficiency during operation.
Take your time to examine each part carefully. Look for signs of wear, cracks, or leaks. This way, you will know which components need attention or replacement along with the seals.
Check The Hydraulic Cylinder
The hydraulic cylinder controls the lifting power of the jack. Look for any fluid leaks around the cylinder. Leaks often indicate damaged seals or worn parts. Also, check for rust or dents that might weaken the cylinder’s function.
Examine The Piston Rod
The piston rod moves up and down inside the cylinder. Inspect it for scratches or bends. Any damage can cause seal failure or poor jack performance. Clean the rod carefully to spot hidden issues.
Inspect The Release Valve
The release valve controls hydraulic pressure. Test it to ensure it opens and closes smoothly. Look for rust or dirt buildup that might block the valve. A faulty release valve can cause leaks or unsafe operation.
Look Over The Pump Assembly
The pump assembly pushes hydraulic fluid into the cylinder. Examine it for cracks or worn seals. Check all connections to avoid fluid leaks. A damaged pump reduces lifting power and may cause failure.
Installing New Seals
Installing new seals on a floor jack is a key step in fixing leaks and keeping it working well. New seals stop oil from escaping and keep the jack lifting safely. This part of the process needs care and attention to avoid damage and ensure a tight fit.
Applying Lubricant
Use a small amount of lubricant on the new seals. This helps them slide into place easily. Avoid too much lubricant. Excess oil can cause the seal to slip or move out of position. A light coat protects the seals during installation and helps them last longer.
Seating The Seals Properly
Place the seals gently into their grooves. Press them evenly around the edge. Make sure the seals sit flat and snug. Do not stretch or twist the seals. Check for any gaps or folds. Proper seating keeps pressure on the seals and prevents leaks. Take your time to get this step right.
Reassembling The Floor Jack
Reassembling the floor jack is a careful process that restores its full function. After replacing the seals, putting the parts back correctly is key. This step ensures the jack works safely and smoothly.
Take your time during reassembly. Align each component carefully and tighten bolts just right. Avoid rushing to prevent damage or leaks.
Cleaning Components Before Assembly
Clean all parts thoroughly before putting them back. Remove dirt, old oil, and debris. Use a clean cloth and mild cleaner. Clean parts help seals fit better and last longer.
Placing New Seals Properly
Fit each new seal in its correct spot. Check the seal edges to make sure they sit flat. Avoid stretching or twisting seals. Proper sealing stops hydraulic fluid leaks.
Reattaching The Hydraulic Cylinder
Carefully slide the hydraulic cylinder back into place. Ensure it moves smoothly without resistance. Tighten the mounting bolts evenly. This keeps the cylinder stable during use.
Refilling Hydraulic Fluid
Fill the jack with the correct hydraulic fluid. Use the amount recommended in the manual. Avoid overfilling, which can cause pressure problems. Check for leaks after filling.
Testing The Floor Jack
Test the jack by pumping the handle slowly. Watch for smooth lifting and holding pressure. Check for any unusual noises or leaks. Proper testing confirms successful reassembly.

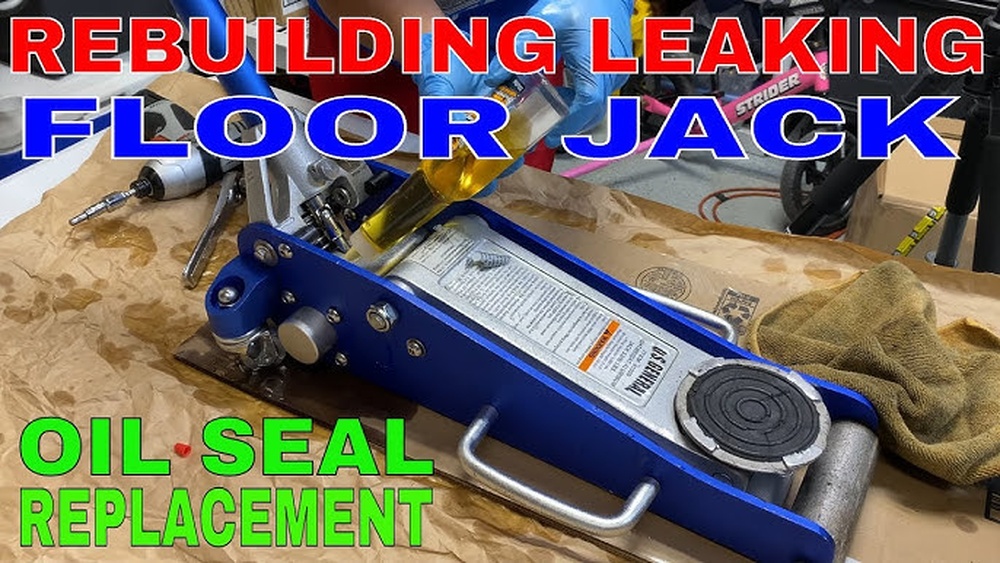
Credit: www.youtube.com
Testing The Jack
Testing the jack after replacing the seals is essential. It confirms the repair is successful and the jack works safely. Proper testing helps avoid accidents and costly damage. Follow simple steps to check the jack’s performance and safety.
Checking For Leaks
Start by inspecting the jack for any fluid leaks. Look closely around the seals and piston area. Use a clean cloth to wipe away dirt first. Pressurize the jack by pumping the handle slowly. Watch for drops of hydraulic fluid or wet spots. Even small leaks can cause the jack to fail. If you see leaks, seals may not be seated properly.
Ensuring Proper Operation
Next, test the jack’s lifting and lowering functions. Place the jack under a heavy object or a solid surface. Pump the handle and observe the lift speed and height. The jack should raise smoothly without jerks or slipping. Lower the jack slowly and check if it descends evenly. Listen for unusual noises during operation. Proper function means the seals are sealed well and pressure is maintained.
Maintenance Tips
Maintaining your floor jack is key to keeping it working well. Proper care helps prevent leaks and damage. Regular checks make seal replacement easier and less frequent. Follow these simple tips to keep your jack in good shape.
Clean The Floor Jack Regularly
Dirt and dust can cause seal damage. Wipe the jack with a clean cloth after each use. Avoid using harsh chemicals that can wear out seals. Keep the jack in a dry place to prevent rust.
Check Hydraulic Fluid Levels
Low fluid can cause the jack to lose pressure. Check the hydraulic fluid often and top it off as needed. Use the type of fluid recommended by the manufacturer. Avoid mixing different fluids, which can harm seals.
Inspect Seals For Damage
Look closely at seals for cracks or wear. Damaged seals let fluid leak and reduce performance. Replace worn seals quickly to avoid bigger problems. Use the right seal size and type for your jack model.
Lubricate Moving Parts
Apply lubricant to the jack’s moving parts to reduce friction. Smooth movement lowers stress on seals and parts. Use lubricants made for hydraulic tools. Avoid over-lubricating, which can attract dirt.
Store The Jack Properly
Keep the jack in a cool, dry place when not in use. Store it in a lowered position to reduce seal stress. Cover the jack to protect it from dust and moisture. Proper storage extends the life of the seals and the jack.
Credit: www.amazon.com

Credit: www.amazon.com
Frequently Asked Questions
How Do I Know When To Replace Floor Jack Seals?
Check for oil leaks or slow lifting. Damaged seals cause hydraulic fluid loss. Replace seals if you notice these issues.
What Tools Are Needed To Replace Floor Jack Seals?
You need a wrench, seal puller, replacement seals, hydraulic fluid, and a clean cloth for this job.
Can I Replace Seals On Any Floor Jack Model?
Most hydraulic floor jacks have similar seal replacement steps. Check your model’s manual for specific instructions.
How Long Does It Take To Replace Seals On A Floor Jack?
Replacing seals typically takes 30 to 60 minutes, depending on your experience and jack model.
Conclusion
Replacing seals on a floor jack keeps it working well and safe. Follow each step with care and patience. Use the right tools and parts for best results. Check the jack often to catch leaks early. A well-maintained jack lasts longer and lifts smoothly.
Fixing seals yourself saves money and builds confidence. Keep your workspace clean and organized during the repair. Small repairs can prevent big problems later on. Stay safe and take your time with the job. Your floor jack will thank you with better performance.