Are you ready to upgrade your home lighting but unsure how to start? Installing a new light switch might seem tricky, but with the right steps, you can do it yourself quickly and safely.
Imagine flipping a switch you installed yourself, knowing you saved money and gained a useful skill. This guide will walk you through every step, making the process simple and stress-free. Keep reading, and you’ll have that new light switch up and running in no time.
Credit: www.familyhandyman.com
Tools And Materials Needed
Installing a new light switch needs the right tools and materials. Using correct items makes the job easier and safer. This section covers what you need before starting.
Essential Tools
A screwdriver set is key. Usually, a flathead and a Phillips screwdriver work best.
Wire strippers help remove insulation from wires safely.
A voltage tester checks if wires carry electricity. This tool protects you from shocks.
Pliers can bend or hold wires firmly during installation.
Types Of Light Switches
Single-pole switches control one light from one spot. They are common in homes.
Three-way switches control one light from two locations, like stairs.
Dimmer switches adjust light brightness. They need specific wiring and tools.
Choose the right switch type before buying to fit your needs.
Safety Gear
Wear insulated gloves to avoid electric shocks.
Safety goggles protect your eyes from dust or sparks.
Use a sturdy ladder if the switch is high on the wall.
Turn off power at the breaker box before starting any work.

Credit: www.dummies.com
Preparing For Installation
Preparing for installation is a key step before changing a light switch. It ensures safety and smooth work. Taking time now prevents problems later. Follow clear steps to get ready.
Turning Off Power
Start by switching off the power at the circuit breaker. This stops electricity from flowing to the switch. Double-check that the right breaker is off. Never work on live wires. Safety first.
Testing The Circuit
Use a voltage tester to confirm no power is present. Touch the tester to the switch wires. If the tester shows no light or sound, the power is off. Testing avoids shocks and injuries. Always test twice.
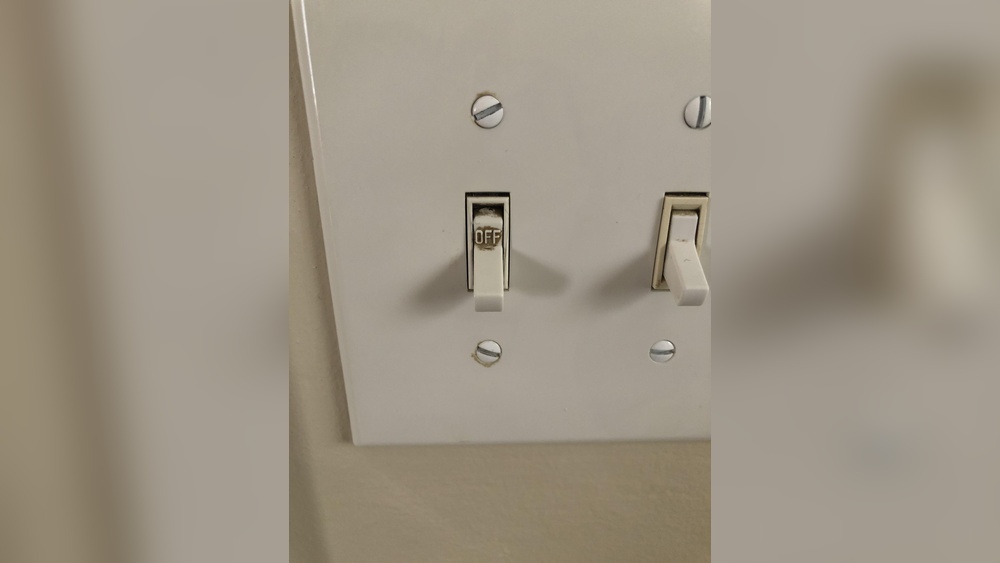
Removing The Old Switch
Unscrew the switch cover plate carefully. Then, remove screws holding the switch to the box. Pull the switch out gently to access wires. Note how wires connect to the switch. This helps during installation.
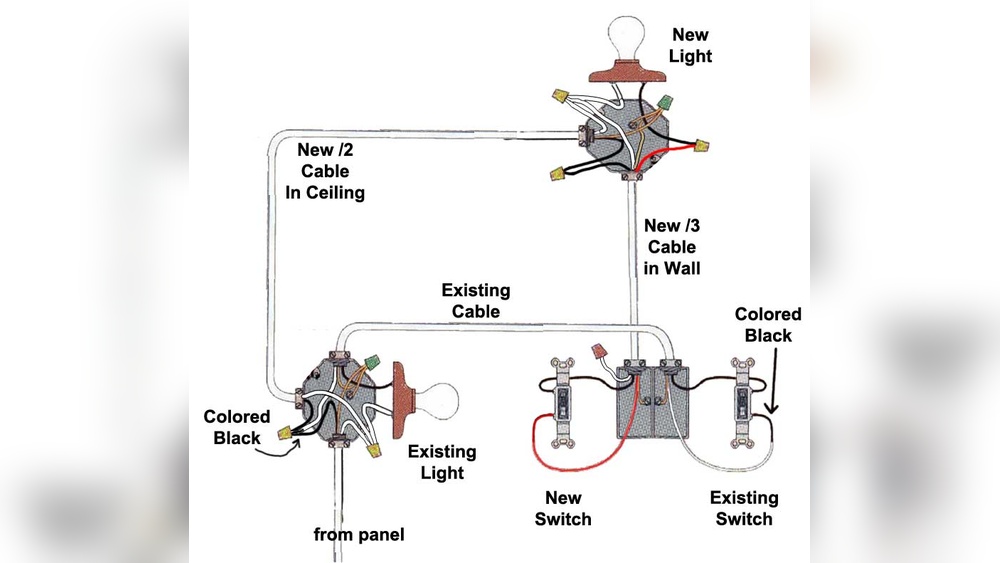
Wiring The New Switch
Wiring the new switch is a crucial step in installing a light switch. This process connects your switch to the home’s electrical system. Proper wiring ensures the switch works safely and efficiently.
Understanding the wires and how to connect them helps avoid electrical hazards. Follow each step carefully for a successful installation.
Identifying Wires
Turn off the power at the circuit breaker before handling wires. Use a voltage tester to confirm no electricity flows.
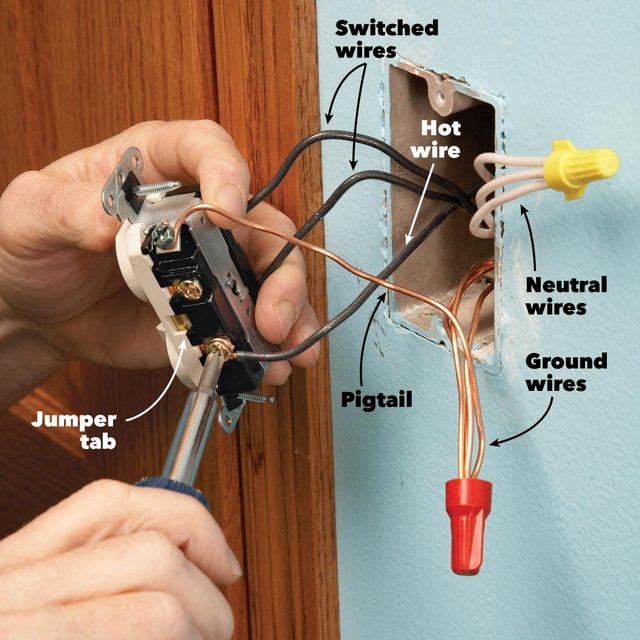
Look for three main types of wires: hot, neutral, and ground. The hot wire is usually black or red. The neutral wire is white. The ground wire is green or bare copper.
Check the wires inside the switch box to know which connects to what. Label them if needed for easy reference.
Connecting Wires To The Switch
Attach the hot wire to the switch’s brass or black screw. This wire controls the flow of electricity.
Connect the ground wire to the green screw on the switch. This ensures safety by grounding the switch.
Neutral wires usually do not connect to the switch. They stay connected in the wire nut behind the switch.
Securing The Connections
Wrap wires tightly around screws in a clockwise direction. This prevents them from slipping off.
Tighten screws firmly but avoid over-tightening to prevent damage. Use wire nuts to join wires securely.
Push all wires neatly back into the electrical box. This creates space and avoids pinching wires when mounting the switch.
Mounting The Switch
Mounting the switch is the final step before you can use your new light switch. It involves fixing the switch securely inside the electrical box and covering it to keep everything safe. Proper mounting ensures the switch stays in place and works well for a long time.
Attaching The Switch To The Box
First, hold the switch inside the electrical box. Align the screw holes on the switch with those on the box. Use a screwdriver to tighten the screws. Do not over-tighten; the switch should be firm but not cracked. Check if the switch moves. It should stay steady and not wiggle.
Installing The Cover Plate
Place the cover plate over the switch. Align the holes on the plate with the screws on the switch. Insert the screws and tighten them gently. The cover plate must sit flat against the wall. Avoid forcing the plate if it does not fit easily. A well-installed cover plate protects wires and adds a clean look.
Testing And Troubleshooting
Testing and troubleshooting are important steps after installing a new light switch. These steps confirm the switch works safely and correctly. They help catch any mistakes before restoring power. This prevents damage and keeps you safe.
Restoring Power
First, turn the circuit breaker back on. This restores electricity to the switch. Watch carefully for sparks or unusual sounds. If you see or hear anything strange, turn off the breaker immediately. Safety first. Use a voltage tester to check if power is flowing to the switch.
Checking Switch Functionality
Flip the switch on and off several times. The light should turn on and off smoothly. If the light flickers or does not respond, something is wrong. Test the switch with a voltage tester to ensure it sends power to the light fixture. Check the wiring connections inside the switch box for tightness and proper placement.
Common Issues And Fixes
The most common problem is loose wires. Tighten any loose screws holding wires. Another issue is reversed wiring. Make sure wires connect to the correct terminals. A faulty switch can also cause problems. Replace the switch if testing shows no power flow. If the light still does not work, check the bulb and fixture for faults.
Safety Tips And Best Practices
Installing a new light switch requires careful attention to safety. Handling electricity can be risky. Following safety tips and best practices helps prevent accidents. This section explains how to stay safe while working with electrical switches.
Avoiding Electrical Hazards
Turn off the power at the circuit breaker before starting. Use a voltage tester to confirm no electricity flows to the switch. Never touch wires with wet hands. Wear insulated gloves for extra protection. Use tools with insulated handles. Keep the work area dry and clean. Do not force wires into terminals. Loose connections can cause sparks or fires. Double-check all wiring before restoring power.
When To Call A Professional
Call an electrician if you see damaged wires or outlets. Complex wiring systems need expert knowledge. Avoid working on circuits with aluminum wiring. If you feel unsure about any step, stop immediately. Professionals have the right tools and training. They ensure the installation meets safety codes. Hiring a pro prevents costly mistakes and injuries.

Credit: diy.stackexchange.com
Frequently Asked Questions
How Do I Safely Turn Off Power Before Installation?
Always switch off the circuit breaker controlling the switch. Use a voltage tester to confirm no electricity flows. This ensures your safety and prevents electrical shocks during installation.
What Tools Are Needed To Install A New Light Switch?
You need a screwdriver, wire stripper, voltage tester, and electrical tape. These tools help you remove the old switch and securely connect wires for the new one.
How Do I Identify The Wires In My Switch Box?
Typically, black wires are hot, white are neutral, and green or bare wires are ground. Use a voltage tester to confirm wires before connecting your new switch.
Can I Replace A Light Switch Without Professional Help?
Yes, if you follow safety steps and have basic electrical knowledge. Always turn off power and use correct tools. If unsure, consult a licensed electrician.
Conclusion
Installing a new light switch is easier than it seems. Follow each step with care and stay safe. Turn off the power before you start working. Double-check your connections to avoid any problems. Take your time and don’t rush the job.
A properly installed switch adds convenience to your home. Practice makes perfect, so don’t worry if it feels tricky at first. Enjoy the bright results of your effort. Simple tools and clear instructions make this task doable for anyone. Ready to light up your space?