Are you ready to improve your shooting accuracy with a perfectly mounted scope? Learning how to mount a drilled and tapped scope mount might seem tricky at first, but with the right steps, you can do it yourself quickly and confidently.
This guide will walk you through every detail, so you don’t miss a thing. By the end, you’ll have a solid, secure scope setup that feels just right. Keep reading, and you’ll discover how simple it can be to get your scope mounted like a pro.
Choosing The Right Scope Mount
Choosing the right scope mount is crucial for a stable and accurate setup. The mount holds the scope firmly on the rifle. A poor choice can cause misalignment and affect shooting performance. Understanding the types and how they fit your rifle is key. Prepare the right tools to make installation smooth and secure.
Types Of Drilled And Tapped Mounts
Drilled and tapped mounts come in several types. Base mounts attach directly to the rifle receiver. They provide a solid foundation for rings and scopes. One-piece mounts combine base and rings for added strength. Picatinny and Weaver style mounts fit specific rail systems. Choose a type that suits your rifle and scope.
Matching Mount To Your Rifle
Check your rifle’s make and model before buying a mount. Some rifles have pre-drilled and tapped holes. Others require drilling or special adapters. Match the mount size to the rifle’s hole pattern. Consider the rifle’s caliber and recoil strength. Strong recoil needs a more durable mount. Correct fit prevents damage and keeps the scope steady.
Tools And Materials Needed
Gather essential tools before mounting your scope. You will need a screwdriver or Allen wrench, depending on screw type. A torque wrench helps tighten screws to the right level. Thread locker keeps screws from loosening under recoil. Use a cleaning cloth to remove dirt and oil. Proper tools and materials ensure a secure installation.
Credit: www.galatiinternational.com
Preparing The Rifle
Preparing the rifle is the first step to mount a drilled and tapped scope mount. This step ensures safety and accuracy. Taking time here prevents problems later. Follow these simple steps to get your rifle ready.
Safety First: Unloading And Clearing
Always unload your rifle before starting any work. Remove the magazine and open the action. Look inside the chamber to confirm it is empty. Double-check to avoid accidents. Safety is the top priority.
Cleaning The Mounting Surface
Clean the area where the mount will attach. Use a soft cloth to wipe away dirt and oil. A clean surface helps the mount fit tightly. Avoid using harsh chemicals that may damage the finish. Clean and dry is best.
Inspecting The Drilled And Tapped Holes
Check the holes carefully before mounting. Make sure they are free of debris and damage. Look for any thread wear or dirt inside the holes. Clean with a small brush if needed. Proper inspection ensures a secure fit.
Positioning The Mount
Positioning the scope mount correctly is key for a steady and accurate shot. It ensures the scope stays secure and aligns with your eye perfectly. This step takes careful attention but is simple with the right approach.
Aligning The Mount Properly
Start by placing the mount on the rifle’s drilled and tapped holes. Make sure it fits snugly without gaps. Check that the mount sits flat on the surface. Use a level if possible to keep it straight. Tighten screws slowly and evenly. Avoid over-tightening to prevent damage. The mount should not shift or wiggle after tightening.
Checking Eye Relief And Scope Placement
Eye relief means the distance between your eye and the scope’s eyepiece. Adjust the mount so you have a clear view without moving your head. Sit or stand in your shooting position. Move the scope forward or backward on the mount. Find the spot where the full view appears without black rings. Proper eye relief reduces eye strain and helps quick target acquisition.
Securing The Mount
Securing the mount is a crucial step in installing a drilled and tapped scope mount. Properly fastening the mount ensures stability and accuracy during use. It also prevents the scope from shifting under recoil or movement. Taking time to secure the mount correctly will improve your shooting experience and extend the life of your equipment.
Choosing The Right Screws
Select screws that match the mount’s specifications. Use screws made of durable materials like stainless steel. Avoid screws that are too long or too short. The right length keeps the mount tight without damaging the firearm. Check the thread size to ensure a perfect fit. Using incorrect screws can cause damage or loosening over time.
Applying Thread Locker
Use thread locker to keep screws from loosening. A small drop on each screw thread is enough. Choose a medium-strength thread locker for easy future removal. Avoid using too much; excess can spread and cause problems. Thread locker helps maintain a firm hold during recoil and vibration.
Tightening Screws Correctly
Tighten screws in a crisscross pattern for even pressure. Use a torque wrench to avoid over-tightening or stripping threads. Follow the manufacturer’s recommended torque settings. Tighten screws gradually, checking each one several times. Proper tightening prevents damage and keeps the mount secure for reliable performance.
Attaching The Scope
Attaching the scope to a drilled and tapped mount requires care and patience. It is important to secure the scope firmly without damaging it. Follow these steps to place the scope correctly and ensure accurate shooting.
Proper attachment improves stability and helps maintain zero. Take your time to get each step right.
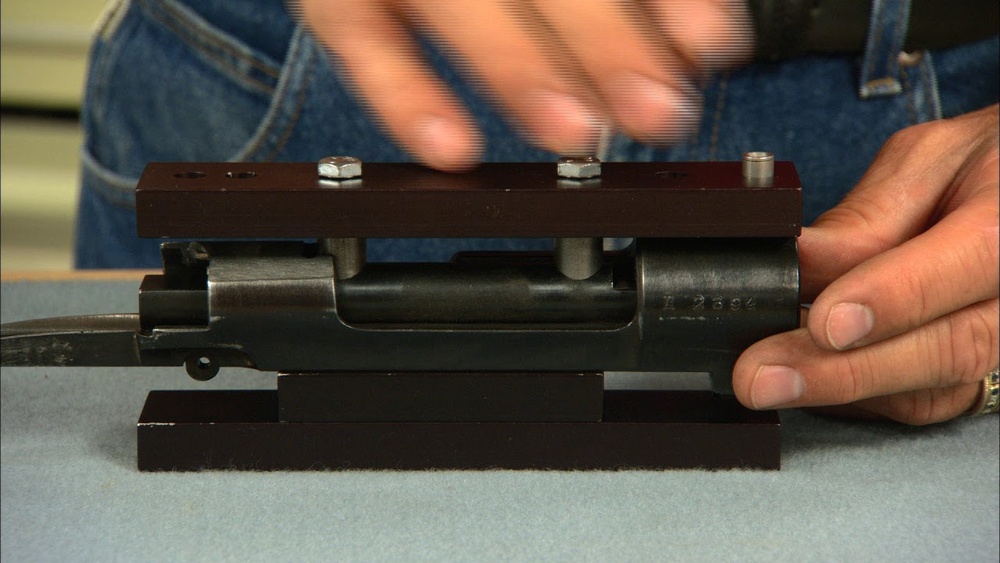
Placing The Scope In Rings
Start by loosening the scope rings enough to fit the scope tube. Gently place the scope into the bottom halves of the rings. Make sure the scope sits evenly and is centered. Avoid pushing or forcing the scope into the rings. Tighten the ring screws just enough to hold the scope in place but still allow adjustments.
Leveling The Scope
Level the scope using a small bubble level or a leveling tool. Place the level on top of the scope tube. Adjust the scope until the bubble is centered. This ensures the crosshairs align properly with the rifle. Double-check the rifle is on a flat surface or secured in a rest. A leveled scope improves shooting accuracy and comfort.
Adjusting For Proper Eye Relief
Slide the scope forward or backward to find the right eye relief. Eye relief is the distance between your eye and the scope lens. Look through the scope with your shooting position. Move the scope until you see a full, clear sight picture. Proper eye relief prevents scope shadow and protects your eye from recoil. Once set, carefully tighten the ring screws evenly to secure the scope.

Credit: addleyprecision.com
Final Checks
Final checks are crucial after mounting your drilled and tapped scope mount. These steps ensure your scope is secure and accurate. Skipping final checks may cause problems during shooting. Take time to confirm everything is set correctly before use.
Verifying Mount Stability
Start by gently shaking the rifle. The mount should not move or wiggle. Check all screws and bolts are tight but avoid over-tightening. Use a torque wrench if possible to reach the recommended tightness. Stability prevents shifts that affect accuracy.
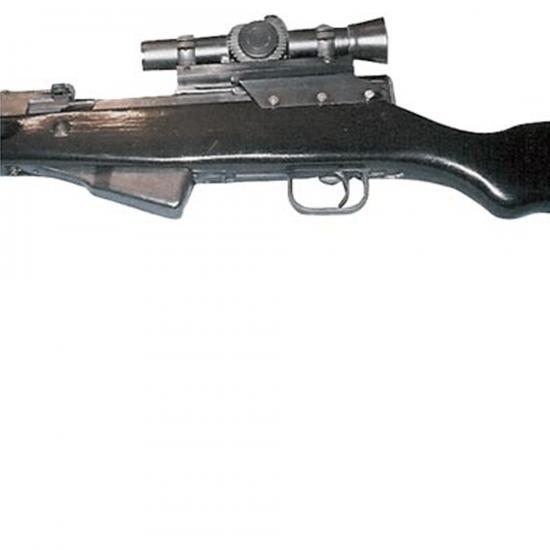
Testing Scope Alignment
Look through the scope and align it with a target. Adjust the scope to center the reticle. Make sure the crosshairs do not move when you shift your head slightly. Proper alignment ensures clear sight picture and accurate shots.
Troubleshooting Common Issues
If the mount feels loose, recheck screw tightness. Uneven tightening can cause problems. If the scope is off-center, loosen the mount and reposition it carefully. Fogging inside the scope may mean a seal problem. Address these issues before shooting.

Credit: www.youtube.com
Frequently Asked Questions
How Do You Prepare A Drilled And Tapped Scope Mount?
Clean the mounting surface thoroughly. Align the mount holes with the rifle’s drilled and tapped holes. Use proper screws to secure the mount tightly without overtightening.
What Tools Are Needed To Mount A Drilled And Tapped Scope Mount?
You need a screwdriver or Allen wrench that fits your mount screws, a torque wrench for precise tightening, and a cleaning cloth to prep the surface.
How Tight Should Screws Be On A Scope Mount?
Screws should be snug but not overtightened. Use a torque wrench to apply manufacturer-recommended torque, usually between 15-25 inch-pounds, to avoid damage or loosening.
Can A Drilled And Tapped Scope Mount Improve Accuracy?
Yes, it provides a stable and secure base for your scope, reducing movement and maintaining zero, which improves overall shooting accuracy.
Conclusion
Mounting a drilled and tapped scope mount is simple with the right steps. Start by aligning the mount carefully on your rifle. Tighten the screws evenly to avoid damage. Check the mount’s stability before use. This ensures your scope stays in place during shooting.
Practice patience and take your time for best results. Follow these tips to enjoy a secure and accurate setup every time.