Are you tired of harsh, bright lights that make your room feel cold and uncomfortable? Imagine being able to adjust your lighting to match your mood or activity with just a simple switch.
Replacing your regular light switch with a dimmer is easier than you think, and it can instantly transform your space. In this guide, you’ll discover clear, step-by-step instructions to upgrade your lighting without any hassle. By the end, you’ll know exactly how to create the perfect ambiance and save energy at the same time.
Ready to take control of your lighting? Let’s get started!
Credit: www.homedepot.com
Tools And Materials Needed
Replacing a light switch with a dimmer requires specific tools and materials. Having the right items makes the job easier and safer. Prepare all tools before starting to avoid interruptions.
Gathering materials helps ensure a smooth installation process. Choose quality tools for better results. Safety gear is important to protect yourself during the work.
Tools Needed
- Screwdriver (flathead and Phillips)
- Voltage tester
- Wire stripper
- Needle-nose pliers
- Electric drill (optional, for tight screws)
- Flashlight or headlamp
Materials Needed
- Dimmer switch compatible with your lighting
- Wire nuts
- Electrical tape
- Wall plate for the dimmer
- Replacement screws (usually come with dimmer)
Safety Equipment
- Insulated gloves
- Safety goggles
- Non-conductive footwear
Safety Precautions
Replacing a light switch with a dimmer requires care and attention. Safety is the top priority. Electrical work can be dangerous without the right steps. Follow these safety precautions to protect yourself and your home.
Turn Off Power At The Circuit Breaker
Always switch off the power at the circuit breaker before starting. Do not rely on the wall switch alone. Use a voltage tester to confirm the power is off. This step prevents electric shock and injury.
Use Proper Tools And Equipment
Use insulated tools designed for electrical work. Avoid metal tools without insulation. Wear rubber-soled shoes for extra protection. Keep your workspace dry and clear of clutter.
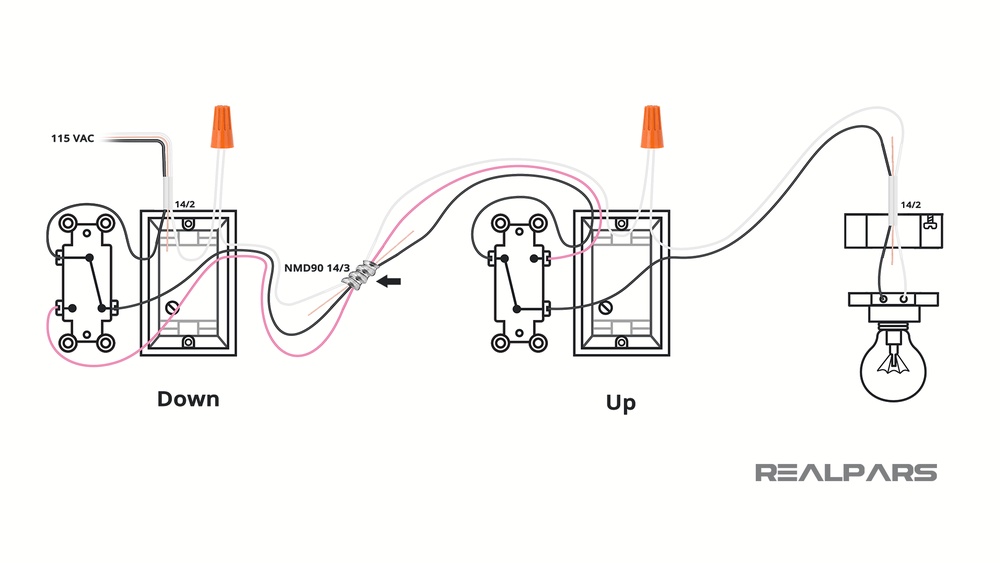
Understand The Wiring
Know the wiring setup before you begin. Study the existing switch and wires carefully. Label wires with tape to avoid confusion. Incorrect wiring can cause shorts or fires.
Work In A Well-lit Area
Good lighting helps you see wires and connections clearly. Use a portable light or flashlight if needed. Avoid working in dark or dim spaces to reduce mistakes.
Do Not Touch Bare Wires
Never touch wires with bare hands. Use insulated gloves if possible. Always handle wires by their insulation only. This reduces the risk of electric shock.
Turn Off Power
Before starting to replace a light switch with a dimmer, turning off the power is essential. This step keeps you safe and prevents electric shocks. Never skip this part, no matter how small the job seems.
Turning off power stops electricity flow to the switch. It protects you while working on the wires. Always double-check that the power is off before touching anything.
Locate The Circuit Breaker
Find the main electrical panel in your home. It is usually in the basement, garage, or utility room. Open the panel door to see the circuit breakers.
Identify The Correct Switch
Look for the breaker that controls the room’s lights. It may be labeled with room names or numbers. If not labeled, turn off breakers one by one to find the right one.
Turn Off The Breaker
Flip the switch of the correct breaker to the off position. This stops power to the light switch you want to replace. Do not force the breaker switch; it should move easily.
Verify Power Is Off
Use a voltage tester or a simple lamp to check the light switch. Ensure no electricity flows to the switch. This test confirms it is safe to work on the wiring.
Credit: www.homedepot.com
Remove Existing Switch
Removing the existing light switch is the first step in installing a dimmer switch. This process helps prepare the wall for the new dimmer and ensures safety. Follow these steps carefully to avoid any electrical hazards.
Turn Off Power At The Circuit Breaker
Locate the circuit breaker that controls the light switch. Switch it off to cut power to the switch. Confirm the power is off by flipping the light switch. The light should not turn on. This step is crucial for safety.
Remove The Switch Cover Plate
Use a screwdriver to remove the screws holding the cover plate. Gently pull the cover plate away from the wall. Set it aside safely for reinstallation later. This exposes the switch and wiring.
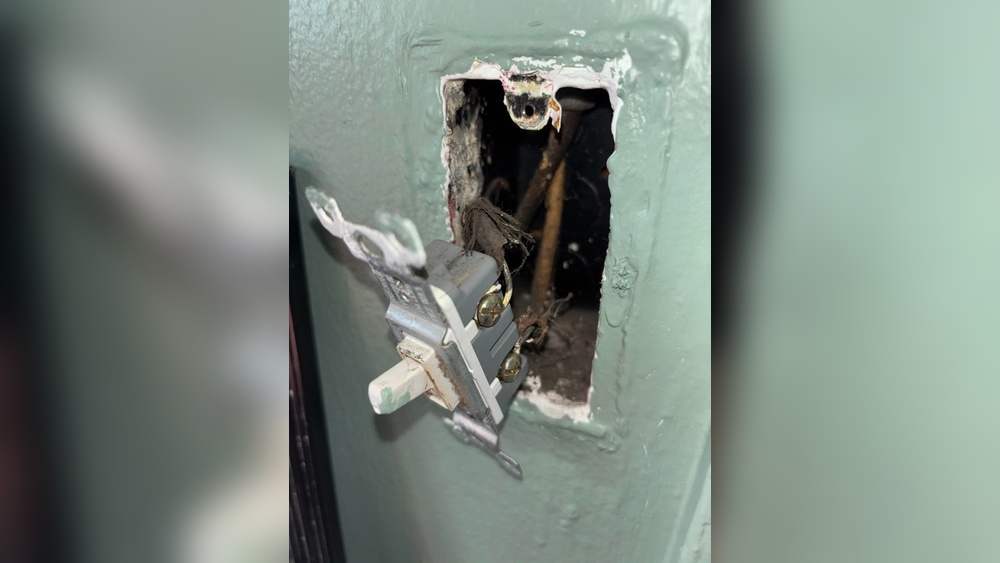
Unscrew The Existing Switch
Remove the screws that secure the switch to the electrical box. Pull the switch out carefully from the wall. Keep the wires attached but note their positions. This helps during the dimmer installation.
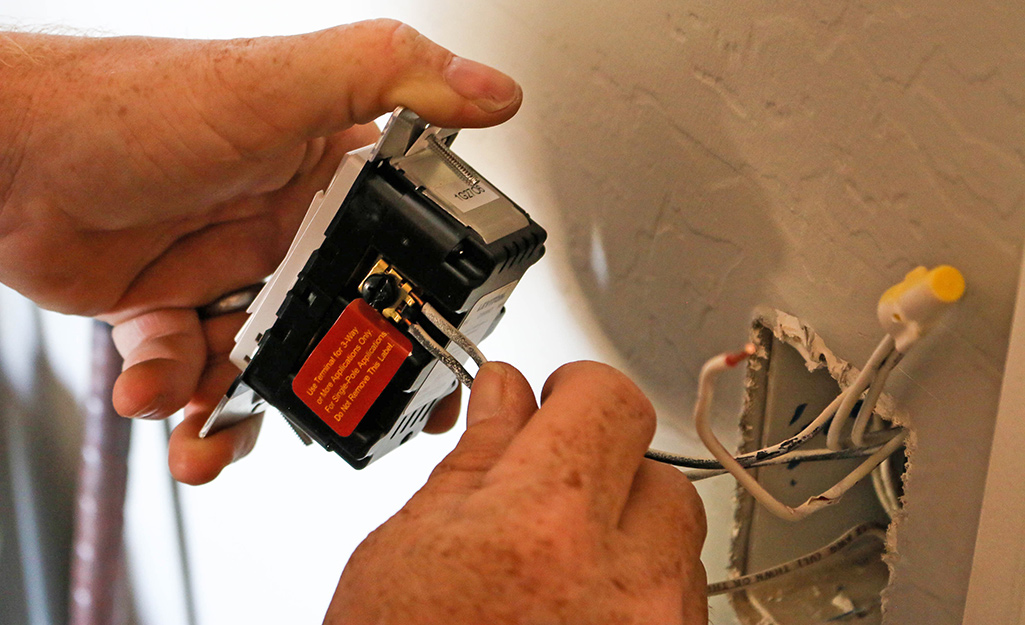
Disconnect The Wires
Look at how the wires connect to the switch terminals. Loosen the screws holding the wires. Gently pull each wire off the switch. Avoid damaging the wires or insulation. The wires must stay intact for the next step.
Identify Wiring
Identifying wiring is an important step before installing a dimmer switch. It helps ensure the dimmer works safely and correctly. Knowing which wires control power, the light, and ground makes the process smooth.
Wiring can vary by home. Taking time to identify each wire reduces mistakes. It also prevents electrical shocks and damage to the dimmer switch.
Switch off power at the circuit breaker. This stops electricity from flowing. Use a voltage tester to confirm no current is present. Safety first.
Remove Existing Switch Cover
Unscrew the switch plate. Gently pull the switch out from the wall box. Look carefully at the wires connected to the switch.
Identify Wire Types
Look for black, white, and green or bare copper wires. Black wires usually carry power. White wires are neutral. Green or bare copper wires are ground.
Label Each Wire
Use tape and a marker to label wires. Mark which wire is live, neutral, and ground. This helps connect the dimmer switch properly.
Check Wire Connections
Note how wires connect to the old switch. Usually, two black wires connect to the switch terminals. Ground wire connects to the green screw.
Connect Dimmer Switch
Connecting a dimmer switch is a key step in replacing your old light switch. It controls the brightness of your lights smoothly. Proper connection ensures the dimmer works safely and correctly.
Take your time to follow each step carefully. Double-check your wiring and tools before starting. This will help avoid mistakes and keep you safe.
Turn Off Power At The Circuit Breaker
Always start by turning off the power at the breaker box. This prevents electric shock while you work. Use a voltage tester to confirm the power is off.
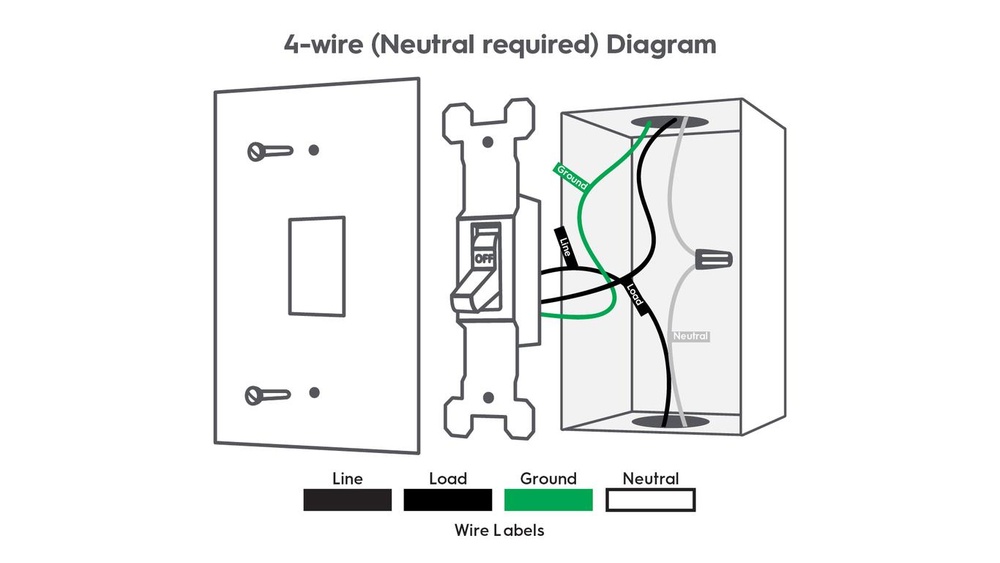
Identify And Prepare Wires
Look at the wires in the switch box. Usually, you find a live wire, a load wire, and a ground wire. Strip about half an inch of insulation from each wire end.
Connect The Dimmer Wires To The House Wires
Match the dimmer switch wires with your house wires by color. Typically, black wires connect together, and the green or bare copper wire is for grounding. Twist wires together and secure with wire nuts.
Secure The Dimmer Switch In The Wall Box
Carefully push the wires back into the box. Attach the dimmer switch using screws. Make sure it fits flush with the wall for a clean look.
Restore Power And Test The Dimmer
Turn the circuit breaker back on. Test the dimmer by sliding or turning its control. The light should brighten and dim smoothly without flickering.
Secure And Test
Securing and testing the dimmer switch is a vital final step. It ensures the switch works safely and correctly. Properly securing the switch prevents it from moving or causing electrical issues. Testing confirms the dimmer adjusts the light as expected.
Secure The Dimmer Switch In The Wall Box
Gently push the dimmer switch back into the wall box. Make sure the wires stay connected. Use screws to fasten the switch to the box. Tighten the screws just enough to hold the switch firmly. Avoid overtightening to prevent damage.
Attach The Switch Plate Cover
Place the switch plate cover over the dimmer switch. Align it carefully with the screw holes. Insert the screws and tighten them by hand. The cover should fit flush against the wall. This step finishes the installation and protects the wiring.
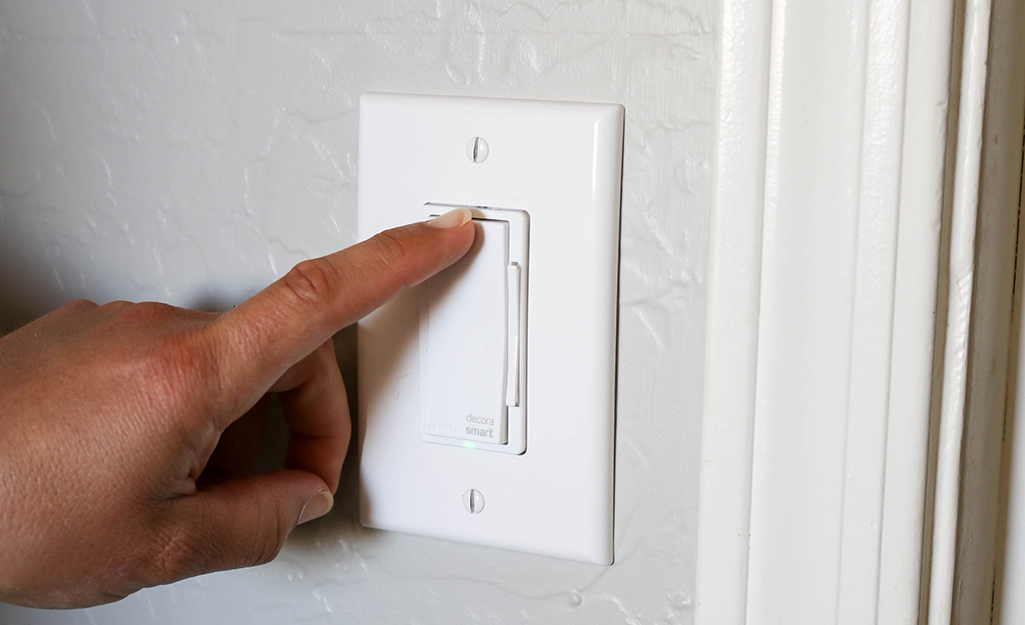
Turn On Power And Test The Dimmer
Switch the circuit breaker back on to restore power. Flip the dimmer switch to check the light. Slide or turn the dimmer control slowly. Watch the light dim and brighten smoothly. If the light flickers or does not work, turn off power and check connections again.

Credit: www.youtube.com
Troubleshooting Tips
Replacing a light switch with a dimmer can be simple, but sometimes problems occur. Troubleshooting helps fix these common issues fast. This section shares clear tips to solve problems during or after installation.
Check The Power Supply
First, make sure the power is off before working on wires. Use a tester to confirm no electricity flows. If the dimmer does not work, check the circuit breaker. A tripped breaker can stop power to the switch.
Verify Wiring Connections
Loose or wrong wires cause dimmers to fail. Match the wires by color and function carefully. Tighten any loose connections. Use wire nuts to secure wires safely.
Confirm Dimmer Compatibility
Not all dimmers work with every bulb type. Check if the dimmer matches your light bulbs. LED bulbs often need special dimmers. Using the wrong dimmer can cause flickering or no dimming.
Inspect The Dimmer Switch
Sometimes the dimmer switch itself is faulty. Try testing with another dimmer switch if possible. A damaged switch will not control lights properly.
Look For Overheating Issues
Dimmers can get hot during use. Overheating may trigger safety features and stop dimming. Ensure the dimmer is rated for the wattage it controls. Avoid overcrowding the electrical box.
Choosing The Right Dimmer
Choosing the right dimmer is key to a smooth switch replacement. A good dimmer fits your light type and matches your needs. It controls brightness without flickers or noise. Picking the correct one avoids problems later.
Understanding Dimmer Types
Know the types before buying. Some dimmers work with incandescent bulbs. Others fit LED or CFL lights. Check your bulb type first. Using the wrong dimmer can cause buzzing or poor dimming.
Checking Dimmer Compatibility
Match the dimmer to your electrical setup. Look at the wattage limit. Make sure it handles your light’s power. Look for dimmers marked for specific bulbs. This ensures smooth and safe operation.
Considering Control Options
Choose between rotary, slide, or touch dimmers. Some dimmers offer remote control or smart features. Pick what feels easy to use. Simple controls make adjusting light quick and stress-free.
Assessing Installation Needs
Some dimmers fit standard switch boxes. Others need more space or special wiring. Check your wall box size. Look for dimmers with clear instructions. This helps avoid tricky installation issues.
Frequently Asked Questions
How Do I Replace A Light Switch With A Dimmer?
Turn off power at the circuit breaker first. Remove the existing switch, connect the dimmer wires matching colors, and secure it. Restore power and test the dimmer. Follow manufacturer instructions and local electrical codes for safety and proper installation.
Can Any Light Switch Be Replaced With A Dimmer?
No, not all switches are compatible. Dimmer switches work with specific bulb types like LEDs or incandescent. Check your bulb and switch compatibility before buying a dimmer. Using the wrong dimmer can cause flickering or damage.
What Tools Do I Need To Install A Dimmer Switch?
You need a screwdriver, voltage tester, wire stripper, and electrical tape. These tools help safely remove the old switch and connect the dimmer. Having the right tools ensures a secure and safe installation.
Is It Safe To Replace A Light Switch With A Dimmer Myself?
Yes, if you follow safety steps. Always turn off the power at the breaker. Use a voltage tester to confirm no electricity flows. If unsure, consult a licensed electrician to avoid risks.
Conclusion
Replacing a light switch with a dimmer is a simple upgrade. It lets you control light brightness easily. Always turn off power before starting the work. Follow each step carefully for safety and success. This small change can improve your room’s mood.
Enjoy softer or brighter lights anytime you want. Take your time and check your work twice. Now, you can brighten your home the smart way.