Have you ever wanted to take control of your home’s lighting but felt unsure about where to start? Connecting a light switch might seem tricky, but with the right steps, you can do it yourself quickly and safely.
Imagine flipping a switch and instantly changing the mood of your room—this simple skill puts that power in your hands. Keep reading, and you’ll discover easy-to-follow instructions that make wiring a light switch something you can confidently handle today. Your home, your rules—it all begins with this one smart move.
Tools And Materials Needed
Before starting to connect a light switch, gather all necessary tools and materials. Proper preparation helps the work go smoothly and safely. Using the right items makes the task easier and faster.
Essential Tools
Basic tools include a screwdriver, wire stripper, and voltage tester. A screwdriver helps remove and attach switch plates. Wire strippers cut and strip insulation from wires without damage. A voltage tester checks if wires have power before touching them.
Safety Gear
Wear safety glasses to protect your eyes from sparks or debris. Use insulated gloves to avoid electric shocks. Always turn off power at the breaker box before starting work. Double-check with a voltage tester to ensure no current is flowing.
Choosing The Right Switch
Select a switch that matches your lighting needs and wiring type. Single-pole switches control one light from one spot. Three-way switches control a light from two locations. Make sure the switch’s voltage and amperage ratings fit your circuit.
Turn Off Power
Before starting any electrical work, turning off the power is crucial. It stops electricity from flowing to the switch. This step keeps you safe from electric shocks. Always follow safety rules when handling electrical parts.
Locate Circuit Breaker
Find your home’s circuit breaker box. It is usually in the basement or a utility room. Open the box to see all switches. Each switch controls power to a different part of the house. Look for the switch labeled for the room with the light switch. Flip the switch to the “off” position. This cuts power to the light switch you want to work on.
Confirm Power Is Off
Check that the power is really off. Use a voltage tester or a simple light bulb. Touch the tester or bulb to the wires or terminals. No light or reading means the power is off. Test twice to be sure. Never trust the switch position alone. Safety depends on confirming no electricity flows.
Remove Old Switch
Removing the old light switch is the first step in the process. It helps you prepare for installing the new switch safely. Take your time and work carefully to avoid damage or injury.
Unscrew Faceplate
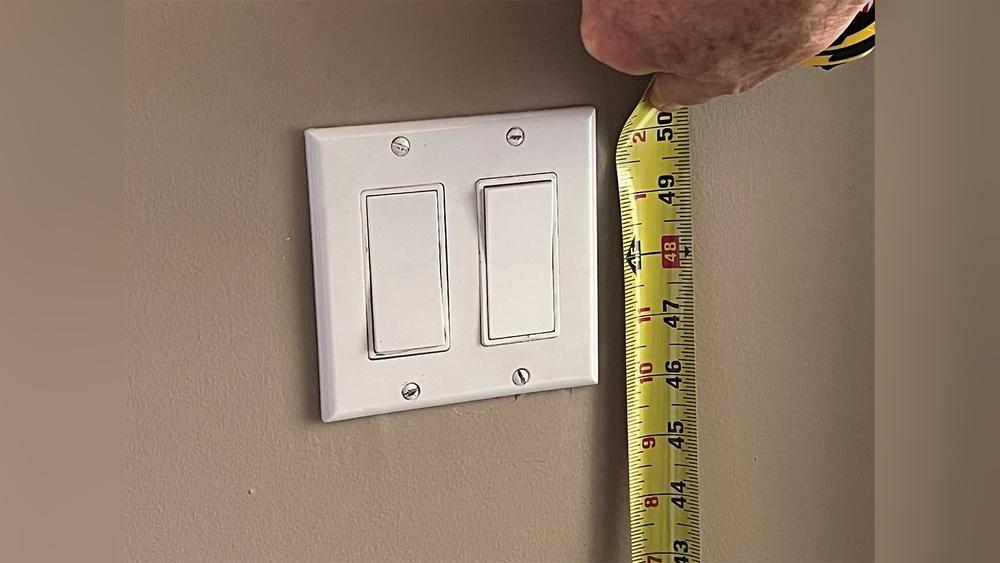
Start by turning off the power at the circuit breaker. This stops electricity from flowing to the switch. Use a screwdriver to remove the screws holding the faceplate. Keep the screws safe for later use. Gently pull the faceplate away from the wall. This reveals the switch and wiring behind it.
Disconnect Wires
Next, check the wiring connected to the switch. Use a screwdriver to loosen the screws holding the wires. Carefully pull the wires away from the switch terminals. Remember their position or take a photo for reference. If wires are connected with push-in terminals, use a tool to release them. After disconnecting, you can remove the old switch completely.

Credit: www.youtube.com
Identify Wiring
Before connecting a light switch, identifying the wiring is important. Each wire has a specific role in the electrical system. Knowing which wire is which helps avoid mistakes. It keeps the work safe and ensures the switch works properly.
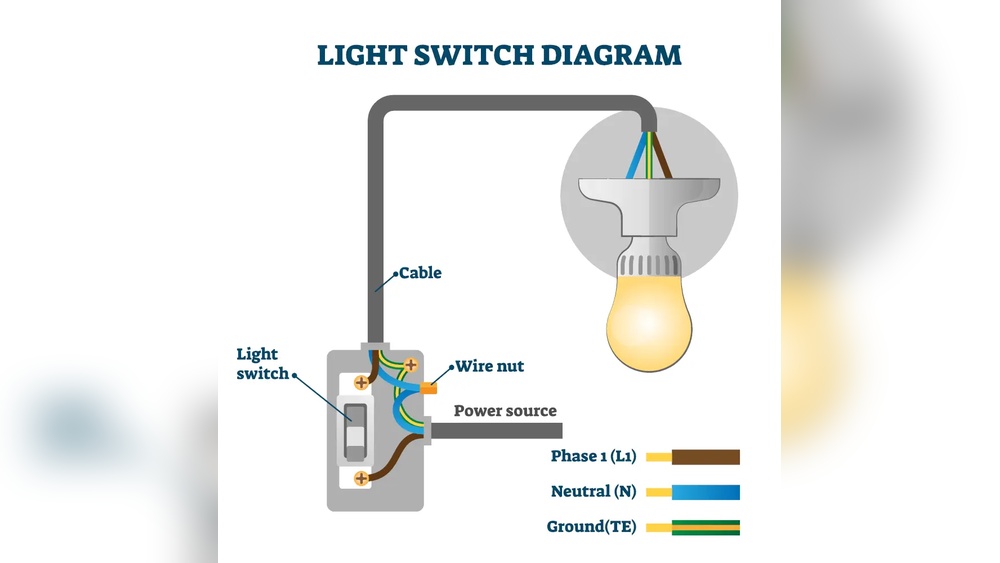
Live Wire
The live wire carries electricity from the power source. It is usually red or brown in color. This wire is dangerous because it has electrical current. Always turn off the power before touching the live wire.
Neutral Wire
The neutral wire completes the electrical circuit. It carries current back to the power source. The neutral wire is often blue or black. It is safe to touch only when the power is off.
Ground Wire
The ground wire protects you from electric shock. It connects metal parts to the earth. This wire is green, green with yellow stripes, or bare copper. The ground wire helps prevent accidents during faults.
Connect New Switch
Connecting a new light switch is a simple task with the right steps. It involves attaching wires correctly and making sure connections are tight. This ensures your switch works safely and lasts long.
Follow these steps carefully to connect your new switch without trouble.
Attach Wires To Terminals
First, identify the wires: usually black (live), white (neutral), and green or bare (ground). Match each wire to the correct terminal on the switch. The live wire goes to the brass terminal. The neutral wire often connects to the silver terminal if present. The ground wire attaches to the green terminal or ground screw.
Use a screwdriver to loosen terminal screws before inserting wires. Wrap the wire ends around the screws clockwise. Tighten screws to hold wires firmly in place.
Secure Connections
Check each wire to ensure it does not slip from the terminal. Loose wires cause poor contact and may create sparks. Tug gently on each wire to test security.
Use electrical tape around terminals for extra safety if needed. Push the switch into the wall box carefully. Fasten the switch with mounting screws to keep it stable. Attach the cover plate to finish the installation.

Credit: community.smartthings.com
Mount Switch And Test
Mounting the switch and testing it is the final step in your light switch installation. This step ensures the switch fits securely and works correctly. You will carefully place the switch in the electrical box, restore the power, and check if the light turns on and off as expected.
Install Switch In Box
Start by pushing the wires gently into the electrical box. Align the switch with the mounting holes. Use screws to fix the switch firmly in place. Avoid over-tightening, as it can damage the switch or box.
Restore Power
Go back to the circuit breaker panel. Turn on the power to the switch circuit. Wait a few seconds for the electricity to flow through the wires safely. Be cautious not to touch any exposed wires during this step.
Test Functionality
Flip the switch to turn the light on. Check if the light responds without flickering or delay. Turn the switch off and confirm the light goes off. Repeat the test a few times to ensure stable operation.
Troubleshooting Tips
Troubleshooting a light switch can save time and avoid extra costs. Knowing basic tips helps fix common problems fast. This guide covers key issues like switches not working, flickering lights, and safety concerns. Follow these steps to get your switch running smoothly again.
Switch Not Working
Check the power source first. Make sure the circuit breaker is on. Test the switch by turning it on and off several times. If the light still does not work, the switch may be faulty. Use a voltage tester to confirm if power reaches the switch. Replace the switch if no power flows through.
Flickering Light
Flickering often means a loose connection. Turn off the power before inspecting the wires. Tighten any loose wire screws on the switch terminals. Check the bulb socket for damage or dirt. Replace the bulb with a new one if flickering continues. A faulty switch can also cause flickering, so consider changing it.
Safety Concerns
Always turn off electricity at the breaker before working on switches. Use insulated tools to prevent shocks. Avoid touching wires with bare hands. Wear gloves for extra protection. If unsure about any step, call a professional electrician. Do not ignore burning smells or sparks; these are signs of serious issues.
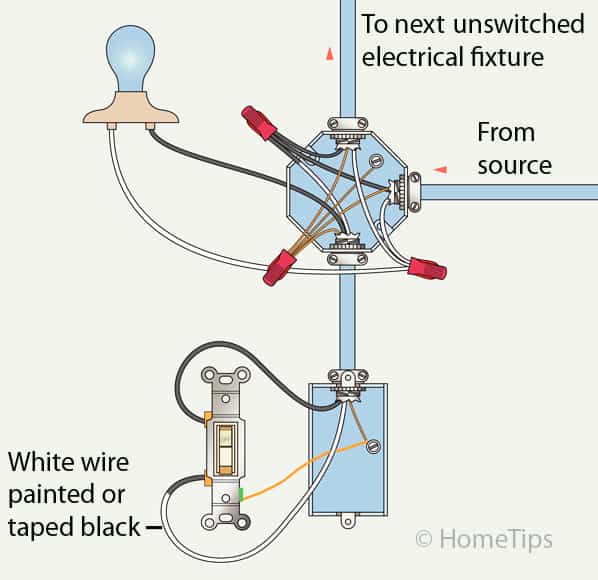
Credit: www.hometips.com
Frequently Asked Questions
How Do I Safely Connect A Light Switch?
Turn off the power at the breaker before starting. Use a voltage tester to confirm no electricity flows. Follow wiring diagrams carefully and connect wires to correct terminals. Secure connections tightly and install the switch in the electrical box properly.
What Tools Are Needed To Connect A Light Switch?
You need a screwdriver, wire stripper, voltage tester, and electrical tape. A pair of pliers may help with wire bending. These tools ensure safe and precise connections when installing a light switch.
Can I Connect A Light Switch Without Professional Help?
Yes, if you understand basic electrical wiring and safety precautions. Always turn off power and verify with a tester. Follow detailed instructions or videos. However, consult a professional if unsure to avoid hazards.
How To Identify Wires For Connecting A Light Switch?
Look for the black (hot) wire, white (neutral), and green or bare (ground). The hot wire connects to the switch terminal. Neutral wires usually connect inside the box but not to the switch. Always verify with a voltage tester.
Conclusion
Connecting a light switch is simple with the right steps. Always turn off the power first. Use a tester to check wires safely. Follow the guide carefully and connect wires correctly. Tighten screws and secure the switch in place. Turn the power back on and test the switch.
This basic skill saves time and money. Practice makes perfect. Soon, you will feel more confident working with electrical tools. Stay safe and take your time. Enjoy a well-lit home!