Are you looking to add convenience and functionality to your home electrical setup? Installing a light switch with an outlet can be a smart upgrade that saves space and gives you more control over your lighting and power sources.
But if the idea of handling wires and switches feels overwhelming, don’t worry—you’re in the right place. This guide will walk you through every step, using simple language and clear instructions, so you can confidently complete the job yourself. Keep reading, and you’ll discover how easy it can be to improve your space while ensuring safety and efficiency.
Tools And Materials Needed
Installing a light switch with an outlet is a handy skill. Having the right tools and materials makes the job easier and safer. This section lists what you need to complete the task.
Basic Tools
Start with a screwdriver set, both flathead and Phillips. A voltage tester is crucial to ensure no electricity runs through wires. Wire strippers help remove insulation without damage. Pliers offer a good grip and help bend wires. A drill may be needed to make new holes.
Electrical Materials
Buy a combo light switch and outlet unit. Use electrical wires rated for your home’s voltage. Wire nuts join wires safely. Electrical tape adds extra protection. A new wall plate covers the switch and outlet neatly.
Safety Equipment
Wear insulated gloves to avoid shocks. Safety glasses protect your eyes from debris. Use a sturdy ladder if the work is high. Keep a flashlight handy for dark spots. Have a fire extinguisher nearby, just in case.

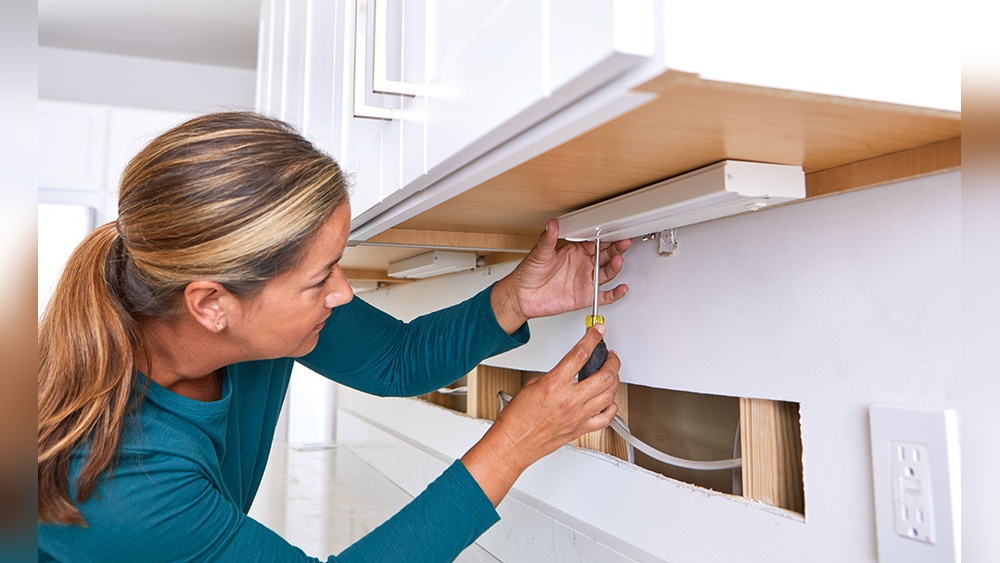
Credit: www.youtube.com
Safety First
Working with electricity can be dangerous. Safety must be the top priority before starting any electrical work. Taking simple safety steps protects you and your home from harm.
Always prepare carefully. Understanding risks helps prevent accidents and injuries. Use the right tools and follow safety rules strictly.
Turn Off The Power
Switch off the main power at the circuit breaker. This stops electricity from flowing to the switch and outlet. Use a voltage tester to confirm power is off. Never trust the switch position alone.
Wear Protective Gear
Use insulated gloves to avoid electric shocks. Safety goggles protect your eyes from sparks or debris. Wear closed shoes and avoid wet areas. Safety gear reduces risk during installation.
Use The Right Tools
Choose tools made for electrical work. Insulated screwdrivers and wire strippers keep you safe. Avoid using damaged or worn tools. Proper tools make the job easier and safer.
Follow Electrical Codes
Check local electrical codes before starting. Codes ensure safe and proper installation. They protect your home and meet legal requirements. Ignoring codes can cause hazards or fines.
Double Check Your Work
Inspect all wiring and connections carefully. Loose wires can cause shorts or fires. Test the switch and outlet with a voltage tester. Confirm everything works correctly before restoring power.
Turn Off Power
Turning off the power is the first and most important step before installing a light switch with an outlet. It keeps you safe from electric shocks. Always take this step seriously to avoid any accidents.
Power must be completely off in the area where you will work. This protects both you and your tools. Never start any electrical project without cutting the power first.
Locate Your Circuit Breaker
Find your home’s circuit breaker box. It is usually in the basement, garage, or utility room. Look for labels on the breakers to identify which one controls the light switch and outlet you want to install.
Switch Off The Correct Breaker
Turn off the breaker that powers the room or area you will work on. Flip the switch firmly to the “off” position. This stops electricity from flowing to that circuit.
Verify The Power Is Off
Use a voltage tester or a simple lamp to check the wires. Make sure the power is really off before touching any wires. This step confirms your safety before you begin installation.

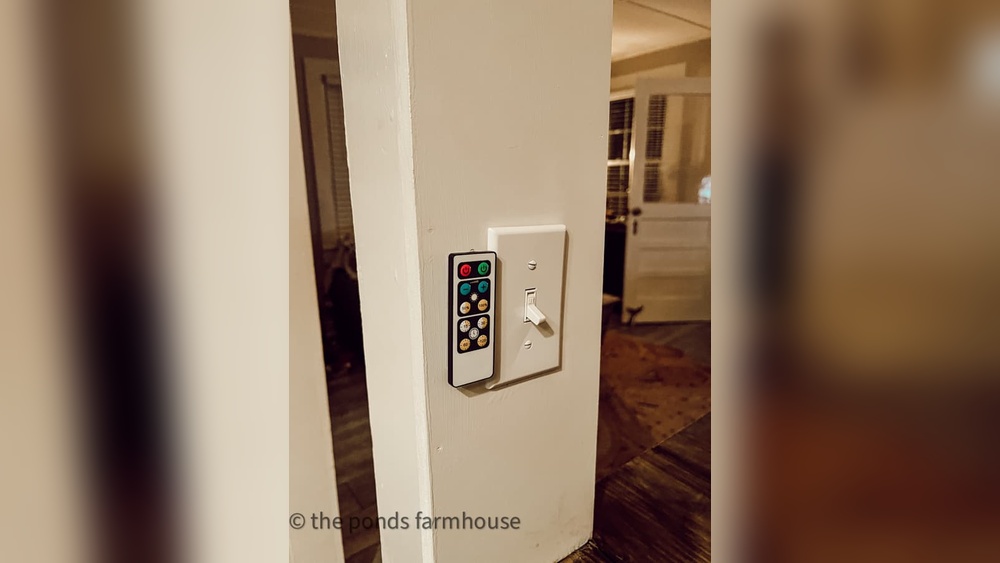
Credit: diy.stackexchange.com
Remove Existing Switch And Outlet
Removing the existing switch and outlet is the first step in this project. This step prepares the wall for the new combined unit. Safety is the top priority before starting any electrical work.
Turn off the power at the circuit breaker. Double-check that the power is off using a voltage tester. This prevents any risk of electric shock while working.
Unscrew The Wall Plate
Use a screwdriver to remove the screws holding the wall plate. Gently pull the plate away from the wall. Set the screws and plate aside for reuse or disposal.
Remove The Switch And Outlet Screws
Locate the screws securing the switch and outlet to the electrical box. Unscrew them carefully. Pull the switch and outlet straight out to access wiring.
Disconnect The Wiring
Note the wiring positions or take a picture for reference. Use a screwdriver to loosen the terminal screws. Gently disconnect each wire from the switch and outlet.
Check For Damage
Inspect the wires and electrical box for damage or wear. Replace any frayed or broken wires before installing new devices. Ensure the box is secure and clean.
Identify Wiring Types
Identifying wiring types is an important step before installing a light switch with an outlet. It helps you know which wires connect to the switch and outlet. This knowledge keeps the installation safe and effective.
Different homes have different wiring setups. Knowing the type of wiring in your wall will guide your work. You can avoid mistakes and electrical hazards by recognizing the wires correctly.
Types Of Electrical Wires
Electrical wires come in several types. The most common are black, white, and green or bare copper. Black wires carry electricity to the switch or outlet. White wires usually return electricity to the panel. Green or bare copper wires are for grounding.
Look For Cable Types
Identify the cable that contains the wires. It may be a non-metallic cable (NM cable) with plastic insulation. Older homes might have cloth-covered wires. Know what cable you are working with to choose the right tools and connectors.
Check Wire Gauge
Wire gauge tells you the thickness of the wire. Most light switches use 14 or 12 gauge wires. Thicker wires carry more current safely. Use a wire gauge tool or check the markings on the cable to identify the size.
Identify Hot, Neutral, And Ground Wires
Hot wires carry power to the switch or outlet. They are usually black or red. Neutral wires complete the circuit and are white. Ground wires provide safety and are green or bare copper. Knowing these helps you connect the wires correctly.

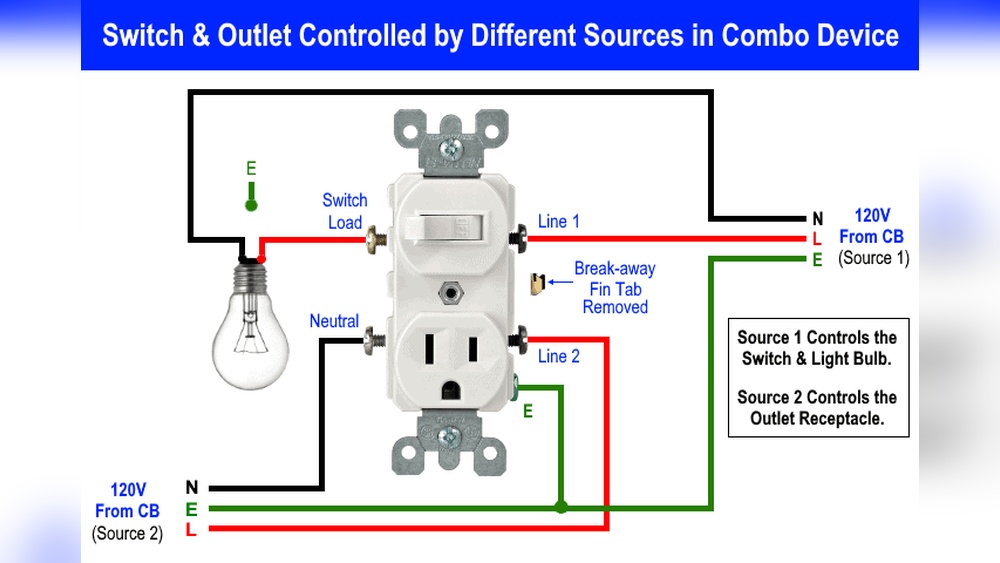
Credit: www.youtube.com
Connect Wires To New Combo Device
Connecting wires to your new combo device is a key step in installation. It ensures the switch and outlet work safely and correctly. Take your time and follow each step carefully.
Use the right tools and check that power is off before starting. Correct connections help avoid electrical problems later.
Attach Ground Wire
Locate the bare or green ground wire in the electrical box. Attach it to the green screw on the combo device. Tighten the screw firmly to secure the wire. This step protects against electrical shocks.
Connect Neutral Wire
Find the white neutral wire bundle. Connect a short white wire (pigtail) from the neutral bundle to the silver screw on the device. Use a wire nut to join the wires tightly. Neutral wires complete the electrical circuit.
Wire The Switch
Identify the black hot wire coming from the power source. Connect it to the brass screw labeled for the switch. Attach the black wire that goes to the light fixture to the other brass screw. This controls the light from the switch.
Wire The Outlet
Attach the black wire for the outlet to the brass screw marked for outlet use. Connect the white neutral pigtail to the silver screw on the outlet side. Double-check all wires are secure and no bare wire is exposed.
Secure The Device And Restore Power
Securing the device and restoring power marks the final step in installing a light switch with an outlet. This step ensures safety and proper function. After wiring, the device must be fixed firmly to avoid loose connections. A loose device can cause sparks or short circuits.
Once secured, restoring power allows testing the switch and outlet. Confirming everything works well avoids future problems. Follow these simple steps carefully to finish the installation safely.
Secure The Device In The Electrical Box
Place the switch and outlet carefully inside the electrical box. Align the screw holes with the box holes. Use a screwdriver to tighten the mounting screws. Do not overtighten. The device should fit snugly but not bend the wires.
Attach The Wall Plate
After securing the device, position the wall plate over it. Align the plate holes with the device screws. Use a screwdriver to fasten the plate gently. The wall plate protects the wiring and gives a clean look.
Restore Power At The Circuit Breaker
Go to your home’s electrical panel. Find the breaker controlling the switch and outlet. Flip the breaker back to the ON position. This action restores electricity to the device.
Test The Switch And Outlet
Turn on the light switch to check the connected light. Plug a small appliance or tester into the outlet. Confirm both work correctly. If not, turn off the power and review your wiring steps.
Test The Installation
Testing the installation is a crucial step after wiring a light switch with an outlet. It ensures the connections are correct and the device works safely. Skipping this step can lead to malfunctions or electrical hazards.
Follow these simple checks to confirm your installation is successful. Safety first. Always turn off the power before handling wires again.
Turn On The Power
Switch the circuit breaker back on to supply electricity. This powers the switch and outlet. Wait a few seconds for power to stabilize before testing.
Check The Light Switch
Flip the switch to see if the light turns on and off. The switch should operate smoothly without sparks or buzzing sounds. If it does not work, turn off power and recheck wiring.
Test The Outlet
Plug in a small device, like a lamp or phone charger, to the outlet. The device should power on without flickering. If the outlet does not work, inspect the wiring connections again.
Use A Voltage Tester
Use a voltage tester to check for proper current at the outlet and switch terminals. This tool confirms safe voltage levels. No voltage or irregular readings indicate wiring errors.
Look For Loose Wires
Visually inspect all wire connections. Tighten any loose screws or wire nuts. Loose wires cause poor contact and can be dangerous.
Troubleshooting Tips
Troubleshooting is key to a smooth installation of a light switch with an outlet. Problems can occur, but most have simple fixes. Understanding common issues helps save time and effort. This section covers easy tips to solve typical problems quickly.
Check The Power Supply
First, verify the power is on. Use a voltage tester on the wires. Confirm the circuit breaker is not tripped. A power cut stops the switch and outlet from working.
Inspect Wiring Connections
Loose or wrong connections cause many issues. Turn off power before checking wires. Make sure each wire is tight in its terminal. Match the wires by color: black to black, white to white.
Test The Switch Function
Switches can fail or be installed wrong. Flip the switch to see if it controls the light. Use a multimeter to check continuity inside the switch. Replace the switch if it shows no continuity.
Look For Outlet Problems
Outlets may not work if damaged or wired badly. Test the outlet with a lamp or outlet tester. Check for broken parts or burn marks. Change the outlet if it looks worn or cracked.
Examine Grounding Issues
Proper grounding is crucial for safety and function. Ensure the ground wire connects to the metal box or outlet. A missing ground can cause flickering or shocks. Add grounding if none exists.
Replace Faulty Components
Sometimes parts fail even with correct installation. Switches and outlets wear out over time. Use quality replacements to avoid future problems. Always buy parts that meet safety standards.
Frequently Asked Questions
How Do I Safely Install A Light Switch With Outlet?
Turn off power at the breaker before starting. Use a voltage tester to confirm no electricity flows. Follow wiring diagrams carefully. Use proper tools and secure connections to avoid hazards. If unsure, consult a licensed electrician for safety.
What Tools Are Needed To Install Switch With Outlet?
You need a screwdriver, wire stripper, voltage tester, electrical tape, and wire nuts. A drill may help for mounting. Use a flashlight for better visibility. These tools ensure a smooth, safe installation process.
Can I Replace An Existing Outlet With A Switch Outlet Combo?
Yes, you can replace an existing outlet with a combo device. Ensure the circuit is powered off. Match the wiring correctly to avoid faults. Confirm the box size can fit the combo unit safely.
How To Connect Wires In A Switch With Outlet Combo?
Connect the hot (black) wire to the switch terminal. Attach the neutral (white) wires to the outlet terminals. Ground wires (green or bare) should connect to the grounding screw. Secure all connections tightly to ensure safety.
Conclusion
Installing a light switch with an outlet can save space and add convenience. Follow safety steps carefully to avoid accidents. Take your time to connect wires correctly and check your work. Using simple tools makes the job easier and faster.
After installation, test the switch and outlet to ensure they work well. A little patience helps you finish the task with confidence. This project can improve your home’s functionality without needing an expert. Ready to enjoy your new setup?