Are you planning to install a new light switch or hang something heavy near one? Knowing exactly how far a stud is from a light switch can save you from costly mistakes.
If you guess wrong, you might drill into wires or fail to secure your fixture properly. You’ll discover simple tips to find the stud’s location quickly and safely. Keep reading to learn the easy tricks that will make your next home project smoother and stress-free.
Stud Location Basics
Knowing where studs are behind your walls is key for many home projects. Studs provide support and hold nails or screws securely. This is especially important when installing a light switch, to ensure it stays firmly attached. Walls usually hide these wooden or metal beams, so finding them is the first step.
Stud location basics help you understand how far a stud is from a light switch. This knowledge makes your work safer and more accurate. Let’s explore common stud spacing and why stud placement matters.
Common Stud Spacing
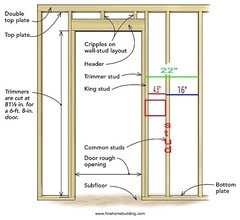
Studs usually sit 16 or 24 inches apart, measured from center to center. The 16-inch spacing is the most common in modern homes. Older homes might use 24-inch spacing. The light switch box often attaches to the side of a stud. This means the switch is not exactly at the stud’s center but close to its edge.
Knowing this helps you guess where the stud lies behind the switch. It also aids in drilling holes or adding fixtures without damaging the wall.
Why Stud Placement Matters
Studs hold the wall’s weight and anything attached to it. A light switch needs a stud nearby for stability. Without a stud, the switch can become loose or fall out. Electrical boxes also require secure attachment to prevent hazards.
Stud placement affects wiring safety too. It keeps wires away from nails and screws that could cause shorts. Understanding stud location reduces damage and keeps your home safe.
Typical Distance From Light Switch
The typical distance from a light switch to a stud is important for safe and easy installation. Knowing this distance helps when mounting switches or running wires inside walls. Most builders follow standard rules, but some differences exist depending on the wall type.
Standard Measurements
Usually, a stud is about 1.5 inches from the edge of the drywall near a light switch. Studs are typically spaced 16 inches apart from center to center. The light switch box is attached to the stud’s side. This setup keeps switches secure and aligned in the wall.
The switch box edge sits flush with the drywall surface. This means the stud is just behind the box, within a couple of inches. This distance helps electricians know where to drill or nail without damaging wires.
Variations In Different Walls
Not all walls have the same stud placement. Older homes might have studs spaced 24 inches apart. Some walls with metal studs can differ from wooden ones. These differences affect how far the stud is from a light switch.
Bathrooms and kitchens might have extra studs or blocking for cabinets. This changes the distance slightly. Always check with a stud finder before cutting or drilling near a switch.
Tools To Find Studs Near Switches
Finding a stud near a light switch helps secure fixtures and avoid damage. Using the right tools makes this task simple and accurate. Different options exist to locate studs safely and quickly. Below are common tools and methods for this job.
Stud Finders
Stud finders are small devices that detect wood or metal behind walls. They work by sensing changes in density or magnetic fields. Place the stud finder flat on the wall and move it slowly. It will beep or show a light when it finds a stud. These tools are affordable and easy for beginners. Some models also detect wires, adding safety near switches.
Alternative Methods
Not everyone owns a stud finder. Simple tricks can still help find studs. Tap the wall and listen for a solid sound, indicating a stud. Look for nails or screws near the switch plate, as they often attach to studs. Measure about 16 inches from a corner or door frame, common stud spacing. A strong magnet can also find nails inside the wall. These methods require patience but work well without special tools.
Electrical Code Considerations
Electrical codes set rules for safe wiring and installation. They guide the placement of studs and light switches. Following these codes helps prevent accidents and electrical problems. Knowing the rules ensures your switch is both safe and functional.
Studs usually support walls and hold electrical boxes. The code tells how far switches must be from studs. This distance affects switch box mounting and wiring safety. Always follow local codes for the best results.
Safety Requirements
Safety is the top priority in electrical work. Codes require switches to be easy to reach and operate. They must also avoid contact with sharp edges or nails in studs. Proper spacing reduces fire risks and electrical shocks. Using approved materials and methods is a must.
Switch Box Mounting
Switch boxes must attach securely to studs. The box should align with the wall surface for easy switch access. Codes specify the height and distance from the stud face. This placement ensures wiring fits safely inside. Correct mounting keeps switches stable and protects wires.
Common Installation Mistakes
Installing a light switch near a stud requires careful planning. Mistakes during installation can cause problems later. Knowing common errors helps avoid damage and ensures proper function. Two main issues often occur: misaligned switches and damaging studs. Both can cause frustration and extra work.
Misaligned Switches
Switches not aligned with studs look unprofessional. They may not fit properly in the wall. This can make the switch loose or hard to use. Misalignment happens when measurements are off. Mark the stud location before cutting the wall. Use a stud finder for accuracy. Proper alignment keeps the switch stable and safe.
Damaging Studs
Cutting or drilling too deeply can harm studs. Studs support the wall and hold switches in place. Damage weakens the wall and can cause safety risks. Avoid large holes or deep cuts near studs. Use the right tools and measure twice. Protecting studs ensures a strong, secure installation.

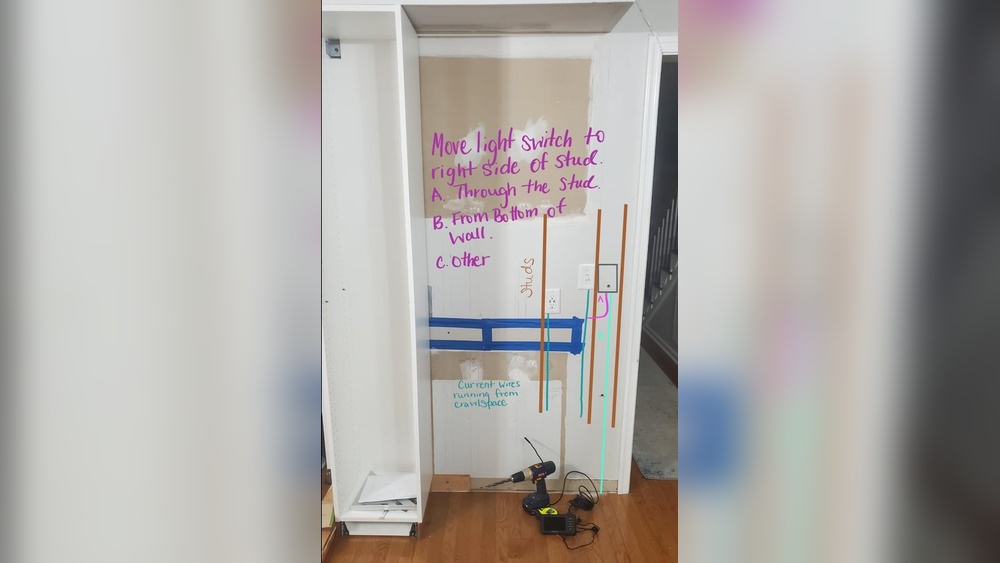
Credit: www.reddit.com
Tips For Accurate Stud Placement
Placing a stud accurately near a light switch is crucial for safe and neat installations. Proper stud placement ensures the switch stays secure and wiring remains protected. Follow these tips to measure and mark studs correctly for the best results.
Measuring Techniques
Start by measuring from a fixed point, like a corner or doorway. Use a tape measure to find the standard stud spacing, usually 16 or 24 inches apart. Measure carefully and mark each distance clearly. Double-check measurements to avoid mistakes. Use a stud finder to confirm the spot before cutting or drilling.
Marking And Planning
Mark the stud location with a pencil on the wall. Draw light lines to guide your installation. Plan the switch position in relation to the stud marks. Keep enough space for wiring and switch boxes. Planning ahead reduces errors and saves time during installation.
When To Call A Professional
Knowing the distance between a stud and a light switch is important for safe electrical work. Sometimes, the job is easy and can be done alone. Other times, it’s safer to call a professional. Professionals have the right tools and skills to handle tricky situations. They also prevent damage to your home and reduce safety risks. Here are some cases when calling a professional is the best choice.
Complex Wiring Situations
Wiring behind walls can be complicated. Some homes have old wires that do not follow current rules. Professionals understand different wiring types and layouts. They can find hidden wires and avoid cutting or damaging them. Complex wiring can cause shocks or fires if handled wrong. A professional ensures the wiring stays safe and works well.
Structural Concerns
Studs hold your walls up. Cutting or drilling in the wrong place can weaken your wall. Professionals know how far a stud is from a switch and where to safely work. They can spot pipes, wires, or other hidden things inside walls. This helps avoid costly repairs or accidents. Protect your home’s structure by trusting a professional for these tasks.
Credit: www.houzz.com

Credit: www.doityourself.com
Frequently Asked Questions
How Far Is A Stud From A Typical Light Switch?
A stud is usually about 1. 5 inches from the edge of a light switch box. This distance allows room for wiring and secure mounting.
Why Is Knowing Stud Distance From Light Switch Important?
Knowing the stud location helps when installing or moving switches. It ensures proper support and avoids drilling into electrical wiring.
Can A Light Switch Be Installed Without Hitting A Stud?
Yes, but it’s less secure. Switches are best mounted on studs for stability and to meet building codes.
How To Find A Stud Near A Light Switch?
Use a stud finder or tap the wall to hear solid sounds. The stud is often 16 or 24 inches apart.
Conclusion
Knowing the distance between a stud and a light switch helps with safe installations. Most studs sit about 1. 5 inches from the switch box edge. This small space matters when mounting shelves or fixtures nearby. Always measure carefully before drilling or nailing.
Mistakes can cause damage or safety risks. Keeping this simple tip in mind saves time and effort. Studs and switches usually follow standard spacing, but checking never hurts. This way, your project stays secure and looks neat.