Have you ever walked into a dark room wishing for a simple way to turn on the lights? Adding a light switch to your room can make your daily life easier and more comfortable.
But if you’re unsure where to start or worried about the process, don’t worry—you’re in the right place. This guide will show you step-by-step how to add a light switch safely and efficiently, even if you’re not an expert. By the end, you’ll have the confidence to brighten up your space exactly how you want.
Keep reading to discover how simple it can be to take control of your lighting.
Tools And Materials Needed
Adding a light switch to a room requires the right tools and materials. These items help make the job safer and easier. Preparing everything before starting saves time and avoids mistakes.
Essential Tools
- Screwdriver set for different screw types
- Wire stripper to remove insulation
- Voltage tester to check power
- Drill with bits for making holes
- Measuring tape for accurate placement
- Level to keep the switch straight
- Utility knife for cutting wires and drywall
- Pliers for bending and gripping wires
Required Materials
- Light switch suited for your room’s electrical system
- Electrical box to hold the switch
- Electrical wire of the correct gauge
- Wire nuts for safe wire connections
- Switch cover plate for a clean finish
- Electrical tape to secure wire nuts
- Wall anchors if mounting on drywall
- Light fixture or lamp to connect to the switch

Credit: diy.stackexchange.com
Safety Precautions
Safety is the top priority when adding a light switch to any room. Electricity can be dangerous. Taking the right steps protects you and your home. Follow these safety precautions carefully. They help prevent accidents and ensure a smooth installation.
Turning Off Power
Always turn off the power at the circuit breaker before starting work. This stops electricity flow to the wires. Use a voltage tester to check the switch box. Confirm no current is present before touching wires. Never rely on the wall switch to cut power. This simple step reduces the risk of electric shock.
Using Proper Gear
Wear insulated gloves to protect your hands from shocks. Use tools with insulated handles made for electrical work. Safety glasses protect your eyes from dust and sparks. Wear closed-toe shoes to avoid injury. Avoid loose clothing that can catch on wires or tools. Proper gear keeps you safe and helps you work confidently.
Planning The Switch Location
Planning the switch location is the first step in adding a light switch to a room. It helps ensure the switch is easy to use and fits well in the space. Thoughtful planning saves time and effort during installation.
Choosing The Spot
Pick a spot near the entrance of the room. It should be at a comfortable height, usually about 48 inches from the floor. Avoid placing it behind doors or furniture. Make sure the switch is easy to reach with your hand.
Think about how people move in and out of the room. The switch should be visible and simple to find. This makes turning the lights on and off quick and safe.
Checking Wiring Access
Check if wiring is available near your chosen spot. You may find existing wires in the wall or ceiling. If wires are not nearby, you might need to run new cables.
Look for nearby power sources like outlets or light fixtures. They can make wiring easier and cheaper. Always turn off the power before inspecting any wires. Safety first.
Running Electrical Wiring
Running electrical wiring is a key step in adding a light switch. It connects the switch to the power source and the light fixture. Proper wiring ensures safety and functionality. Take care to follow local codes and use the right tools.
Routing Cables
Plan the cable path before you start. Avoid sharp bends and obstacles inside walls. Use a fish tape to pull wires through tight spaces. Keep cables away from plumbing and heating pipes. Mark the route on the wall for easy reference.
Securing Wires
Use cable staples or clips to hold wires in place. Space them evenly to prevent sagging. Do not pinch or damage the cables when securing. Leave a little slack near boxes for easy connections. Proper securing reduces wear and risk of shorts.
Installing The Switch Box
Installing the switch box is a key step in adding a light switch to a room. The switch box holds the switch and protects the wiring. It must be placed correctly and secured firmly inside the wall. Careful work here ensures the switch works safely and looks neat.
Marking And Cutting
First, choose the spot for the switch box on the wall. Use a pencil to mark the outline of the box. Make sure the height is comfortable to reach. Use a level to keep the lines straight. Cut along the marked lines with a drywall saw or utility knife. Cut carefully to avoid damaging wires or pipes behind the wall.
Mounting The Box
Next, insert the switch box into the hole you cut. The box should fit snugly without gaps. Use screws or nails to fix the box to a stud or wall frame. Check that the box is flush with the wall surface. A secure box keeps the switch steady and safe. Double-check the box is level before tightening screws fully.
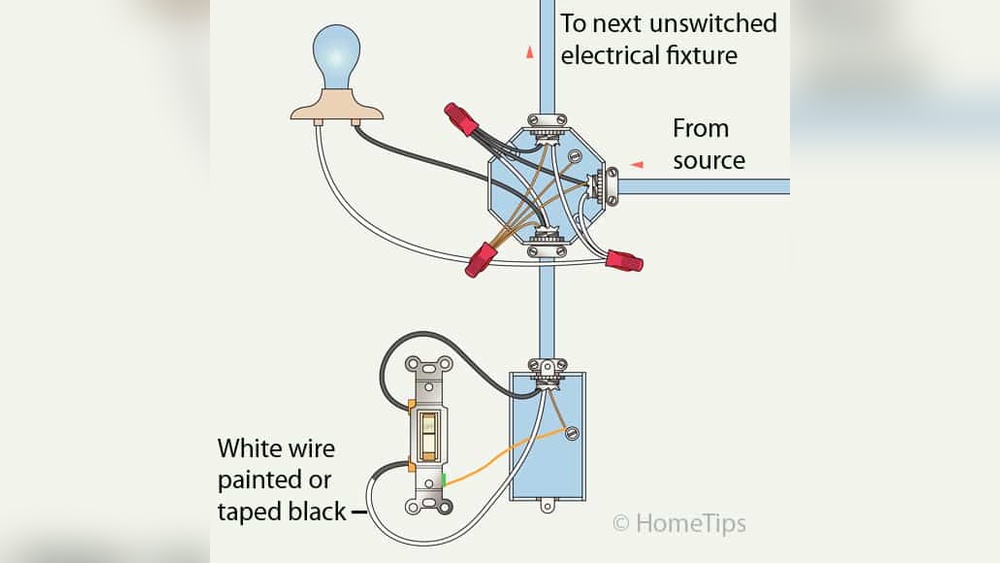
Connecting The Wires
Connecting the wires is an important step in adding a light switch to a room. It requires care and attention to ensure safety and proper function. Understanding wire types and making secure connections will help complete the job correctly.
Identifying Wire Types
First, know the wires you will work with. Typically, you find three main types: live, neutral, and ground wires. The live wire carries electricity to the switch. The neutral wire completes the circuit back to the power source. The ground wire protects against electrical shocks. Each wire has a different color. Black or red is usually live. White is neutral. Green or bare copper is ground. Check these colors carefully before connecting.
Making Safe Connections
Turn off the power at the breaker box before handling wires. Use a voltage tester to confirm no power is present. Strip the wire ends to show about half an inch of bare copper. Twist the correct wires together tightly. Use wire nuts to cover and secure these connections. Never leave exposed wires. Attach the ground wire to the switch’s grounding screw. Double-check every connection is firm. Proper connections prevent shorts and keep the switch working well.
Mounting The Switch
Mounting the switch is a key step in adding a light switch to your room. It secures the switch in place and connects it properly. Take your time to ensure the switch fits well and is safe to use. Follow clear steps to avoid common mistakes and keep everything neat.
Attaching The Switch
First, place the switch into the electrical box. Align the screw holes on the switch with those on the box. Use a screwdriver to tighten the screws gently. Do not over-tighten; this could crack the switch or the box. Make sure the switch sits flush with the wall surface. Check that the wires are tucked neatly behind the switch. This prevents pinching and keeps the wiring safe.
Testing The Function
Before fixing the cover plate, test the switch function. Turn the power back on at the breaker box. Flip the switch to see if the light turns on and off. If it does not work, switch off the power again and check your wiring. Correct any loose or wrong connections. Testing now saves time and ensures safety. Once the switch works properly, attach the cover plate securely.

Credit: decoradventures.com
Finishing Touches
Finishing touches make your light switch look complete and safe. This step ensures your work is neat and functional. It also protects the wiring and the wall. Follow these simple tasks to finish the job properly.
Installing The Cover Plate
Place the cover plate over the switch carefully. Align it so the screw holes match. Use a screwdriver to tighten the screws gently. Do not overtighten, or the plate might crack. A clean cover plate improves the room’s look.
Restoring Power And Final Checks
Turn the power back on at the breaker box. Test the switch by flipping it on and off. Check if the lights respond as expected. Listen for any unusual sounds or smells. Make sure the switch feels firm and secure. Your installation is now complete and ready to use.

Credit: www.youtube.com
Frequently Asked Questions
How Do I Safely Add A Light Switch To A Room?
Turn off the power at the circuit breaker before starting. Use a voltage tester to ensure no electricity flows. Follow local electrical codes and consider hiring a professional if unsure. Proper wiring and grounding are essential for safety.
What Tools Do I Need To Install A Light Switch?
You need a voltage tester, wire stripper, screwdriver, electrical tape, and wire nuts. A drill may be required for mounting. Having all tools ready ensures a smooth installation process and prevents interruptions.
Can I Add A Light Switch Without Rewiring The Whole Room?
Yes, you can add a switch using existing wiring if accessible. Use a switch loop from the light fixture to the switch box. This method avoids rewiring but requires careful planning and proper connections.
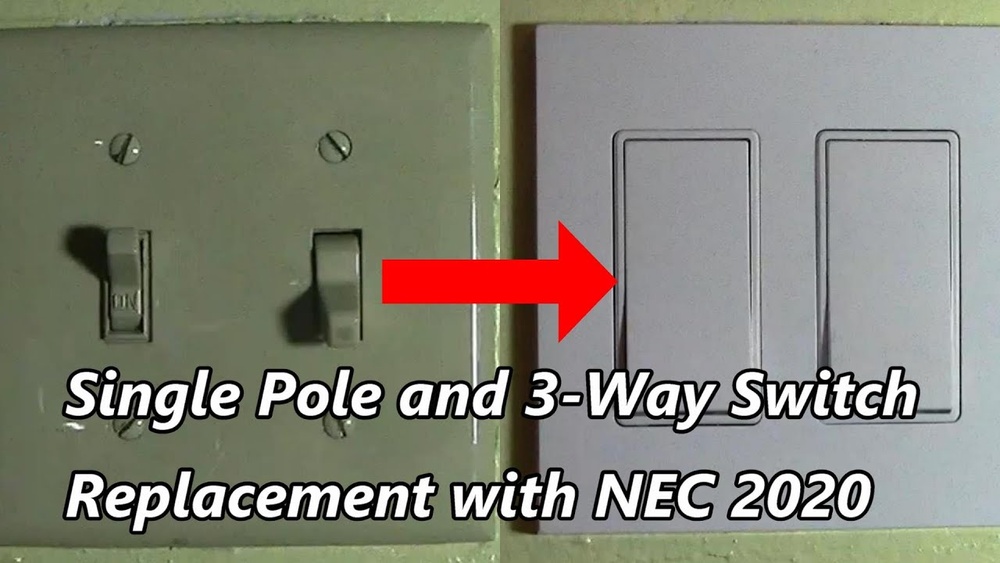
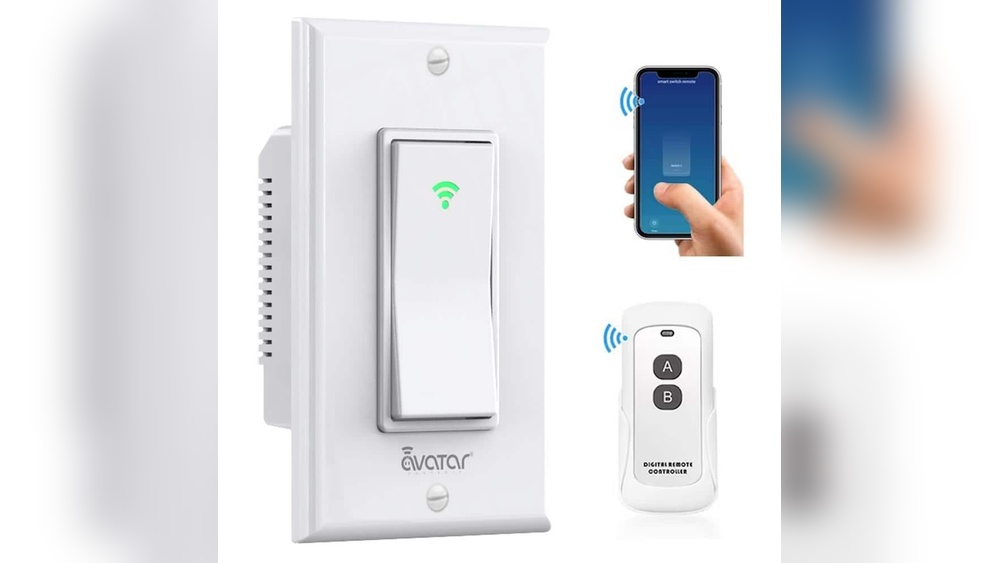
How Do I Choose The Right Light Switch For My Room?
Consider switch type: toggle, rocker, or dimmer, based on your lighting needs. Match the switch rating to your circuit amperage. Choose a style that complements your room decor for both function and aesthetics.
Conclusion
Adding a light switch to a room can brighten your space and save energy. Follow each step carefully and stay safe during the process. Use the right tools and check your work twice. This simple upgrade improves convenience and comfort in your home.
Take your time and ask for help if needed. Enjoy the ease of controlling your lights with a switch. Small projects like this build your confidence in home repairs. Keep learning and improving your skills one step at a time.