Are your brake lights not working properly? Knowing how to test a brake light switch can save you time, money, and keep you safe on the road.
This small but important part controls your brake lights, and if it’s faulty, others might not see when you’re stopping. In this guide, you’ll learn simple steps to check your brake light switch yourself—no special tools or skills needed. Keep reading to find out how to spot the problem and fix it quickly before it becomes a bigger issue.

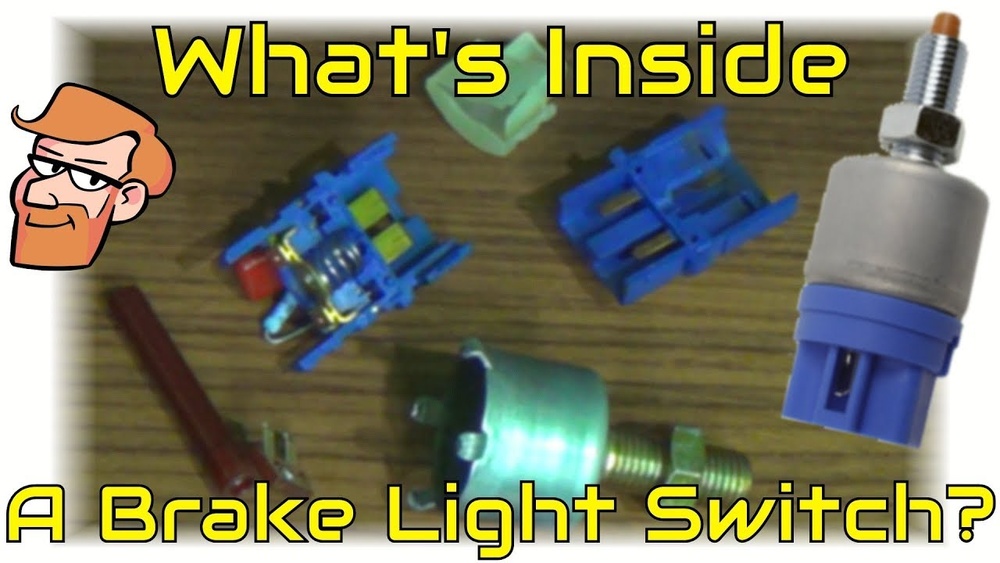
Credit: www.youtube.com
Brake Light Switch Basics
The brake light switch is a small but vital part of a car’s safety system. It controls the brake lights that warn other drivers when you slow down or stop. Without a working brake light switch, accidents can happen easily. Understanding the basics of this switch helps you keep your vehicle safe and road-ready.
Role In Vehicle Safety
The brake light switch sends power to the brake lights. When you press the brake pedal, the switch activates the lights. This alerts drivers behind you to stop or slow down. It helps prevent rear-end collisions. The switch also works with other safety systems like cruise control and ABS. A faulty switch can cause brake lights to stay off or stay on.
Common Types Of Switches
There are two main types of brake light switches. The first is the plunger type. It uses a small button pressed by the brake pedal. Pressing the pedal releases the button and turns on the lights. The second type is the magnetic or Hall-effect switch. It uses sensors to detect pedal movement without physical contact. Both types serve the same purpose but work differently. Knowing the type helps when testing or replacing the switch.
Credit: premierautotrade.com.au
Signs Of A Faulty Brake Light Switch
The brake light switch is a small but important part of your vehicle. It tells the brake lights to turn on when you press the pedal. If this switch fails, it can cause several problems. Recognizing these signs helps you fix the issue early. This keeps you and others safe on the road.
Here are some common signs of a faulty brake light switch.
Brake Lights Not Illuminating
Brake lights that do not turn on are a clear sign of a bad switch. The switch sends the signal to light up the brake lamps. If it fails, the lights stay off even when you press the pedal. This makes driving risky, especially at night or in traffic.
Cruise Control Issues
The brake light switch also controls the cruise control system. A faulty switch can stop cruise control from turning off. This can make it hard to slow down or stop. The system might stay active even after pressing the brake pedal, which is unsafe.
Brake Pedal Problems
A bad switch can cause the brake pedal to feel strange. It might feel loose or stiff. Sometimes, the pedal does not respond smoothly. This happens because the switch affects the brake system’s signals. Such problems need quick attention to avoid accidents.
Tools Needed For Testing
Testing a brake light switch requires some basic tools. These tools help check if the switch works properly. Using the right tools makes the process easier and accurate.
Below are the main tools needed for testing a brake light switch.
Multimeter
A multimeter measures electrical current, voltage, and resistance. It is essential to test the brake light switch’s electrical function. With a multimeter, you can check if the switch opens and closes the circuit correctly. A simple digital multimeter works well for this task. It helps find any electrical faults in the switch.
Basic Hand Tools
Basic hand tools include screwdrivers, pliers, and wrenches. These tools help access and remove the brake light switch from its place. Sometimes the switch is behind panels or under the dashboard. Having the right hand tools makes removal easier. These tools also help tighten or adjust the switch during testing.

Credit: www.agcoauto.com
Preparing For The Test
Preparing for the brake light switch test is an important first step. It helps ensure you get accurate results. Taking time to prepare also keeps you safe during the process.
This section covers how to find the brake light switch and how to keep your vehicle safe. Follow these steps before you start testing.
Locate The Brake Light Switch
The brake light switch is usually near the brake pedal. Look under the dashboard or near the pedal arm. It is a small device with wires attached. Identifying it correctly makes the test easier and faster.
Ensure Vehicle Safety
Park your vehicle on a flat surface. Turn off the engine and set the parking brake. Use wheel chocks to stop the car from moving. Safety helps prevent accidents while testing the switch.
Step-by-step Testing Process
Testing a brake light switch is simple and important. This process helps you find problems early. Follow these steps to check if your switch works well. Each step uses easy tools and clear checks. The goal is to make sure your brake lights turn on when you press the pedal.
Visual Inspection
Start by looking at the brake light switch. Check for dirt, damage, or loose wires. Make sure the switch is in the right place. Look for signs of wear or broken parts. Clean the area if needed. A good visual check can spot obvious problems fast.
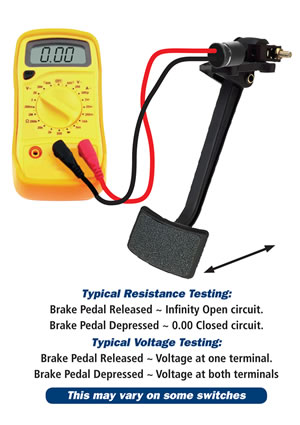
Electrical Continuity Test
Use a multimeter to test the switch’s electrical path. Set the multimeter to continuity mode. Disconnect the switch from the wiring. Touch the multimeter probes to the switch terminals. Press the brake pedal to see if the circuit closes. A beep or reading shows the switch works. No beep means the switch may be faulty.
Pedal Activation Test
Press the brake pedal and watch the brake lights. They should turn on immediately when you press the pedal. Release the pedal and see if the lights turn off. If lights don’t respond, the switch might be broken. Adjust the switch position if needed. This test confirms the switch activates the lights properly.
Interpreting Test Results
After testing a brake light switch, understanding the results is crucial. Proper interpretation helps decide if the switch works well or needs replacement. This section guides you through reading test outcomes clearly and simply.
Normal Function Indicators
A properly working brake light switch shows specific signs during testing. The switch should complete the circuit when pressed. This means the multimeter reads continuity or a low resistance value. When released, the circuit breaks, showing no continuity. The brake lights turn on only when the pedal is pressed. These are clear signs that the switch functions normally and safely.
Signs Of Malfunction
Faulty brake light switches show different test results. If the switch never completes the circuit, the brake lights won’t turn on. A constant circuit, even when the pedal is not pressed, means the lights stay on. High or infinite resistance during testing also signals a problem. These signs suggest the switch is broken or worn out and needs replacement.
Replacing A Faulty Brake Light Switch
Replacing a faulty brake light switch is essential for safe driving. The brake light switch controls the brake lights, alerting other drivers when you slow down or stop. A broken switch can cause brake lights to stay off or stay on continuously. This can lead to accidents or traffic tickets. Fixing it quickly keeps your vehicle safe and legal.
Choosing The Right Replacement
Select a brake light switch that fits your vehicle model. Check your car’s manual or ask a parts store for help. Choose a switch with good reviews and proper certification. Avoid cheap, low-quality parts that may fail soon. A reliable switch ensures your brake lights work perfectly every time.
Installation Tips
Start by disconnecting the car battery to avoid shocks. Locate the old brake light switch near the brake pedal. Remove any screws or clips holding the switch in place. Carefully disconnect the wiring harness from the old switch. Connect the new switch to the wiring harness. Secure it properly so it does not move out of place. Test the brake lights before reassembling everything. Reconnect the battery and press the brake pedal to check the lights. Proper installation makes your brake lights work like new.
Preventive Maintenance Tips
Preventive maintenance helps keep your brake light switch working well. It stops problems before they start. This saves time and money. Regular care also improves safety on the road. Follow these simple tips to maintain your brake light switch.
Regular Inspections
Check the brake light switch often. Look for signs of wear or damage. Test if the brake lights turn on when you press the pedal. Clean the switch and its connections to avoid dirt build-up. Replace the switch if it feels loose or does not work properly.
When To Seek Professional Help
Call a mechanic if the brake lights stay on or do not light up. If you hear strange noises when pressing the brake, get it checked. Problems with wiring or complicated parts need expert attention. Professionals can fix issues safely and correctly.
Frequently Asked Questions
How Do You Check If A Brake Light Switch Is Faulty?
To check a faulty brake light switch, inspect the brake lights when pressing the pedal. If lights don’t illuminate, test the switch with a multimeter for continuity.
What Tools Are Needed To Test A Brake Light Switch?
You need a multimeter, screwdriver, and sometimes a wrench to access and test the brake light switch effectively.
Can A Bad Brake Light Switch Affect Car Safety?
Yes, a faulty brake light switch can cause brake lights to fail, increasing accident risks and compromising vehicle safety.
How Do You Test Brake Light Switch Continuity?
Set the multimeter to continuity mode, connect probes to switch terminals, and press the brake pedal. Continuity indicates a working switch.
Conclusion
Testing a brake light switch keeps your car safe. It helps ensure your brake lights work well. Simple tools can check the switch quickly. Knowing how to test saves time and money. Always test if your brake lights act strange.
A working brake light switch avoids accidents. Stay safe by checking your car regularly. Easy steps make the process clear. Take care of your vehicle; it matters.