Are you looking to control an outlet with a light switch but don’t know where to start? Connecting a light switch to an outlet can seem tricky, but with the right steps, you can do it safely and easily.
Imagine turning your favorite lamp on and off without reaching for the plug every time—sounds convenient, right? In this guide, you’ll discover simple, clear instructions that anyone can follow, even if you’re not an expert. Keep reading, and you’ll learn how to make your home smarter and more comfortable with just a few tools and a little know-how.
Tools And Materials Needed
Before connecting a light switch to an outlet, gather all necessary tools and materials. Having everything ready makes the work safer and easier. The right tools help you complete the job smoothly. This section lists what you need for this task.
Basic Tools
Start with simple tools. A screwdriver set is essential for removing covers and securing wires. Wire strippers help to remove insulation without damaging wires. A voltage tester ensures the power is off before you start. Needle-nose pliers aid in bending and positioning wires. A utility knife helps with cutting electrical tape and wire sheathing.
Electrical Materials
You need a light switch compatible with your outlet. Electrical wire is necessary to connect the switch and outlet safely. Use wire connectors to join wires securely. Electrical tape insulates and protects connections. An outlet cover plate finishes the installation neatly and safely.
Safety Gear
Safety is important. Wear insulated gloves to protect from electric shocks. Safety glasses shield your eyes from sparks or debris. Use a flashlight if the area has low light. Always turn off the main power before starting any electrical work.
Safety Precautions
Working with electricity can be risky. Taking safety precautions protects you from harm. Always prepare before connecting a light switch to an outlet. This section covers key safety steps to follow.
Turn Off The Power
Switch off the circuit breaker linked to the area you work on. Use a voltage tester to ensure no current flows. Never trust the switch position alone.
Use Proper Tools And Equipment
Choose insulated tools made for electrical work. Avoid using damaged or worn-out tools. Wear rubber-soled shoes for extra protection.
Double Check Wiring And Connections
Identify wires correctly before touching them. Confirm wire colors and functions match standard codes. Secure all connections tightly to avoid sparks.
Work In A Dry Environment
Avoid wet or damp spaces to reduce shock risk. Dry your hands before handling wires or tools. Keep the work area clean and dry.
Wear Safety Gear
Use safety goggles to protect your eyes from debris. Gloves help prevent accidental shocks or cuts. Wear long sleeves to cover your skin.
Identify Wiring Types
Identifying wiring types is important before connecting a light switch to an outlet. Knowing the wires helps you work safely and correctly. It prevents mistakes that can cause electric shocks or damage.
Different wires have different colors and roles. Recognizing them makes your task easier. Let’s explore the common wiring types you will find in a typical electrical box.
Black (hot) Wire
The black wire carries electricity from the power source. It is the “hot” wire that powers the switch and outlet. Always handle this wire carefully as it is live when the circuit is on.
White (neutral) Wire
The white wire completes the electrical circuit by returning current to the panel. It is called the neutral wire. It usually connects directly to the outlet and does not go through the switch.
Ground Wire
The ground wire is usually green or bare copper. It protects you by directing electricity into the earth if there is a fault. This wire connects to the outlet’s ground terminal and the switch’s metal box if present.
Red (traveler) Wire
The red wire appears in some switch setups. It often acts as a traveler wire in three-way switches. It may also provide power to the outlet from the switch in certain wiring plans.
Turn Off Power
Turning off power is the first step before connecting a light switch to an outlet. Safety is the priority. Electricity can cause serious injury or damage. Always make sure the power is off to avoid accidents. This step protects you and your home.
Power is usually controlled by the circuit breaker. This device cuts the electricity supply to specific areas. You need to find the right breaker and switch it off. Confirm the power is off before handling any wires.
Locate The Circuit Breaker Panel
Find the main breaker box in your home. It is often in the basement, garage, or utility room. The panel contains switches for all electrical circuits. Look for labels on each switch to identify the right one.
Turn Off The Correct Breaker
Switch off the breaker that controls the outlet and switch you will work on. Flip the breaker to the “off” position. This cuts power to the area. Double-check the label to avoid turning off the wrong breaker.
Verify Power Is Off
Use a voltage tester or a simple lamp to check the outlet. Plug the lamp in or use the tester on the outlet terminals. If the lamp does not light or the tester shows no voltage, power is off. Never skip this step.
Remove Existing Outlet Cover
Removing the existing outlet cover is the first step before connecting a light switch to an outlet. It helps you see the wiring inside safely. Always turn off the power from the main breaker before starting.
Careful removal prevents damage to the outlet and wall. Use the right tools and follow safety steps to avoid accidents.
Gather The Necessary Tools
Get a flathead or Phillips screwdriver, depending on your outlet screws. Have a flashlight ready for better visibility. Keep a voltage tester nearby to check power.
Turn Off The Power
Switch off the breaker that controls the outlet. Double-check by testing the outlet with a voltage tester. No power means it’s safe to proceed.
Unscrew The Outlet Cover
Use the screwdriver to remove the screws holding the cover. Place screws in a small container to avoid loss. Gently pull the cover off the outlet.
Inspect The Outlet And Wires
Look for any damage or loose wires inside. Make sure wires are intact and not frayed. This check helps prevent future problems during installation.
Connect Switch To Outlet Wiring
Connecting a light switch to an outlet allows control of the outlet’s power. First, turn off the electricity for safety. Then, link the switch’s wires to the outlet’s hot wire following wiring rules carefully.
Locate Hot And Neutral Wires
Start by turning off the power at the breaker box. Safety first. Remove the outlet cover and switch plate. Use a voltage tester to check wires. Find the hot wire, usually black or red. This wire carries electricity to the device. Next, find the neutral wire, often white. The neutral wire completes the circuit back to the panel. Mark these wires to avoid confusion later. Double-check that power is off before touching any wires.
Attach Switch Wires Correctly
Connect the hot wire from the power source to one terminal on the switch. Use a wire nut to join wires if needed. Connect the second terminal of the switch to the outlet’s hot terminal. Attach the neutral wires together with a wire nut. Do not connect neutral wires to the switch. Tighten all terminal screws firmly. Carefully tuck wires back into the boxes. Replace the switch and outlet covers. Turn the power back on and test the switch and outlet.
Mount The Switch And Outlet
Mounting the switch and outlet is a key step in connecting them safely. Proper placement ensures easy use and a neat finish. Follow clear steps to fix them securely in the wall box. This section guides you through the process.
Prepare The Wall Box
Check the wall box for any debris or damage. Make sure it fits the switch and outlet snugly. Clear any dust or loose material inside. This helps the devices sit flat and stable.
Attach The Switch To The Box
Align the switch with the screw holes in the box. Use a screwdriver to tighten the screws gently. Avoid over-tightening to prevent cracking the switch. The switch should be flush with the wall surface.
Secure The Outlet In Place
Place the outlet in the wall box carefully. Match the screw holes with the box’s holes. Screw in the outlet using a screwdriver. Ensure it does not move or tilt after tightening.
Install The Cover Plates
Place cover plates over the switch and outlet. Line them up with the screw holes. Screw the plates in gently. This gives a clean, finished look and protects wiring.

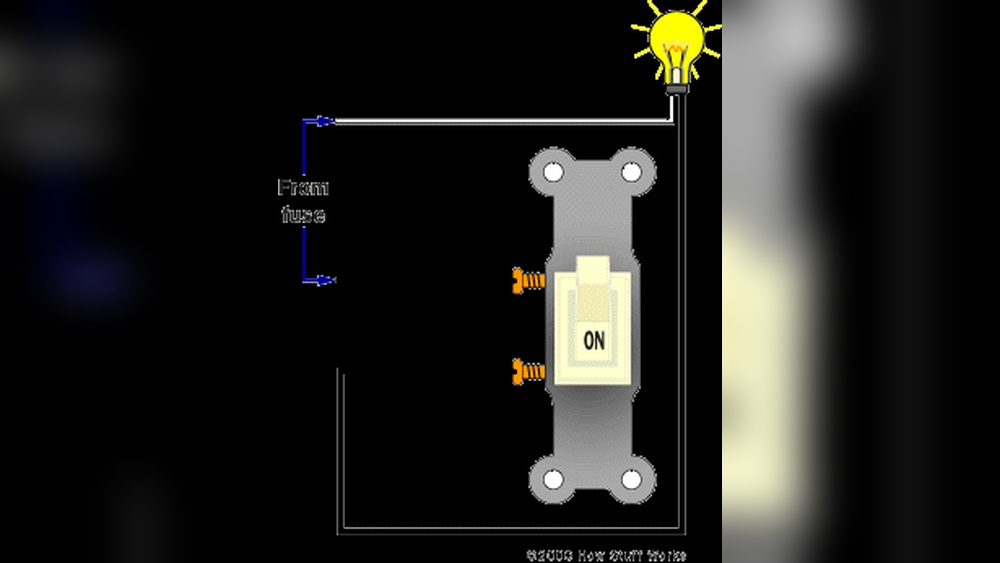
Credit: www.do-it-yourself-help.com
Test The Connection
Testing the connection is an important step after wiring a light switch to an outlet. It ensures the switch controls the outlet properly and safely. Checking the connection avoids electrical problems later. Follow simple steps to confirm everything works well.
Check Power Supply
First, turn on the main power from the circuit breaker. This supplies electricity to the outlet and switch. Use a voltage tester or a multimeter to confirm the outlet has power. If no power is detected, recheck your wiring connections.
Operate The Switch
Flip the light switch on and off. Watch the outlet or any device plugged into it. The device should turn on and off with the switch. If the device does not respond, check the wiring for errors or loose connections.
Test With A Device
Plug a lamp or small appliance into the outlet. Turn the switch on to power the device. Turn the switch off to cut power. This test shows if the switch correctly controls the outlet’s power flow.
Look For Safety Issues
Listen for buzzing sounds or smell burning. These signs mean a bad connection or overload. Turn off power immediately if you detect these issues. Fix wiring or consult an electrician for safety.
Troubleshooting Common Issues
Troubleshooting common issues is important when connecting a light switch to an outlet. Problems can stop your setup from working correctly. Knowing how to find and fix these issues saves time and frustration.
Many problems come from simple mistakes. Checking wiring, switches, and outlets carefully helps spot errors fast. This section explains common issues and how to solve them step by step.
Checking The Wiring Connections
Loose or wrong wiring is the main cause of problems. Turn off power before checking wires. Make sure wires are connected to the right terminals. Tighten any loose screws. Look for damaged or broken wires and replace them.
Testing The Light Switch
A faulty switch can stop the outlet from working. Use a voltage tester to check the switch. Flip the switch on and off while testing. Replace the switch if it does not pass the test.
Inspecting The Outlet
The outlet itself may cause issues. Use a socket tester to check the outlet. Look for signs of damage or burning. Replace the outlet if it looks worn or unsafe.
Verifying The Circuit Breaker
The circuit breaker controls power to the outlet and switch. Check if the breaker has tripped. Reset it by switching off then back on. If it trips again, call an electrician.
Confirming Proper Grounding
Grounding keeps the system safe. Ensure the ground wire is attached to the outlet and switch. Test grounding with a circuit tester. Poor grounding can cause shocks or malfunctions.
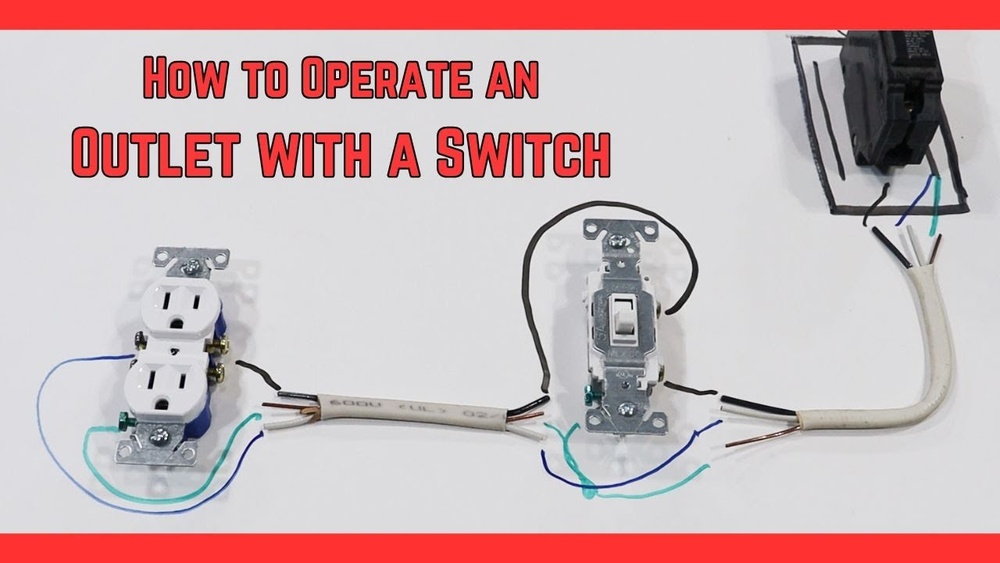
Credit: www.youtube.com

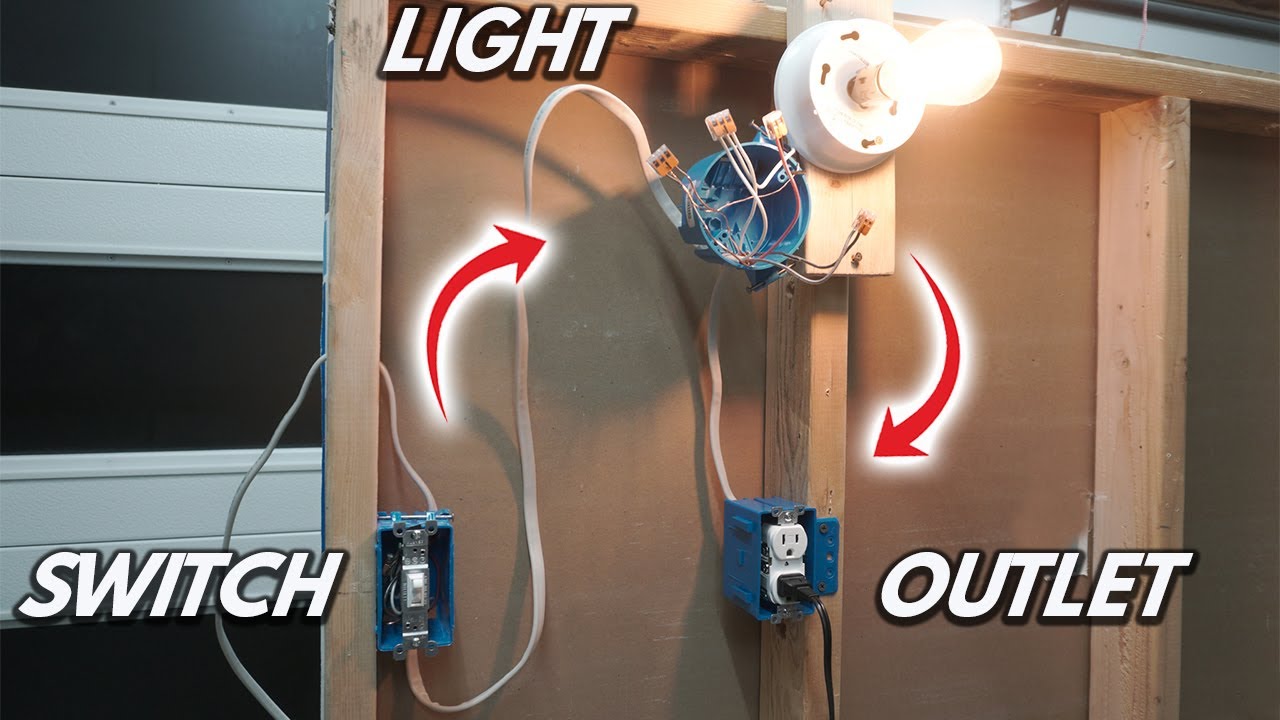
Credit: diy.stackexchange.com
Frequently Asked Questions
How Do I Wire A Light Switch To Control An Outlet?
To wire a light switch controlling an outlet, connect the switch’s line wire to the outlet’s hot wire. Use a traveler wire from the switch to the outlet’s switch terminal. Always turn off power before starting to ensure safety.
Can A Single Switch Operate Multiple Outlets?
Yes, a single switch can control multiple outlets by wiring the hot line through the switch to all outlets. Ensure the switch and wiring can handle the total load to avoid overheating or electrical faults.
What Tools Are Needed For Switch To Outlet Wiring?
You need a voltage tester, wire stripper, screwdriver, electrical tape, wire nuts, and a multimeter. These tools ensure safe, precise connections and help verify that the wiring is correct before restoring power.
Is It Safe To Connect A Switch Directly To An Outlet?
Yes, it’s safe if done correctly with proper wiring standards and circuit protection. Always follow local electrical codes and turn off power at the breaker before starting any wiring work.
Conclusion
Connecting a light switch to an outlet is a useful skill. It lets you control power easily and safely. Always turn off the main power before starting. Follow the steps carefully to avoid mistakes. Use the right tools and check your work.
This simple project can save time and money. With practice, wiring becomes clearer and less confusing. Take your time and stay safe throughout the process. You will feel proud once it works well. Keep learning and improving your home electrical skills.