Changing a light switch cover is one of the easiest home improvement tasks you can do. Yet, many people avoid it because they think it’s complicated or risky.
What if you could refresh the look of your room in just a few minutes, without any special tools or skills? In this guide, you’ll learn exactly how to change a light switch cover safely and quickly. By the end, you’ll feel confident to tackle this simple project and give your space an instant upgrade.
Ready to get started? Let’s dive in!
Gather Necessary Tools
Before changing a light switch cover, gather the right tools. This makes the task safe and easy. Having everything ready saves time and avoids mistakes.
Safety Gloves
Wear safety gloves to protect your hands. They help prevent cuts and electric shocks. Choose gloves that fit well and are comfortable.
Screwdriver
A screwdriver is essential for removing and attaching screws. Most light switch covers use a flathead or Phillips screwdriver. Check the screw type before starting.
Voltage Tester
Use a voltage tester to check if the power is off. This tool ensures no electricity flows to the switch. Safety first to avoid shocks.
New Light Switch Cover
Have the replacement cover ready. Match it to your switch size and style. This avoids fitting problems and extra trips to the store.
Cleaning Cloth
A soft cloth helps clean the switch area before installing the new cover. It removes dust and dirt for a neat finish.
Turn Off Power
Always turn off the power at the breaker before changing a light switch cover. This step keeps you safe from electric shock during the process. Safety first, then remove the old cover carefully.
Locate The Circuit Breaker
Start by finding your home’s main electrical panel. It is usually in the basement, garage, or a utility room. Open the panel door to see the circuit breakers. Each breaker controls power to a part of your house.
Identify The Correct Breaker
Look for the breaker that controls the room with the light switch. It might be labeled with room names or numbers. If not labeled, turn off breakers one by one and check if the light turns off. This ensures you stop power to the right switch.
Switch Off The Breaker
Flip the correct breaker to the off position. This cuts power to the light switch and prevents shocks. You should hear a click when it switches off. Do not skip this step. It is important for safety.
Test The Light Switch
After switching off the breaker, try turning on the light. It should not light up. Use a voltage tester on the switch to check for electricity. If the tester shows no power, it is safe to proceed with changing the cover.
Remove Old Cover
Removing the old light switch cover is the first step in changing it. This task is simple and takes only a few minutes. Safety is important. Always turn off the power before starting. This prevents any chance of electric shock. Use a screwdriver to remove the screws holding the cover. Keep the screws safe to use later. Gently pull the cover away from the wall. Sometimes, covers stick a little. Use a slow and steady motion to avoid damage. Once removed, the old cover is ready to be replaced.
Switch off the power at the circuit breaker. Do not rely on the wall switch alone. Use a voltage tester to check if the power is off. This step keeps you safe during the process.
Unscrew The Cover
Use a flathead or Phillips screwdriver. Remove the screws holding the cover in place. Turn the screws counterclockwise until loose. Place the screws somewhere safe for reuse.
Remove The Cover Plate
Pull the cover plate gently from the wall. Avoid using too much force. If the cover is stuck, wiggle it slightly. Do not damage the wall or switch.
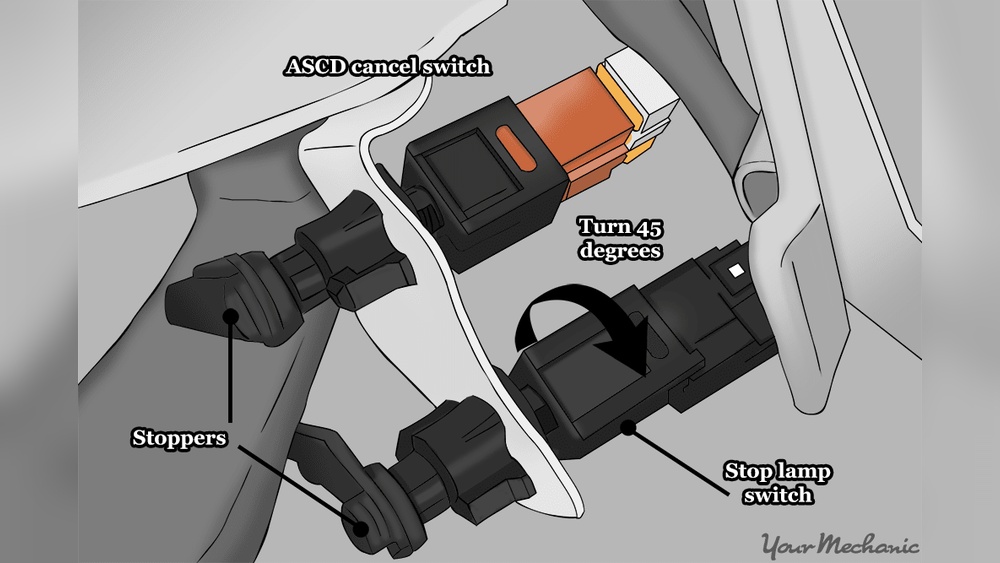
Credit: www.reddit.com
Inspect Switch And Wall
Start by turning off the power to the switch for safety. Check the wall and switch for any damage before removing the cover. Make sure the area is clean and dry to fit the new cover properly.
Check The Switch For Damage
Start by examining the light switch closely. Look for cracks, chips, or any broken parts. A damaged switch can be unsafe to use. If you see any problems, consider replacing the switch before changing the cover.
Look At The Wall Around The Switch
Next, inspect the wall area around the switch. Check for peeling paint, cracks, or holes. Damaged walls can make the new cover look uneven. Fix small wall problems to ensure a smooth, clean finish.
Ensure The Switch Is Clean
Dust and dirt can build up around the switch over time. Use a dry cloth to wipe the surface gently. A clean switch and wall help the new cover fit better and look nicer.
Choose New Cover
Select a new cover that fits your light switch size and style. Make sure it matches your room’s look before installing. Changing covers is quick and simple.
Choosing a new light switch cover is the first step. It changes the look of your room. The cover hides wires and protects the switch. It also adds style and color.
Many types of covers exist. Plastic covers are common and affordable. Metal covers are strong and shiny. Wood covers give a warm, natural look.
Match The Size
Measure the old cover first. Check the height and width. The new cover must fit perfectly. Too big or small will look bad. Most covers have standard sizes. Double switches need bigger covers.
Pick The Style
Choose a style that fits your room. Simple covers suit modern rooms. Decorative covers add charm to classic rooms. Textured covers can hide fingerprints and dirt. Match the cover’s color to your walls or décor.
Consider The Material
Plastic covers are easy to clean and cheap. Metal covers last long and resist heat. Wood covers are stylish but need care. Think about where the switch is placed. Bathrooms need moisture-resistant covers.
Check The Number Of Switches
Count how many switches you have. One switch needs a single cover. Two switches need a double cover. Three or more switches need larger covers. The cover must cover all switches without gaps.

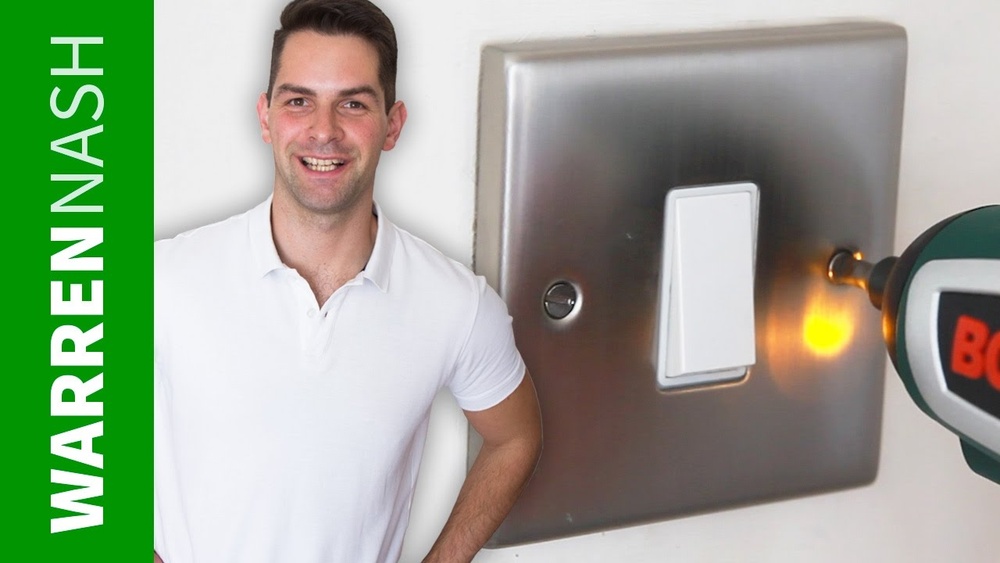
Credit: www.youtube.com
Align And Attach Cover
Aligning and attaching the light switch cover is an important step in the process. It gives a clean and finished look to the switch. Proper alignment keeps the cover flush against the wall. It also helps avoid cracks or damage.
Take your time to position the cover correctly. Check that the screw holes line up with the switch plate. This step ensures the cover fits snugly and looks even.
Position The Cover Over The Switch
Hold the cover so it sits flat over the switch. Make sure the openings match the switch shape. This prevents gaps or uneven edges. Steady your hand to keep the cover from shifting.
Insert Screws Into The Holes
Place the screws into the cover’s holes carefully. Use the right size screws to avoid stripping. Insert screws gently to keep the cover in place. Do not force the screws.
Tighten The Screws Securely
Use a screwdriver to tighten the screws slowly. Tighten each screw a little at a time. This keeps the cover from tilting or bending. Stop once the cover feels firm but not too tight.
Restore Power
Restoring power is the final step after changing a light switch cover. It brings the switch back to life and lets electricity flow again.
Safety is key. Make sure the cover is properly installed before restoring power. This prevents sparks or shocks.
Turn The Circuit Breaker Back On
Find your home’s electrical panel. Look for the breaker you turned off earlier. Flip it back to the “On” position. This restores power to the switch.
Test The Light Switch
Press the switch to see if the light works. If the light turns on, you did it right. If not, check the cover and wiring again.
Check For Any Issues
Look for flickering lights or strange sounds. These signs mean something is wrong. Turn off the breaker and inspect the switch cover and wiring carefully.
Test The Switch
Testing the light switch is a key step after changing the cover. It ensures the switch works properly and is safe. Without testing, you might face electrical issues or damage.
Take a moment to check the switch’s function. This step helps you avoid surprises later.
Turn The Power Back On
After replacing the cover, restore electricity to the switch. Go to the breaker box and switch the power on. Make sure power flows to the circuit before testing.
Flip The Switch
Press the switch up and down. Notice if the light turns on and off smoothly. The switch should move without resistance or noise.
Observe The Light
Watch the light connected to the switch. It should glow brightly when on. No flickering or dimming should happen during the test.
Check For Warmth
Touch the switch cover gently after a few minutes. It should not feel warm or hot. Heat signals a wiring problem or bad switch.
Use A Voltage Tester
For extra safety, use a voltage tester on the switch terminals. It confirms if electricity flows correctly. This step requires care and proper tools.
Safety Tips
Always turn off the power before changing a light switch cover. Use a screwdriver carefully to avoid electric shock or damage. Check that the new cover fits well and is secure before restoring power.
Turn Off The Power
Always switch off the power at the circuit breaker. This stops electricity from flowing to the light switch. Double-check by flipping the switch to see if the light turns off. Safety first.
Use A Voltage Tester
Test the switch with a voltage tester before touching any wires. This tool shows if electricity is still present. It ensures the switch is safe to handle.
Wear Protective Gear
Wear rubber gloves and safety goggles. They protect your hands and eyes from shocks or sparks. Keep yourself safe throughout the task.
Avoid Wet Conditions
Never work on electrical switches with wet hands or in damp areas. Water increases the risk of electric shock. Dry conditions keep you safe.
Handle Parts Gently
Remove the cover and screws carefully. Avoid forcing or breaking parts. This prevents damage and possible injury.

Credit: home.howstuffworks.com
Frequently Asked Questions
How Do You Safely Remove A Light Switch Cover?
Turn off the power at the circuit breaker first. Use a screwdriver to unscrew the cover plate gently. Avoid touching wires to prevent shocks. Removing the cover is simple and safe with these steps.
What Tools Are Needed To Change A Light Switch Cover?
You mainly need a flathead or Phillips screwdriver. Optionally, have a voltage tester to ensure power is off. These basic tools make the process quick and easy.
Can I Change A Light Switch Cover Without Turning Off Power?
It’s unsafe to change a switch cover without cutting power. Always switch off the circuit breaker. This prevents electrical shock and ensures safe handling of the switch.
How Do I Choose The Right Replacement Cover For My Switch?
Match the cover size and screw hole placement. Check if it’s single or double switch type. Material and color should complement your room’s decor. This ensures a perfect fit and look.
Conclusion
Changing a light switch cover is simple and quick. Turn off the power first for safety. Use a screwdriver to remove the old cover. Place the new cover carefully and tighten the screws. This small task can refresh your room’s look.
Anyone can do it with basic tools. Try it yourself and enjoy a neat, updated space. No need to call a professional. A little effort can make a big difference.