Are you looking to remove a light switch cover but don’t know where to start? It might seem tricky at first, but with the right steps, you can do it quickly and safely.
Whether you want to replace a worn-out cover or just need access to the wiring, this guide will walk you through the process in simple terms. By the end, you’ll feel confident handling this small home task on your own.
Let’s dive in and make your light switch cover removal easy and hassle-free!

Credit: www.youtube.com
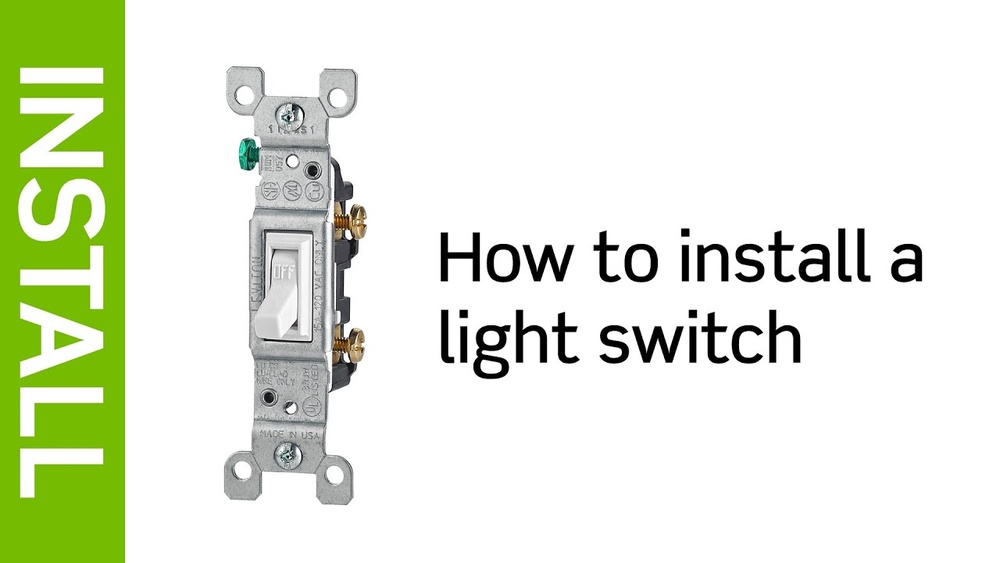
Tools You Need
Removing a light switch cover is a simple task that requires a few basic tools. Having the right tools helps you work safely and finish quickly. Prepare everything before you start. This way, you avoid stopping in the middle of the job.
Screwdrivers
A screwdriver is the main tool you need. Most switch covers use flathead or Phillips screws. Check which type your cover has. A small or medium screwdriver fits best. Using the right size prevents damage to the screws.
Safety Gear
Safety is important. Wear gloves to protect your hands from sharp edges. Use safety glasses to keep dust and debris out of your eyes. Turn off the power at the breaker before touching the switch.
Additional Supplies
Keep a flashlight nearby to see inside the switch box. A small container helps hold screws so they don’t get lost. Have a cloth ready to wipe dust and dirt. These extra items make the job easier and cleaner.
Power Off Precautions
Before removing a light switch cover, safety is the top priority. Turning off the power prevents electric shocks. It protects both you and your home. Follow simple steps to ensure the power is safely off.
Locate The Circuit Breaker
Find your home’s main electrical panel. It is usually in the basement or garage. Look for the switch labeled for the room or area. Flip this switch to turn off power to the light switch. This stops electricity flow to the switch.
Confirm Power Is Off
Test the light switch to be sure power is off. Try turning the light on and off. Use a non-contact voltage tester for extra safety. If the tester shows no electricity, it is safe to proceed. Never skip this step for your safety.
Removing The Cover Plate
Removing the cover plate is the first step to access the light switch. It is simple and requires only a few tools. Knowing how to remove it safely helps avoid damage to the wall or switch.
Focus on the screws holding the plate. Different screws need different tools. Take your time to avoid stripping the screws or breaking the plate.
Identify Screw Types
Look closely at the screws on the cover plate. Most light switches use either flathead or Phillips screws. Flathead screws have a single straight slot. Phillips screws have a cross shape. Knowing the screw type helps pick the right screwdriver. Using the wrong tool can damage the screw head.
Unscrewing The Cover
Use the correct screwdriver to turn the screws counterclockwise. Turn slowly and steadily. Keep the screwdriver straight to avoid slipping. Place the screws in a small container to keep them safe. Once screws are out, gently pull the cover plate away from the wall. Do not force it. If it sticks, check for hidden screws or clips.
Handling Stubborn Screws
Sometimes screws get stuck or are hard to turn. Spray a little penetrating oil on the screw head to loosen rust. Wait a few minutes before trying again. Use a screwdriver with a good grip to apply firm pressure. Tap the screwdriver handle lightly with a hammer for extra help. If a screw is stripped, use a rubber band between the screw and screwdriver for grip.

Credit: www.ifixit.com
Dealing With Different Cover Styles
Light switch covers come in various styles and materials. Each type needs a different approach to remove it safely. Knowing the right method helps avoid damage to the cover or the wall. Below, learn how to handle the most common cover styles.
Plastic Covers
Plastic covers are the easiest to remove. Usually, they have small screws at the top and bottom. Use a screwdriver to turn the screws counterclockwise. Keep the screws in a safe place. Gently pull the cover away from the wall. If the cover sticks, wiggle it slightly. Avoid using too much force to prevent cracks.
Metal Covers
Metal covers are more durable but require care during removal. Like plastic, they often use screws. Use a screwdriver that fits the screws well. Turn the screws slowly to avoid stripping them. Metal covers can be heavier, so hold them firmly. If paint covers the screws, scrape it gently first. This makes unscrewing easier.
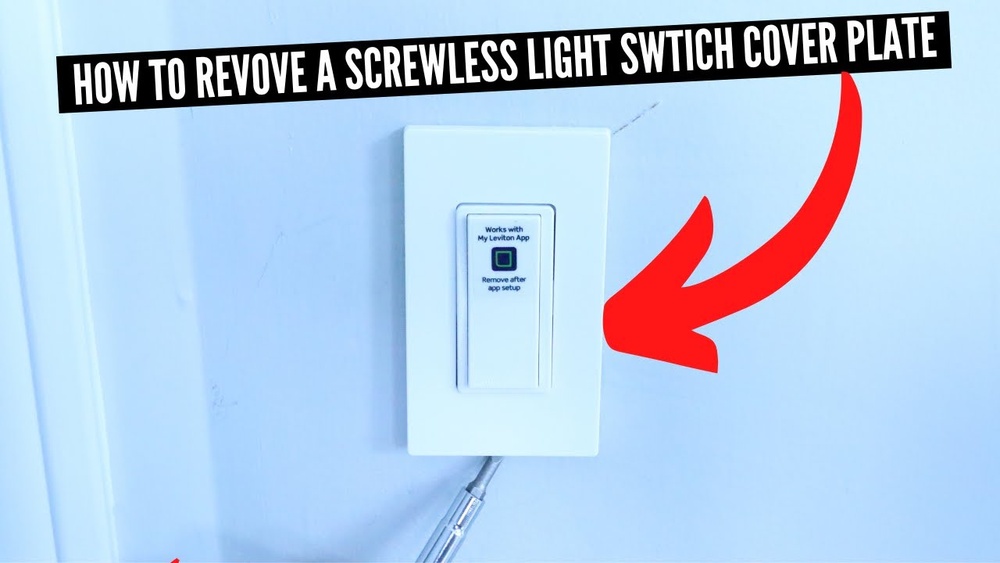
Decorative Covers
Decorative covers come in many designs and materials. They may have hidden screws or clips. Look for small slots or tabs around the edges. Use a flat tool to gently pry the cover loose. Be careful not to damage the design or wall. Some decorative covers slide off after removing screws. Take your time to avoid breaking delicate parts.
Safety Tips During Removal
Removing a light switch cover requires care and attention. Safety is the top priority to avoid accidents. Follow these tips for a safe removal process.
Simple steps can keep you safe from electrical hazards. Take your time and use the right tools.
Avoiding Electrical Shock
Always turn off the power at the circuit breaker before starting. Never rely on just the wall switch being off. Use a voltage tester to check the wires. This tool shows if electricity is still flowing. Wearing rubber-soled shoes helps reduce shock risk. Avoid working in wet or damp areas. Keep your hands dry at all times.
Handling Wires Carefully
Do not pull or tug on wires. Gently loosen screws holding the cover plate. Keep wires separated to prevent touching. Use insulated tools to handle wires safely. If wires look damaged or frayed, stop and call a professional. Proper handling prevents shorts and electrical hazards.
Troubleshooting Common Issues
Removing a light switch cover can be tricky if problems arise. Common issues like stripped screws or broken cover plates can stop progress. Knowing how to fix these problems saves time and effort. Below are solutions to handle these common challenges safely and easily.
Stripped Screws
Stripped screws lose their grip and become hard to turn. Use a rubber band for extra grip. Place it over the screw head before turning with a screwdriver. A screwdriver with a better fit can also help. If screws still won’t move, try pliers to twist them gently. Avoid forcing screws to prevent damage.
Broken Cover Plates
Cover plates can crack or break during removal. Use gentle pressure to avoid breaking. If broken, remove all pieces carefully to avoid sharp edges. Replace with a new cover plate that fits your switch size. Choose durable materials for longer use. Proper removal reduces risk of damage next time.
Next Steps After Removal
After removing the light switch cover, there are important steps to follow. These steps help keep the switch safe and clean. Proper care also makes the area ready for a new cover or any repairs.
Inspecting The Switch
Look closely at the light switch. Check for any cracks or damage. Make sure the switch is firmly attached to the wall. Look at the wires for any signs of wear or loose connections. If anything looks wrong, consider calling an electrician. Do not touch wires directly to avoid electric shock.
Cleaning The Area
Use a dry cloth to wipe dust and dirt around the switch. Avoid using water or wet cloth near electrical parts. Clean the wall area where the cover was attached. This helps the new cover stick or fit properly. Keeping the area clean also prevents dirt buildup in the future.
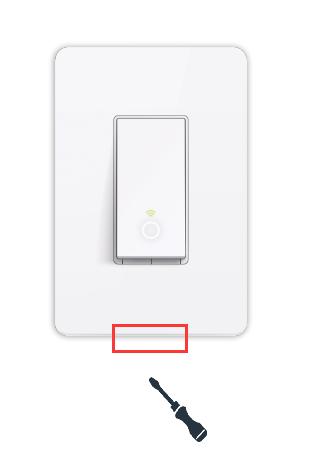
Credit: www.tp-link.com
Frequently Asked Questions
How Do I Safely Remove A Light Switch Cover?
Turn off the power at the circuit breaker first. Use a screwdriver to unscrew the cover plate carefully. Avoid touching wires to prevent electric shock. Always handle the cover gently to prevent damage.
What Tools Are Needed To Remove A Light Switch Cover?
A flathead or Phillips screwdriver is typically required. Sometimes, a voltage tester is helpful for safety. These tools ensure you can remove screws and check power safely.
Can I Remove A Light Switch Cover Without Turning Off Power?
No, always turn off the power to avoid electric shock. Safety is crucial when working with electrical fixtures. Turning off the breaker prevents accidents during removal.
How Do I Avoid Damaging The Wall When Removing Cover?
Use the correct screwdriver size to avoid stripping screws. Remove screws slowly and gently pull the cover away. Protect the wall by not forcing the cover off.
Conclusion
Removing a light switch cover is simple with the right steps. Always turn off power first to stay safe. Use a screwdriver to gently remove the screws. Keep the screws safe for reattaching later. Take your time to avoid damage.
Now you can clean or replace the cover easily. Small tasks like this save money and improve your home. Try it yourself next time; it’s easier than you think.