Want to change the mood of any room with just a flick of a switch? Connecting a dimmer switch to your light is an easy way to control brightness and save energy.
Whether you’re looking to create a cozy atmosphere or just want more control over your lighting, you’re in the right place. This guide will walk you through the simple steps to install a dimmer switch yourself—no electrician needed. Keep reading, and you’ll have your lights dimmed perfectly in no time.
Credit: www.gelighting.com
Tools And Materials Needed
Before starting to connect a dimmer switch to a light, gather all the necessary tools and materials. Having everything ready saves time and makes the process safer. It also helps avoid interruptions and mistakes.
Each tool and material has a specific role in the installation. Using the right items ensures the dimmer switch works correctly. Below are the essential tools and materials needed for this project.
Basic Tools
You need a screwdriver, usually flathead and Phillips. A wire stripper helps remove insulation from wires. A voltage tester checks if the power is off. Pliers help twist wires together securely.
Safety Equipment
Safety glasses protect your eyes from debris. Insulated gloves protect against electric shock. A flashlight helps if the area is dark or has poor lighting.
Materials For Installation
A dimmer switch designed for your light type is necessary. Wire nuts connect wires safely. Electrical tape secures connections and prevents shorts. A wall plate covers the switch neatly.
Additional Supplies
Keep a small container for screws and parts. Use a step ladder if the switch is high. A manual or instruction guide helps understand specific steps for your dimmer model.
Safety Precautions
Working with electrical wiring can be risky. Safety comes first when connecting a dimmer switch to a light. Taking simple steps can protect you from accidents and damage. Always prepare your workspace and tools before starting.
Turn Off The Power
Switch off the main power at the circuit breaker. Double-check that the light switch no longer has power. Use a voltage tester to confirm no electricity flows to the wires. This step prevents electric shocks.
Wear Protective Gear
Wear insulated gloves to avoid electric shocks. Use safety glasses to protect your eyes from dust and sparks. Keep your clothes tight to avoid catching on wires or tools.
Use The Right Tools
Select tools designed for electrical work. Use insulated screwdrivers and wire strippers. Avoid using damaged or worn tools, as they can cause injuries.
Follow Instructions Carefully
Read the dimmer switch manual thoroughly. Follow each step exactly to prevent wiring mistakes. Incorrect connections can cause short circuits or fires.
Work In A Dry Area
Avoid working in wet or damp conditions. Water increases the risk of electric shock. Keep your hands dry at all times during installation.
Check Local Electrical Codes
Understand your area’s electrical rules and standards. Following codes ensures safe and legal installation. Consult a professional if unsure about any step.
Choosing The Right Dimmer Switch
Choosing the right dimmer switch is important for controlling your room’s lighting. A good dimmer switch can save energy and create the perfect mood. Picking the wrong one might cause flickering or damage your bulbs. Understand the types and compatibility before buying.
Types Of Dimmer Switches
There are several types of dimmer switches. The most common is the rotary dimmer, which works like a volume knob. Slide dimmers move up or down to change brightness. Touch dimmers respond to a tap or swipe. Some dimmers work with a remote control. Choose one that fits your style and needs.
Compatibility With Light Bulbs
Not all dimmers work with every bulb. Incandescent bulbs work with most dimmers. LED and CFL bulbs need special dimmers made for them. Using the wrong dimmer can cause flickering or buzzing. Check the bulb type before picking a dimmer. Match the dimmer to the bulb for smooth dimming.
Preparing The Work Area
Preparing the work area is the first step to safely connect a dimmer switch to a light. This step helps avoid accidents and ensures a smooth process. A clean, organized space makes the task easier and faster.
Before starting the installation, take time to gather all needed tools and materials. Also, make sure the power is off to prevent electric shocks. These actions protect you and your home.
Turning Off Power
Locate the main electrical panel in your home. Switch off the circuit breaker that controls the light you want to change. Test the light switch to confirm the power is off. Use a voltage tester if you have one. Safety first. Never skip this step.
Gathering Supplies
Collect all tools and parts before you begin. You will need a screwdriver, wire stripper, electrical tape, and the dimmer switch. Have a ladder ready if the switch is high on the wall. Organize everything on a flat surface. This saves time and reduces stress.
Removing The Existing Switch
Removing the existing switch is the first step to install a dimmer switch. It helps to work safely and prepare the wires for the new switch. Follow these steps carefully and make sure the power is off before starting.
Unscrewing The Cover Plate
Locate the screws holding the switch cover plate. Use a screwdriver to remove them. Keep the screws in a safe place. Gently pull the cover plate away from the wall. This reveals the switch and wiring behind it.
Disconnecting Wires
Check that the power is off at the circuit breaker. Use a voltage tester to confirm no electricity flows. Note how the wires connect to the switch. Unscrew the terminals or release the wire connectors. Carefully pull the wires away from the old switch. Keep the wires separated and ready for the dimmer switch.
Wiring The Dimmer Switch
Wiring the dimmer switch is a key step to control your light’s brightness. It needs careful attention to ensure safety and proper function. Follow each step to connect the wires correctly and securely.
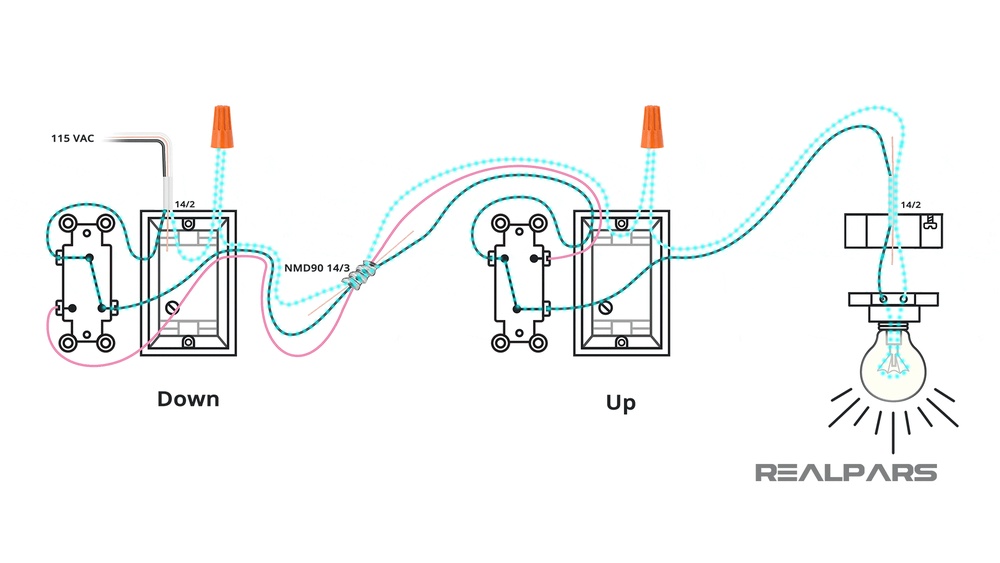
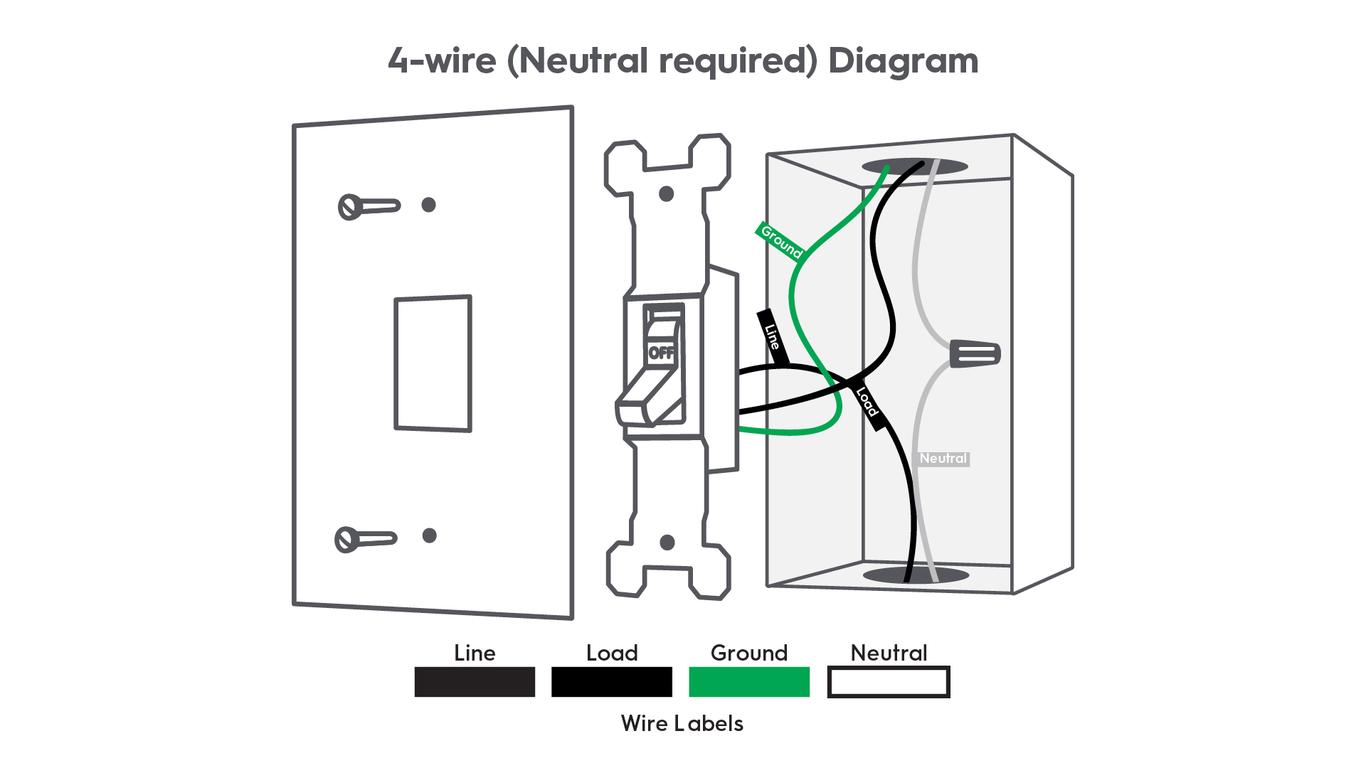
Identifying Wire Types
First, find the wires in your wall box. Usually, there are three types: live (hot), neutral, and ground wires. The live wire carries power from the panel. Neutral wire returns power to the panel. Ground wire prevents electrical shocks. The live wire is often black or red. Neutral wire is white. Ground wire is green or bare copper. Use a voltage tester to confirm the live wire. Label the wires if needed to avoid confusion.
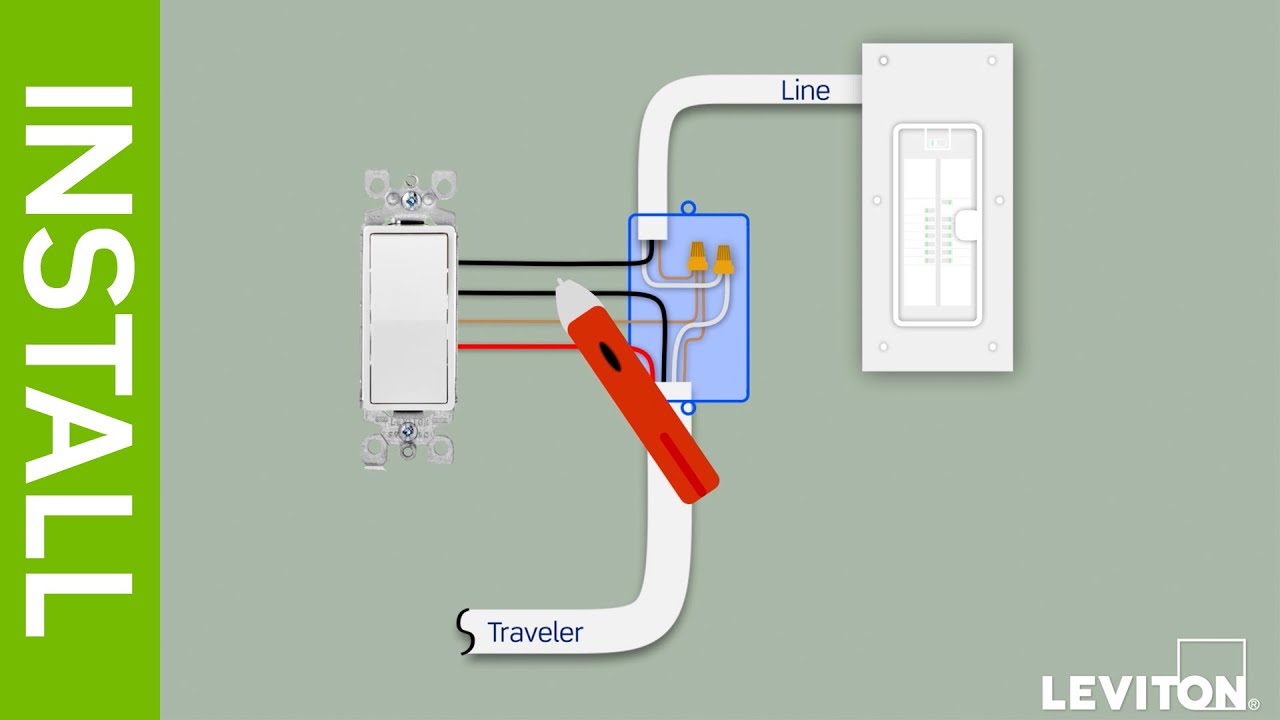
Connecting Wires Correctly
Match each dimmer switch wire with the wall wire. Connect the dimmer’s live wire to the live wire in the wall. Attach the neutral wire of the dimmer to the neutral wire in the wall. Connect the ground wire from the dimmer to the ground wire in the wall box. Twist the wires together clockwise to ensure a tight connection. Use wire nuts to cover the twisted wires. Make sure no copper is exposed outside the wire nuts.
Securing The Connections
After connecting, gently tug each wire to check firmness. Push the wires carefully back into the electrical box. Avoid sharp bends that can damage the wires. Screw the dimmer switch to the wall box securely. Attach the switch plate over the dimmer. Turn on the power and test the dimmer switch to confirm it works properly. Good connections prevent flickering and electrical hazards.
Installing The Dimmer Switch
Installing the dimmer switch is a simple step to control your light brightness. Follow clear steps to fit the switch safely and correctly. This part focuses on mounting the switch and replacing the cover plate to finish the job.
Mounting The Switch
Start by placing the dimmer switch into the electrical box. Align the screw holes on the switch with the holes on the box. Use a screwdriver to tighten the screws gently. Do not overtighten to avoid damaging the switch or box. Ensure the switch sits flush against the wall. The switch should feel secure and stable before moving on.
Replacing The Cover Plate
Pick the correct cover plate for your dimmer switch. Place the cover plate over the switch carefully. Align the screw holes on the cover plate with the switch. Insert screws and tighten them just enough to hold the plate firmly. Avoid overtightening to prevent cracking the plate. Check that the plate is even and fits well. Your dimmer switch is now neatly installed and ready for use.
Testing The Dimmer Switch
Testing the dimmer switch is a key step after installation. It ensures the switch works properly and controls the light as expected. This step also helps find any wiring issues early. Take time to test carefully for safety and function.
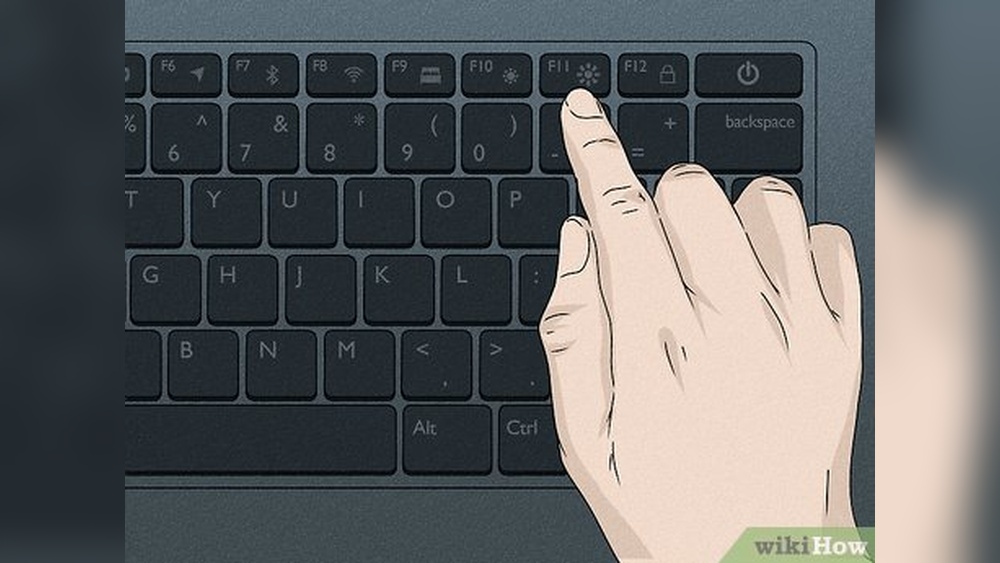
Restoring Power
First, turn the power back on at the circuit breaker. This allows electricity to flow to the dimmer switch. Stand clear of any exposed wires. Use the switch to turn the light on. Check if the light responds immediately. No flickering or strange noises should appear. If the light does not turn on, switch off the power again and check wiring.
Adjusting Light Levels
Next, use the dimmer control to change the light brightness. Slide or rotate the dimmer slowly. Watch how the light changes from bright to dim. The light should adjust smoothly without flickering. Test the full range of dimming. Some lights may not dim well. If flickering or buzzing happens, check bulb compatibility with the dimmer.
Troubleshooting Common Issues
Connecting a dimmer switch to a light can sometimes cause problems. These issues stop your light from dimming correctly or working at all. Understanding common problems helps you fix them fast. This section explains easy ways to solve frequent dimmer switch troubles. Follow these tips to get your dimmer working smoothly again.
Check The Wiring Connections
Loose or wrong wiring causes many dimmer switch issues. Turn off the power before checking wires. Make sure all wires are connected tightly. Match the wires by color: black to black, white to white. Use wire nuts to secure connections. Poor wiring can stop the dimmer from working or cause flickering.
Verify The Dimmer Switch Compatibility
Not all dimmers work with every light bulb. Some dimmers fit only incandescent or halogen bulbs. LED and CFL bulbs need special dimmers. Check the dimmer packaging for bulb type compatibility. Using the wrong dimmer causes flickering or no dimming. Always use the right dimmer for your light bulbs.
Test The Light Bulb
A faulty bulb can look like a dimmer problem. Remove the bulb and try it in another socket. If the bulb is dim or flickers, replace it. New bulbs work better with dimmers. Old or damaged bulbs may not dim properly. Testing bulbs helps isolate the issue quickly.
Inspect The Dimmer Switch For Damage
Dimmer switches can wear out or break. Look for cracks, burn marks, or loose parts. A damaged dimmer may not control the light correctly. Replace the dimmer if it shows signs of damage. Using a broken dimmer can be unsafe and cause electrical problems.
Check For Overloaded Circuits
Too many lights or devices on one circuit can cause dimmer issues. Overload makes lights flicker or dim incorrectly. Reduce the number of devices on the circuit. Use a dimmer designed for higher wattage if needed. Proper load helps the dimmer work smoothly without flickering.

Credit: www.gelighting.com
Credit: www.youtube.com
Frequently Asked Questions
What Tools Do I Need To Connect A Dimmer Switch?
You need a screwdriver, wire stripper, voltage tester, and electrical tape. These tools ensure safe and proper installation.
Can I Install A Dimmer Switch Myself?
Yes, if you follow safety precautions and instructions carefully. Always turn off power before starting the installation.
Will A Dimmer Switch Work With Led Bulbs?
Only if the LED bulbs are dimmable. Check packaging to ensure compatibility with your dimmer switch.
How Do I Identify Wires For Dimmer Switch Connection?
Look for black (hot), white (neutral), and green or copper (ground) wires. Use a voltage tester to confirm.
Conclusion
Connecting a dimmer switch to a light can change your room’s mood easily. Always turn off power before starting to stay safe. Follow each step carefully to avoid mistakes. Use the right tools and check your work twice. Enjoy softer or brighter light with a simple switch.
Small changes make a big difference in your home. Now, you can control light levels anytime you want. Simple and smart lighting is within your reach.