Are you ready to upgrade your home lighting with a Leviton light switch? Installing one yourself might seem tricky, but it’s easier than you think.
With the right steps, you can save time and money by doing it on your own. In this guide, you’ll find simple, clear instructions that make the process smooth and safe. Keep reading, and soon you’ll have full control of your lights with a brand-new switch you installed yourself.
Tools And Materials Needed
Installing a Leviton light switch needs the right tools and materials. Using proper equipment helps finish the job safely and correctly.
This section lists the tools and materials needed for installation. Prepare everything before you start.
Essential Tools
- Screwdriver (flathead and Phillips)
- Voltage tester
- Wire stripper
- Needle-nose pliers
- Electrical tape
- Utility knife
- Flashlight or work light
Required Materials
- Leviton light switch
- Wire nuts
- Electrical box (if needed)
- Wall plate cover
- Wire connectors

Credit: diy.stackexchange.com
Safety Precautions
Safety is the top priority before starting any electrical work. Installing a Leviton light switch involves handling live wires. This can cause electric shock or injury. Taking the right safety steps protects you and your home.
Follow safety rules carefully. Use the correct tools and check everything twice. These simple actions reduce risks and make the job easier.
Turn Off Power
Always switch off power at the circuit breaker. Do not rely on the wall switch. This stops electricity from flowing to the wires. Confirm the power is off before touching any wires. This step keeps you safe from shocks.
Use A Voltage Tester
Use a voltage tester to check for electricity in wires. This tool shows if wires are live or safe to touch. Test all wires before starting work. Never skip this step. It ensures no current is running through the switch box.
Remove Existing Switch
Start by turning off the power to the switch at the breaker box. Unscrew the switch cover and carefully pull out the old switch from the wall. Disconnect the wires by loosening the terminal screws.
Unscrew The Cover Plate
Start by turning off the power to the switch at the circuit breaker. Safety first. Use a flathead or Phillips screwdriver to remove the screws holding the cover plate. Keep the screws in a safe place. Gently pull the cover plate away from the wall. This exposes the old switch and wiring.
Disconnect Wires
Check that the power is off using a voltage tester. Carefully unscrew the terminal screws that hold the wires to the switch. Note the wire positions or take a photo for reference. Disconnect each wire from the switch. Avoid touching the wire ends together. Set the old switch aside.
Credit: www.youtube.com
Prepare Leviton Switch
Preparing your Leviton switch before installation is important for a smooth process. This step helps you understand the parts of the switch and get your wires ready. Proper preparation makes installation safer and faster.
Start by learning the different terminals on the switch. Then, prepare your wires by stripping them correctly. These small tasks can prevent problems later.
Identify Terminals
Look at the back of the Leviton switch. You will see several terminals. Each terminal has a specific purpose. Usually, there is a ground terminal, a common terminal, and one or more traveler terminals.
The ground terminal is often green. The common terminal is usually black or dark-colored. Traveler terminals are brass or light-colored. Knowing these helps connect the wires correctly.
Wire Stripping Tips
Use a wire stripper to remove the insulation gently. Strip about 3/4 inch of insulation from the wire ends. Avoid cutting the metal wire inside.
Check the wires for any damage or frays. Smooth and clean wires make a better connection. Twisting the wire strands can help keep them together.
Connect Wires To Switch
Connecting the wires to your Leviton light switch is a key step in installation. It ensures the switch works safely and correctly. Take your time and follow each step carefully. Double-check the wires before attaching them to avoid mistakes.
Use the right tools and keep the power off for safety. Proper wire connection helps the switch last longer and perform well. Now, let’s look at how to connect the wires properly.
Match Wire Colors
Look at the wires coming from your wall. Usually, black or red wires are hot wires. White wires are neutral. Green or bare copper wires are ground wires.
Match each wire color to the correct terminal on the switch. The switch will have labels or color-coded screws. Connect black or red wires to brass or black terminals. Connect white wires to silver terminals if your switch has them.
Do not mix wire colors. Incorrect connections can cause short circuits or switch failure. Take your time to identify each wire before attaching.
Attach Ground Wire
Find the green or bare copper wire from your wall. This is the ground wire. It helps protect you from electric shock.
Attach the ground wire to the green screw on the switch. Wrap the wire clockwise around the screw. Tighten it firmly, but do not over-tighten.
If your switch or wall box has a ground wire, connect them together using a wire nut. Grounding is important for safety and code compliance.
Mount The Switch
Mounting the Leviton light switch properly ensures it stays secure and works well. This step is simple but important. It keeps the switch safe in the wall and ready for daily use.
Follow each part carefully to avoid problems later. A well-mounted switch looks neat and fits perfectly.
Secure Switch In Box
Start by placing the switch into the electrical box. Align the screw holes on the switch with those in the box. Use a screwdriver to tighten the screws. Do not over-tighten to avoid damage.
Make sure the switch sits flush with the wall. It should not tilt or move when pushed. Check the wiring is tucked inside the box and not pinched.
Attach Cover Plate
Once the switch is secure, attach the cover plate. Position it over the switch and align the screw holes. Insert the screws and tighten them gently.
The cover plate should sit flat against the wall without gaps. This protects the switch and gives a clean look. Avoid cracking the plate by tightening screws slowly.
Restore Power And Test
After installing your Leviton light switch, restoring power and testing it is crucial. This step ensures the switch works safely and correctly. Follow the steps carefully to avoid damage or injury.
Turn On Circuit Breaker
Find the circuit breaker panel in your home. Flip the switch back to the ON position. This action restores electricity to the switch and connected lights. Make sure the breaker is fully on before proceeding.
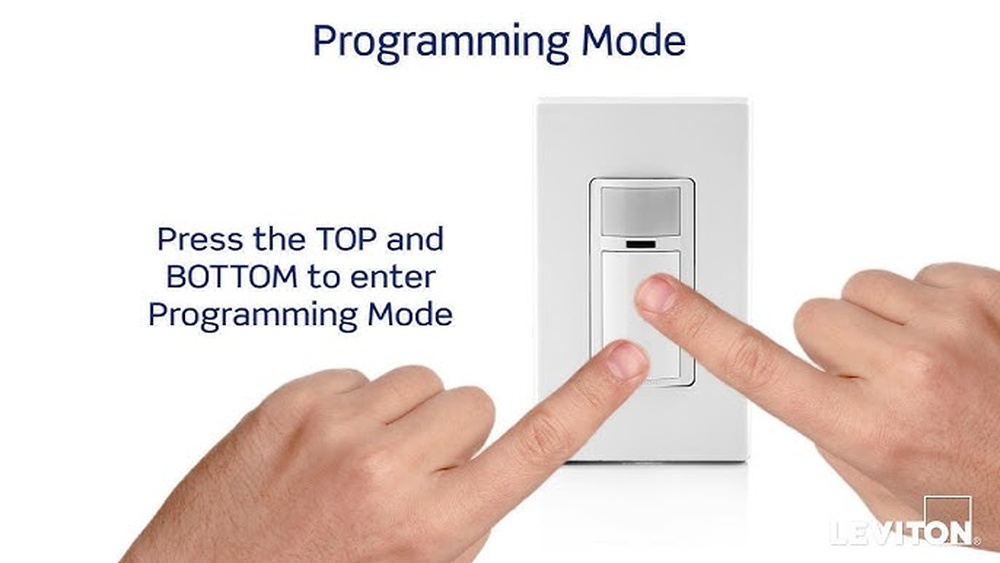
Check Switch Operation
Press the Leviton switch to turn the lights on and off. The lights should respond immediately. If they do not, double-check your wiring connections. Test the switch a few times to confirm it works smoothly.
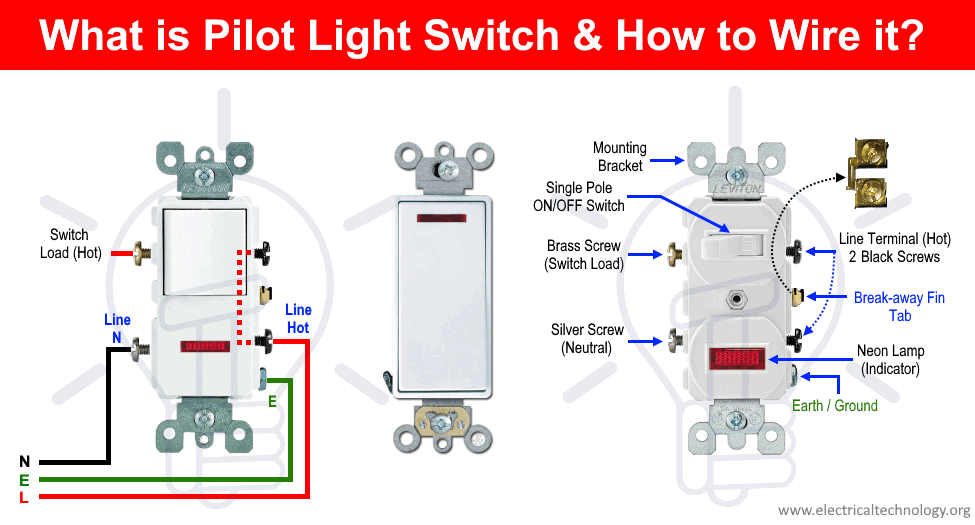
Credit: www.electricaltechnology.org
Troubleshooting Tips
Troubleshooting is key when installing a Leviton light switch. Small issues can stop the switch from working properly. This section helps you find quick fixes. Follow these tips to solve common problems without stress.
Switch Not Working
Check the power source first. Make sure the circuit breaker is on. Loose wiring can cause the switch to fail. Turn off power, then tighten all wire connections. Confirm the switch is installed correctly. Use a voltage tester to see if power reaches the switch. Replace the switch if it still does not work.
Flickering Lights
Flickering may mean loose wires. Turn off the power and check all connections. Tighten any loose wires on the switch and light fixture. A bad bulb can also cause flickering. Try a new bulb to rule this out. Sometimes, the dimmer setting affects the light. Adjust or replace the dimmer switch if needed.
Frequently Asked Questions
How Do I Safely Turn Off Power Before Installation?
Always switch off the circuit breaker controlling the switch’s power. Use a voltage tester to confirm no electricity flows. This prevents shocks and ensures safe installation of your Leviton light switch.
What Tools Are Needed For Leviton Switch Installation?
You’ll need a screwdriver, wire stripper, voltage tester, and electrical tape. These tools help you remove the old switch, prepare wires, and secure connections safely and efficiently.
Can I Replace Any Switch With A Leviton Switch?
Leviton switches fit most standard electrical boxes. Confirm compatibility with your wiring type and voltage. Some specialized switches may require different models or professional installation.
How Do I Identify The Line And Load Wires?
The line wire brings power from the breaker; the load wire goes to the light. Use a voltage tester to identify the live line wire before connecting.
Conclusion
Installing a Leviton light switch is simple and safe with careful steps. Turn off power before starting to avoid shocks. Follow the instructions and connect wires correctly. Use a tester to check the power is off. Tighten screws firmly for a secure fit.
Once done, turn power back on and test the switch. This guide helps you change your switch easily. Save time and gain confidence in home repairs. Try it yourself and enjoy better control of your lighting.