Are you tired of flickering lights or switches that just don’t work right? Replacing a three-way light switch might sound tricky, but it’s easier than you think—and you can save money by doing it yourself.
Imagine flipping your switch and having your lights respond perfectly every time. In this guide, you’ll learn simple steps to replace your three-way light switch safely and quickly. Keep reading, and you’ll have your lighting working smoothly before you know it!
Tools And Materials Needed
Replacing a three-way light switch requires the right tools and materials. Having them ready makes the job safer and easier. This section lists everything you need before starting.
Basic Tools
Start with a screwdriver set. Both flathead and Phillips screwdrivers are essential. A voltage tester helps check if wires have power. Wire strippers make removing insulation simple. Pliers are useful for bending and twisting wires.
Safety Equipment
Wear insulated gloves to protect from electric shocks. Safety glasses keep debris out of your eyes. A flashlight or headlamp helps if the area is dimly lit. Always turn off the power at the breaker before work.
Materials For Replacement
Get a new three-way switch that matches the old one. Use wire nuts to secure wire connections. Electrical tape helps cover exposed wires. You may need extra electrical wire if the old wires are damaged.

Credit: www.dummies.com
Safety Precautions
Working with electrical switches can be risky without proper safety steps. Taking safety precautions reduces the chance of injury or damage. Always treat electrical parts with care and respect.
Follow these safety tips to protect yourself while replacing a three-way light switch.
Turn Off The Power
Switch off the power at the circuit breaker. Do not rely on the switch itself to cut power. Use a tester to confirm no electricity flows to the switch.
Use Proper Tools
Choose insulated tools made for electrical work. Avoid using metal tools without insulation. This lowers the risk of electric shock.
Wear Safety Gear
Put on safety glasses to protect your eyes. Use rubber-soled shoes to reduce the chance of shock. Avoid loose clothing that might catch on wires.
Check For Live Wires
Test all wires with a voltage tester before touching. Treat every wire as if it is live. Never assume wires are safe without testing.
Work In A Dry Area
Make sure the work area is dry and free from moisture. Water and electricity do not mix safely. Use a dry cloth to wipe surfaces if needed.
Follow Instructions Carefully
Read the switch’s instructions before starting. Follow the steps closely to avoid errors. Double-check connections before restoring power.
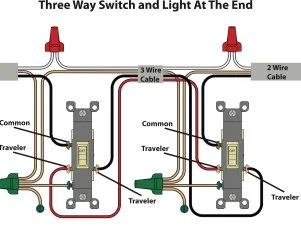
Identify Existing Wiring
Identifying the existing wiring is a crucial step before replacing a three-way light switch. Knowing how the wires are connected helps ensure a safe and correct installation. It also prevents confusion and potential electrical issues.
Start by turning off the power at the circuit breaker. This keeps you safe while working with electrical wires. Next, remove the switch cover plate and gently pull out the switch from the electrical box.
Locate The Common Wire
The common wire is usually different from the traveler wires. It connects to the black or dark-colored screw on the switch. This wire carries power or connects to the light fixture.
Identify The Traveler Wires
Traveler wires connect the two switches in a three-way setup. They attach to the brass or light-colored screws. Usually, there are two traveler wires, often red and black.
Check For Ground Wire
The ground wire is bare copper or green. It connects to the green screw on the switch. Ground wires help protect against electrical shock.
Use A Voltage Tester
A voltage tester confirms which wires carry power. Test each wire carefully after turning the power back on. This step ensures you correctly identify the common and traveler wires.
Turn Off Power Supply
Turning off the power supply is the first and most important step in replacing a three-way light switch. It keeps you safe from electrical shocks. Always treat electricity with care. Never skip this step before starting any work on switches or wires.
Power can still be live even if the light is off. That is why it is crucial to cut off the power at its source. This protects you while handling the switch and wiring. Safety first to avoid accidents or injuries.
Locate The Circuit Breaker Panel
Find your home’s main circuit breaker panel. It is usually in the basement, garage, or utility room. Look for a metal box with a door. Inside, you will see switches labeled for different parts of your home.
Identify The Correct Circuit Breaker
Check for the breaker that controls the light switch you want to replace. The labels can help, but if they are unclear, turn off breakers one by one. Test the light switch until the power is off. This ensures you have the right breaker.
Switch Off The Circuit Breaker
Flip the switch to the OFF position. This stops the electricity flow to your three-way switch. Wait a few seconds to make sure the power is completely off. Double-check by trying the light switch or using a voltage tester.
Use A Voltage Tester For Safety
A voltage tester shows if wires still have electricity. Touch the tester to the switch wires. If the tester lights up or beeps, power is still present. Do not start working until the tester shows no voltage.
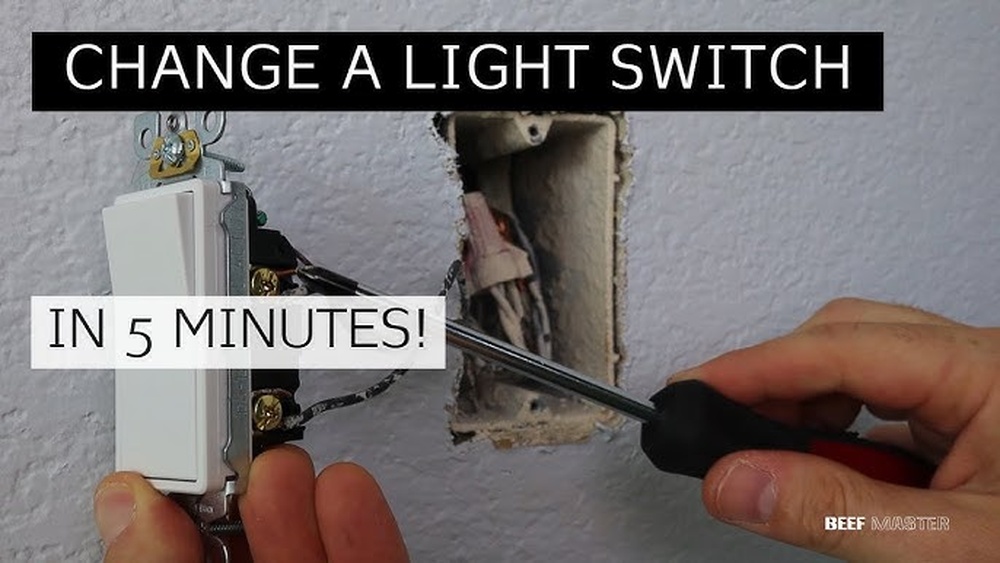
Remove Old Three Way Switch
Removing an old three way switch is the first step in replacing it. This process requires care and attention to safety. Turning off the power at the breaker box is essential before touching any wires.
Once the power is off, you can begin to take out the old switch. The goal is to expose the wiring so you can connect the new switch properly. Follow these clear steps to remove the old switch safely.
Turn Off Power At The Breaker
Locate the correct breaker that controls the switch. Flip the breaker to the off position. Use a voltage tester on the switch to confirm power is off. Never skip this step.
Remove The Switch Cover Plate
Unscrew the screws holding the cover plate. Carefully pull the plate away from the wall. This exposes the switch and wires behind it.
Unscrew The Old Switch
Remove the screws that secure the switch to the electrical box. Gently pull the switch out without pulling on the wires. Keep the wires intact for easy replacement.
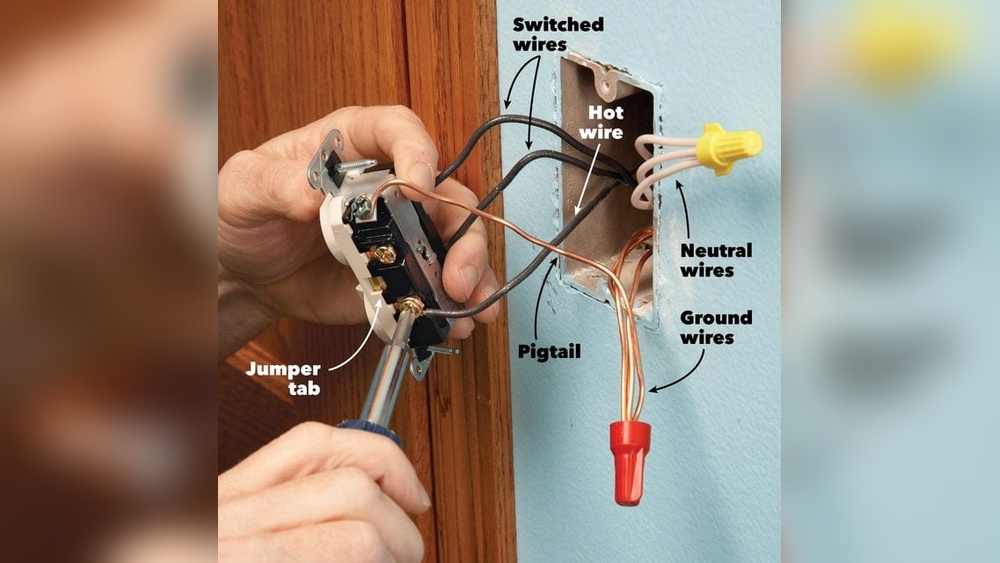
Note The Wire Connections
Look closely at how the wires connect to the switch. Take a photo or label each wire. This helps when attaching wires to the new switch.
Disconnect The Wires
Loosen the terminal screws to free the wires. Carefully remove each wire from the switch terminals. Avoid damaging the wire ends for a smooth installation.

Credit: www.youtube.com
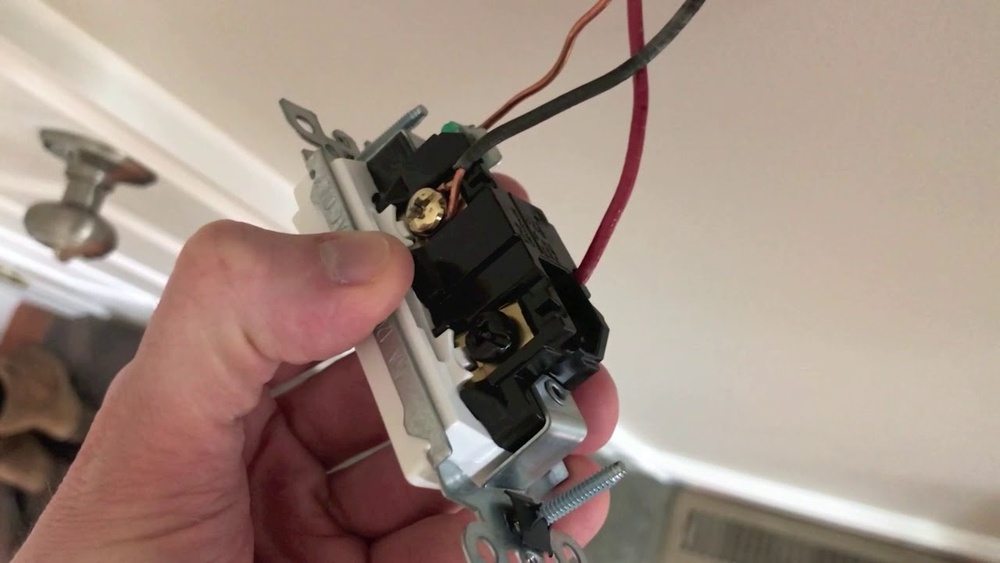
Connect New Three Way Switch
Connecting a new three way switch needs careful work. This step ensures your light switch works correctly from two locations. Follow each part carefully for a safe and proper setup.
Match Wire Colors
First, identify the wires by color. Black or red wires are travelers. White wires are neutral. Green or bare wires are ground. Connect wires to the same color terminals on the new switch. This keeps the circuit correct and safe.
Attach Ground Wire
Next, find the ground wire. It is green or bare copper. Attach it to the green screw on the switch. This wire protects you from electric shocks. Make sure it is tight and secure.
Secure Terminal Screws
Finally, tighten all terminal screws firmly. Loose screws cause poor connections and flickering lights. Use a screwdriver to make each screw snug. Do not over-tighten to avoid damage.
Test The New Switch
Testing the new three-way switch is a key step after installation. It ensures the switch works correctly and safely. This check helps avoid future problems and saves time.
Follow these simple steps to test your new switch effectively. Take your time and be careful.
Turn The Power Back On
After installing the new switch, restore power at the circuit breaker. This step powers the switch and the connected lights. Make sure the breaker is fully on before testing.
Check The Switch Operation
Flip the new switch to the ON position. Observe if the light turns on. Then switch it OFF and see if the light goes off. Repeat this at both switch locations.
Test Both Switches Together
Operate each switch separately. The light should turn on or off regardless of which switch you use. This confirms the three-way circuit works properly.
Look For Flickering Or Inconsistencies
Notice if the light flickers or behaves oddly. Flickering can mean loose wiring or a faulty switch. If it happens, turn off power and check connections again.
Use A Voltage Tester For Safety
Use a voltage tester to confirm no electricity flows when switches are off. This extra step ensures your wiring is safe. Always prioritize safety when working with electricity.
Troubleshooting Common Issues
Troubleshooting common issues with a three-way light switch helps save time and effort. Understanding typical problems makes repairs easier. It also ensures safety and proper function. Below are common issues and ways to address them.
Switch Not Working
Check if power is off before starting. Test the switch with a voltage tester. Confirm the wires connect to the right terminals. Replace the switch if it shows no signs of power. Sometimes, a faulty switch causes failure.
Light Flickering
Flickering lights often mean loose wiring or poor connections. Tighten all wire nuts and terminal screws. Inspect the bulbs to ensure they fit correctly. Use bulbs recommended for your fixture’s wattage. Replace faulty bulbs and check again.
Loose Connections
Loose connections cause sparks and switch failure. Turn off power at the breaker before checking. Secure all wire connections tightly with wire nuts. Inspect for frayed or damaged wires and replace them. Firm connections improve safety and switch function.
Tips For Maintenance
Maintaining a three-way light switch helps keep it working well for years. Simple care avoids many common problems. Regular checks and cleaning improve safety and function. Small steps make a big difference in switch performance.
Check For Loose Connections
Loose wires cause flickering or no light at all. Turn off power before inspecting. Tighten any loose screws on the switch terminals. Use a screwdriver to secure wires firmly. Loose connections can lead to electrical hazards.
Clean The Switch Regularly
Dust and dirt build up over time. Use a dry cloth to wipe the switch surface. Avoid wet cloths to prevent damage. Cleaning prevents grime from affecting switch operation.
Test The Switch Function Often
Test the switch from both locations regularly. Make sure the light responds quickly and correctly. Early detection of issues saves repair costs later. Replace the switch if it feels hot or sparks.
Replace Worn Or Damaged Parts
Switches wear out after years of use. Check for cracks or discoloration on the switch. Replace damaged parts immediately to ensure safety. Use parts that match the original switch specifications.
Avoid Overloading The Circuit
Overloaded circuits cause switches to fail. Know the wattage limits of your lighting fixtures. Spread out electrical load across different circuits. Overloading increases the risk of switch damage.
Credit: www.hgtv.com
Frequently Asked Questions
What Tools Do I Need To Replace A Three Way Light Switch?
You need a screwdriver, voltage tester, wire stripper, electrical tape, and a new three way switch. Safety gear like gloves is also recommended.
How Do I Turn Off Power Before Replacing The Switch?
Turn off the circuit breaker that controls the switch. Use a voltage tester to confirm no electricity flows to the switch.
Can I Replace A Three Way Switch Without An Electrician?
Yes, if you follow safety steps and understand wiring. Turn off power, label wires, and connect the new switch correctly.
How Do I Identify The Traveler Wires In A Three Way Switch?
Traveler wires connect the two switches and usually have the same color, often red or black. Use a tester to verify.
Conclusion
Replacing a three-way light switch is easier than it seems. Take your time and follow each step carefully. Always turn off the power before starting any work. Double-check your wiring connections to avoid mistakes. Testing the switch after installation ensures everything works well.
This simple task can save money on repairs. Confidence grows with practice and patience. You can handle small electrical jobs safely at home. Keep this guide handy for future reference. Small projects like this build useful skills over time.