Are you ready to take control of your home lighting and save money on electrician fees? Installing a light switch yourself might sound tricky, but it’s easier than you think.
With just a few simple steps, you can replace or add a switch that works perfectly for your space. Imagine flipping the switch and knowing you did it all on your own. Keep reading, and you’ll discover how to install a light switch safely and quickly—no special skills needed.
Your home improvement journey starts here!
Credit: www.youtube.com
Tools And Materials Needed
Installing a light switch needs the right tools and materials. This ensures the job is done safely and correctly. Having everything ready saves time and avoids mistakes. Below are the key items you need before starting.
Essential Tools
A screwdriver set is a must. Both flathead and Phillips screwdrivers work well. A voltage tester helps check if wires are live. Wire strippers make removing insulation easy. Needle-nose pliers help bend wires and reach tight spots. Electrical tape is useful for securing wire connections.
Choosing The Right Switch
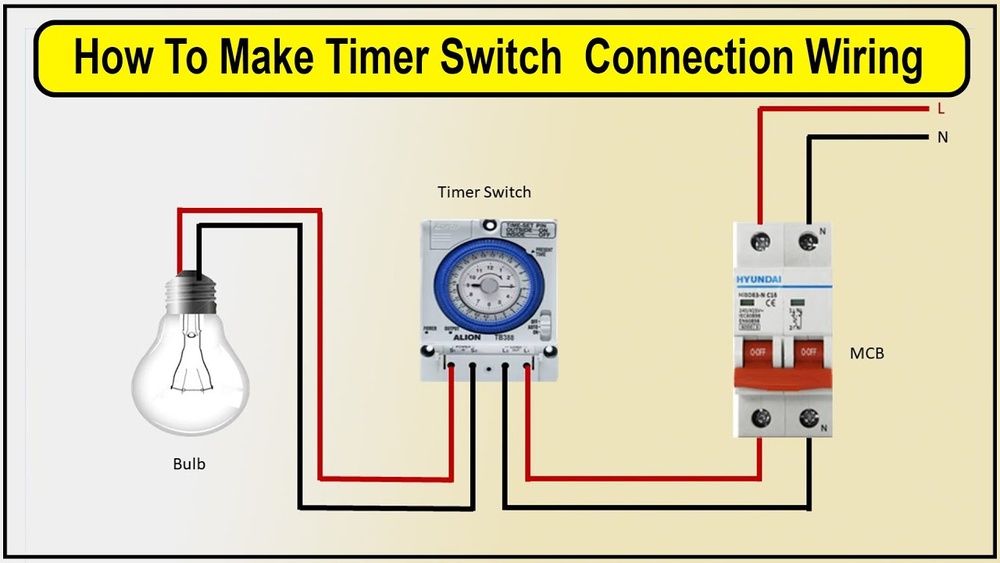
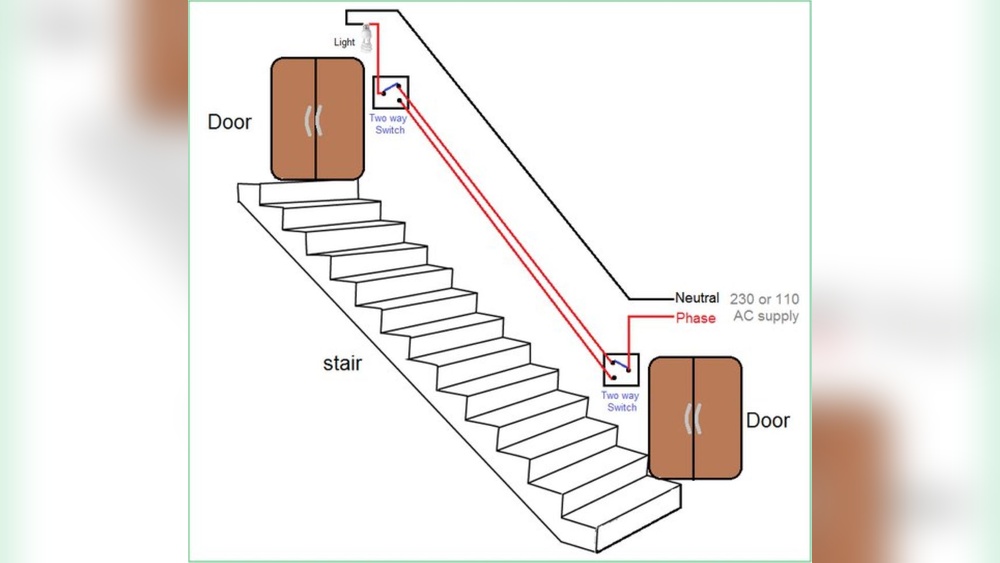
Select a switch that fits your needs and wiring type. Single-pole switches control one light from one place. Three-way switches work with two locations. Look at the switch’s voltage and amperage ratings. Match these with your home’s electrical system for safety.
Safety Gear
Protective gear is very important. Wear insulated gloves to avoid shocks. Safety glasses protect your eyes from sparks or debris. Use a face mask if dust is present. Make sure your workspace is well-lit and dry for safety.

Credit: www.belkin.com
Preparing For Installation
Preparing for installation is a crucial step when changing a light switch. It helps keep you safe and ensures the process goes smoothly. Taking time to prepare can prevent accidents and damage to your home’s electrical system.
Before handling any wires, you must follow safety steps carefully. Each step builds on the last to protect you from electric shock. Proper preparation makes the installation easier and faster.
Turning Off Power
Start by switching off power to the circuit you will work on. Find the correct breaker in your electrical panel. Flip the switch to the off position. This stops electricity flow to the light switch. Use a label or note to mark the breaker for safety.
Testing For Live Wires
Use a voltage tester to check wires inside the switch box. Touch the tester to each wire. If the tester lights up or beeps, the wire is live. Make sure no wires have power before touching them. Never skip this step; it saves lives.
Removing The Old Switch
Unscrew the cover plate from the switch. Then, remove screws holding the switch to the wall box. Gently pull the switch out without touching wires. Note or take a photo of how wires connect. Carefully disconnect wires from the switch terminals.
Wiring The New Switch
Wiring the new switch is a key step in installing a light switch. It connects the switch to your home’s electrical system. Proper wiring ensures the switch works safely and correctly. This part requires careful attention to detail and safety.
Identifying Wires
First, identify each wire in the switch box. Usually, you will see a black (hot), white (neutral), and green or bare copper (ground) wire. The black wire carries power to the switch. The white wire returns power to the fixture. The green or bare wire grounds the switch for safety. Use a voltage tester to confirm the live wire. Label wires if needed to avoid confusion.
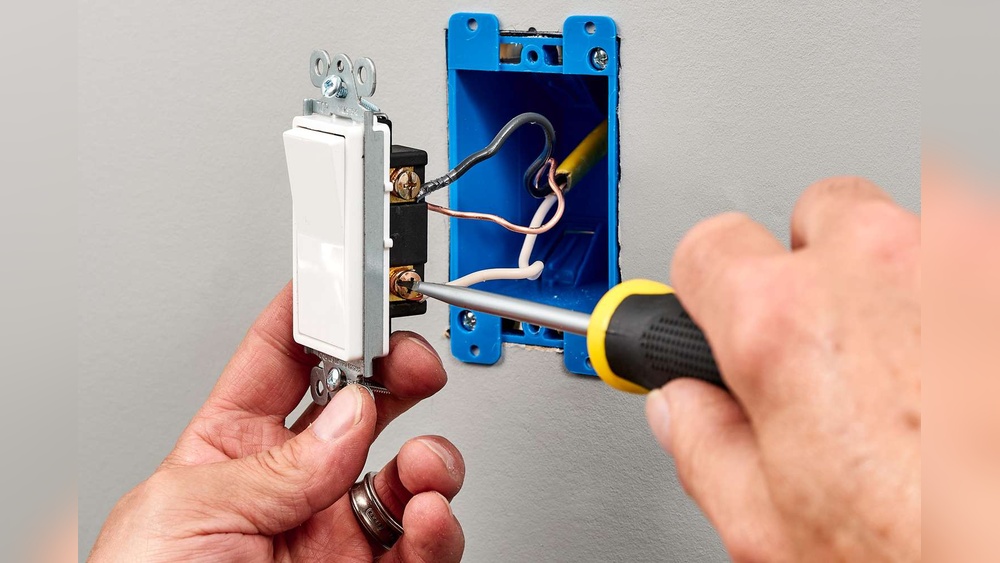
Connecting Wires Correctly
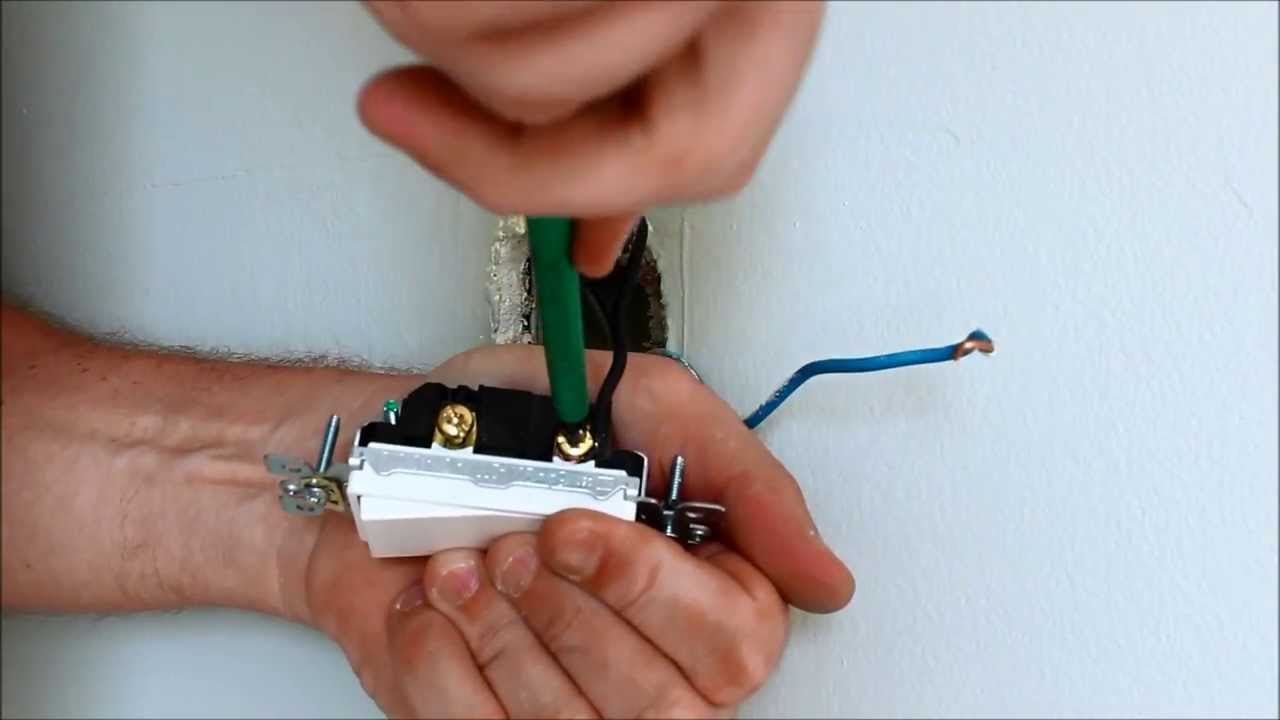
Connect the black wire to the switch’s brass or black terminal. Attach the white wire to the silver terminal if your switch has one. If not, the white wire connects directly to the light fixture. Connect the ground wire to the green terminal or grounding screw. Twist wires together with wire nuts tightly to ensure a good connection. Do not mix wires or force connections.
Securing The Switch
Push the wires gently back into the electrical box. Align the switch with the mounting holes. Use screws to secure the switch firmly to the box. Avoid over-tightening to prevent damage. Attach the switch cover plate last. Check that the switch moves smoothly and fits well in place.
Finalizing Installation
Finalizing the installation of your light switch is the last step to complete the project. This part ensures the switch is secure, safe, and works properly. Follow each step carefully to avoid any issues.
Reattaching The Cover Plate
Place the cover plate over the switch. Align it with the screw holes. Use a screwdriver to tighten the screws gently. Do not overtighten. The plate should sit flat against the wall.
Restoring Power
Go back to your circuit breaker panel. Turn the power switch back on. This restores electricity to the light switch. Always be cautious during this step to avoid shocks.
Testing The Switch
Flip the switch to test if the light works. Check both the ON and OFF positions. If the light turns on and off correctly, the installation is successful. If not, turn off the power and check your wiring again.
Common Issues And Fixes
Installing a light switch may seem easy, but some common problems can occur. Knowing these issues helps you fix them quickly. This saves time and keeps your home safe.
Switch Not Working
The switch may not work due to power issues or wiring mistakes. Check if the circuit breaker is on. Turn off the power before inspecting wires. Make sure all wires connect to the right terminals. Replace the switch if it is old or broken.
Loose Connections
Loose wires can cause the switch to fail or work erratically. Tighten all screws holding the wires. Use a tester to check for voltage. If wires look damaged, cut and strip them again. Secure wires firmly to avoid future problems.
Sparks Or Flickering
Sparks or flickering light show a serious issue. It may be loose wires or a bad switch. Turn off power immediately. Inspect connections and replace any damaged parts. If sparks continue, call an electrician for safety.
Safety Tips For Diy Electrical Work
Working with electricity can be risky. Safety must be the top priority in every step of installing a light switch. Following simple safety tips helps prevent accidents and injuries. Protect yourself and your home by understanding basic precautions before starting.
When To Call A Professional
Some electrical jobs need expert skills. Complex wiring or old electrical systems are not for beginners. If you feel unsure or see damaged wires, stop work immediately. A licensed electrician can handle tough problems safely. Calling a pro saves time and avoids costly mistakes.
Avoiding Electrical Hazards
Always turn off the power at the circuit breaker before touching wires. Test the switch or wires with a voltage tester to confirm no electricity flows. Keep your work area dry to prevent shocks. Avoid working near water or wet surfaces. Never use metal ladders around electricity.
Using Insulated Tools
Use tools with insulated handles to reduce shock risk. Insulated tools block electricity from reaching your body. Check tool insulation for cracks or damage before use. Replace worn tools to stay safe. Proper tools make electrical work safer and easier.

Credit: www.dummies.com
Frequently Asked Questions
How Do I Safely Install A Light Switch?
Turn off power at the circuit breaker first. Use a voltage tester to confirm no current. Follow wiring instructions carefully. Secure all connections tightly. Mount the switch properly and restore power to test.
What Tools Are Needed To Install A Light Switch?
You need a flathead screwdriver, wire stripper, voltage tester, and electrical tape. A drill may be useful for mounting. Having a flashlight and needle-nose pliers helps with wire handling.
Can I Replace A Light Switch Without An Electrician?
Yes, if you follow safety steps and understand wiring. Turn off power and verify with a tester. Follow instructions and local codes. Call an electrician if unsure or if wiring is complex.
How Do I Identify The Wires For A Light Switch?
Typically, black is hot, white is neutral, and green or bare is ground. Use a voltage tester to confirm. Check your wiring diagram, as colors may vary. Label wires before disconnecting.
Conclusion
Installing a light switch is simple with clear steps. Always turn off power before starting to stay safe. Use the right tools and follow instructions carefully. Double-check your work before turning power back on. A properly installed switch works well and lasts long.
Now, you can control your lights easily at home. Give it a try and see the difference it makes!