Is your light switch acting up or completely unresponsive? You don’t have to live in the dark or call an expensive electrician just yet.
Fixing a light switch yourself is easier than you think, and it can save you time and money. In this guide, you’ll discover simple steps to troubleshoot and repair your switch safely and quickly. Keep reading—by the end, you’ll have the confidence to get your lights back on without hassle.

Credit: www.wikihow.com
Tools And Materials Needed
Fixing a light switch requires the right tools and materials. Having these ready makes the job easier and safer. This list covers all basics needed for a smooth repair process.
Screwdrivers
A flathead and a Phillips screwdriver are essential. Use them to remove and replace screws on the switch plate and switch itself.
Voltage Tester
Check if the power is off before touching wires. A voltage tester helps avoid electrical shocks.
Wire Strippers
Wire strippers remove insulation from electrical wires. This tool is important for making clean wire connections.
Replacement Light Switch
Buy a switch that matches your current one. This ensures it fits and works correctly.
Electrical Tape
Use electrical tape to cover wire connections. It helps prevent short circuits and keeps wires secure.
Needle-nose Pliers
These pliers help bend wires and hold small parts. They make wiring easier and more precise.
:max_bytes(150000):strip_icc()/how-to-replace-a-light-switch-1824670_07_newswitch_40431-69f2872f4a734dc89e3c2bed8711fc69.jpg)
Credit: www.thespruce.com
Safety Precautions
Safety is the top priority when fixing a light switch. Electricity can cause serious injuries. Taking the right precautions protects you and your home. Follow these steps carefully before starting any work.
Turn Off The Power
Switch off the circuit breaker that controls the light switch. Do not rely on the wall switch alone. Use a tester to check if the power is off. This prevents electric shock during the repair.
Use Insulated Tools
Choose tools with insulated handles. These tools reduce the risk of electric shock. Avoid metal tools without insulation. Keep your hands dry and steady while working.
Wear Safety Gear
Wear rubber-soled shoes to avoid grounding yourself. Use safety goggles to protect your eyes. Gloves help protect your hands from sharp edges. Dress properly to stay safe during the repair.
Work In A Dry Area
Never work on a light switch in wet or damp conditions. Water increases the risk of electric shock. Make sure the area is dry before starting the job. Use a dry cloth to clean the work area if needed.
Check For Loose Wires
Before touching anything, look for loose or damaged wires. Loose wires can cause sparks or shocks. Fix any damaged wires before continuing with repairs. Use wire nuts to secure wire connections.
Identifying The Problem
Fixing a light switch starts with identifying the problem. This step helps avoid unnecessary work. It also guides you to the right fix. Problems can come from power issues or faulty wiring. Careful checks save time and money.
Check For Power Issues
First, check if the power is off. Use a tester to see if electricity flows. Test other switches or lights on the same circuit. A tripped breaker or blown fuse might cause the problem. Reset breakers or replace fuses if needed. No power means the switch won’t work.
Inspect The Switch And Wiring
Turn off the power before touching wires. Remove the switch cover and look inside. Check for loose or damaged wires. Look for signs of burning or corrosion. Tighten any loose connections carefully. Damaged wires need replacement for safety and function.
Turning Off The Power
Turning off the power is the first step to fix a light switch safely. Electricity can cause serious injury or damage. Always make sure the power is off before touching wires or the switch.
It protects you and your home. Taking this step seriously prevents accidents. The process is simple and quick but very important.
Locate The Circuit Breaker
Find your home’s circuit breaker panel. It is usually in the basement, garage, or utility room. Look for a metal box with switches inside. The breakers control the electricity in your home.
Switch Off The Correct Breaker
Identify the breaker that controls the light switch circuit. The breakers often have labels like “kitchen” or “living room.” Flip the switch to the OFF position. This stops electricity to the light switch.
Test The Power Is Off
Use a voltage tester or a simple light bulb tester. Touch the tester to the wires or switch terminals. No light or signal means power is off. If unsure, test again or consult a professional.
Wear Safety Gear
Wear insulated gloves to protect from shocks. Use tools with insulated handles. These small steps add extra safety. Never rush this part of the job.
Removing The Old Switch
Removing the old light switch is the first step to fixing it. This process requires care and attention to safety. Turn off the power at the circuit breaker before starting. Double-check that the switch is not live by testing it. Removing the old switch allows you to see the wiring and prepare for the new one.
Gather Necessary Tools
Prepare a screwdriver, voltage tester, and needle-nose pliers. Having the right tools nearby saves time. A flashlight can help if the area is dark. Keep everything within reach before starting work.
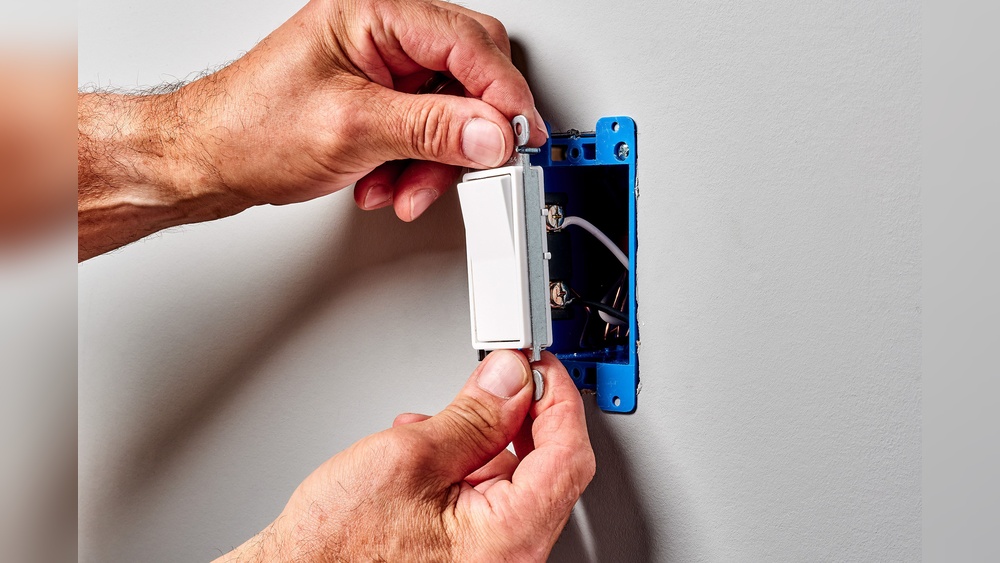
Remove The Switch Cover Plate
Use a screwdriver to unscrew the cover plate gently. Place the screws somewhere safe. Removing the cover plate exposes the switch and wiring. Handle the plate carefully to avoid breaking it.
Unscrew The Old Switch
Unscrew the screws holding the switch to the electrical box. Pull the switch out slowly to avoid damaging wires. Hold the switch firmly while loosening screws. This step reveals the wires connected to the switch.
Test For Electricity
Use a voltage tester to check each wire for power. Ensure all wires show no current before touching. Safety is critical in electrical work. Confirming no electricity prevents shocks or injuries.
Disconnect The Wires
Note how wires are connected to the old switch. Loosen the terminal screws and gently pull wires free. Use needle-nose pliers if wires are tight. Keep wires separate to avoid confusion later.
Wiring The New Switch
Wiring the new switch is the key step in fixing a light switch. Proper wiring ensures the switch works safely and correctly. Handle each wire carefully to avoid mistakes. Follow the steps below for a smooth process.
Match Wire Colors
Look at the wires in the box. Most wires have colors like black, white, and green or copper. Black wires carry power. White wires are neutral. Green or bare wires are ground. Match the new switch wires to the same colors. This helps the switch work right and keeps you safe.
Secure Connections
Connect the wires tightly to the switch terminals. Use a screwdriver to tighten the screws firmly. Loose wires can cause sparks or stop the switch from working. Twist wire ends before attaching them for a better fit. Check all connections twice before closing the box.
Testing The Switch
Testing the light switch is a key step in fixing it. This helps find out if the switch works or not. Testing takes only a few minutes and shows if the problem is with the switch or the wiring.
Use simple tools like a screwdriver and a multimeter for testing. These tools check if the switch lets electricity flow properly. Testing also keeps you safe by making sure the switch is off before you fix it.
Turn Off The Power
Always start by turning off the power at the breaker box. This stops electricity from running to the switch. Use a non-contact voltage tester to check the wires. This makes sure no current flows before you touch anything.
Remove The Switch Cover
Use a screwdriver to take off the switch cover plate. This gives access to the switch and wires. Be gentle to avoid breaking the cover or damaging the wall.
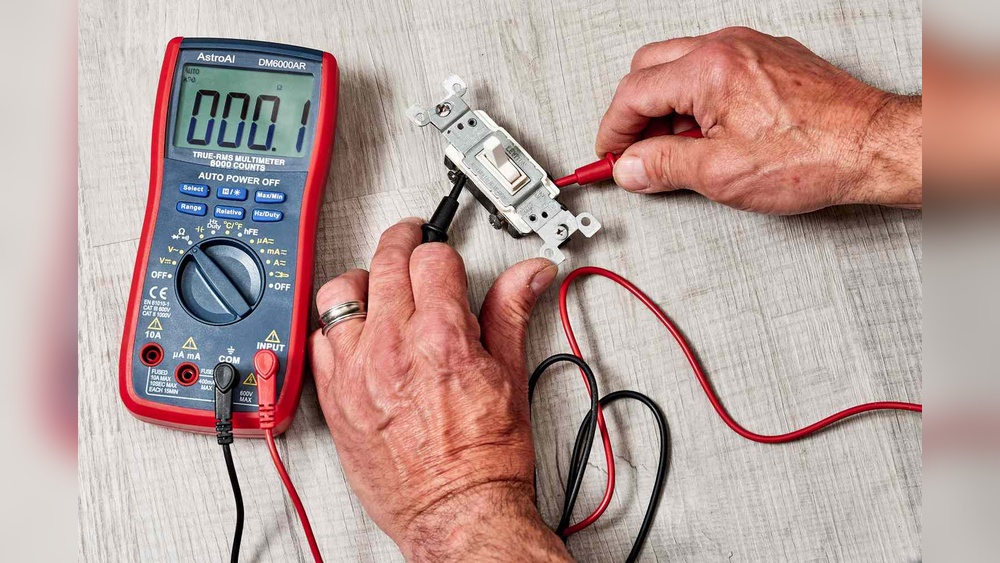
Check For Power Using A Multimeter
Set the multimeter to test voltage. Touch the probes to the switch terminals. A reading shows if power reaches the switch. No reading means the power does not reach the switch or it is off.
Test Continuity Of The Switch
Turn the switch on and off. Use the multimeter set to continuity mode. Place probes on the switch terminals. A beep or zero reading means the switch works well. No beep means the switch is broken and needs replacement.
Tips To Avoid Future Problems
Fixing a light switch is only part of the job. Avoiding future problems keeps your home safe and working well. Small steps make a big difference in the life of your switch and wiring.
Follow these tips to keep your light switch in good shape. They help stop common issues and save time and money later.
Use The Right Switch For Your Needs
Choose a switch that matches the electrical load. Using a switch not made for your setup causes damage. Check the wattage and type before buying.
Turn Off Power Before Any Work
Always cut power at the breaker box before touching wires. This prevents shocks and accidents. Double-check with a tester to be sure power is off.
Keep Wires Tight And Secure
Loose wires cause flickering and shorts. Tighten all connections firmly but gently. Avoid over-tightening to prevent damage.
Regularly Inspect Your Switches
Look for cracks, wear, or sparks around switches. Catch problems early to prevent bigger issues. Replace any damaged parts right away.
Use Quality Tools And Parts
Cheap tools and switches can fail fast. Invest in good-quality items for safety and durability. They make repairs easier and last longer.

Credit: www.youtube.com
Frequently Asked Questions
How Do I Safely Turn Off Power Before Fixing A Switch?
Always switch off the circuit breaker for the switch’s circuit. Use a voltage tester to confirm no power flows. This ensures safety while repairing or replacing the light switch.
What Tools Are Needed To Fix A Light Switch?
You need a screwdriver, voltage tester, wire stripper, and replacement switch. These tools help safely access, test, and replace faulty switches efficiently.
How Can I Identify A Faulty Light Switch?
Look for flickering lights, no response when toggled, or a warm switch plate. These signs usually indicate a malfunctioning switch needing repair or replacement.
What Steps Fix A Loose Light Switch Connection?
Turn off power, unscrew the switch plate, tighten wire terminals securely, then reassemble. Proper connections restore switch functionality and prevent electrical hazards.
Conclusion
Fixing a light switch can save time and money. Always turn off power before starting any work. Use basic tools and follow simple steps carefully. Take your time to check each connection. If something feels unsafe, stop and call a professional.
Small repairs like this help keep your home safe. Practice these tips to fix switches confidently and easily.