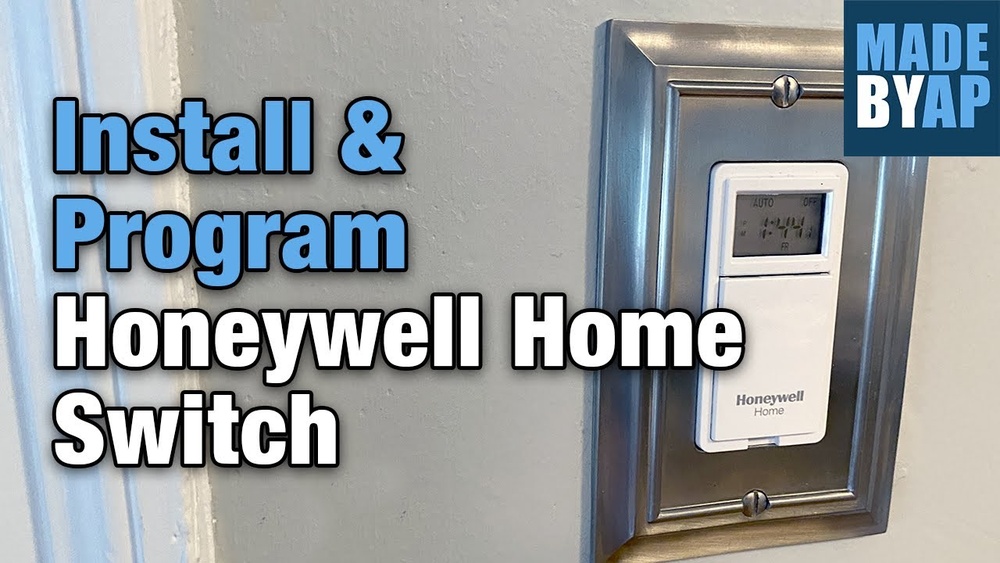
Are you tired of coming home to a dark house or worrying about leaving your lights on all day? Programming your Honeywell light switch timer can solve these problems and save you money on electricity.
In this guide, you’ll learn simple, step-by-step instructions to set up your timer quickly and easily. Whether you want your lights to turn on at sunset or off after you go to bed, this article will help you take full control of your lighting.
Keep reading to discover how you can make your home smarter and more energy-efficient starting right now.
Choosing The Right Honeywell Timer
Choosing the right Honeywell timer is key for easy and effective light control. The right timer fits your needs and works well with your switches. It saves energy and adds convenience to your home. Understanding the options helps you pick the best model for your space. This section explains important points to consider before buying.
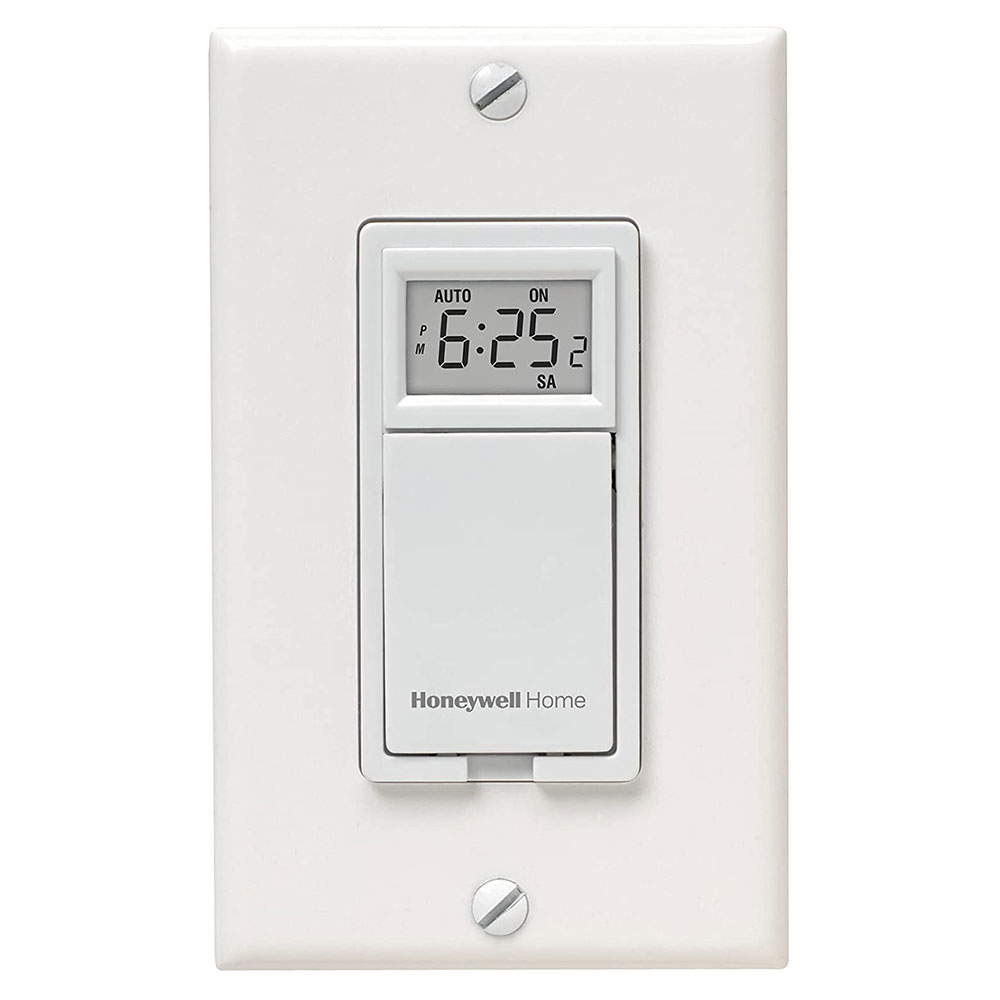
Models And Features
Honeywell offers several timer models with different features. Some have simple on/off settings. Others allow multiple programs for different days. Some timers have digital displays for easy reading. Many include battery backup to keep settings during power loss. Choose a model with features you need. Avoid extra features that may confuse you. Think about how often you want to change the schedule. Some timers allow quick manual override. This helps in unexpected situations.
Compatibility With Light Switches
Not all Honeywell timers fit every light switch. Check if the timer matches your switch type. Common types include single-pole and three-way switches. Some timers work only with specific wiring. Look for timers that support your home’s wiring setup. Also, confirm the timer matches your light load. High wattage bulbs may need special timers. Using the wrong timer can cause flickering or failure. Reading the product manual or label helps avoid issues. Proper compatibility ensures smooth operation and safety.

Credit: www.youtube.com
Gathering Required Tools
Before programming your Honeywell light switch timer, gather the necessary tools. Having the right tools ready makes the process smooth and safe. It saves time and avoids frustration during installation.
Essential Tools List
Start with a flathead screwdriver for removing the switch cover. A Phillips screwdriver will help with securing screws. A voltage tester is crucial to check if the power is off. Wire strippers prepare the wires for connection. Needle-nose pliers help handle small wires. Electrical tape ensures safe insulation. Finally, have a flashlight ready if the area is dimly lit.
Safety Precautions
Always turn off the power at the circuit breaker before starting. Use a voltage tester to confirm no electricity flows to the switch. Wear rubber-soled shoes to avoid electric shocks. Keep your hands dry while working. Work in a well-lit area to see clearly. Avoid touching metal parts with bare hands. Follow all safety instructions in the Honeywell manual.
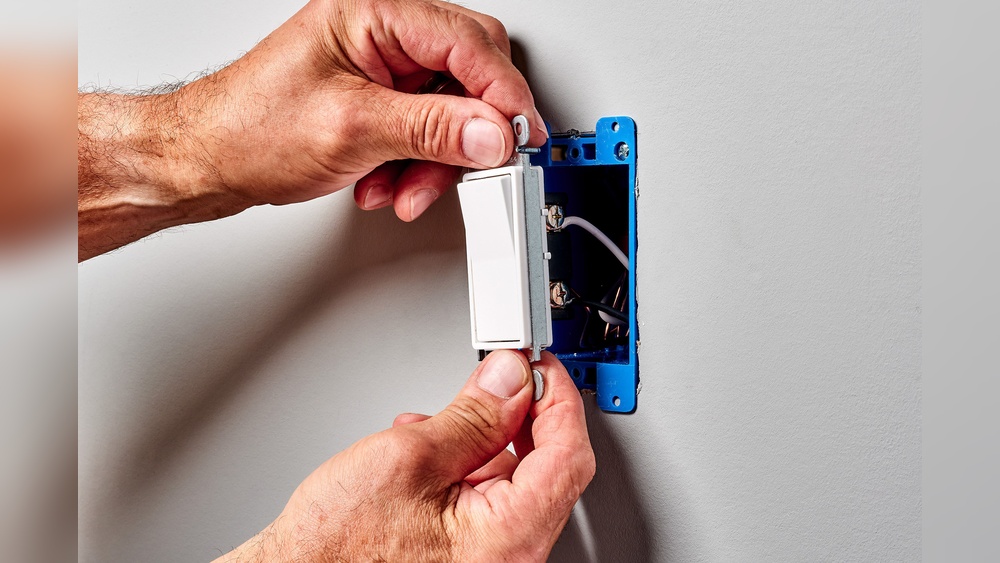
Preparing For Installation
Preparing for installation is the first step in setting up your Honeywell light switch timer. Careful preparation helps ensure safety and makes the process smoother. It involves turning off the power and removing the existing switch.
Turning Off Power
Always turn off power at the circuit breaker. This stops electricity flow and prevents shocks. Use a voltage tester to check the switch wires. Make sure no current is present before touching wires.
Removing Existing Switch
Remove the switch cover plate with a screwdriver. Unscrew the existing switch from the wall box. Gently pull the switch out to expose the wires. Note the wire connections or take a photo for reference. Carefully disconnect the wires from the old switch.
Credit: www.honeywellstore.com
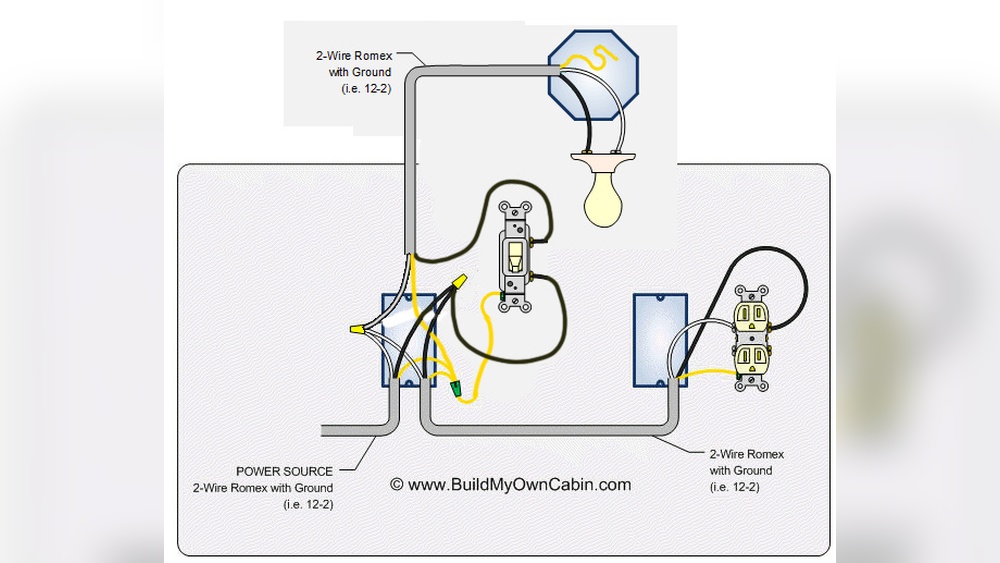
Wiring The Honeywell Timer
Wiring the Honeywell timer is a key step in setting up your light switch timer. Proper wiring ensures the timer works correctly and safely. This part does not take long but requires attention to detail. Follow clear steps to connect wires the right way.
Identifying Wires
Start by turning off power at the breaker box. Use a voltage tester to confirm no electricity flows. Look at the wires inside your switch box. Usually, you will find a black wire (hot), a white wire (neutral), and a green or bare wire (ground). Some setups may have red wires for a second load. Check your timer’s manual for wire color codes. Mark each wire to avoid confusion.
Connecting Wires Properly
Connect the black wire from the wall to the timer’s line terminal. Attach the black or red load wire to the timer’s load terminal. Connect the white neutral wires together with a wire nut. Attach the green or bare ground wire to the timer’s ground screw. Make sure all connections are tight and secure. Use wire nuts to cover exposed wire ends. Push wires gently back into the box. Tighten the timer to the wall plate. Turn power back on to test the timer function.
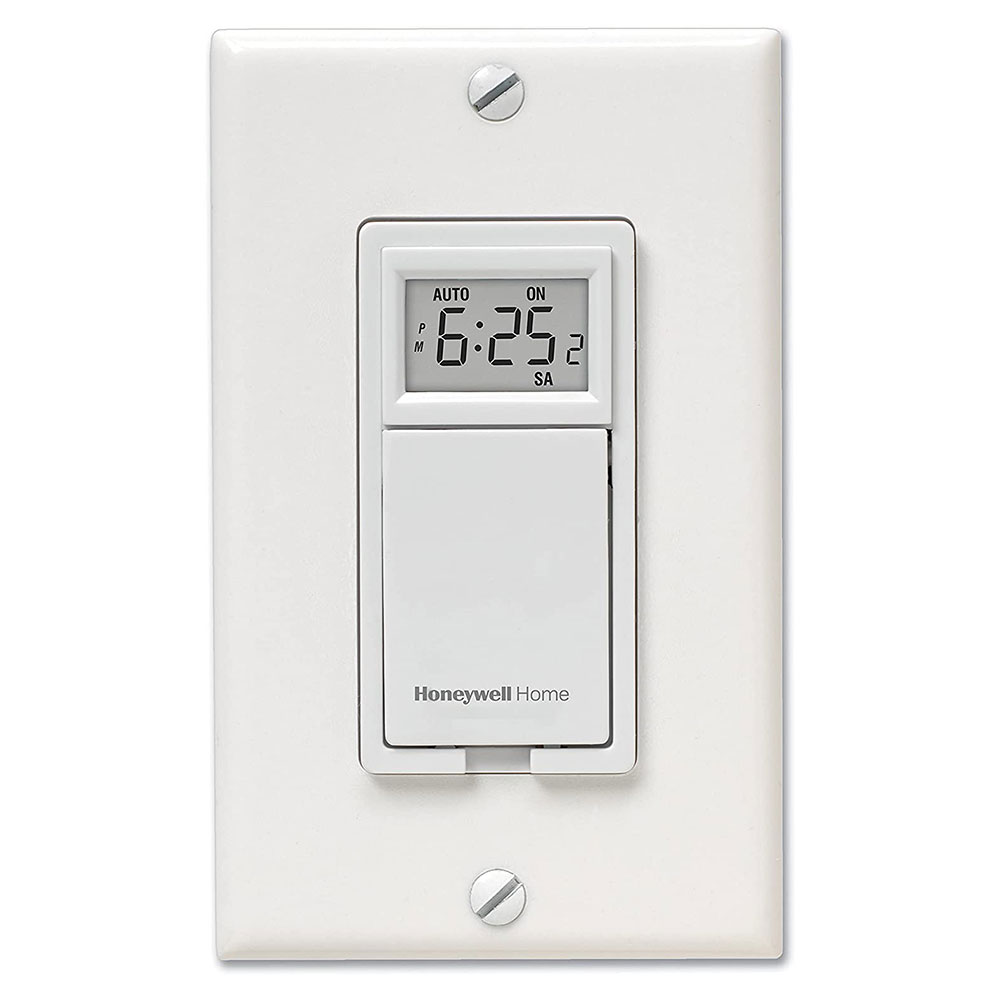
Setting The Current Time
Setting the current time on your Honeywell light switch timer is a key step. The timer works best with the right time set. This helps control your lights accurately and saves energy. Below are easy steps to set the time correctly.
Accessing Time Settings
First, press the “Menu” button on the timer. Look for the option that says “Time” or “Clock.” Use the arrow keys to find it quickly. Once found, press “Enter” to open the time settings. The display will show the current time or a blinking hour. This means you can start adjusting now.
Adjusting Time Correctly
Use the arrow buttons to change the hour. Make sure to set AM or PM correctly. After the hour, press “Enter” to move to minutes. Adjust the minutes with the arrow keys. Confirm your settings by pressing “Enter” again. The timer now shows the correct current time. This ensures your lights switch on and off at the right moments.
Programming On And Off Times
Programming the on and off times of your Honeywell light switch timer lets you control lights automatically. This saves energy and adds convenience. Setting these times is simple and takes only a few steps.
Start by entering the times you want the lights to turn on. Then, set the off times. You can also add multiple programs for different days or activities. Follow these steps carefully to ensure your timer works perfectly.
Entering On Times
Press the program button to start setting the on time. Use the hour and minute buttons to choose the exact time. Confirm the time by pressing the program button again. The timer will now remember this as the on time.
Entering Off Times
After setting the on time, the screen will show the off time setting. Use the hour and minute buttons to set when the light should turn off. Press the program button to save the off time. The timer is now set to turn off the lights automatically.
Setting Multiple Programs
You can set more than one on and off time. Press the program button again to add another schedule. Choose the times just like before. This lets you create different schedules for weekdays and weekends or special events. Save each program by pressing the program button.
Testing The Timer Function
Testing the timer function of your Honeywell light switch is key to ensure it works as planned. This step confirms the settings you programmed will control your lights correctly. It helps avoid surprises like lights turning on or off at wrong times. Testing also lets you adjust settings if needed for better performance. Follow these simple checks to verify your timer’s operation.
Manual Override Options
The manual override lets you control lights without changing the timer. Use the switch or button to turn lights on or off instantly. This feature is useful if you want light outside scheduled times. Check if the manual override works smoothly by pressing the switch. Make sure the lights respond immediately to your command. This test confirms that manual control and timer work together well.
Verifying Scheduled Operations
To verify scheduled operations, watch the lights during programmed on and off times. Confirm the lights turn on at the set start time. Check if they switch off exactly at the programmed end time. Repeat this test for different schedules you set. Note any delays or failures in switching the lights. Adjust the timer settings if the schedule does not run properly. This step ensures your Honeywell timer controls lighting as expected.
Troubleshooting Common Issues
Troubleshooting common issues with your Honeywell light switch timer can save time and stress. Many problems arise from simple mistakes. Identifying and fixing these quickly helps the timer work correctly. This section covers easy fixes to get your timer running smoothly again.
Resetting The Timer
Resetting the timer can clear errors and restore normal function. Locate the reset button on your device. Press and hold it for about 5 seconds. The screen may flash or go blank, showing the reset is complete. After this, reprogram the timer according to your schedule. This step often fixes unresponsive timers or incorrect settings.
Fixing Wiring Errors
Incorrect wiring causes many timer problems. Turn off power at the circuit breaker first. Remove the switch cover and check the wires. Ensure the live, neutral, and ground wires connect to the correct terminals. Loose wires can stop the timer from working. Tighten all connections and replace the cover. Turn the power back on and test the timer. Correct wiring ensures safe and proper operation.
Credit: www.honeywellstore.com
Frequently Asked Questions
How Do I Set The Time On A Honeywell Light Switch Timer?
To set the time, press and hold the “Clock” button. Use the arrow keys to adjust hours and minutes. Release the “Clock” button to save the time.
Can I Program Multiple On/off Schedules?
Yes, Honeywell timers allow multiple on/off schedules. Use the “Program” button to set start and stop times for different days.
How Do I Override The Timer Temporarily?
Press the “Override” or “Manual” button to bypass the schedule temporarily. The switch will return to the programmed schedule after the override period.
What Should I Do If The Timer Isn’t Working?
Check the power supply and ensure the timer is properly installed. Reset the timer by unplugging it or pressing the reset button if available.
Conclusion
Programming your Honeywell light switch timer saves time and energy. You can set it to match your daily routine easily. This helps keep your home safe and well-lit without extra effort. Follow the simple steps and adjust settings as needed.
Enjoy automatic control and peace of mind every day. Keep your timer updated to fit any changes in your schedule. Small changes make a big difference in comfort and savings. Try it today and see how simple it is to use.