Have you ever noticed your floor jack feeling weak or slow when lifting? That’s often because there’s air trapped inside, stopping it from working properly.
Knowing how to remove air from your floor jack can save you time, frustration, and even money on repairs. In this guide, you’ll learn simple steps you can follow right now to get your jack lifting smoothly again. Keep reading, and you’ll quickly master this easy fix that makes a big difference in your tool’s performance.
Signs Of Air In A Floor Jack
Air inside a floor jack can cause several problems. It reduces the jack’s ability to lift heavy objects safely. Knowing the signs of air in a floor jack helps you fix it quickly. This keeps your jack working well and prevents accidents.
Common Symptoms
The jack feels spongy or soft when you pump it. It may not hold the weight steadily. The handle might move more than usual without lifting. Sometimes, the jack lowers slowly or sinks under pressure. These signs mean air is trapped inside the hydraulic system.
Impact On Jack Performance
Air in the jack causes weak lifting power. The jack may fail to raise the vehicle fully. It can make the lifting process unsafe and unreliable. The jack might leak fluid or make strange noises. Such issues can lead to damage or accidents if ignored.
Tools Needed
Removing air from a floor jack needs a few simple tools. These tools help release trapped air and restore the jack’s proper function. Having the right items ready makes the process easier and faster.
Hydraulic Fluid
Hydraulic fluid is the main liquid used inside the jack. Use the fluid recommended by the manufacturer. It helps push out air and keeps the jack working smoothly.
Wrench Or Spanner
A wrench or spanner fits the release valve or bleed screw. It allows you to open and close the valve safely. Choose the correct size to avoid damage.
Clean Rag Or Cloth
A clean rag wipes away any dirt or spills. It keeps the work area neat and prevents contamination of the fluid. Use a dry cloth for best results.
Protective Gloves
Protective gloves keep your hands clean and safe. Hydraulic fluid can irritate the skin. Gloves also improve grip on tools and parts.
Small Container
A small container catches any leaking fluid during the air removal process. It helps avoid mess and protects your workspace from stains.
Preparing The Floor Jack
Preparing the floor jack is a key step before removing air from it. Proper setup helps the jack work well and keeps you safe. Take time to get everything ready. This makes the process easier and prevents damage or injury.
Safety Measures
Always wear gloves and safety glasses before starting. Check the jack for any cracks or damage. Do not use a damaged jack. Clear the area around your workspace to avoid accidents. Keep children and pets away while working. Follow the manufacturer’s instructions closely.
Positioning The Jack
Place the jack on a flat, hard surface. Avoid soft ground or slopes. Ensure the jack is stable and does not wobble. Position the handle so it moves freely without hitting anything. Align the jack under the vehicle’s lift point. This avoids slipping and helps lift safely.

Credit: www.ari-hetra.com
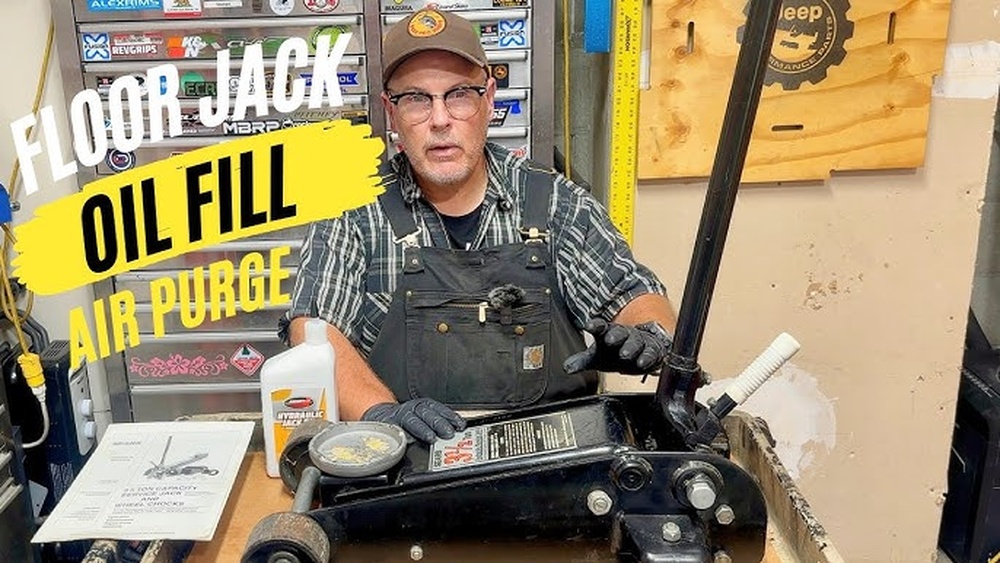
Bleeding The Air Out
Bleeding the air out of a floor jack is key to keeping it working well. Air trapped inside stops the jack from lifting smoothly. Removing this air helps the jack hold pressure and lift heavy loads safely. The process is simple and only takes a few steps.
Loosening The Release Valve
Start by finding the release valve on the jack. Use a wrench to turn it counterclockwise. Loosen it just enough to let air escape. Do not open it too much or the hydraulic fluid may leak out. This step prepares the jack to release trapped air.
Pumping The Jack
Next, pump the jack handle slowly. This action pushes air bubbles out through the loosened valve. Pump several times, around 10 to 15 pumps. You will feel the jack becoming firmer as the air leaves. Keep pumping until you notice less resistance.
Re-tightening The Valve
After pumping, tighten the release valve by turning it clockwise. Use the wrench to secure it firmly. This seals the jack and stops any fluid or air from coming out. Your floor jack is now free of air and ready for use.
Checking For Leaks
Checking for leaks is an important step when removing air from a floor jack. Leaks can cause air to enter the system, making it hard to pump and lift properly. Finding and fixing leaks helps the jack work smoothly and safely.
Leaks usually happen around seals, valves, and connections. Careful inspection of these areas can reveal damage or loose parts. Fixing leaks stops air from getting inside and keeps the hydraulic fluid where it belongs.
Inspecting Seals And O-rings
Seals and O-rings prevent fluid and air from escaping the jack. Look for cracks, tears, or worn spots. Replace any damaged seals to stop leaks. Clean the seals gently before checking to avoid missing small cracks.
Checking Hydraulic Fluid Level
Low fluid can cause air to enter the jack. Check the fluid level and top it off if needed. Use the recommended hydraulic fluid type. Too little fluid can create air pockets and reduce the jack’s power.
Tightening Loose Connections
Loose bolts or fittings often cause leaks. Use the correct tools to tighten all connections. Avoid overtightening, which can damage parts. Secure connections keep the system sealed and air-free.

Credit: www.youtube.com
Testing The Jack After Bleeding
Testing the jack after bleeding is a crucial step. It ensures the air removal process worked well. This step helps confirm the jack lifts smoothly and holds pressure. Without testing, you cannot be sure the jack is safe to use.
After bleeding the jack, check its performance carefully. Look for any signs of slipping or jerky movements. Proper testing prevents accidents and extends the jack’s life.
Lift And Hold Test
Start by placing the jack under a sturdy object. Pump the handle to lift the load slowly. Hold the load in the raised position for at least one minute.
Watch for any drop in height or sudden movements. If the jack holds steady, the bleeding was successful. If it lowers, air might still be inside the system.
Rechecking For Smooth Operation
Lower the jack slowly after the hold test. Pump the handle several times to raise the load again. Pay attention to smooth, even movements without noises.
If the jack feels stiff or jerky, repeat the bleeding process. Smooth operation means no trapped air and proper fluid flow.
Maintaining Your Floor Jack
Maintaining your floor jack is key for safe and easy use. A well-kept jack lifts smoothly and lasts longer. Regular care helps avoid air problems and other issues. Follow simple steps to keep your jack in top shape.
Regular Inspections
Check your floor jack often for leaks or damage. Look at the hydraulic fluid level and top it up if low. Inspect seals and hoses for cracks or wear. Test the jack by lifting a small load to see if it holds pressure. Catching problems early saves time and money.
Proper Storage Tips
Store the floor jack in a dry, clean place. Keep it away from dirt and moisture to stop rust. Lower the jack fully before storing to reduce stress on parts. Cover it with a cloth or plastic sheet to protect from dust. Good storage keeps your jack ready for use anytime.

Credit: www.ari-hetra.com
Frequently Asked Questions
How Do You Know If Air Is In A Floor Jack?
Air in a floor jack causes spongy or uneven lifting. The jack may feel soft or fail to hold pressure. This reduces lifting efficiency and can be unsafe during use. Regular checks help identify trapped air early.
What Is The Easiest Way To Remove Air From A Floor Jack?
The easiest way is to bleed the jack by opening its release valve. Pump the jack slowly to expel trapped air. Close the valve once air bubbles stop. Repeat if necessary for smooth operation.
Can Trapped Air Damage My Floor Jack?
Yes, trapped air can cause poor performance and internal damage. It leads to inconsistent pressure and potential hydraulic failure. Removing air promptly ensures safety and extends the jack’s lifespan.
How Often Should I Bleed Air From My Floor Jack?
Bleed air whenever the jack feels spongy or lifts unevenly. Regular maintenance every few months also helps prevent air buildup. Consistent care keeps the jack reliable and safe for use.
Conclusion
Removing air from a floor jack keeps it working smoothly and safely. Follow the steps carefully for the best results. Regular maintenance helps avoid problems and saves money. A well-functioning jack lifts your vehicle with ease. Keep your tools ready for any repair or change.
Simple care means longer life for your floor jack. Don’t rush the process. Take your time and check for leaks. Your jack will thank you with reliable performance every time.