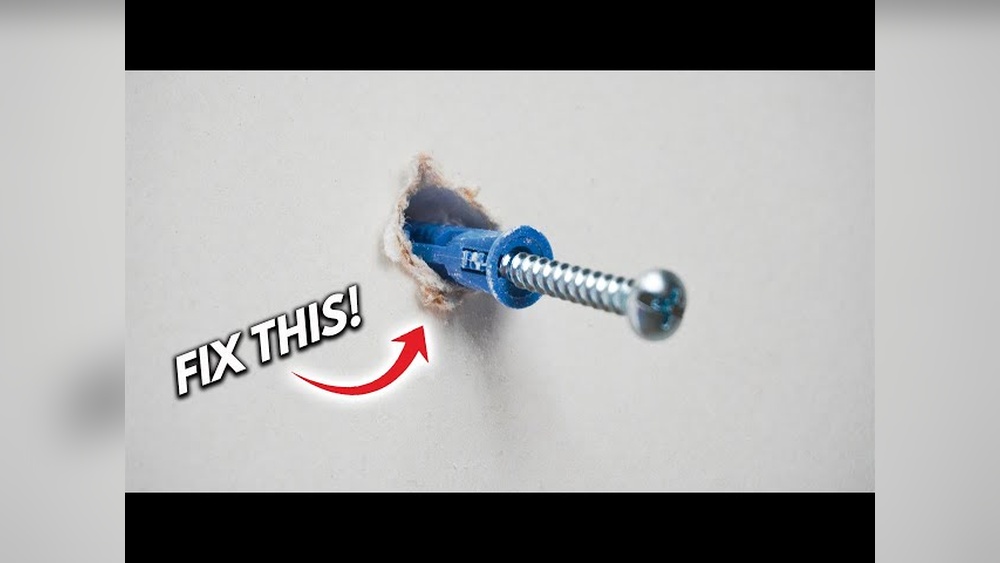
Are you tired of struggling with wall anchors that just don’t hold? Installing Zip It Wall Anchors might be the simple solution you’ve been looking for.
These anchors are designed to make your DIY projects stronger and easier, but only if you install them correctly. In this guide, you’ll learn exactly how to put them in the right way, step by step. By the end, you’ll have the confidence to hang shelves, pictures, or anything else securely—without worrying about them falling down.
Ready to get started? Let’s dive in and make your walls work for you!
Choosing Zip It Wall Anchors
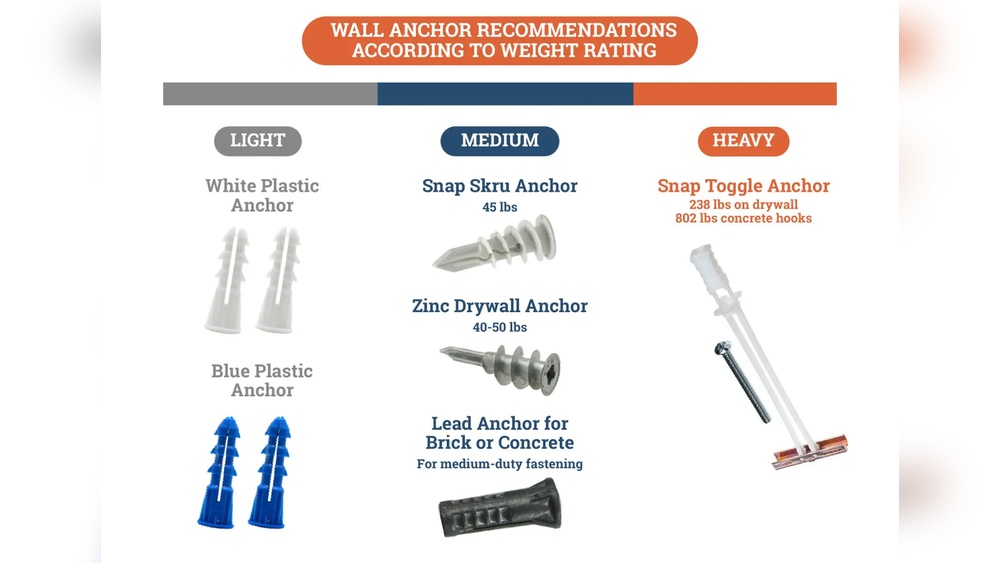
Choosing the right Zip It wall anchors is important for a secure hold. These anchors come in different types and sizes. Each type fits specific wall materials and weight needs. Picking the correct anchor helps prevent damage and ensures safety.
Types And Sizes
Zip It wall anchors vary by design and size. Some anchors are made for drywall, others for plaster or masonry. Sizes range from small for light items to large for heavy objects. Knowing the wall material guides the choice of anchor type. The size depends on the weight of the item to hang. Using the right size keeps the anchor from pulling out.
Best Uses
Each Zip It anchor suits specific jobs. Small anchors work well for picture frames and clocks. Medium anchors hold shelves and mirrors. Large anchors support heavy items like cabinets. Some anchors are better for hollow walls, others for solid walls. Match the anchor to the wall type for best results. This makes your installation safe and strong.
Tools Needed
Installing Zip It wall anchors is simple with the right tools. This section lists the essential tools needed for a smooth installation. Having the correct items ensures you work quickly and safely.
Basic Tools
- Drill with a 3/16-inch drill bit
- Hammer
- Phillips screwdriver
- Measuring tape
- Level
- Pencil for marking
These tools help you measure, drill, and secure the anchors properly. They are common in most toolkits and easy to use.
Optional Accessories
- Stud finder to avoid wall studs
- Safety goggles for eye protection
- Masking tape to mark drill spots
- Vacuum or brush to clean dust
These extras make the job safer and cleaner. They are not required but improve your installation experience.
Preparing The Wall
Preparing the wall is an important first step before installing Zip It wall anchors. This process helps ensure the anchors hold firmly and the wall stays damage-free. Take your time to prepare the surface correctly for a secure fit.
Locating Studs And Marking
Use a stud finder to find wooden studs behind the drywall. Studs provide strong support for heavy items. Mark the edges and center of each stud with a pencil. If no stud is available, plan to use the Zip It anchor in drywall only.
Mark the exact spots where you want to install the anchors. Measure carefully to keep spacing even. Clear, visible marks save time during drilling.
Drilling Pilot Holes
Choose a drill bit slightly smaller than the Zip It anchor size. This helps create a snug fit in the wall. Drill straight pilot holes at your marked points. Keep the drill steady to avoid damaging the wall.
Clear out any dust or debris from the holes before inserting anchors. Clean holes allow anchors to grip tightly. This step improves the overall strength of your installation.

Credit: www.wikihow.com
Installing Zip It Anchors
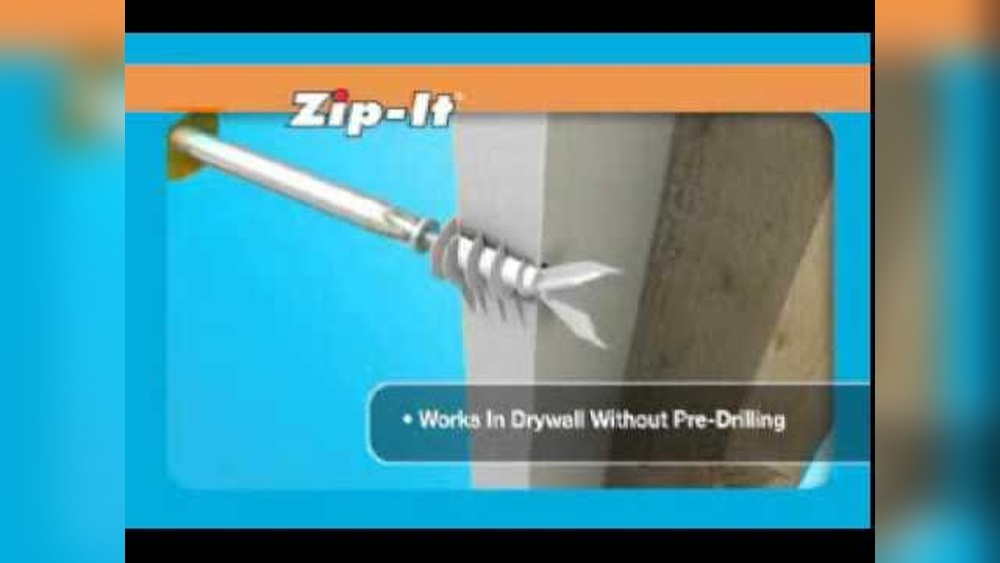
Installing Zip It wall anchors is simple and fast. These anchors hold items securely in drywall without the need for special tools. Follow the steps carefully to ensure strong support for your wall fixtures.
Inserting The Anchor
Start by pushing the Zip It anchor into the drywall hole. Make sure the anchor sits flush with the wall surface. Use gentle pressure to avoid damaging the drywall. The anchor’s design grips the inside of the wall tightly.
Securing With The Screw
Next, place the screw into the anchor’s center. Turn the screw clockwise with a screwdriver. The anchor will expand inside the wall, locking in place. Stop tightening once the screw feels firm. This keeps your item secure and stable.
Testing Anchor Strength
Testing the strength of Zip It wall anchors is key after installation. It ensures the anchors hold well and support the items you hang. This step prevents damage to your walls and accidents from falling objects.
Weight Capacity Check
Start by checking the anchor’s weight limit. Each Zip It anchor has a specific load rating. Use a scale or a known weight to test the anchor. Gently hang the weight on the anchor and watch for any signs of movement. If the anchor holds steady, it passes the test. Never exceed the recommended weight. This keeps your wall and items safe.
Ensuring Stability
After the weight test, check the anchor’s stability. Push and pull the anchored item slightly. Feel for any looseness or shifting. The anchor should stay firmly in place. If it moves, remove and reinstall the anchor properly. Good stability means the anchor grips the wall tightly. This gives extra security for your mounted objects.

Credit: www.youtube.com
Common Installation Mistakes
Installing Zip It wall anchors seems simple but often causes errors. These mistakes reduce the anchor’s strength and risk damage. Avoiding them leads to a strong, secure hold for your walls.
Two common errors are over-tightening and misalignment. Fixing these helps your project last longer and stay safe.
Avoiding Over-tightening
Over-tightening Zip It anchors can crack the wall or strip the anchor. Turn the screw slowly and stop once it feels snug. Tighten just enough to hold the item firmly.
Use a screwdriver with a good grip to control pressure. Too much force weakens the wall and anchor. Check the anchor’s instructions for torque limits if available.
Fixing Misaligned Anchors
Placing anchors at wrong angles weakens their hold. Mark the exact spot before drilling. Keep the drill straight to the wall surface.
If an anchor is misaligned, remove it carefully. Fill the hole with spackle, let it dry, then drill a new hole. Proper alignment keeps your anchor strong and secure.
Maintenance Tips
Maintaining Zip It wall anchors helps keep your walls strong and safe. Regular care prevents damage and extends anchor life. Simple checks and timely fixes save time and money.
Regular Inspection
Check anchors every few months. Look for cracks or looseness around the anchor. Test the anchor by gently pulling the attached item. Notice any wobbling or movement. Inspect the wall surface for signs of damage or wear. Early detection stops bigger problems.
Replacing Damaged Anchors
Remove anchors that show signs of damage. Use a screwdriver or pliers to take out the old anchor. Clean the hole before installing a new one. Choose the right size Zip It anchor for the job. Install the new anchor firmly to ensure a tight fit. Replace damaged anchors quickly to keep items secure.

Credit: www.kaz-metiz.com
Frequently Asked Questions
What Tools Do I Need To Install Zip It Wall Anchors?
You need a drill, a drill bit, a screwdriver, and the Zip It wall anchors kit. These tools ensure proper installation and secure mounting.
How Do I Prepare The Wall For Zip It Anchors?
First, mark the spot, then drill a hole matching the anchor size. Clean the hole before inserting the Zip It anchor to ensure a snug fit.
Can Zip It Anchors Hold Heavy Items On Drywall?
Yes, Zip It wall anchors are designed to hold medium to heavy loads on drywall securely when installed correctly.
How Do I Remove Zip It Wall Anchors Safely?
Unscrew the attached screw, then gently pull the Zip It anchor out using pliers without damaging the wall surface.
Conclusion
Installing Zip It wall anchors is a simple task anyone can do. Follow each step carefully for the best results. These anchors hold items securely on drywall or hollow walls. No need for special tools or skills. Take your time and check your work as you go.
Strong, stable walls make your space safer and more organized. Practice makes perfect, so don’t worry if it feels tricky at first. Soon, you’ll hang shelves, pictures, or hooks with confidence. Enjoy a neat, sturdy setup that lasts.