Have you ever struggled to remove command hooks from your wall without leaving a mark? You’re not alone.
Those handy hooks are great for organizing, but taking them down can be tricky—and frustrating. What if you could remove them quickly, safely, and without damage? You’ll discover simple, effective steps to get those hooks off your walls cleanly. Keep reading to save your paint and walls while making your space look flawless again.
:max_bytes(150000):strip_icc()/how-to-remove-command-strips-5089679-08-f1a503a270af4f05a47e576b957c8f6b.jpg)
Credit: www.thespruce.com
Choosing The Right Command Hooks
Choosing the right Command hooks is important for a clean wall and easy removal. Not all hooks work the same on every surface. The right hook holds well and leaves no marks. It also makes removing hooks simple and damage-free. Understanding the types of hooks and your wall type helps pick the best option.
Types Of Command Hooks
Command hooks come in many shapes and sizes. Some hooks hold light items like keys or small frames. Others support heavier things like coats or large pictures. There are plastic hooks, metal hooks, and ones with decorative designs. Each hook uses a special adhesive strip made to stick well but peel off easily.
Some strips are designed for walls that get wet, like in bathrooms. Others work best on smooth surfaces such as painted drywall or tiles. Choose a hook that matches the weight of your item and the surface you want to hang on.
Selecting Hooks For Your Wall Type
Different walls need different hooks. Painted drywall is common and works with most Command hooks. Textured walls or brick need stronger adhesive strips. For glass or tile, choose hooks made for smooth, hard surfaces. Avoid hooks on wallpaper as they may peel it off.
Check the package for wall compatibility. If unsure, test a small area first. Clean the wall surface before applying hooks to improve stickiness. Proper selection prevents damage and makes removal easier later.
Preparing For Removal
Preparing to remove Command hooks from your wall helps avoid damage. Taking time to gather tools and clear space makes the process smooth. You feel ready and confident to remove hooks safely.
Gathering Necessary Tools
Collect tools before starting. You need dental floss or fishing line for removal. Use a hairdryer to warm the adhesive if needed. Have a clean cloth handy to wipe the wall after. These simple items make the job easier and faster.
Clearing The Area
Remove objects near the hook. Clear shelves or furniture around the wall spot. Move fragile items away to avoid accidents. Make sure the wall is easy to reach. A clear space helps you work carefully and safely.
Step-by-step Removal Process
Removing Command hooks from the wall is simple and safe with the right steps. This process prevents damage to your paint or drywall. Follow these steps carefully for a clean removal. The key is to handle the adhesive strip gently and patiently.
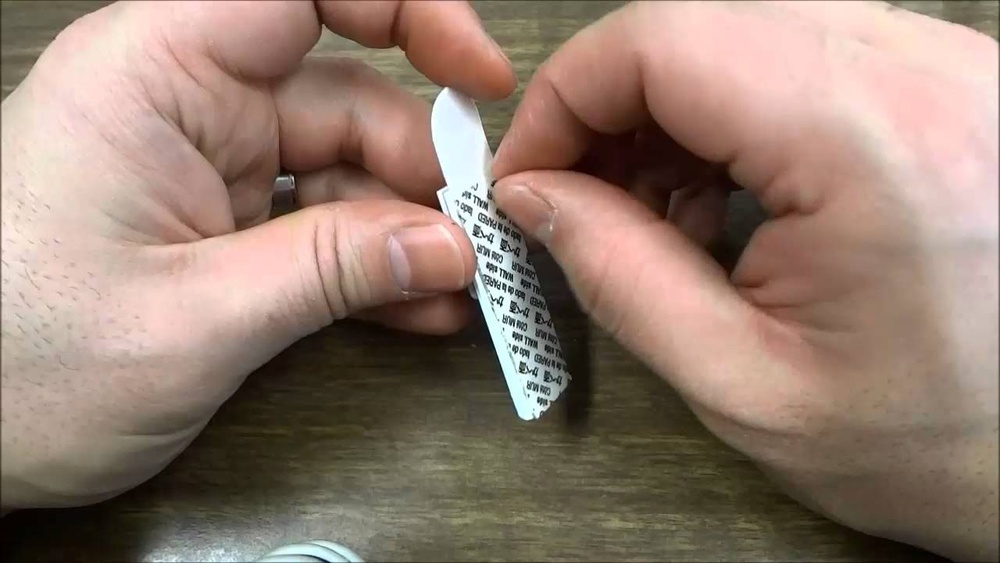
Loosening The Adhesive Strip
Start by holding the hook gently. Do not pull the hook itself. Locate the adhesive strip tab at the bottom of the hook. Slowly pull the tab away from the wall. Pull straight down, not out or towards you. This action loosens the glue without harming the surface.
Pulling The Strip Downward
Keep pulling the strip down in a slow, steady motion. Stretch the strip along the wall, not away from it. Continue until the strip releases completely. You may feel some resistance. Stay calm and maintain the downward pull. This prevents wall damage and removes the hook cleanly.
Removing Stubborn Residue
Sometimes sticky residue remains on the wall. Use a soft cloth with warm, soapy water. Gently rub the area until the residue lifts. Avoid harsh scrubbing to protect the paint. For tougher spots, apply a small amount of rubbing alcohol. Wipe carefully and dry the wall with a clean cloth.
Tips To Avoid Wall Damage
Removing Command hooks from walls can be tricky without causing damage. The right approach helps protect your paint and wall surface. Use gentle methods to keep your walls clean and smooth. Avoid pulling hard or fast to prevent peeling or holes.
Below are simple tips to remove Command hooks safely and keep your walls intact.
Applying Gentle Pressure
Start by holding the hook base firmly. Slowly stretch the adhesive strip downward, not outward. Pull the strip straight down, staying close to the wall. Stretch the strip gently and steadily until it releases. Do not yank or tear the strip quickly. This method reduces paint peeling and wall damage.
Using Heat For Stubborn Hooks
Use a hair dryer on low heat to warm the adhesive. Warmth softens the glue, making removal easier. Hold the dryer a few inches from the strip. Heat the strip for about 30 seconds before pulling. This helps loosen the adhesive without harming the wall. Avoid using high heat to prevent paint damage.
Cleaning After Removal
Cleaning after removing Command hooks keeps your walls neat and fresh. It helps avoid sticky spots and small marks. Taking care of the wall now saves time later. A clean wall looks good and stays ready for new hooks or decorations.
Removing Adhesive Residue
Use warm soapy water and a soft cloth to wipe the wall gently. This helps remove leftover sticky glue without damage. For tough spots, try rubbing alcohol on a cotton ball. Rub carefully in small circles until the residue disappears. Avoid harsh scrubbing to protect paint or wallpaper.
Repairing Minor Wall Marks
Fill small holes or dents with a light spackle or putty. Use a putty knife to smooth the surface evenly. Let it dry completely before sanding lightly with fine sandpaper. Touch up with matching paint to blend the repair. This makes your wall look smooth and clean again.

Credit: www.reddit.com
Preventing Damage In Future Hook Use
Preventing damage during future use of command hooks helps keep your walls clean. Proper use reduces marks, holes, and peeling paint. A few simple habits can protect your walls and save time.
Follow these tips to avoid common mistakes and maintain wall integrity. The right placement and regular checks make a big difference.
Proper Hook Placement
Place hooks on smooth, clean, and dry surfaces for best results. Avoid rough or textured walls that may cause poor adhesion. Keep hooks away from corners and edges to prevent peeling. Choose spots that bear the hook’s weight evenly. This reduces stress on the wall and tape.
Follow the weight limit on the hook package strictly. Heavy items require stronger hooks or multiple hooks. Using the correct hook size lowers the risk of wall damage.
Regular Maintenance Checks
Check hooks often to ensure they stick well. Loose hooks can fall and damage the wall or the item hung. Replace tape or hooks if they start to peel or lose grip. Clean the wall around the hook to remove dust or dirt. This helps the tape stick better and last longer.
Regular checks prevent bigger problems. Small fixes save time and keep your walls safe.

Credit: www.youtube.com
Frequently Asked Questions
How Do I Safely Remove Command Hooks From Walls?
To remove command hooks safely, pull the adhesive strip slowly downward, stretching it parallel to the wall. Avoid pulling outward to prevent wall damage.
Can Command Hooks Damage My Paint Or Wallpaper?
If removed correctly, command hooks usually don’t damage paint or wallpaper. Always pull the adhesive strip straight down to minimize risk.
What Tools Help In Removing Command Hooks Easily?
No tools are needed. Use your hands to slowly stretch the adhesive strip downward until it releases from the wall.
How Long Do Command Hook Adhesives Last On Walls?
Command hook adhesives typically last several months to a year. Longevity depends on wall texture, weight load, and environmental conditions.
Conclusion
Removing Command hooks from the wall is simple and safe. Pull the tab slowly, straight down, to avoid damage. Use gentle heat if the adhesive feels stiff. Clean the area with soap and water after removal. This keeps your wall smooth and ready for new hooks.
Following these steps saves time and effort. No need to worry about marks or holes. Keep your space neat without stress. Easy, quick, and effective.