If you’re facing a jammed or broken Kwikset deadbolt, you know how frustrating it can be. Maybe you’re locked out, or the lock just won’t turn no matter what you try.
Drilling out your deadbolt might sound scary, but with the right steps, you can do it yourself without damaging your door. In this guide, you’ll learn exactly how to drill out a Kwikset deadbolt safely and quickly. Keep reading, and you’ll be back inside your home before you know it.
Tools Needed
Drilling out a Kwikset deadbolt requires the right tools. Using proper equipment makes the job easier and safer. Gather all necessary tools before starting. This will save time and reduce mistakes.
Drill Types
A power drill is essential for this task. Corded drills provide constant power. Cordless drills offer more mobility. Choose a drill with variable speed settings. This helps control drilling speed and prevents damage.
Drill Bit Sizes
Start with a small drill bit, like 1/8 inch. Use it to create a pilot hole. Next, use a larger bit, around 3/8 inch. This helps remove the deadbolt mechanism. Having multiple bit sizes ensures better control and accuracy.
Safety Equipment
Protect yourself with safety glasses. They shield your eyes from metal shavings. Wear gloves to protect your hands. Use ear protection to block loud drill noise. Safety is crucial during any drilling task.
Preparing The Door
Preparing the door is an important first step before drilling out a Kwikset deadbolt. This process helps make the job safer and easier. It also protects your door from damage during drilling.
Start with a clear workspace around the door. Gather all tools you will need. Take safety precautions like wearing goggles and gloves.
Remove Exterior Hardware
Begin by removing the exterior parts of the deadbolt. Use a screwdriver to take off the screws holding the lock. Carefully pull the lock away from the door. This exposes the metal parts inside the door.
Keep the screws safe for later. Removing these parts reduces resistance while drilling. It also prevents damage to the lock’s outside components.
Mark Drill Points
Next, mark the spots where you will drill. Find the center of the deadbolt cylinder. Use a pencil to mark the drill points clearly. Check these marks twice to ensure accuracy.
Marking helps guide the drill bit straight into the lock. This prevents slipping and accidental damage to the door. Use a piece of tape on the drill bit tip for better control.
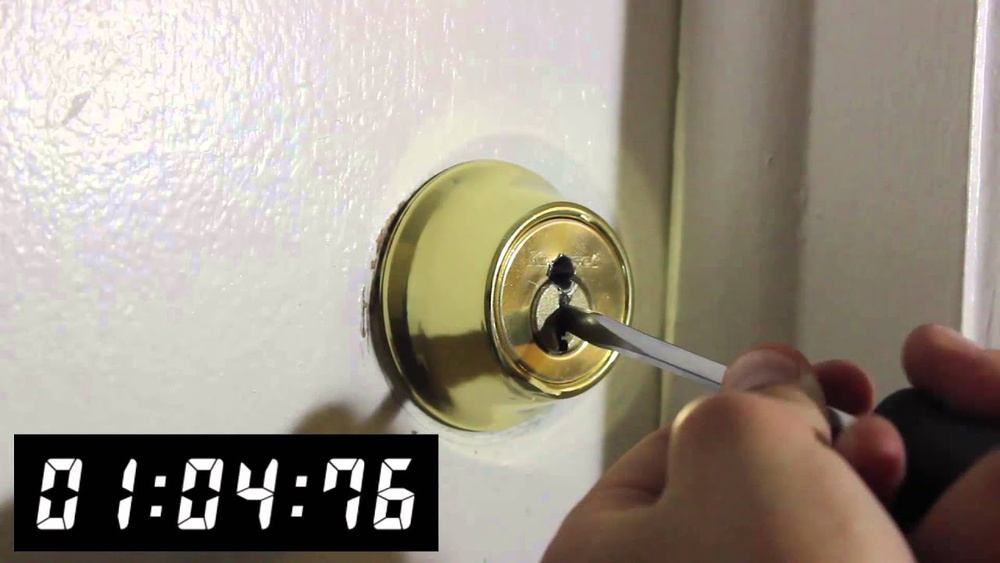
Drilling The Deadbolt
Drilling the deadbolt is a key step in removing a Kwikset lock quickly. It needs focus and the right tools. The goal is to disable the lock mechanism by carefully drilling into it. This process breaks the lock cylinder, letting you open the door.
Start With Pilot Holes
Begin by making small pilot holes on the lock face. Use a drill bit around 1/8 inch wide. These holes guide the larger drill bits later. Place the pilot holes near the keyhole center. Drill slowly to avoid slipping and damaging the door.
Drill Through The Lock Cylinder
Switch to a larger drill bit, about 1/2 inch wide. Drill straight into the lock cylinder, following the pilot holes. Use steady pressure and keep the drill level. The goal is to break the pins inside the lock. This stops the deadbolt from working.
Clear Debris
Remove metal shavings and dust from the drilled area. Use a brush or vacuum to clean the hole. Clearing debris helps you see the lock parts better. It also prevents the drill from getting stuck. Keep the area clean before trying to turn the lock open.

Credit: www.reddit.com
Removing The Deadbolt
Removing the deadbolt is a key step when you drill out a Kwikset lock. This part holds the door secure. Taking it out carefully saves time and effort. The process starts with turning and pulling the lock. If it is stuck, other methods help loosen it safely.
Turn And Pull Out Lock
First, try to turn the lock cylinder gently. Use steady pressure to avoid damage. Once it turns, pull the lock straight out. Use your fingers or pliers for a better grip. This step frees the cylinder from the door. Do not rush. Slow and steady works best.
Handle Stubborn Locks
Sometimes the lock does not budge. Rust or debris may block it. Apply a little lubricant around the lock. Let it sit for a few minutes. Try turning and pulling again. If still stuck, tap lightly with a hammer. This can loosen internal parts. Avoid using force that breaks the door or lock.
Installing A New Lock
Installing a new lock after drilling out a Kwikset deadbolt is an important step. It restores security and ensures your door works properly. Choosing the right replacement and fitting it correctly makes a big difference. Follow these simple steps to get the job done right.
Choose Replacement Deadbolt
Select a deadbolt that fits your door’s thickness and style. Check the backset measurement to match your door’s existing hole. Pick a model with good durability and smooth operation. Consider a lock with easy installation instructions. A quality deadbolt improves safety and lasts longer.
Fit And Secure New Lock
Insert the new deadbolt into the door hole carefully. Align the latch with the edge of the door. Secure the lock with screws, tightening firmly but not too tight. Attach the exterior and interior parts, making sure they fit flush. Test the lock by turning the key or thumb turn to confirm smooth action.

Credit: www.reddit.com
Safety Tips
Drilling a Kwikset deadbolt needs care to avoid injury or damage. Wear safety glasses and use the right drill bit. Keep hands clear and drill slowly for control.
Protecting The Door
Drilling a Kwikset deadbolt can damage the door. Use masking tape on the drill area. This helps reduce splintering and scratches. Choose the right drill bit size to avoid making holes too large. Drill slowly to keep control and protect door material. Keep the drill steady and straight to prevent extra damage.
Avoiding Injury
Wear safety goggles to protect your eyes from flying debris. Gloves help protect your hands from sharp edges and slips. Keep your fingers away from the drill bit and moving parts. Work in a well-lit area to see clearly and avoid mistakes. Take breaks if you feel tired to maintain focus and safety.

Credit: www.youtube.com
Frequently Asked Questions
How Do You Safely Drill Out A Kwikset Deadbolt?
To drill out a Kwikset deadbolt, use a power drill with a 1/8-inch bit first. Drill through the lock cylinder carefully. Increase the bit size to 1/4-inch to remove the internal pins. Always wear safety goggles and work slowly to avoid damage.
What Tools Are Needed To Drill Out A Kwikset Deadbolt?
You need a power drill, 1/8-inch and 1/4-inch drill bits, a screwdriver, and safety goggles. A center punch can help mark drilling spots. These tools ensure precise and safe removal of the Kwikset deadbolt lock.
Can Drilling Out A Kwikset Deadbolt Damage The Door?
Yes, drilling incorrectly can damage the door or lock. Use the right drill bits and steady pressure. Avoid drilling beyond the lock cylinder to prevent door damage. Proper technique minimizes risks and preserves the door’s integrity.
How Long Does It Take To Drill Out A Kwikset Deadbolt?
Drilling out a Kwikset deadbolt typically takes 10-20 minutes. The time depends on your skill level and tools. Taking your time ensures safety and prevents damage. Rushing may cause mistakes or damage the door.
Conclusion
Drilling out a Kwikset deadbolt takes care and the right tools. Stay patient and follow each step carefully. Avoid rushing to prevent damage to your door. Always wear safety gear to protect yourself. After drilling, clean the area well before installing a new lock.
This process helps regain access safely and quickly. Now, you can handle this task with confidence and ease.