Have you ever struggled to remove a curtain rod anchor stuck deep in your wall? It can be frustrating when that small piece just won’t budge, leaving you worried about damaging your wall or spending hours on a simple fix.
But don’t worry—getting that anchor out doesn’t have to be a headache. You’ll discover easy, step-by-step methods to safely and quickly remove curtain rod anchors, saving your wall and your time. Keep reading, and you’ll be surprised how simple the process can be.
Credit: www.reddit.com
Tools Needed
Removing a curtain rod anchor from a wall requires the right tools. Using proper tools makes the job easier and prevents damage. Some tools are common in most homes, while others are made for specific removal tasks.
Common Household Tools
Basic tools work well for many curtain rod anchor removals. A flathead screwdriver helps pry the anchor from the wall carefully. Pliers provide grip to pull out stubborn anchors. A hammer can tap the screwdriver or help loosen anchors stuck inside the wall. A utility knife allows cutting around the anchor to free it gently. These tools are easy to find and usually enough for simple removals.
Specialized Removal Tools
Sometimes, specialized tools speed up the process. An anchor removal tool is designed to grip and pull anchors without wall damage. A drill with a screwdriver bit can unscrew anchors fixed by screws. Wall patching kits help fix holes after removal. These tools are useful when anchors are deeply embedded or when many need removal. They reduce effort and protect the wall surface.
Safety Precautions
Removing a curtain rod anchor from the wall can be tricky and might cause damage. Taking safety precautions helps protect you and your walls during this task. Following simple safety steps makes the process easier and safer.
Protective Gear
Wear safety glasses to protect your eyes from dust and debris. Gloves keep your hands safe from sharp edges and splinters. Use a dust mask if the wall material creates dust. These simple tools reduce injury risks.
Wall Protection Tips
Place painter’s tape around the anchor to protect paint and drywall. Use a putty knife to gently pry the anchor without damaging the wall. Work slowly to avoid creating holes or cracks. Cover the area with a cloth to catch falling debris.
Identify The Type Of Anchor
Removing a curtain rod anchor from the wall starts with identifying the anchor type. Different anchors need different removal methods. Knowing the type helps avoid wall damage and makes the job easier. Here is a guide to common anchor types you might find behind curtain rods.
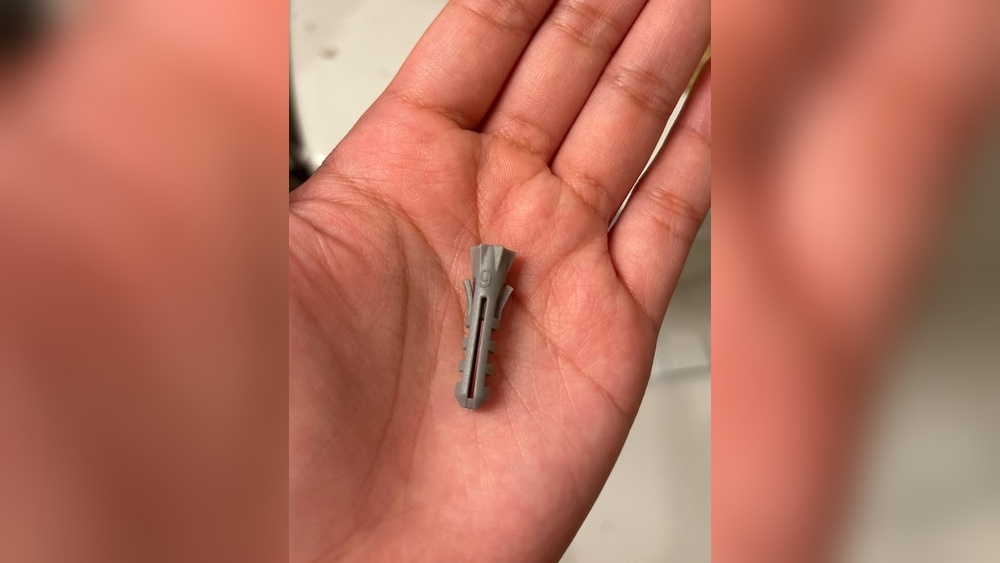
Plastic Expansion Anchors
Plastic expansion anchors are common in drywall. They look like small plastic tubes inserted into a drilled hole. The screw expands the anchor, holding it tight in the wall. These anchors are usually easy to spot because they stick out slightly or have a visible lip on the surface. Removing them often means pulling gently or pushing them inside the wall after unscrewing.
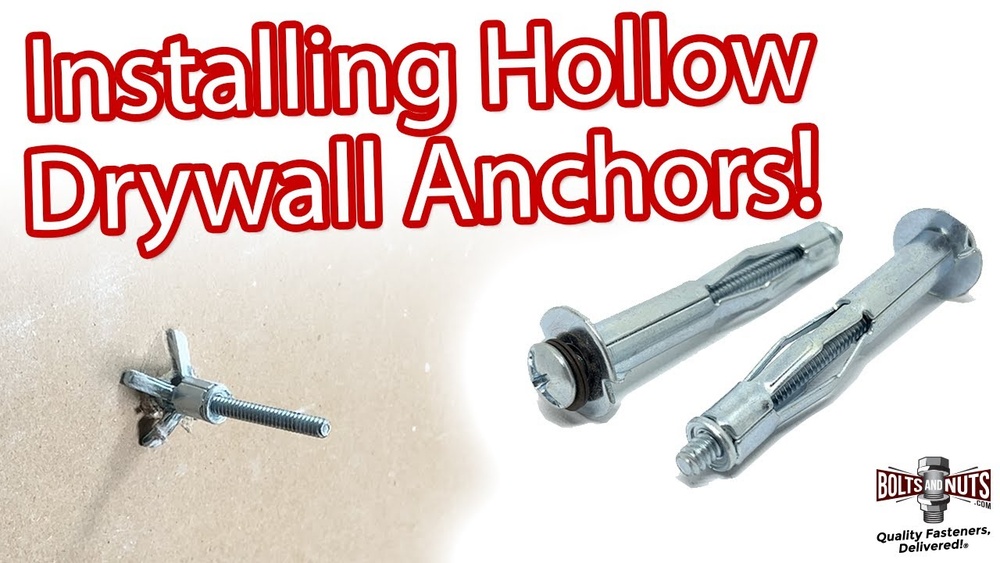
Metal Molly Bolts
Metal molly bolts are metal anchors with a sleeve and a screw. They expand behind the wall to hold heavy items. You can identify molly bolts by their metal collar visible on the surface. They are stronger than plastic anchors. To remove, the bolt usually needs to be unscrewed, and the metal sleeve either pulled out or pushed inside the wall cavity.
Toggle Bolts
Toggle bolts have metal wings that open inside the wall. The wings provide strong support for heavy curtains. The wings are hidden, but the bolt head is visible on the surface. These bolts need the screw to be fully unscrewed. After that, the wings fall inside the wall, so the anchor cannot be pulled out easily. You may need to patch the hole afterward.
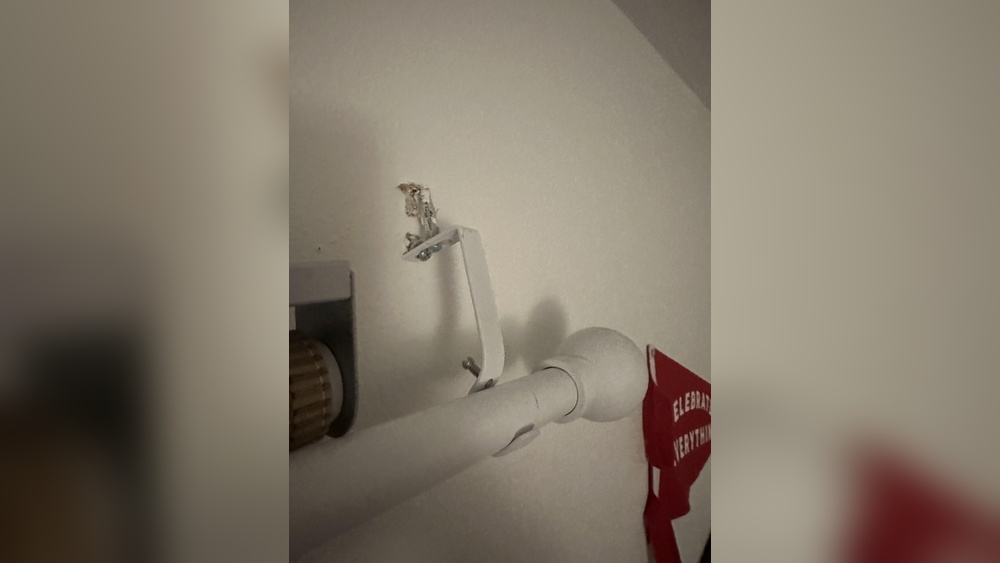
Credit: www.younghouselove.com
Step-by-step Removal Methods
Removing a curtain rod anchor from a wall can seem tricky. Using the right method makes the job easier and prevents wall damage. Below are simple, step-by-step ways to remove these anchors safely. Choose the method that fits your tools and the anchor type.
Using Pliers
First, grip the anchor with needle-nose pliers. Pull the anchor straight out slowly. Wiggle it gently if it feels stuck. Avoid twisting too hard to prevent wall damage. If the anchor breaks, try another method.
Using A Screwdriver
Insert a flathead screwdriver between the wall and the anchor edge. Pry the anchor out carefully. Use slow, steady pressure. Work around the anchor to loosen it evenly. This method works best for plastic anchors.
Drilling Out The Anchor
Choose a drill bit slightly smaller than the anchor. Drill slowly into the center of the anchor. The drill will break the anchor apart inside the wall. Remove the broken pieces with pliers or vacuum. This method suits stubborn metal anchors.
Dealing With Stubborn Anchors
Removing a curtain rod anchor can be tricky, especially when it feels stuck tight. Some anchors dig in deep, making them hard to pull out. Stubborn anchors need special care to avoid wall damage. Try gentle tricks first. Patience helps. Use the right tools and methods to loosen the anchor safely.
Applying Lubricants
Lubricants can ease the anchor’s grip inside the wall. Use a small amount of WD-40 or silicone spray. Spray it directly around the anchor’s edge. Let it sit for 5 to 10 minutes. The lubricant helps the anchor slide out easier. Avoid using too much to prevent wall stains. Use a cloth to wipe any excess.
Using Heat
Heat can soften the wall material around the anchor. Use a hairdryer set to medium heat. Hold it close to the anchor for about 2 minutes. This warms the plastic or drywall, making the anchor less tight. Avoid overheating to protect the paint or wallpaper. Test the heat level on a hidden spot first.
Tapping Techniques
Tapping helps loosen anchors stuck deep inside. Use a small hammer or a screwdriver handle. Gently tap around the anchor’s edges. This shakes the anchor and breaks its hold. Tap lightly to avoid wall damage. After tapping, try pulling the anchor out slowly. Repeat tapping if needed before pulling harder.
Repairing The Wall After Removal
After removing the curtain rod anchor, the wall will have holes and rough spots. Repairing these areas makes the wall look clean and smooth again. This process is simple and requires only a few tools and materials. Follow these steps to fix your wall and prepare it for painting or hanging new decorations.
Filling Holes
Start by cleaning the holes from dust and loose debris. Use a putty knife to apply wall filler or spackle into each hole. Press the filler firmly so it fills the entire hole. Smooth the surface as much as possible. Let the filler dry fully before moving on. Drying time can vary depending on the product used.
Sanding And Smoothing
Once the filler is dry, gently sand the area with fine-grit sandpaper. Sand until the wall surface feels even and smooth to the touch. Be careful not to sand too hard and damage the surrounding wall. Wipe away dust with a clean, dry cloth. This step ensures a seamless finish for painting.
Painting Touch-ups
Match your wall paint color to cover the repaired spots. Use a small brush or roller for precise application. Apply one or two thin coats for even coverage. Allow each coat to dry completely before applying the next. Proper painting hides repairs and restores your wall’s original look.
Preventing Wall Damage
Removing curtain rod anchors can damage walls if done carelessly. Preventing wall damage is important for a clean, smooth surface. Using the right tools and techniques protects your walls and saves repair time. Follow simple steps to keep your walls intact while removing anchors.
Choosing The Right Anchor
Select anchors based on your wall type. Drywall needs plastic or metal anchors made for light to medium loads. Use toggle bolts for heavier curtains and plaster walls. Avoid anchors that are too large or too small for the wall hole. The correct anchor holds firmly and reduces wall damage during removal.
Proper Installation Tips
Drill holes carefully to avoid cracks. Use a drill bit that matches the anchor size. Insert anchors gently without forcing them in. Tighten screws slowly to prevent wall stress. Check anchor alignment to keep pressure even. Proper installation makes removal easier and safer for your walls.

Credit: www.youtube.com
Frequently Asked Questions
How Do I Remove A Curtain Rod Anchor Safely?
To remove a curtain rod anchor safely, use a pair of pliers to grip the anchor. Pull it out gently while twisting slightly. Avoid damaging the wall by applying slow, steady pressure. If the anchor resists, try loosening it with a screwdriver first.
What Tools Help Remove Curtain Rod Anchors Easily?
Helpful tools include needle-nose pliers, flathead screwdrivers, and a utility knife. Pliers grip and pull anchors. A screwdriver can loosen stuck anchors. A utility knife helps score around the anchor to prevent wall damage during removal.
Can I Reuse Curtain Rod Anchors After Removal?
Reusing curtain rod anchors is not recommended. They often deform or weaken during removal. Using new anchors ensures a secure hold and prevents damage. Always replace anchors when rehanging curtains for safety and stability.
How To Fix Holes After Removing Curtain Rod Anchors?
Fill holes with wall putty or spackle using a putty knife. Let it dry completely, then sand smooth. Paint over the patch to match the wall color. This restores the wall’s appearance after anchor removal.
Conclusion
Removing a curtain rod anchor from the wall is simple with the right steps. Use basic tools like pliers or a screwdriver carefully. Take your time to avoid wall damage. After removal, patch up holes to keep walls smooth. This helps prepare for new curtain rods or decorations.
Practice patience and follow safety tips to get the best results. Small fixes can make your home look neat and fresh again. Keep these tips handy for any future wall projects.