Are you ready to make your electrical sub panel installation safer and more secure? Knowing how to attach wall anchors for your sub panel is a crucial step that many people overlook.
If you don’t get it right, your panel could become loose or even fall, causing damage or safety hazards. But don’t worry—this guide will walk you through simple, clear steps to ensure your sub panel stays firmly in place. By the end, you’ll feel confident handling this task like a pro.
Keep reading to learn exactly what you need to do to protect your home and electrical system.
Choosing The Right Wall Anchors
Choosing the right wall anchors is key to a safe and strong sub panel installation. The right anchor holds the panel firmly in place. It also protects the wall from damage. Picking the wrong anchor can cause the panel to fall or the wall to crack. Understanding different anchors helps you pick the best one for your wall and load.
Types Of Wall Anchors
There are several types of wall anchors. Plastic expansion anchors expand when a screw is driven in. They work well in drywall and light materials. Metal anchors, like molly bolts, spread inside the wall for more strength. Toggle bolts have wings that open behind the wall for heavy loads. Each type fits different wall types and weights.
Matching Anchors To Wall Material
Anchor choice depends on the wall material. Drywall needs anchors that expand or toggle behind the wall. Concrete or brick walls require anchors that drill into the surface. Wood walls allow screws to go directly without anchors. Knowing your wall type helps pick anchors that fit tightly and hold well.
Weight Capacity Considerations
Consider the weight of the sub panel and equipment. Each anchor has a weight limit. Choose an anchor that holds more than the total weight. Using weak anchors risks panel falling and damage. It is safer to select anchors with higher capacity for heavy panels.
Tools And Materials Needed
Attaching wall anchors for a sub panel requires the right tools and materials. Using proper equipment makes the job easier and safer. It helps you secure the panel firmly on the wall. This section lists all essentials for the task.
Essential Tools
- Power drill with drill bits
- Screwdriver (flathead and Phillips)
- Hammer
- Measuring tape
- Level
- Stud finder
- Utility knife
Safety Gear
- Safety goggles to protect your eyes
- Work gloves to protect your hands
- Dust mask for breathing safety
- Ear protection if using loud tools
Additional Supplies
- Wall anchors suitable for your wall type
- Mounting screws that fit the anchors
- Electrical tape
- Wire nuts for connections
- Marker or pencil for marking spots
Preparing The Wall For Installation
Preparing the wall for installation is a vital step before attaching wall anchors for a sub panel. This stage ensures that the anchors hold firmly and the panel stays secure. Proper preparation avoids damage to the wall and helps maintain safety throughout the project.
Locating Studs And Marking Spots
Find the studs behind the wall using a stud finder or tapping method. Mark the spots with a pencil where the anchors will go. Anchors placed in studs provide stronger support for the sub panel. Avoid areas with pipes or wires to prevent accidents.
Measuring And Leveling
Measure the distance between anchor points carefully. Use a level tool to make sure the marks are straight and even. Proper alignment keeps the sub panel balanced and looks professional. Double-check all measurements before drilling holes.
Cleaning The Surface
Clean the wall surface to remove dust and debris. Use a damp cloth or mild cleaner for better adhesion. A clean surface helps the anchors stick well and prevents slipping. Allow the wall to dry completely before starting installation.
Drilling Holes For Wall Anchors
Drilling holes for wall anchors is a key step in installing a sub panel. Precise drilling ensures the anchors hold tightly and support the panel well. Careful preparation can prevent damage to walls and improve safety. Follow the right steps for clean, secure holes.
Selecting Drill Bit Size
Choose a drill bit that matches the wall anchor size. The hole must be just big enough for the anchor to fit snugly. Too small a bit can break the anchor. Too large makes the anchor loose. Check the anchor packaging for the recommended drill bit size.
Drilling At Correct Depth
Drill the hole to the exact depth of the wall anchor. Mark the drill bit with tape to avoid drilling too deep. A shallow hole will not hold the anchor properly. A hole too deep can weaken the anchor’s grip. Keep the drill steady and drill straight into the wall.
Avoiding Common Mistakes
Do not force the drill or push too hard. This can crack the wall or damage the anchor. Always use a level to keep holes straight and aligned. Avoid drilling near electrical wires or plumbing. Clear dust from the hole before inserting the anchor. This helps the anchor grip tightly.
Installing Wall Anchors
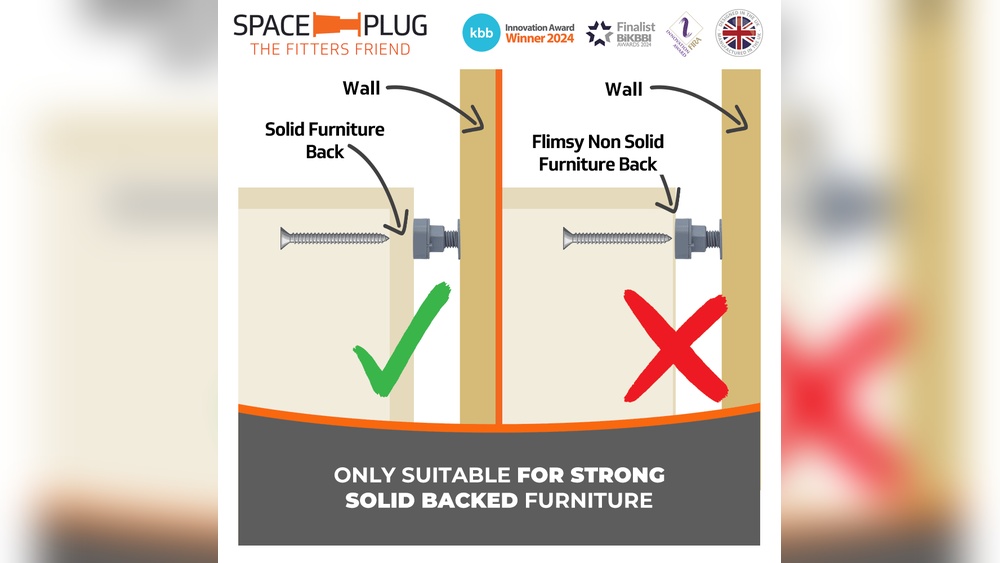
Installing wall anchors is a key step in mounting a sub panel safely and securely. Anchors help hold screws tight in drywall or masonry. They prevent the panel from falling or loosening over time.
Different types of anchors fit different wall materials and weights. Choosing the right anchor and installing it correctly ensures strong support. Follow these methods for common wall anchors.
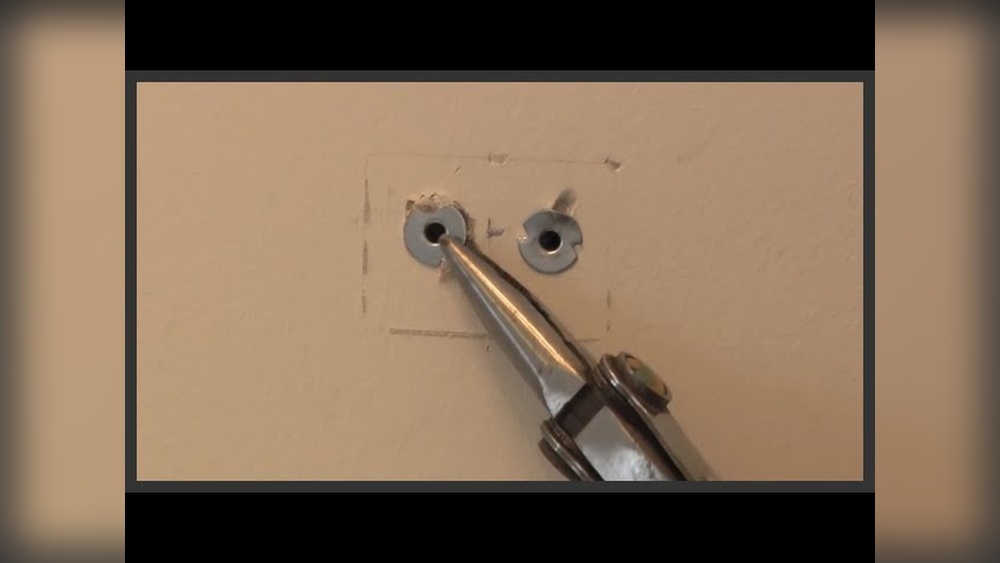
Inserting Plastic Anchors
Plastic anchors work well for light loads on drywall. Start by drilling a hole that fits the anchor size. Push the plastic anchor into the hole until flush with the wall. Tap gently with a hammer if needed. Screw the mounting screw into the anchor slowly. The anchor expands inside the wall for a tight hold.
Using Toggle Bolts
Toggle bolts are strong and good for heavier panels. Drill a hole wide enough for the closed toggle. Thread the bolt through the panel hole and attach the toggle on the bolt end. Push the toggle through the wall hole. It opens behind the wall to spread the load. Tighten the bolt carefully to secure the panel.
Setting Metal Anchors
Metal anchors suit heavy loads on drywall or masonry. Drill a hole matching the metal anchor size. Insert the anchor into the hole until flush. Drive the screw into the anchor, which expands to grip the wall. Metal anchors give firm support for sub panels. Always check anchor ratings before use.

Credit: backyardoas.com
Mounting The Sub Panel
Mounting the sub panel is a key step in your electrical setup. It must be done carefully to ensure safety and durability. Proper mounting keeps the panel stable and accessible for future work. Follow these steps to attach your sub panel securely.
Aligning The Panel
Start by placing the sub panel against the wall. Use a level tool to check if it is straight. Mark the spots where the screws will go. Make sure the panel is at a comfortable height for access. Proper alignment prevents problems later.
Securing With Screws
Drill pilot holes on the marked spots. Use wall anchors if the wall material is weak. Insert the anchors firmly to hold the screws tight. Screw the panel in place using the right size screws. Tighten the screws evenly to avoid tilting.
Checking Stability
After attaching, push the panel gently to test firmness. It should not move or wobble. Check all screws to ensure they are tight. A stable panel protects wiring and prevents accidents. Fix any loose parts before finishing the job.
Final Tips And Safety Precautions
Attaching wall anchors for a sub panel requires care and attention. Final tips and safety precautions help ensure a secure and safe installation. Follow these guidelines to avoid problems and keep your setup reliable.
Double-checking Connections
Check all connections twice before powering the panel. Tighten screws firmly but avoid over-tightening. Loose or faulty connections can cause sparks or failures. Use a tester to verify each wire is correctly placed. Confirm the wall anchors hold the panel securely in place.
Avoiding Electrical Hazards
Turn off the main power before starting any work. Wear insulated gloves to protect against shocks. Use tools with insulated handles for safety. Keep water and moisture away from the panel area. Never touch exposed wires or terminals with bare hands.
Maintaining The Installation
Inspect the sub panel regularly for signs of wear or damage. Tighten any loose screws and replace damaged anchors promptly. Clean dust and debris from the panel to prevent overheating. Schedule periodic checks to keep the system safe and functional.
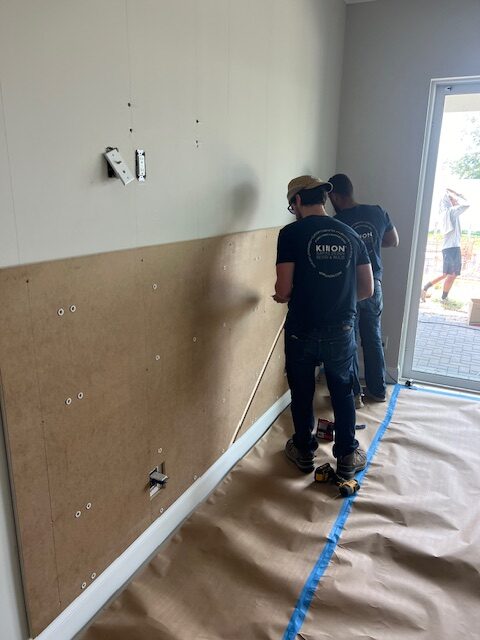
Credit: kinon.com
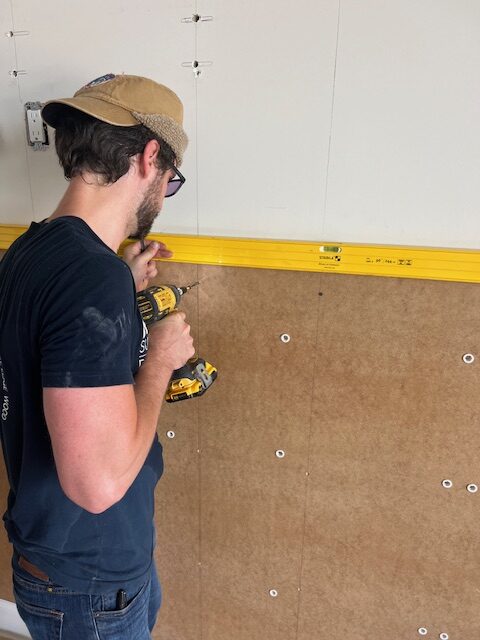
Credit: kinon.com
Frequently Asked Questions
What Types Of Wall Anchors Work Best For Sub Panels?
Heavy-duty toggle or molly anchors are ideal for sub panels. They support significant weight and ensure firm mounting on drywall or masonry.
How Do You Prepare The Wall Before Attaching Anchors?
Clean the wall surface and locate studs if possible. Mark the drilling spots accurately and use the right drill bit size for anchors.
Can I Install A Sub Panel Without Wall Anchors?
No, wall anchors provide essential support for the sub panel. Direct screwing into drywall alone won’t hold the panel securely, risking safety.
What Tools Are Needed To Attach Wall Anchors For Sub Panels?
You’ll need a drill, screwdriver, hammer, level, and appropriate drill bits. These tools help ensure precise anchor placement and secure mounting.
Conclusion
Attaching wall anchors for a sub panel is simple with the right steps. Choose the correct anchor type for your wall. Drill holes carefully and insert anchors firmly. Tighten screws to secure the panel in place. Taking these actions ensures a strong and safe installation.
Practice patience and double-check your work for best results. This method helps keep your sub panel steady and reliable. Follow these tips to complete your project confidently and safely.