Have you ever wished your room had an extra light controlled by the same switch? Adding a light to an existing switch can brighten up your space without the hassle of installing a whole new circuit.
It might sound tricky, but with the right steps, you can do it yourself safely and efficiently. You’ll discover simple, clear instructions to help you add that extra light and transform your room instantly. Keep reading—you’re just a few easy moves away from better lighting and greater control.

Credit: www.do-it-yourself-help.com
Tools And Materials Needed
Adding a light to an existing switch needs the right tools and materials. Using the correct items makes the job safer and easier. Gather all tools and materials before starting. This saves time and avoids interruptions.
Tools Needed
- Voltage tester to check power is off
- Wire stripper to remove insulation
- Screwdriver for removing switch plate and screws
- Drill for making holes if needed
- Measuring tape to measure wire length
- Needle-nose pliers for bending wires
- Flashlight or headlamp for better visibility
Materials Needed
- Light fixture suitable for the room
- Electrical wire (14 or 12 gauge depending on circuit)
- Wire nuts to connect wires safely
- Electrical tape for extra insulation
- Light switch (if replacing or adding)
- Wall box for mounting the light
- Circuit breaker or fuse for safety
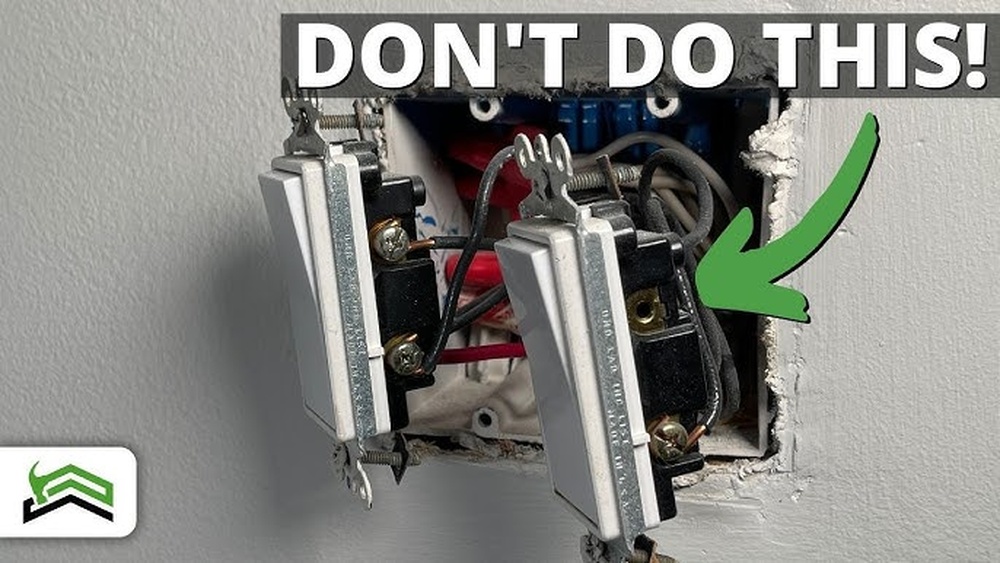
Safety Precautions
Turn off the power at the breaker before starting any electrical work. Use a voltage tester to ensure wires are not live. Always wear insulated gloves to avoid electric shock.
Turn Off The Power
Always switch off the power at the main circuit breaker. This stops electricity from flowing to the switch. Use a tester to make sure the power is off before you start working. Never trust the wall switch alone to cut power.
Use Proper Tools
Use insulated tools designed for electrical work. These tools protect you from electric shock. Avoid using metal tools without insulation. Keep your tools dry and in good condition.
Wear Safety Gear
Wear rubber-soled shoes to reduce shock risk. Use safety glasses to protect your eyes. Avoid loose clothing that can catch on wires. Gloves made for electrical work add extra safety.
Check Wiring And Equipment
Inspect wires for damage or wear before starting. Replace any frayed or old wires. Use equipment rated for your home’s voltage. Never mix old and new wiring types.
Work In A Dry Environment
Never work on electrical switches in wet areas. Moisture increases the risk of electric shock. Dry your hands and the workspace thoroughly. Avoid working in damp basements or outdoors during rain.
Preparing The Switch Box
Preparing the switch box is the first step to adding a light to an existing switch. It ensures safety and makes the installation easier. A well-prepared switch box helps avoid electrical problems and keeps wires organized.
Start by turning off the power at the circuit breaker. This prevents electric shocks during the work. Use a voltage tester to check that no electricity flows to the switch. Safety is the top priority.
Gather Necessary Tools And Materials
Collect all tools before starting. You will need a screwdriver, wire strippers, voltage tester, electrical tape, and wire connectors. Also, have the new light fixture and the right type of wire ready.
Remove The Switch Cover Plate
Unscrew the switch cover plate carefully. Set the screws aside to reuse later. Removing the cover exposes the switch box and wiring inside.
Inspect The Switch Box
Check the switch box for enough space. It should hold new wires and the light fixture cable. Look for any damaged wires or loose connections. Fix or replace damaged parts before proceeding.
Label The Wires
Use tape or markers to label each wire. This helps identify their function during installation. Labeling prevents confusion and wiring mistakes.
Running The Electrical Cable
Running the electrical cable is a key step in adding a light to an existing switch. It connects the new light fixture to the power source. This step requires careful planning and safety measures. You must follow electrical codes and use the right tools.
Start by turning off the power at the circuit breaker. This protects you from electric shock. Next, plan the path for the cable. The cable should run smoothly from the switch box to the new light location. Avoid sharp bends or damage to the cable.
Choosing The Right Cable Type
Select a cable type suited for your home wiring. Typically, 14/2 or 12/2 NM cable works for lighting circuits. The number indicates wire gauge and conductors inside. Use cable rated for indoor use and local codes.
Measuring And Cutting The Cable
Measure the distance between the switch and light fixture. Add extra length for slack and connections. Cut the cable cleanly with wire cutters. Avoid frayed ends to ensure safe connections.
Running The Cable Through Walls And Ceilings
Drill holes through studs or joists to run the cable. Use a fish tape or wire puller to guide the cable through tight spaces. Protect the cable with conduit if needed. Keep the cable away from heat sources.
Securing The Cable Properly
Use cable staples to attach the cable to framing. Space staples about every 4 feet. Do not pinch or damage the cable. Proper securing prevents movement and wear over time.
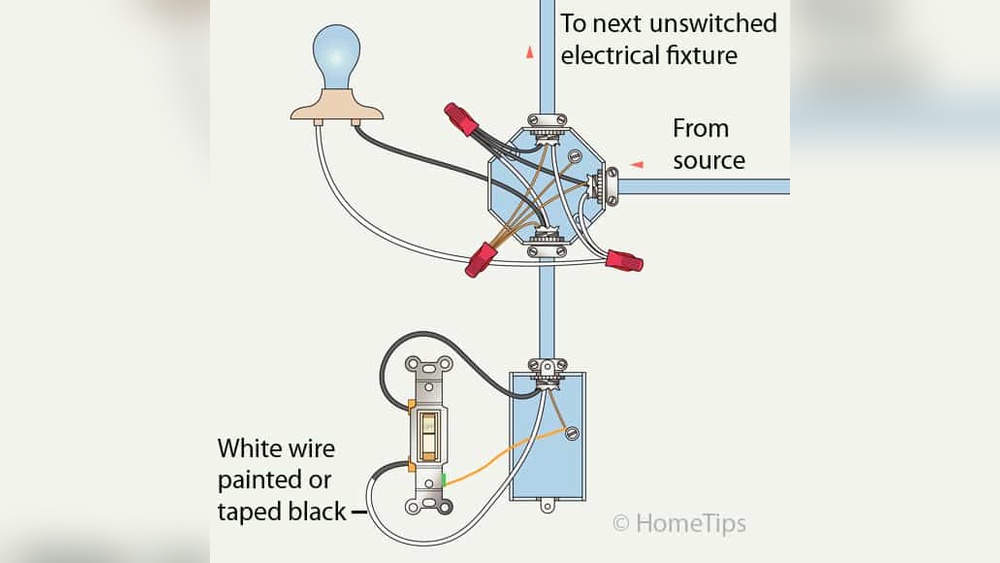
Connecting The Wires
Connecting the wires is a crucial step when adding a light to an existing switch. It involves identifying the wires, wiring the switch correctly, and connecting the light fixture. Each step must be done carefully to ensure safety and proper function.
Identifying Wire Types
First, look at the wires in the switch box. You will usually find three types: live (hot), neutral, and ground. Live wires are often black or red. Neutral wires are white. Ground wires are green or bare copper. Use a voltage tester to confirm which wire is live. This step helps avoid mistakes and electric shocks.
Wiring The Switch
Turn off the power at the circuit breaker before working on the switch. Connect the live wire from the power source to one terminal on the switch. The wire leading to the light fixture should connect to the other terminal. Attach the ground wire to the green screw on the switch. Tighten all connections to avoid loose wires.
Connecting To The Light Fixture
At the light fixture, connect the neutral wire from the power source to the fixture’s neutral wire. Connect the live wire from the switch to the fixture’s live wire. Attach the ground wire to the fixture’s ground screw or wire. Use wire nuts to secure all connections. Check all wiring before restoring power to the circuit.
Installing The Light Fixture
Installing the light fixture is the next step after wiring the switch. This part needs care and attention. A properly installed light fixture looks good and works safely.
Follow the steps carefully to fix the fixture correctly. Use the right tools and materials for the job. This will make the process smooth and safe.
Preparing The Mounting Area
Turn off the power at the breaker box. Check the wires with a tester to confirm no electricity flows. Remove any old fixture or cover from the switch box.
Clear the area so you have space to work. Inspect the box for damage or loose parts. Fix or replace the box if needed for secure mounting.
Match the fixture wires to the house wires by color. Usually, black goes to black, white to white, and green or bare wire to ground. Use wire nuts to twist wires together tightly.
Wrap electrical tape around the wire nuts for extra safety. Push the connected wires neatly into the box. Avoid squeezing or bending wires sharply.
Securing The Fixture
Hold the fixture base against the mounting box. Align the screw holes and fasten screws firmly but gently. Check that the fixture sits flat and does not wobble.
Attach any covers or decorative parts as per instructions. Make sure all parts fit well and look clean. This completes the physical installation of the light fixture.
Testing The Installation
Testing the installation is a crucial step after adding a light to an existing switch. It ensures everything works safely and correctly. You can avoid problems like short circuits or faulty wiring by testing carefully. Follow simple steps to check your work and confirm the light turns on and off as expected.
Turn On The Power
Start by switching the circuit breaker back on. This restores power to the switch and light. Never test without power; it won’t work and could be unsafe. Use caution to avoid electric shocks.
Check The Light Operation
Flip the switch to the ‘on’ position. The new light should illuminate immediately. If the light does not turn on, try switching it off and on again. This helps confirm if the wiring is correct and the bulb is good.
Test For Loose Connections
Gently wiggle the switch and light fixture. Watch for flickering or dimming. Flickering means a loose wire or bad connection. Turn off power before tightening any connections. Secure all wires firmly to avoid hazards.
Use A Voltage Tester
Employ a voltage tester to check live wires. Place the tester near the switch terminals. A reading means power flows properly. No reading may indicate a wiring issue. Voltage testers help confirm safe and proper function.

Credit: www.finehomebuilding.com
Troubleshooting Common Issues
Adding a light to an existing switch is a useful home upgrade. Sometimes, problems come up during or after installation. Troubleshooting common issues can save time and avoid frustration. This section helps identify and fix frequent problems quickly. Clear steps make the process easier for everyone.
Checking The Power Supply
Start by ensuring the power is on at the breaker. A tripped breaker can stop the light from working. Use a voltage tester to check the switch wires. No power means the breaker or wiring may need attention.
Verifying Correct Wiring
Incorrect wiring causes lights to fail or flicker. Match wires by color and function carefully. Use the instructions or diagrams from the light and switch. Loose connections can also cause issues. Tighten all wire nuts securely.
Inspecting The Light Bulb And Fixture
Sometimes the problem is the bulb itself. Test the bulb in another socket to confirm it works. Check the fixture for damage or dirt. Replace broken parts or clean contacts as needed.
Testing The Switch Function
The switch might be faulty or installed wrong. Flip the switch on and off to see if it controls power. Use a multimeter to test the switch terminals. Replace the switch if it shows no continuity when on.
Confirming Ground And Neutral Connections
Proper grounding is essential for safety and function. Make sure ground wires connect to the switch and fixture. Neutral wires must also connect correctly. Loose or missing wires can cause the light to fail.

Credit: diy.stackexchange.com
Frequently Asked Questions
How Do I Add A Light To An Existing Switch?
To add a light, first turn off the power at the breaker. Then, connect the new light fixture wiring to the existing switch wires. Use wire nuts and secure connections. Finally, mount the light and restore power to test.
Can I Add A Light Without Rewiring The Switch?
No, adding a light usually requires wiring changes. You must connect the new fixture to the switch’s power source. This ensures the switch controls the new light safely and effectively.
What Tools Are Needed To Add A Light To A Switch?
You need a screwdriver, wire stripper, voltage tester, wire nuts, electrical tape, and a drill. These tools help you safely connect and mount the new light fixture.
Is It Safe To Add A Light To An Existing Switch?
Yes, if you turn off the power and follow electrical codes. Use proper wiring techniques and secure connections to prevent hazards. When unsure, consult a licensed electrician.
Conclusion
Adding a light to an existing switch can brighten your space easily. Follow the steps carefully for a safe and neat setup. Double-check all connections and turn off power before starting. This small change can improve your room’s look and function.
Take your time and enjoy the new lighting. Simple fixes like this bring big benefits to your home.