Are you tired of your plain light switch blending into the wall? Changing the color of your light switch is a simple way to refresh your room’s look without a big renovation.
Imagine how a small change like this can brighten up your space and match your style perfectly. In this guide, you’ll learn easy steps to change your light switch color safely and quickly. Keep reading, and you’ll discover how to make this quick upgrade that adds a touch of personality to your home.
Choose The Right Switch Color
Choosing the right color for your light switch can change the look of any room. The color should fit well with your walls and furniture. It should also match the style of the room. Picking the perfect switch color makes your space feel more complete and polished.
Match Your Room Decor
Look at the colors in your room first. Pick a switch color that blends with the wall paint or wallpaper. For bright walls, choose a neutral switch color. For neutral walls, a bold switch color can add interest. The switch should not stand out too much. It should feel like part of the room’s design.
Consider Switch Material
Switches come in plastic, metal, or glass. Each material has a different look and feel. Plastic switches are common and come in many colors. Metal switches add a modern, sleek touch. Glass switches look elegant but need careful cleaning. Choose the material that fits your room style and daily use.
Explore Popular Color Options
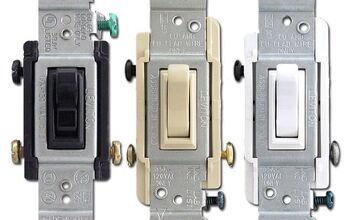
White is the most common switch color. It fits most rooms and looks clean. Beige and cream offer a softer, warmer look. Black switches create a strong, modern contrast. Gray is a good choice for a subtle, stylish look. Pick a popular color that suits your room’s mood and style.
Credit: www.youtube.com
Gather Necessary Tools
Gathering the right tools is the first step to change a light switch color safely and smoothly. Having everything ready helps you finish the job faster. It also reduces the chance of mistakes. Prepare your workspace and collect tools before starting.
Safety Gear
Wear safety gloves to protect your hands from sharp edges. Use safety glasses to keep dust and debris out of your eyes. Turn off the power at the circuit breaker to avoid electric shock. Test the switch with a voltage tester to confirm the power is off.
Basic Tools Needed
A screwdriver is essential to remove the switch cover and screws. Use a flathead or Phillips screwdriver depending on your switch type. A voltage tester ensures the power is off before touching wires. Needle-nose pliers help to bend or hold wires in place. A utility knife can cut paint or caulk around the switch plate.
Optional Accessories
Painter’s tape helps protect the wall and switch plate from paint. A small paintbrush or foam brush works well for painting the switch cover. A screwdriver with a built-in light makes it easier to see in dim areas. Wire nuts may be needed if you disconnect any wires. A level ensures the switch plate aligns perfectly after installation.
Turn Off Power Safely
Changing the color of a light switch can refresh a room’s look. Safety is the first step. Turning off power stops accidents and shocks. Follow careful steps to make sure power is off before you start.
Locate Circuit Breaker
Find your home’s circuit breaker box. It is usually in the basement, garage, or utility room. Open the panel and look for the switch that controls the light switch area. The switch may be labeled with room names or numbers.
Flip the correct breaker to the OFF position. This cuts power to the switch you want to change. Take your time to be sure you choose the right one.
Double Check Power Off
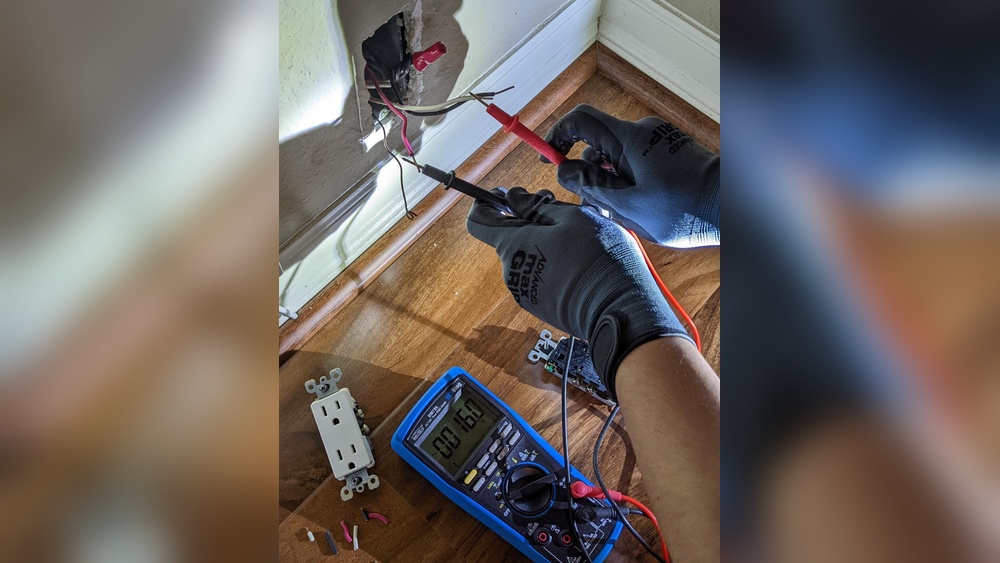
Even after switching off the breaker, verify power is really off. Use a voltage tester or a non-contact voltage detector. Touch the tester to the wires or switch terminals. No light or sound means no electricity.
Another way is to flip the light switch. If the light does not turn on, power is off. Never skip this step. It keeps you safe while working on electrical parts.
Remove Existing Switch Cover
Removing the existing switch cover is the first step in changing your light switch color. This task is simple and requires only a few tools. Taking care during this process helps avoid damage to the switch or wall. Follow these steps to remove the cover safely and prepare for the new color.
Unscrew Faceplate
Start by turning off the power to the switch at the circuit breaker. Use a flathead or Phillips screwdriver to remove the screws holding the faceplate. Keep the screws in a safe place to use later. Gently pull the faceplate away from the wall. If it feels stuck, wiggle it slightly to loosen it.
Handle Switch Carefully
After removing the faceplate, avoid touching the switch’s internal parts. Hold the switch by its edges to keep it steady. Do not pull on the wires or force the switch out. Take your time to prevent damage. Proper handling makes the next steps easier and safer.
Swap The Switch Cover
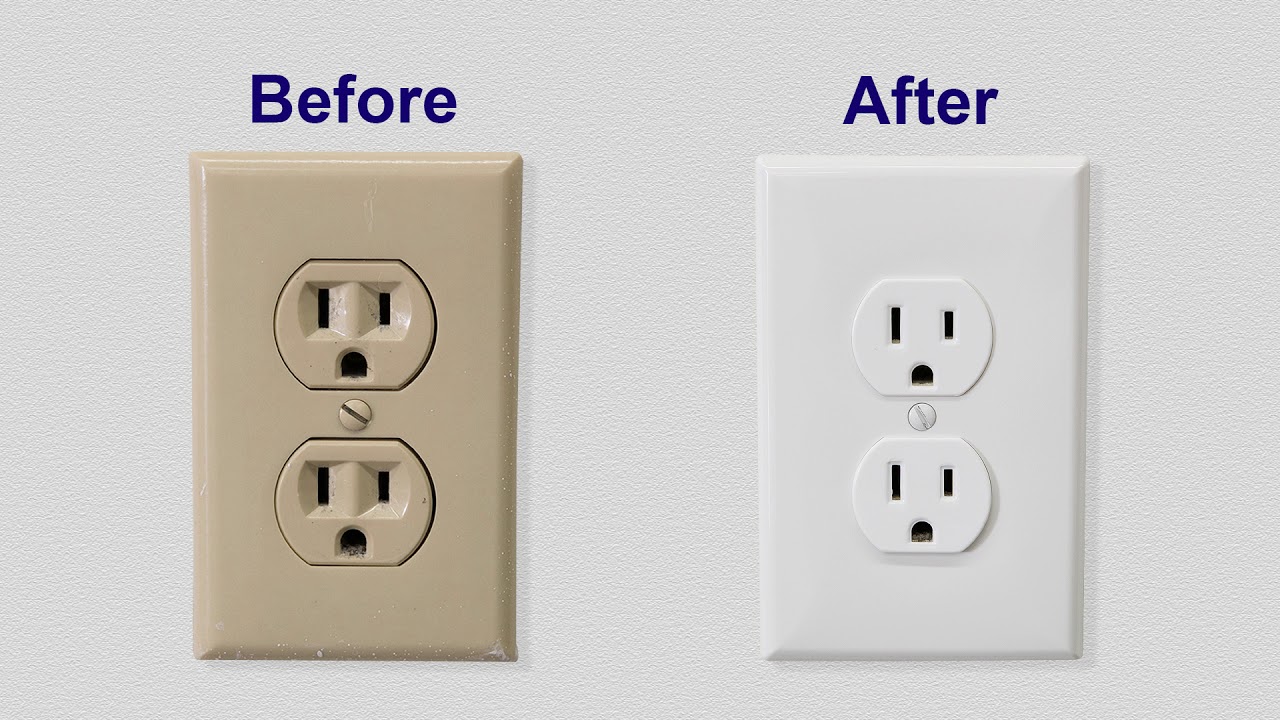
Swapping the switch cover is a simple step to change the light switch color. It gives your room a fresh, updated look without much effort. This step involves removing the old cover and placing a new one that matches your style.
Align New Cover
Place the new cover over the switch carefully. Make sure the holes line up with the switch screws. The cover should fit snugly against the wall. Check for any gaps or misalignment. A well-aligned cover looks neat and professional.
Secure Screws Properly
Use a screwdriver to tighten the screws gently. Do not overtighten to avoid cracking the cover. Tighten each screw a little at a time for even pressure. The cover should stay firm and not move. Properly secured screws keep the cover safe and stable.
Credit: www.hometalk.com
Test The New Switch
Testing the new light switch is a key step after installation. It ensures the switch works safely and correctly. Follow simple checks to confirm everything is fine before finishing your project.
Restore Power
Turn the circuit breaker back on. This restores electricity to the switch. Make sure the area is dry and clear of tools. Safety first.
Check Functionality
Flip the switch up and down. The light should turn on and off smoothly. Listen for any unusual sounds. No buzzing or crackling means good contact. If the light works well, your new switch is ready to use.
Tips For A Professional Finish
Changing the color of a light switch can refresh a room’s look. A neat finish makes all the difference. Follow these tips to get a clean, professional result. Small details matter and help your work stand out.
Clean Surrounding Area
Before starting, clean the wall and switch plate. Dust and dirt stop paint from sticking well. Use a damp cloth to wipe the area. Let it dry completely. Cover nearby surfaces with painter’s tape. This keeps paint off walls and fixtures.
Avoid Common Mistakes
Remove the switch plate carefully. Paint the plate outside for better control. Apply thin, even coats to avoid drips. Let each coat dry before adding the next. Avoid using strong paint that can crack. Use paint designed for plastic or metal switches. Reattach the plate only after full drying. This prevents smudges and uneven texture.

Credit: www.youtube.com
Frequently Asked Questions
How Do I Change A Light Switch Color Safely?
Turn off the power at the breaker before starting. Remove the switch plate and unscrew the switch. Replace with a new colored switch or paint the existing one using spray paint designed for plastic.
Can I Paint My Existing Light Switch?
Yes, you can paint a plastic switch with spray paint. Use primer first and apply thin, even coats. Avoid painting the toggle to keep functionality intact. Let it dry completely before reinstalling.
What Tools Do I Need To Change Switch Color?
You need a screwdriver, painter’s tape, and spray paint or a new colored switch. Turn off power for safety. Painter’s tape helps protect surrounding walls and plates during painting.
Will Changing Switch Color Affect Electrical Safety?
No, changing the color does not affect safety if done properly. Always turn off power before handling the switch. Use quality materials and ensure no paint covers electrical contacts.
Conclusion
Changing a light switch color can brighten any room quickly. Choose a color that matches your style and décor. Always turn off the power before you start working. Take your time and follow safety steps carefully. A fresh switch color adds a small but noticeable change.
You don’t need special skills or tools to do it. Enjoy the new look and feel of your space. Small updates like this can make your home feel new again. Give it a try and see the difference yourself.