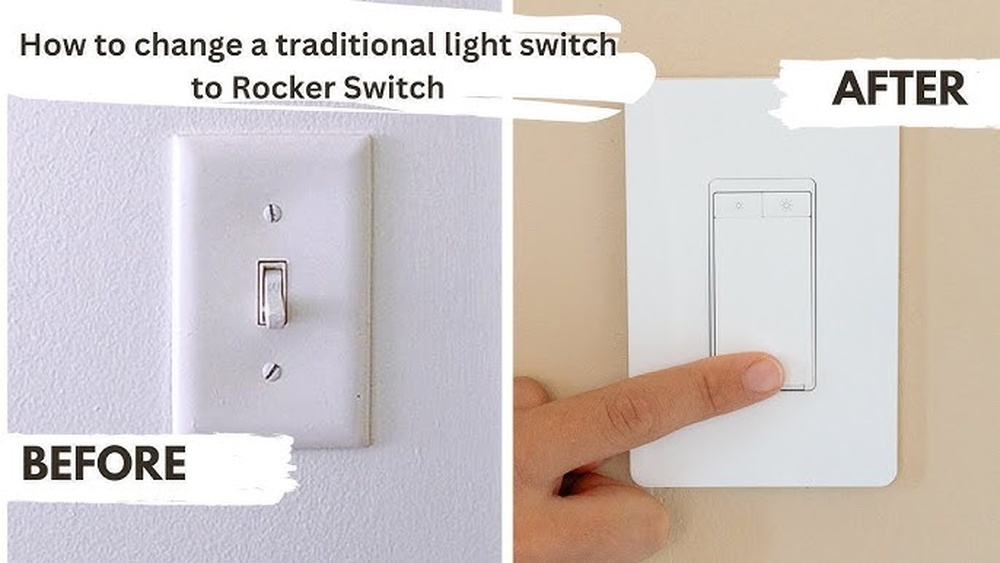
Are you tired of your old toggle light switch and ready for a sleek, modern upgrade? Changing your light switch from toggle to rocker can instantly refresh the look of any room.
Plus, rocker switches are easier to use and give your home a cleaner, more stylish feel. You might think this is a tricky job, but with the right steps, you can do it yourself quickly and safely. Keep reading, and you’ll learn exactly how to make the switch with confidence—no electrician needed!
Tools And Materials Needed
Changing a light switch from toggle to rocker needs some basic tools and materials. Having the right items makes the job safer and easier. Prepare everything before you start to avoid delays.
Essential Tools
Gather these tools for the switch change:
- Screwdriver (flathead and Phillips)
- Voltage tester
- Wire stripper
- Needle-nose pliers
- Flashlight or work light
- Electrical tape
Materials Needed
Collect these materials for a smooth switch replacement:
- Rocker switch compatible with your wiring
- Wire connectors (wire nuts)
- Wall plate for rocker switch
- Replacement screws (if needed)
Safety Gear
Protect yourself with this safety gear:
- Insulated gloves
- Safety glasses

Credit: www.apiele.com
Turn Off Power Safely
Always switch off the power at the breaker before starting any electrical work. This keeps you safe from electric shocks while changing your light switch. Safety first, every time.
Locate The Circuit Breaker
Start by finding your home’s main electrical panel. It is usually in the basement, garage, or a utility room. Open the panel door carefully to see the breakers.
Look for the breaker that controls the light switch you want to change. It may be labeled with the room name or area.
Switch Off The Correct Breaker
Flip the breaker to the “off” position. This stops electricity from flowing to the switch. Double-check that the breaker stays off and does not move back.
Turning off the right breaker is key for your safety during the switch replacement.
Verify Power Is Off
Use a non-contact voltage tester near the switch wires. The tester lights up or beeps if power is still on. No signal means it is safe to proceed.
Test twice to be sure. Never assume the power is off without testing.
Remove The Toggle Switch
Start by removing the old toggle switch carefully. This step is important for a safe and smooth switch change. Always turn off the power at the circuit breaker before touching anything.
Take your time. Handle the switch and wires gently to avoid damage or injury.
Unscrew The Faceplate
Use a screwdriver to remove the screws holding the faceplate. Keep the screws safe for later use. Gently pull the faceplate away from the wall. This exposes the toggle switch and wiring behind it.
Disconnect Wires
Note how the wires connect to the toggle switch. Take a picture or make a note for reference. Use a screwdriver to loosen the terminal screws. Carefully pull the wires free from the switch. Avoid pulling on the wires themselves to prevent damage.

Credit: www.youtube.com
Prepare For Rocker Switch
Preparing for a rocker switch replacement is an important step before starting the project. It helps ensure safety and a smooth installation. Taking time to check the wiring and electrical box saves problems later. A proper check can confirm if your current setup fits the new switch style.
Check Wiring Compatibility
Start by turning off the power at the breaker. Use a voltage tester to confirm no electricity flows through the switch wires. Remove the old toggle switch cover to see the wires. Rocker switches usually need the same wiring type as toggles. Check if the wires connect to screws or push-in slots. Make sure the wires are in good condition with no damage. If wires look old or frayed, replace them before installing the rocker switch.
Inspect The Electrical Box
Look inside the electrical box for space and condition. Rocker switches are often larger than toggle switches. The box must have enough room to fit the new switch without bending wires. Check for any cracks or damage in the box itself. Tighten loose screws that hold the box in place. A sturdy box ensures the switch stays secure and works correctly. Clear out any dust or debris before fitting the rocker switch.
Install The Rocker Switch
Installing a rocker switch is a simple task that improves your room’s look. This type of switch is easier to use and looks modern. Follow each step carefully for a safe and neat installation.
Connect The Wires
First, take the wires from the wall. Match each wire to the correct terminal on the rocker switch. Usually, black or red wires go to the brass screws. The white wire connects to the silver screw. If there is a green or bare wire, attach it to the green ground screw. Tighten all screws firmly to hold the wires well. Loose wires can cause problems later.
Secure The Switch
Push the rocker switch gently back into the wall box. Make sure no wires get pinched or bent. Use the screws that come with the switch to fix it in place. Tighten the screws evenly to keep the switch straight. Check that the switch sits flush with the wall surface.
Attach The Faceplate
Place the rocker switch faceplate over the switch. Align the screw holes carefully. Use the small screws to fix the faceplate to the wall. Do not over-tighten these screws to avoid cracking the plate. The faceplate should sit flat and smooth against the wall.
Test The New Switch
Testing the new rocker switch is a vital step after installation. It ensures the switch works correctly and safely. Before restoring power, double-check all connections are secure and no wires are exposed. Safety first.
Once the power is back on, test the switch by toggling it on and off. The light should respond immediately without flickering or delay. A smooth operation means the switch is installed properly.
Check For Proper Light Operation
Turn the rocker switch on. The light should turn on fully. Turn it off. The light should go out completely. Any flicker or dim light suggests a wiring problem.
Feel The Switch Movement
The rocker switch should move easily without sticking. It should click softly when pressed. A stiff or loose switch may need adjustment or replacement.
Inspect For Heat Or Noise
After a few minutes of use, touch the switch plate. It should not feel warm. Listen for buzzing or crackling sounds. Heat or noise signals electrical issues.
Troubleshooting Tips
Troubleshooting tips can help solve common problems during a switch change. These tips save time and avoid damage. Follow them to ensure a smooth switch replacement process.
Check Power Supply Before Starting
Turn off the power at the circuit breaker. Use a voltage tester to confirm no power flows. This step protects you from electric shocks.
Ensure Correct Wiring Connections
Match wires to the new switch terminals. Tighten screws firmly to avoid loose connections. Loose wires cause flickering or no power.
Test The Switch Functionality
After wiring, restore power and test the switch. Flip it several times to check smooth operation. If it fails, switch off power and recheck wiring.
Use Proper Tools For Installation
Use insulated screwdrivers and wire strippers. Avoid forcing parts into place. Proper tools make the job easier and safer.
Replace Damaged Components
Inspect old wires and terminals. Replace any frayed or broken parts. Damaged components can cause shorts or fire hazards.
Safety Precautions
Turn off the power at the circuit breaker before starting any work. Always use a voltage tester to ensure no electricity flows through the switch. Wear insulated gloves to protect yourself from electric shocks.
Turn Off The Power
Always switch off the power at the circuit breaker before starting. Confirm the power is off by testing the switch with a voltage tester. This step prevents electrical shocks and injuries.
Use Proper Tools
Use insulated tools designed for electrical work. Avoid using damaged or worn tools. Proper tools reduce the risk of accidents and make the job easier.
Wear Safety Gear
Wear rubber-soled shoes and safety glasses. These protect you from electric shocks and debris. Keep your hands dry and avoid touching bare wires.
Check For Wire Damage
Inspect all wires for cuts or frays before handling. Damaged wires can cause short circuits or shocks. Replace any damaged wiring before installing the new switch.
Follow Manufacturer Instructions
Read the instructions that come with the rocker switch. Follow each step carefully to ensure safe installation. Do not skip any safety warnings or guidelines.

Credit: www.apiele.com
Frequently Asked Questions
How Do I Safely Turn Off Power Before Changing Switch?
Turn off power at the circuit breaker to avoid shocks. Use a voltage tester to confirm no electricity flows to the switch before starting work.
What Tools Do I Need To Change Toggle To Rocker?
You need a screwdriver, voltage tester, wire stripper, and the new rocker switch. Optional: needle-nose pliers for better wire handling.
Can I Replace A Toggle Switch With A Rocker Switch?
Yes, rocker switches fit standard switch boxes. Ensure the new rocker switch matches your wiring and voltage requirements for safe replacement.
How Do I Connect Wires To The Rocker Switch?
Connect wires to the rocker switch terminals as per the instructions. Tighten screws securely, matching the original wire setup for correct function.
Conclusion
Changing a toggle switch to a rocker switch is simple and quick. Always turn off the power before starting to stay safe. Remove the old switch carefully and connect the wires to the new rocker switch. Test the switch to make sure it works well.
With just a few steps, your light switch looks modern and works smoothly. This small upgrade can make a big difference in your home’s style and comfort. Try it yourself and enjoy the new look today!