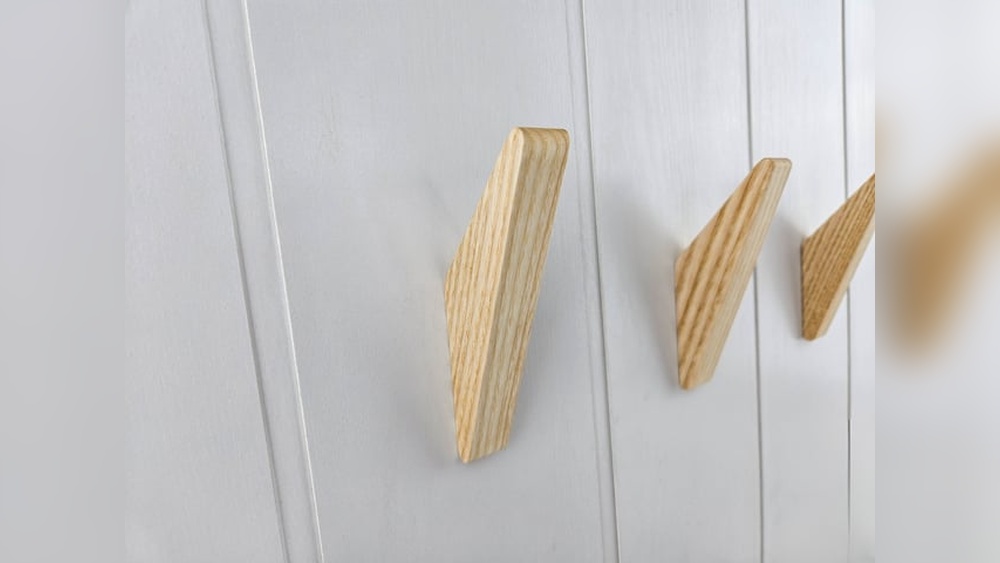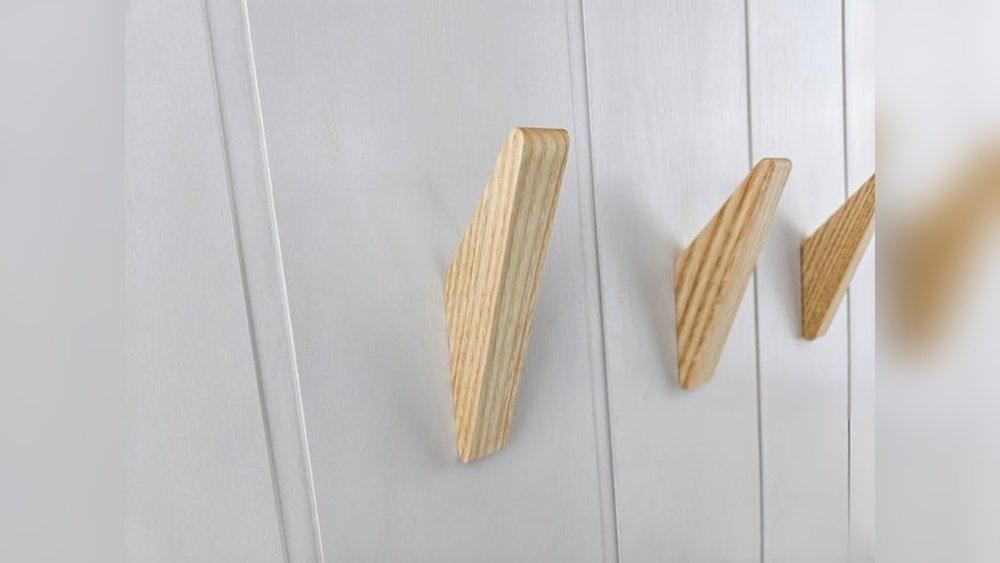
Are you looking for a simple way to add style and function to your walls? Making your own wood wall hooks is easier than you think.
With just a few tools and materials, you can create unique hooks that fit perfectly in your space. Imagine having a personalized spot to hang your keys, bags, or coats—crafted by your own hands. Keep reading, and you’ll discover step-by-step instructions to make beautiful wood wall hooks that will impress everyone who visits your home.
Ready to get started? Let’s dive in!
Materials And Tools Needed
To make wood wall hooks, gather the right materials and tools first. This step saves time and helps create strong, lasting hooks. Knowing what wood and tools to use makes the project easier. Below, find what you need for this simple DIY task.
Types Of Wood To Use
Choose wood that is sturdy and easy to shape. Pine is a great choice for beginners. It is soft and cuts well. Oak and maple are harder woods. They last longer but need more effort to work with. Avoid soft woods like cedar or spruce. They may break under weight.
Essential Tools For The Project
Use a saw to cut the wood into hook shapes. A drill helps make holes for screws. Sandpaper smooths rough edges for safety. A screwdriver or power drill tightens screws. A measuring tape or ruler ensures correct sizes. A pencil marks cutting lines.
Additional Supplies
Grab screws or nails to fix hooks on the wall. Wood glue adds extra hold between pieces. A wood finish or paint protects the wood and adds color. Hooks or pegs need to be sturdy. Choose finishes that suit your room style.
Preparing The Wood
Preparing the wood is the first step in making wood wall hooks. This process ensures the hooks look great and last long. Proper preparation improves the wood’s strength and appearance. It helps the paint or finish stick well.
Measuring And Cutting
Start by measuring the wood pieces carefully. Use a ruler or tape measure for accuracy. Mark the wood where you want to cut. Use a saw to cut the wood to the right size. Cut slowly to avoid splinters or mistakes. Precise cuts make the hooks fit better on the wall.
Sanding For A Smooth Finish
Sand the wood surface with sandpaper to make it smooth. Begin with rough sandpaper to remove rough spots. Then switch to finer sandpaper for a soft finish. Sand edges and corners well to prevent splinters. Smooth wood feels better and looks cleaner. It also helps paint or stain stick evenly.
Choosing The Right Shape
Pick a shape that matches your style and use. Simple shapes like rectangles or circles are easy to cut. Creative shapes add personality to your hooks. Think about the hook’s strength and function. Round edges often work best for hanging items safely. The right shape makes your wall hooks both useful and attractive.
Design Ideas For Wall Hooks
Design ideas for wood wall hooks vary widely. They allow you to add style and function to your space. Choosing the right design can fit your home’s look perfectly. Below are some popular styles you might try.
Rustic And Natural Styles
Rustic wood wall hooks bring warmth and charm to any room. Use rough-cut wood or branches for a natural feel. Leave the wood unfinished or lightly stained. This style works well in cabins or farmhouse decor. Simple metal hooks or leather straps match this look well.
Modern And Minimalist Designs
Modern hooks focus on clean lines and simple shapes. Use smooth, polished wood with a light or dark stain. Keep the design small and sleek. Round or square hooks work best here. This style fits well in apartments or offices with minimalist decor.
Creative Shapes And Patterns
Creative shapes add personality to your wall hooks. Think about geometric forms, animals, or abstract designs. Paint or carve patterns on the wood for added interest. This approach makes your hooks stand out as art. It also lets you customize hooks to match your style.

Credit: www.youtube.com
Assembling The Hooks
Assembling the hooks is an essential step in making wood wall hooks. This part puts all your efforts together. It ensures the hooks stay strong and useful for a long time. Proper assembly helps your hooks hold weight without falling off.
Attaching Hooks To Wood
Start by placing the hooks on the wood. Mark the spots where the screws or nails will go. Align each hook evenly for a neat look. Use a drill or hammer to fix the hooks firmly. Make sure the hooks do not wiggle after attaching.
Using Adhesives Vs. Screws
Adhesives offer a clean look without holes. Use strong wood glue or epoxy for best results. Press hooks firmly and let the glue dry fully. Screws provide a stronger hold for heavier items. Choose screws if you want more security. Screws leave small holes but last longer.
Ensuring Stability And Durability
Check each hook for tightness after assembly. Test by gently pulling or hanging light items. Tighten screws or add more glue if needed. Sand any rough edges to avoid splinters. Seal the wood with a finish to protect it. This keeps your hooks strong and looking good.
Finishing Touches
Finishing touches bring your wood wall hooks to life. They protect the wood and enhance its beauty. A good finish also makes your hooks last longer. Take your time with these final steps for the best results.
Painting And Staining Tips
Choose paint or stain that fits your room style. Use light coats to avoid drips and blotches. Let each layer dry fully before the next. Sand lightly between coats for smoothness. Test colors on scrap wood first to see the true shade.
Adding Protective Coating
Seal your hooks with a clear coat to protect them. Polyurethane or varnish works well for durability. Apply thin, even layers with a soft brush. Allow plenty of drying time between coats. This coating shields against water and scratches.
Decorative Enhancements
Personalize your hooks with simple decorations. Try decals, stencils, or hand-painted designs. Add small accents like metal studs or rope for texture. Keep decorations minimal to maintain function. These touches make each hook unique and charming.
Mounting Your Wood Hooks
Mounting your wood hooks correctly makes them strong and lasting. This step is important to keep your hooks safe and useful. Follow these simple tips to install your wood hooks properly.
Choosing The Right Wall Location
Pick a spot that fits your needs. Choose a wall space near the door or where you plan to hang items. Avoid walls with electrical wires or pipes behind. Use a stud finder to locate wooden studs. Mounting on studs gives better support.
Installation Techniques
Mark the spots for screws with a pencil. Drill small pilot holes to avoid splitting the wood. Use screws that match the hook size. Screw the hooks firmly into the wall or stud. Use a level to keep hooks straight. For drywall, use anchors for extra hold.
Weight Testing And Safety
Test the hooks by hanging light items first. Gradually add more weight to check strength. Avoid hanging very heavy objects unless hooks are deeply anchored. Regularly check screws for tightness. Replace any damaged hooks to prevent accidents.
Creative Storage Ideas
Creative storage ideas help make your space neat and useful. Wood wall hooks offer a simple way to keep things off the floor and easy to find. They fit many rooms and styles, adding charm and order.
Using wood hooks, you can organize small items or heavy gear. They save space and bring a warm, natural touch to your walls. Let’s explore some smart ways to use these hooks around your home.
Organizing Entryways
Wood wall hooks in the entryway catch coats, hats, and bags. Keep your keys and umbrellas close by. This stops clutter at the door and saves time when leaving.
Arrange hooks at different heights for all family members. Add a small shelf above for mail or gloves. A tidy entryway feels welcoming and calm.
Kitchen And Bathroom Uses
Hooks in the kitchen hold towels, aprons, and utensils. This keeps counters clear and tools handy. Use several hooks to hang mugs or pot holders.
In bathrooms, hooks hang towels, robes, and brushes. They dry items faster and free up space. Wood hooks resist moisture better with a simple finish.
Bedroom And Closet Solutions
Hooks in bedrooms organize jewelry, belts, and scarves. They keep accessories visible and untangled. Place hooks inside closets for extra bag or coat storage.
Wood hooks add style and function to your personal space. They make daily routines easier by keeping things in reach and neat.

Credit: www.reddit.com
Maintenance And Care
Taking care of your wood wall hooks keeps them looking great and working well. Regular maintenance helps prevent damage and extends their life. Simple steps can make a big difference in keeping your hooks strong and clean.
Cleaning Tips
Dust your wood hooks often to stop dirt build-up. Use a soft cloth or brush for gentle cleaning. Avoid water or harsh chemicals that can damage the wood. A dry or slightly damp cloth works best for removing dirt.
Repairing Minor Damages
Small scratches or dents can happen over time. Lightly sand the damaged area with fine sandpaper. Apply wood filler if needed, then sand smooth. Finish with a matching wood stain or sealant to blend the repair.
Extending The Life Of Your Hooks
Keep your hooks dry to avoid warping or cracking. Mount them on sturdy walls away from direct sunlight. Check screws and fixings regularly to keep hooks secure. Applying wood polish or oil once in a while protects the wood and keeps it looking fresh.

Credit: www.papernstitchblog.com
Frequently Asked Questions
What Materials Are Needed To Make Wood Wall Hooks?
You need wood pieces, hooks, screws, sandpaper, a drill, and wood finish. Choose sturdy wood for durability. Use strong hooks to hold weight securely. Sand the wood smoothly before finishing to prevent splinters.
How Do I Install Wood Wall Hooks Securely?
Find wall studs using a stud finder for strong mounting. Mark holes, drill pilot holes, then screw hooks firmly. Use wall anchors if no studs are available. Ensure hooks are level for a neat look.
Can I Customize Wood Wall Hooks Design?
Yes, customize by choosing different wood shapes, sizes, and finishes. Paint or stain wood for a unique look. Add decorative hooks or engravings to match your style and home decor.
What Type Of Wood Is Best For Wall Hooks?
Hardwoods like oak, maple, or walnut are best. They are durable and resist wear. Softwoods can work but may dent or break easily. Choose quality wood for long-lasting hooks.
Conclusion
Making wood wall hooks is simple and fun. You only need a few tools and materials. Each hook you create adds style and function to your space. Personal touches make these hooks unique and useful. Try different wood types and finishes for variety.
Crafting your own hooks saves money and gives pride. Start today and enjoy your handmade wall hooks soon.