Is your light switch flickering or completely unresponsive? A faulty light switch can be more than just annoying—it can affect your safety and comfort at home.
But don’t worry, you don’t need to call an electrician right away. You can fix it yourself with a few simple steps. In this guide, you’ll learn exactly how to change a faulty light switch safely and quickly. By the end, you’ll feel confident handling this common household problem and save money on repairs.
Ready to bring the light back to your room? Let’s get started!
Credit: www.reddit.com
Signs Of A Faulty Light Switch
Changing a faulty light switch requires a few basic tools and materials. Having the right items ready makes the job safer and easier. Each tool plays an important role in the process.
Gather everything before starting. This helps avoid interruptions and keeps the work smooth. The following list covers all essentials needed for a simple switch replacement.
Screwdrivers
Screwdrivers are necessary to remove the switch cover and the switch itself. A flathead and a Phillips screwdriver usually work well. These tools help you access the wiring and remove screws safely.
Voltage Tester
A voltage tester ensures the power is off before you touch any wires. It protects you from electric shock. Test the switch and wires to confirm no electricity flows through them.
Replacement Switch
Buy a replacement switch that matches your old one in size and type. This ensures compatibility with your electrical system. Check the switch rating to match your home’s voltage and current.
Electrical Tape
Electrical tape insulates wire connections and prevents short circuits. Use it to wrap exposed wires after connecting them. It adds a layer of safety and keeps wires secure.
Tools And Materials Needed
Safety is the top priority when changing a faulty light switch. Electricity can cause serious harm. Taking the right safety steps protects you from shocks and injuries. Never skip these precautions.
Follow these simple but important safety tips before you start any electrical work. They help keep you safe and make the task easier.
Turn Off Power
Switch off the power at the main circuit breaker. This stops electricity from flowing to the switch. Double-check that the right breaker is off. Do not rely on the switch position alone.
Verify Power Is Off
Use a voltage tester or multimeter to check the wires. Touch the tester to the switch terminals. No light or beep means no power. Always test before touching any wires.
Use Insulated Tools
Choose screwdrivers and pliers with insulated handles. These tools reduce the risk of electric shock. Avoid using metal tools without insulation. Keep your hands dry during the work.
Safety Precautions
Removing the old light switch is the first step to fix a faulty one. Safety is key. Turn off the power at the circuit breaker. Double-check the switch has no power with a tester. Then, you can start to remove the old switch carefully. Follow these simple steps.
Remove Switch Plate
Use a screwdriver to remove the screws on the switch plate. Keep the screws safe for later use. Gently pull the plate away from the wall. This reveals the switch and wiring behind it.
Unscrew The Switch
Next, unscrew the screws holding the switch to the electrical box. Pull the switch out slowly. Avoid pulling too hard to prevent wire damage. Now, you see the connected wires clearly.
Disconnect Wires
Note the position of each wire before disconnecting. You can take a photo for reference. Loosen the terminal screws or release the wires. Carefully detach all wires from the switch. Keep the wires separated and away from metal parts.
Removing The Old Switch
Installing the new switch is the key step after removing the old one. This part needs care and attention to ensure the switch works safely. Follow each step carefully to avoid any mistakes.
Connect Wires Correctly
First, match each wire to the right terminal on the switch. Usually, black or red wires go to the brass screws. The white wire connects to the silver screw. Tighten the screws firmly to hold the wires in place. Loose wires can cause problems or a fire risk.
Secure The Switch
Push the wires back into the electrical box gently. Align the switch with the screw holes in the box. Use a screwdriver to tighten the mounting screws. The switch should sit flat and not wiggle. Proper securing keeps the switch stable and safe to use.
Attach Switch Plate
Place the switch plate over the switch carefully. Line up the screw holes on the plate with the switch. Use a screwdriver to fasten the plate screws. Do not overtighten, or the plate may crack. The plate protects the wiring and gives a clean look.
Installing The New Switch
After installing a new light switch, testing it is essential. This step ensures the switch works correctly and safely. Follow the steps below to confirm your new switch functions as expected.
Restore Power
Turn the power back on at the circuit breaker. This will supply electricity to the switch. Be cautious and avoid touching wires during this process. Use a voltage tester to double-check the power is live.
Check Switch Operation
Flip the new switch on and off several times. The light should respond instantly each time. If the light does not turn on, or flickers, turn off the power and check your wiring connections. A properly installed switch will work smoothly and reliably.
.2404190730550.jpg)
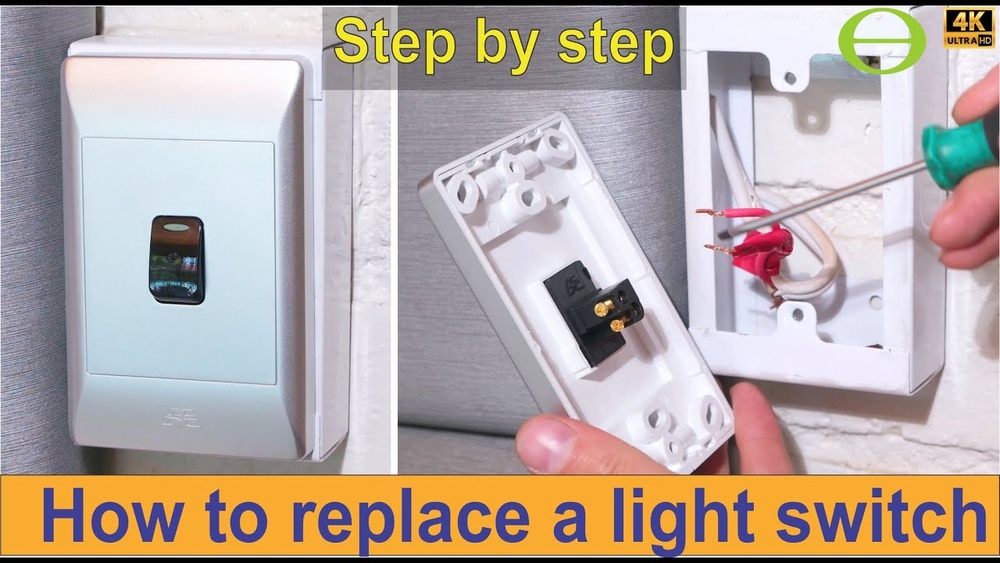
Credit: www.kneeselectric.com
Testing The New Switch
Troubleshooting a faulty light switch can save time and prevent extra costs. Simple fixes often solve common problems. Follow these tips to check your work and ensure the switch functions properly.
Switch Still Not Working
Check if the power is off before touching wires. Use a tester to confirm no electricity flows. Tighten all wire connections securely. Replace the switch if you find visible damage. Verify the circuit breaker is on and not tripped. Consider testing the switch with a multimeter for continuity.
Lights Flicker After Replacement
Loose wiring can cause flickering lights. Ensure all screws hold wires firmly. Check if the switch type matches the bulb type. Dimming switches need compatible bulbs to avoid flicker. Inspect the bulb socket for corrosion or damage. Replace bulbs with fresh ones to rule out faults.
Safety Concerns
Always turn off the main power before starting. Use insulated tools to avoid electric shocks. Avoid touching metal parts during installation. Wear rubber-soled shoes for extra protection. If unsure, seek help from a professional electrician. Never ignore warning signs like sparks or burning smells.

Credit: www.youtube.com
Frequently Asked Questions
How Do I Know If My Light Switch Is Faulty?
A faulty light switch may cause flickering, no light, or sparks. Test by toggling the switch or checking other lights on the circuit. If problems persist, the switch likely needs replacement.
What Tools Do I Need To Change A Faulty Light Switch?
You need a screwdriver, voltage tester, wire stripper, and replacement switch. Always turn off the power at the breaker before starting any work for safety.
Is It Safe To Change A Light Switch Myself?
Yes, if you follow safety steps like turning off power and using a voltage tester. If unsure, consult a professional electrician to avoid risks.
How Do I Remove The Old Light Switch Safely?
Turn off power, use a voltage tester to confirm no electricity. Unscrew the switch plate, disconnect wires carefully, and note wire positions before removal.
Conclusion
Changing a faulty light switch is easier than it seems. Always turn off the power first. Use the right tools and follow safety steps carefully. Taking your time helps avoid mistakes and keeps you safe. A working switch brings light and comfort back to your home.
Simple fixes like this save money and build confidence. Try it yourself, step by step. You can do it!