Have you ever wanted to control one light from two different switches? Whether it’s for a hallway, staircase, or large room, connecting two light switches together can make your life more convenient.
You might think it’s complicated, but with the right steps, you can do it yourself without calling an electrician. In this guide, you’ll learn exactly how to connect two light switches safely and easily. Keep reading to discover simple tips that will save you time and money while brightening up your space just the way you want.
Types Of Light Switches
Light switches come in different types. Each type has a unique way to control lights. Knowing these types helps when connecting two switches. This guide will explain the main types of light switches used in homes.
Single-pole Switch
A single-pole switch controls one light or set of lights. It has two terminals and an on/off function. This switch is common in most rooms. It is simple to wire and use. It cannot control a light from two places.
Three-way Switch
A three-way switch lets you control one light from two locations. It has three terminals and works in pairs. This switch is useful for hallways and stairs. It requires special wiring called “traveler wires.” It allows switching the light on or off from either switch.
Four-way Switch
A four-way switch works with two three-way switches. It lets you control a light from three or more places. It has four terminals for traveler wires. This switch is used in large rooms or long hallways. It adds flexibility in lighting control across multiple switches.
Tools And Materials Needed
Connecting two light switches needs the right tools and materials. Having these ready makes the job easier and safer. This section lists everything needed for a smooth project.
Essential Tools
- Screwdriver set (flathead and Phillips)
- Wire stripper and cutter
- Voltage tester
- Needle-nose pliers
- Electrical tape
- Drill (optional, for mounting)
Required Materials
- Two compatible light switches
- Electrical wires (14 or 12 gauge, based on circuit)
- Wire connectors (wire nuts)
- Electrical box (if new installation)
- Wall plate covers
Safety Gear
- Insulated gloves
- Safety goggles
- Non-conductive shoes
- Flashlight or headlamp
Safety Precautions
Working with electrical switches requires care and attention. Safety comes first. Follow important steps to keep yourself safe. Avoid risks of electric shock or fire. Always prepare your workspace properly before starting.
Turning Off Power
Start by switching off the power at the circuit breaker. This stops electricity from flowing to the switches. Double-check the correct breaker controls the switch circuit. Do not rely on just the wall switch being off. Power must be off to work safely.
Using A Voltage Tester
Use a voltage tester to confirm no electricity is present. Test the wires and terminals around the switch. The tester shows if current is still live. Always test even after switching off the breaker. This step protects against hidden power sources.
Protective Measures
Wear rubber gloves and safety glasses during work. Use insulated tools designed for electrical jobs. Keep your hands dry and avoid touching metal parts. Work in a well-lit area to see clearly. Have a fire extinguisher nearby just in case. Take your time and stay focused on safety.

Credit: www.realpars.com
Wiring Basics
Understanding wiring basics is the first step in connecting two light switches. Knowing the types of wires and their roles helps you work safely and correctly. This section breaks down the key wire colors and their uses in simple terms.
Understanding Wire Colors
Wire colors tell you the purpose of each wire in a switch setup. Black or red wires usually carry power. White wires act as neutral, completing the circuit. Green or bare wires connect to the ground for safety. Recognizing these colors helps avoid mistakes.
Identifying Common, Traveler, And Ground Wires
In two-switch systems, three main wire types appear. The common wire connects to the power source or light fixture. Traveler wires run between the two switches, allowing control from both points. Ground wires provide a safe path for electricity if a fault occurs.
Connecting Two Switches
Connecting two light switches lets you control one light from two places. This setup is common in hallways or large rooms. It requires a special wiring method called a three-way switch. The process may seem tricky, but breaking it down helps.
Each step is important for safety and function. Knowing the right wires and connections is key. Follow these instructions carefully to get your switches working perfectly.
Wiring A Three-way Switch Setup
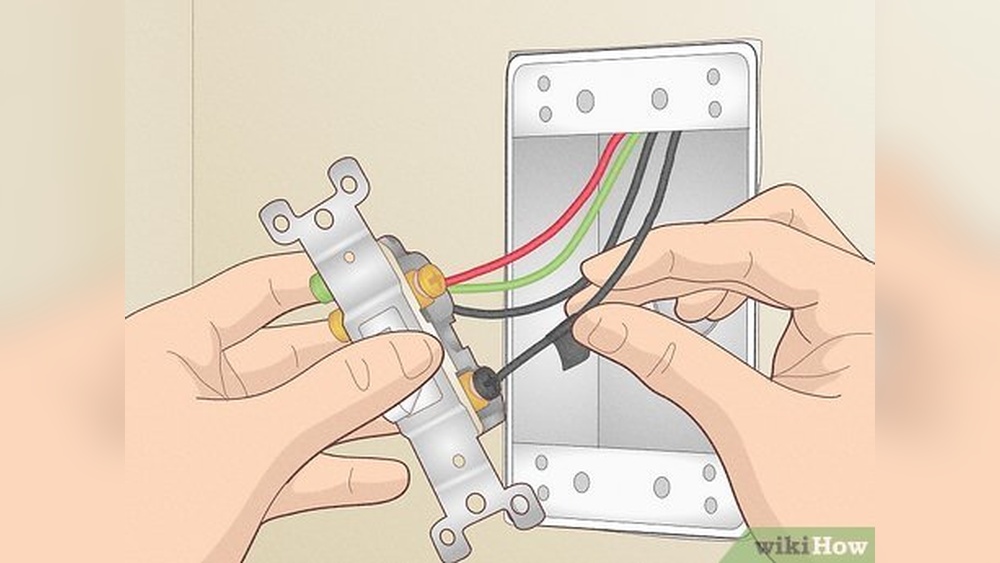
A three-way switch setup uses two switches and one light. Each switch can turn the light on or off. You start by turning off power at the breaker. Then, connect the common terminal on each switch to the power source and the light fixture. The common terminal is often a darker screw. Use a voltage tester to confirm power is off before handling wires.
Connecting Traveler Wires
Traveler wires link the two switches. They carry current between switches so either can control the light. These wires usually have red and black colors. Connect traveler wires to the traveler terminals on both switches. The traveler terminals are lighter screws. Make sure wires are firmly attached and not loose. Loose wires can cause flickering or failure.
Securing Ground Connections
Ground wires keep the circuit safe. They are usually bare copper or green. Attach ground wires to the green screw on each switch. Also, connect them to the metal box if it is grounded. Use wire nuts to join ground wires if needed. Proper grounding helps prevent electrical shocks and fires.

Credit: www.realpars.com
Testing The Connection
Testing the connection between two light switches is essential. It ensures the switches work correctly and safely control the light. This step confirms that your wiring is done properly. Take your time to test carefully before finishing the project.
Restoring Power Safely
Turn the main power back on at the circuit breaker. Stand away from the switches while doing this. Use a voltage tester to check if power is flowing. Make sure your hands and tools are dry. Safety must come first to avoid shocks.
Checking Switch Functionality
Flip each switch one by one. Watch if the light turns on and off as expected. Test all positions if using three-way switches. Check for any flickering or unusual behavior. Fix any problems before securing the switch covers.
Troubleshooting Common Issues
Troubleshooting issues with two connected light switches can be simple. Most problems come from wiring or switch faults. Understanding common issues helps fix them fast. Below are frequent problems and how to address each one.
Switch Not Working
Check if the power is off before testing. Sometimes the switch is faulty or broken. Test the switch with a voltage tester. Replace the switch if it does not work. Make sure the wires are connected correctly to the terminals.
Light Flickering
Flickering lights often mean a loose wire or bad connection. Tighten the wire screws on the switch. Check the bulb for damage or poor contact. Use a bulb with the correct wattage. Replace the bulb if flickering continues.
Loose Connections
Loose connections cause switches to fail or lights to flicker. Turn off power before checking wires. Look for wires that are not firmly attached. Tighten all wire nuts and terminal screws. Use electrical tape to secure wire nuts if needed.
Credit: www.reddit.com
Tips For A Neat Installation
Installing two light switches together can be tricky. A neat installation makes your work safe and looks professional. Keeping wires tidy and organized helps avoid mistakes and future problems. Follow these simple tips to achieve a clean and safe setup.
Organizing Wires
Keep wires straight and grouped by function. Use wire clips or ties to hold them in place. Avoid crossing wires over each other. This reduces clutter and makes troubleshooting easier. Neat wiring also prevents shorts and sparks.
Labeling Switches
Mark each switch clearly before connecting wires. Use small labels or colored tape for easy identification. This helps you know which switch controls what light. Labeling saves time during installation and future repairs.
Using Proper Tools
Use tools made for electrical work. A wire stripper, screwdriver, and voltage tester are essential. Proper tools make your job safer and faster. Avoid using damaged or wrong tools to prevent accidents.
Frequently Asked Questions
How Do You Wire Two Light Switches Together?
To wire two light switches together, use a three-way switch setup. Connect the common terminal to the power source. Run traveler wires between switches. Finally, connect the switches to the light fixture, allowing control from both locations.
What Tools Are Needed To Connect Two Switches?
You need a screwdriver, wire stripper, voltage tester, electrical tape, and wire connectors. These tools help safely strip wires, test power, and secure connections during switch installation.
Can Two Switches Control One Light Fixture?
Yes, using a three-way switch system, two switches can control one light. This setup enables turning the light on or off from two separate locations.
Is It Safe To Connect Two Light Switches?
Yes, connecting two switches is safe if done correctly. Always turn off power before working, follow wiring codes, and use proper tools to avoid hazards.
Conclusion
Connecting two light switches is easier than it seems. Follow the steps carefully and take safety first. Use the right tools and double-check your wiring. Test the switches to make sure they work well together. This simple project saves time and adds convenience to your home.
Enjoy controlling your lights from two spots with ease. Keep learning and improving your home skills step by step.