Have you ever tried to remove wall hooks, only to find them stuck fast and impossible to pull off? It’s frustrating when those hooks won’t budge, leaving you worried about damaging your walls.
But don’t worry—you’re not alone, and there’s a simple way to get those stubborn hooks off without leaving marks or holes. You’ll discover easy, effective methods to remove stuck wall hooks quickly and safely. Keep reading, and say goodbye to those annoying hooks for good!
Types Of Wall Hooks
Wall hooks come in different types. Each type sticks or attaches to the wall in a unique way. Knowing these types helps in removing them without damage. Some hooks use glue, others use screws or nails. Understanding these basics makes removal easier and safer.
Adhesive Hooks
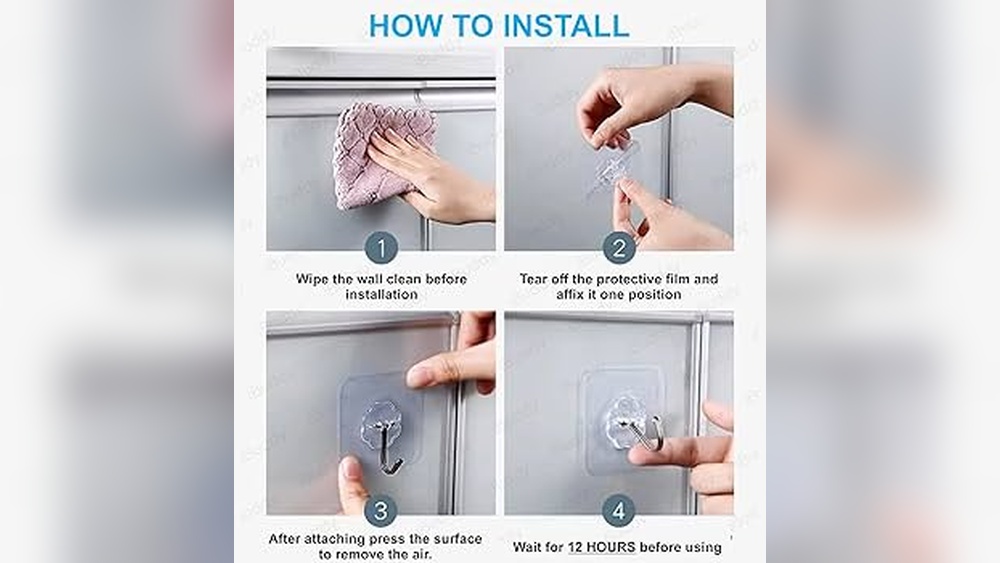
Adhesive hooks stick to the wall with glue. They are easy to put up and take down. The glue can leave sticky marks if not removed carefully. These hooks do not need drilling or nails. They work well for light items and smooth surfaces.
Screw-in Hooks
Screw-in hooks have a threaded end. You twist them into the wall or a stud. They hold heavier items than adhesive hooks. Removing them leaves small holes in the wall. These holes need filling and painting after removal.
Nail-in Hooks
Nail-in hooks use small nails to attach to the wall. They are quick to install and sturdy. Taking them out can cause small wall damage. The nail holes must be patched up later. These hooks support medium weight items well.
Tools Needed For Removal
Removing stuck wall hooks can be tricky without the right tools. Using the correct tools helps protect your wall and makes removal easier. Gather what you need before starting to avoid damage and frustration.
Common Household Tools
Many tools needed for hook removal are already in your home. A flathead screwdriver helps pry hooks gently from the wall. A butter knife can also work for careful lifting. Pliers provide a strong grip to pull hooks out. A hairdryer softens adhesive on sticky hooks for easier removal. A putty knife scrapes off leftover glue or residue. Paper towels or cloths keep the area clean during the process.
Specialized Removal Tools
Some hooks require special tools for safe removal. A hook removal tool or wall hook remover is designed to slide behind hooks. This tool minimizes wall damage by easing hooks out slowly. A heat gun offers more heat than a hairdryer, perfect for tough adhesives. If hooks have screws, a power drill with the correct bit speeds up unscrewing. These tools make removing stubborn hooks less stressful and more effective.
Removing Adhesive Hooks
Removing adhesive hooks from walls can be tricky. The sticky part often stays stuck, making the wall look messy. You need care to avoid damage. The right steps help remove hooks cleanly and easily.
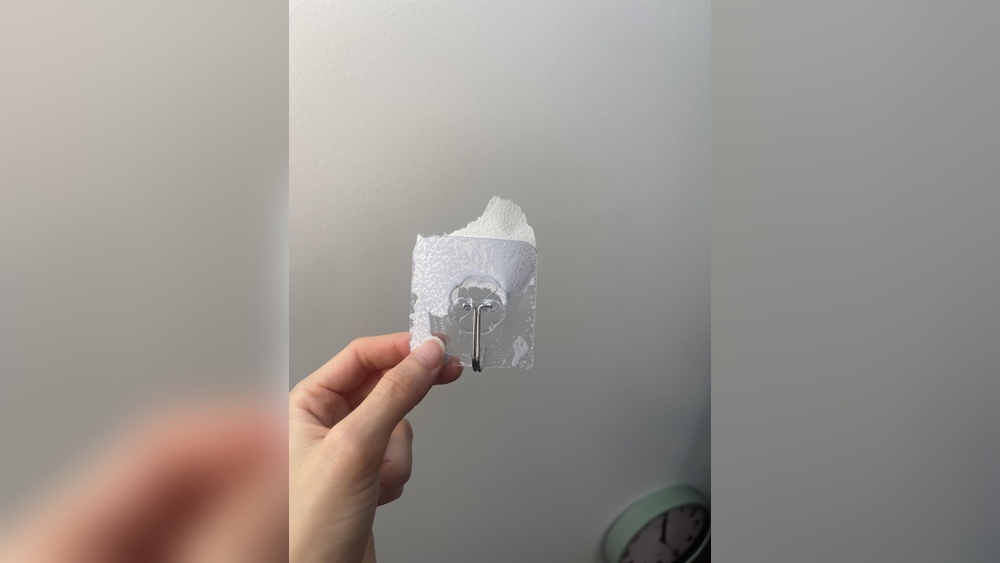
Softening The Adhesive
Heat helps soften the glue under the hook. Use a hairdryer on low heat. Hold it close to the hook for about 30 seconds. The warmth makes the adhesive less sticky. This step makes pulling the hook easier.
Peeling Off Without Damage
Start peeling the hook gently from one side. Pull slowly and evenly. Avoid quick or sharp moves. Pulling straight down works best to protect the wall. If the hook resists, apply more heat and try again.
Cleaning Residue
Sticky glue may remain on the wall after removal. Use a soft cloth with warm soapy water. Rub gently to remove leftover adhesive. For stubborn spots, try rubbing alcohol or vinegar. Clean the area well to prepare for new paint or hooks.
Removing Screw-in Hooks
Removing screw-in hooks from walls can be tricky. These hooks are designed to hold tightly. Pulling them out roughly can damage the wall. Using the right tools and methods helps remove them safely. This section covers simple steps to get screw-in hooks off without hassle.
Using The Right Screwdriver
Choose a screwdriver that fits the screw head exactly. A loose fit can strip the screw, making removal harder. Turn the screwdriver slowly and steadily. Apply steady pressure to avoid slipping. If the hook is large, use a screwdriver with a comfortable grip. This gives better control and reduces hand fatigue.
Dealing With Stuck Screws
Sometimes screws get stuck tight inside the wall. Use a drop of oil or lubricant on the screw head. Let it sit for 5-10 minutes to loosen the grip. Tap the screwdriver gently with a hammer to break rust or paint seal. Use a rubber grip or cloth to improve your hold on the screwdriver. Avoid forcing the screw, as it may damage the wall.
Repairing Wall After Removal
After removing the hook, small holes usually remain. Fill these holes with spackling paste or wall filler. Smooth the surface with a putty knife. Wait for it to dry completely. Sand the area lightly for a flat finish. Paint over the patch to match the wall color. This restores the wall and hides any damage.
Removing Nail-in Hooks
Nail-in hooks often stick firmly to walls. Removing them needs care to avoid wall damage. The process can be simple with the right method. Below are ways to remove nail-in hooks cleanly and safely.
Prying Techniques
Use a flat tool like a putty knife or flathead screwdriver. Slide it gently under the hook base. Apply slow, steady pressure to lift the hook away. Avoid quick, forceful movements to prevent wall damage. Work around the hook to loosen it evenly.
Handling Deeply Embedded Nails
For nails driven deep, grip the hook firmly. Use pliers to pull the nail straight out. Wiggle the nail gently if it resists. Avoid bending the nail as it may harm the wall. If the nail breaks, try to remove the remaining piece carefully.
Wall Patch Tips
After hook removal, small holes often remain. Fill holes with spackle or wall filler. Smooth the surface with a putty knife. Let it dry completely before sanding lightly. Paint over the patch to match the wall color. This restores the wall’s smooth look quickly.

Credit: www.youtube.com
Preventing Wall Damage
Removing stuck wall hooks can damage your walls if done carelessly. Protecting the wall is important. Small mistakes may cause holes, peeling paint, or marks. Taking simple steps before and during removal keeps your walls safe and smooth.
Protective Measures Before Removal
Clean around the hook gently. Dust or dirt can cause scratches during removal. Use a soft cloth and mild cleaner. Let the area dry completely before starting.
Check the hook type. Some hooks use adhesive, others nails or screws. Knowing this helps choose the best way to remove them. Prepare tools like a hairdryer for heat or a putty knife for lifting.
Cover the wall below the hook with painter’s tape. This protects paint from accidental scratches. It also helps mark the hook’s edges for careful work.
Safe Removal Practices
Heat adhesive hooks with a hairdryer. Warmth softens glue and eases removal. Hold the dryer a few inches away for about 30 seconds.
Use a gentle, slow pulling motion. Pull hooks straight from the wall. Avoid twisting or sudden jerks that can tear paint or drywall.
For hooks with nails or screws, use the right screwdriver or pliers. Remove nails slowly to avoid creating large holes.
Stop if resistance feels strong. Apply more heat or try a different tool. Forcing hooks can cause more damage.
Quick Fixes For Wall Marks
Wall marks left by hooks can be annoying. These marks spoil your clean wall look. Quick fixes help restore your wall fast. You can make your wall look new again with simple steps. No need for big repairs or professional help.
Using Spackle Or Putty
Spackle or putty fills small holes and dents on walls. Use a putty knife to apply a small amount over the mark. Spread it evenly and smooth it out. Let it dry for a few hours. After drying, gently sand the area to make it flat. This method hides holes left by stuck wall hooks. It works well on painted drywall or plaster.
Touch-up Painting Tips
Touch-up paint covers stains or small patches after spackling. Use the same paint color as your wall. Apply paint with a small brush for better control. Dab gently to blend the new paint with the old. Avoid using too much paint to prevent drips. Let the paint dry fully to see the final look. Touch-up painting refreshes your wall’s appearance quickly.

Credit: www.reddit.com
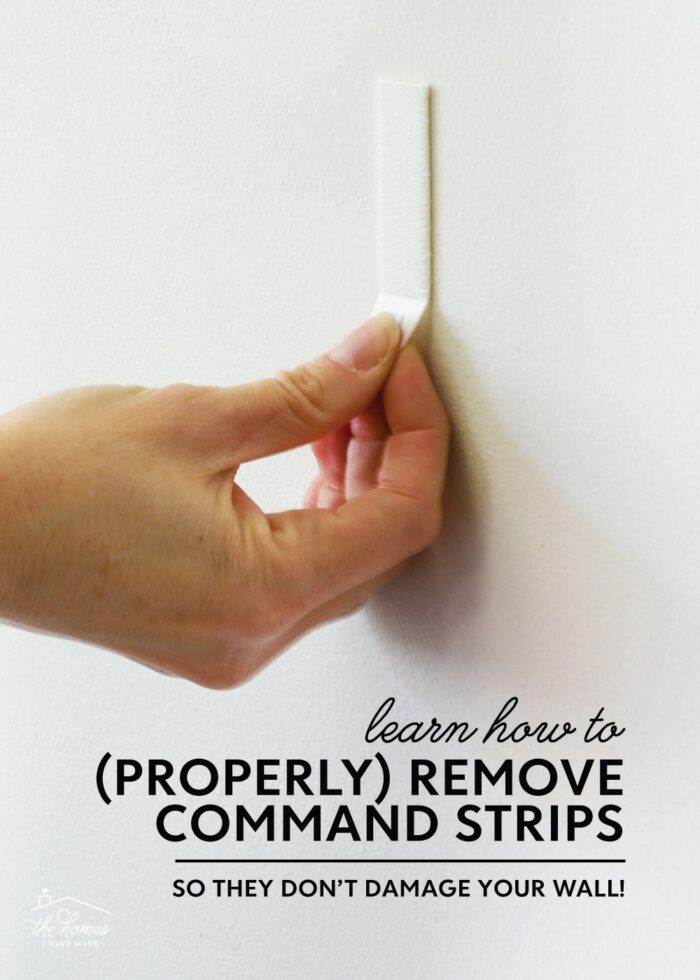
Credit: thehomesihavemade.com
Frequently Asked Questions
How Do I Safely Remove Stuck Wall Hooks?
To remove stuck wall hooks safely, use heat or adhesive remover. Warm the hook with a hairdryer to soften glue. Gently twist or slide a putty knife beneath to lift it off without damaging the wall.
What Tools Help Get Wall Hooks Off Easily?
Common tools include a hairdryer, putty knife, and adhesive remover. Heat softens glue, while a putty knife helps lift the hook. Adhesive removers dissolve sticky residue, making hook removal cleaner and easier.
Can I Remove Wall Hooks Without Damaging Paint?
Yes, apply heat to soften adhesive before removing hooks. Use a putty knife carefully to avoid paint peeling. Clean residue with mild adhesive remover or soap and water to protect paint finish.
How To Remove Sticky Residue After Taking Off Hooks?
Use rubbing alcohol or adhesive remover on a cloth. Gently rub the sticky residue until it lifts. Avoid harsh scrubbing to protect the wall surface and paint.
Conclusion
Removing stuck wall hooks does not have to be hard. Use gentle tools like dental floss or a hairdryer. Take your time and work carefully to avoid damage. Small steps make a big difference. Clean the wall after removal to keep it smooth.
With patience, your wall will look good again. Try these tips next time hooks get stuck. Simple methods often work best.