Are you facing a tricky situation where your light switch wiring just doesn’t reach where it needs to? Extending your light switch wiring might sound complicated, but with the right steps, you can do it yourself safely and confidently.
Imagine having the freedom to place your switches exactly where you want, without calling in an expensive electrician. In this guide, you’ll discover simple, clear instructions that make the process easy to follow. Stick with me, and by the end, you’ll have the know-how to extend your light switch wiring like a pro—saving time, money, and frustration.
Let’s get started!

Credit: www.youtube.com
Tools And Materials Needed
Before you start extending light switch wiring, gather the right tools and materials. Using the correct items makes the job easier and safer. Prepare everything in advance to avoid interruptions.
Essential Tools
- Wire strippers for removing insulation cleanly.
- Voltage tester to check if wires are live.
- Flathead and Phillips screwdrivers for screws.
- Needle-nose pliers to bend or hold wires.
- Electrical tape for insulating wire connections.
- Cable cutters to trim wires to length.
- Drill with bits for making holes if needed.
Required Materials
- Electrical wires matching your home’s wiring type and gauge.
- Wire connectors (wire nuts) to join wires securely.
- New light switch if replacing or adding one.
- Electrical boxes to house new wiring safely.
- Wall plates to cover switch boxes neatly.
Safety Gear
- Insulated gloves to protect from electric shocks.
- Safety glasses to protect your eyes from debris.
- Work boots for good footing and protection.
- Flashlight or headlamp for clear visibility.
Preparing For The Project
Preparing for extending light switch wiring is crucial for a safe and smooth project. Careful steps before starting help avoid accidents and mistakes. This section guides you through the basic preparation tasks.
Turning Off Power
Always turn off the power at the circuit breaker. This step stops electricity flow to the switch. It keeps you safe from electric shocks. Use a clear label to mark the breaker off. Never rely only on the switch position.
Testing For Live Wires
Use a voltage tester to check wires for electricity. Test all wires in the switch box. Even with the breaker off, some wires might still have power. A tester shows if wires are live. This step is important to avoid danger.
Planning The Wiring Route
Plan the path for your new wires before you start work. Look for the shortest and safest route. Avoid sharp bends and obstacles like pipes or nails. Check that you have enough wire length. Clear planning saves time and effort later.
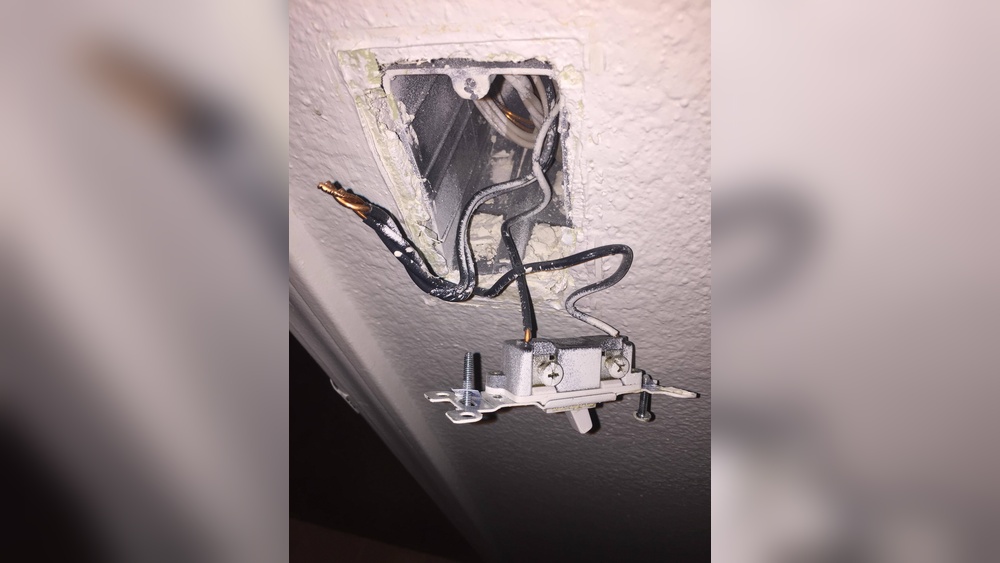
Removing The Existing Switch
Removing the existing light switch is the first step in extending the wiring. It requires care and attention to avoid damage or injury. Always turn off the power at the breaker before starting. This ensures safety while handling electrical parts.
Follow a clear process to remove the switch correctly. This helps prepare for extending the wiring smoothly. Let’s break down the steps involved in removing the switch safely and effectively.
Unscrewing The Switch Plate
Start by unscrewing the switch plate cover. Use a screwdriver that fits the screws well. Place the screws somewhere safe to avoid losing them. Gently remove the plate to expose the switch and wires.
Disconnecting Wires
Next, carefully disconnect the wires from the switch. Note their positions or take a photo for reference. Loosen the terminal screws or release the wires from push-in connectors. Pull the wires gently to avoid damage.
Inspecting Wiring Conditions
Check the wires for any signs of wear or damage. Look for frayed ends, corrosion, or loose strands. Good wiring is essential for a safe and effective extension. Replace any damaged wires before proceeding.
Extending The Wiring
Extending the wiring of a light switch needs careful steps. This ensures safety and proper function. You must select the right materials and connect them correctly. The process involves choosing the wire, splicing, and securing connections. Follow clear steps for a neat and safe extension.
Choosing The Right Wire
Select wire matching the original cable type and gauge. Use wire with the same thickness to avoid overheating. Copper wire is most common for light switches. Choose wire rated for household electrical use. Avoid mixing different wire types in one circuit.
Splicing And Connecting Wires
Cut wires cleanly with wire cutters. Strip about half an inch of insulation from each wire end. Twist the bare wires together firmly. Make sure the wires fit tightly to prevent loose connections. Keep the wires neat to fit inside the electrical box.
Using Wire Connectors
Use wire nuts or connectors to secure splices safely. Choose connectors that fit the wire size and number of wires. Twist the wire nut clockwise over the twisted wires. Tug gently to check if connections hold firmly. Cover all exposed wire ends fully with connectors.
Installing The Extended Switch
Installing the extended switch is a key step in extending light switch wiring. It involves connecting wires correctly and securing the switch in place. This ensures safe and reliable operation of your light switch. Follow these simple steps for a smooth installation process.
Securing Wires To The Switch
Strip about half an inch of insulation from each wire end. Twist the exposed wires tightly to avoid loose connections. Attach each wire to the correct terminal on the switch. Tighten the terminal screws firmly to hold the wires in place. Double-check that no wire strands are loose or touching other terminals.
Mounting The Switch
Carefully push the wires back into the electrical box. Align the switch with the mounting holes on the box. Use screws to fasten the switch securely. Avoid overtightening to prevent cracking the switch or box. Make sure the switch sits flush and straight in the box.
Reattaching The Switch Plate
Place the switch plate over the installed switch. Align the screw holes on the plate with those on the switch. Insert the screws and tighten them gently. Do not overtighten to avoid damaging the plate. The plate should fit snugly and cover all wiring.
Credit: www.reddit.com
Testing And Troubleshooting
Testing and troubleshooting are key steps after extending light switch wiring. These steps confirm the wiring works safely and correctly. Testing helps find wiring errors early. Troubleshooting fixes issues before final use.
This section guides you through restoring power, checking switch functionality, and fixing common problems. Follow these steps to ensure your light switch wiring extension works well.
Restoring Power
First, restore power at the circuit breaker. Turn the breaker back on carefully. Use a voltage tester to check if the wires have power. Always handle wires with care during this step. Confirm no power is flowing before touching exposed wires.
Checking Switch Functionality
Test the switch by flipping it on and off. Check if the light turns on or off as expected. Use a continuity tester to check the switch connections. A good switch shows continuity when on, none when off. Replace the switch if it shows no continuity or stays on all the time.
Fixing Common Issues
Loose connections cause many wiring problems. Tighten all wire nuts and terminal screws firmly. Look for damaged or frayed wires and replace them. If the light flickers, check for a weak bulb or bad switch. Use a multimeter to test wires for proper voltage. Repeat the testing steps after each fix to confirm the issue is resolved.
Safety Tips For Diy Wiring
Extending light switch wiring at home can save money and improve your space. Safety matters most in any electrical project. Taking the right steps protects you from shocks and fires. Follow clear safety tips to keep your work safe and effective.
Avoiding Electrical Hazards
Turn off power at the circuit breaker before starting any wiring. Use a voltage tester to confirm no electricity flows in the wires. Wear insulated gloves to prevent shocks. Keep your work area dry and clear of clutter. Do not touch bare wires with your hands or tools. Use the right tools designed for electrical work. Secure wires properly to avoid loose connections and sparks. Double-check all connections before turning the power back on.
When To Call A Professional
Call an electrician if you feel unsure or unsafe during wiring. Complex wiring or old circuits need expert knowledge. Professionals handle hidden problems behind walls or ceilings. A licensed electrician knows local rules and safety standards. Avoid guessing or experimenting with electrical systems. Protect your home and family by hiring a pro for tricky tasks.
Maintaining Code Compliance
Follow local electrical codes to ensure safe and legal wiring. Codes set standards for wire type, size, and installation methods. Use approved materials and tools for your wiring project. Keep all electrical boxes accessible and properly covered. Label circuit breakers for easy identification. Inspect your work against code rules before restoring power. Proper code compliance lowers fire risks and improves system reliability.
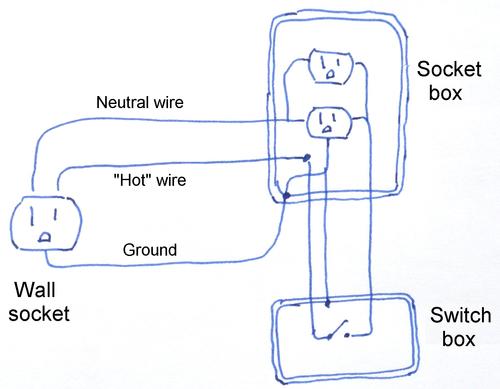
Credit: woodgears.ca
Frequently Asked Questions
How Do I Safely Extend Light Switch Wiring?
Turn off power at the breaker before starting. Use wire nuts to connect new wires. Match wire colors correctly. Follow local electrical codes for safety.
What Materials Are Needed To Extend Switch Wiring?
You need electrical wire, wire nuts, a screwdriver, voltage tester, and electrical tape. Choose wire gauge matching existing wiring for safety and compliance.
Can I Extend Light Switch Wiring Myself?
Yes, if you understand basic electrical work and safety. Always turn off power and test wires. Consult a professional if unsure to avoid hazards.
How Long Can Light Switch Wiring Be Safely Extended?
Extensions should comply with local electrical codes. Generally, keep extensions as short as possible to avoid voltage drop and maintain safety.
Conclusion
Extending light switch wiring can save time and money on home projects. Follow the right steps and stay safe while working. Always double-check connections before turning power back on. Using proper tools makes the job easier and more reliable. Take your time and keep instructions close by.
Soon, your new wiring will work just as you need. Simple changes can improve your home’s lighting and comfort. A little effort brings lasting results anyone can enjoy.