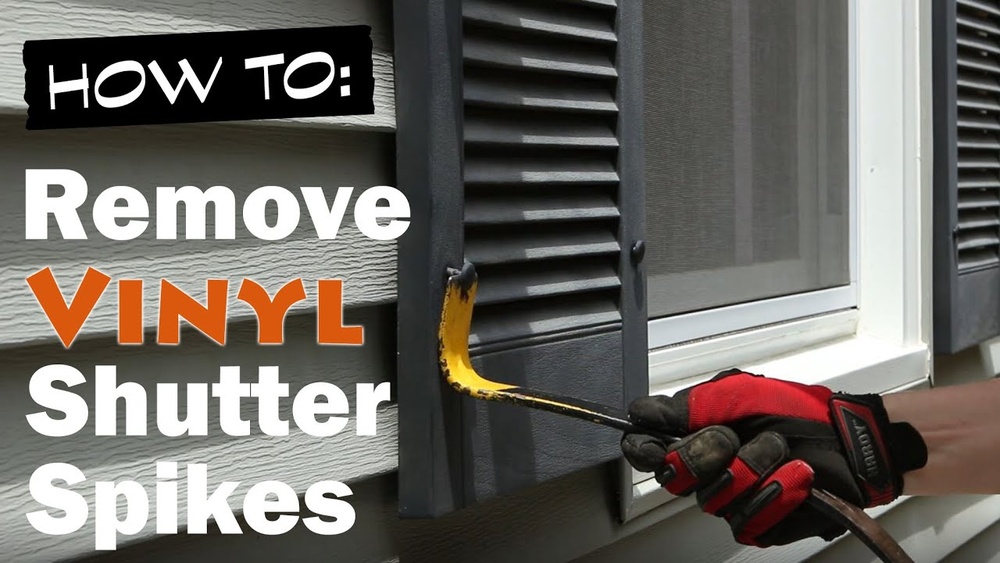
Have you ever struggled with broken shutter fasteners stuck in your siding? It’s a common problem that can leave your home looking unfinished and worn down.
Removing these fasteners might seem tricky, but with the right approach, you can fix it quickly and safely. You’ll discover simple, step-by-step methods to get those stubborn fasteners out without damaging your siding. Keep reading—you’re just minutes away from restoring your home’s clean, polished look.
Tools Needed
Removing broken shutter fasteners from siding requires the right tools. Using proper tools makes the job easier and faster. Some tools are basic and found in most homes. Others are power tools that save time and effort.
Prepare all tools before starting. This helps avoid interruptions and keeps the work smooth.
Essential Hand Tools
A screwdriver set is a must-have. Choose flathead and Phillips screwdrivers for different fasteners. A pry bar helps lift fasteners carefully without damaging siding. Needle-nose pliers work well to pull out small broken parts. Hammer and chisel can assist in loosening stuck fasteners. A utility knife helps cut around the fastener if needed.
Power Tools Options
A cordless drill speeds up fastener removal. Use drill bits that match the screw size. An impact driver gives extra force for stubborn fasteners. Oscillating multi-tools with a cutting blade can remove fasteners flush with siding. A rotary tool with grinding attachments also helps smooth rough spots after removal.

Credit: www.reddit.com
Safety Precautions
Removing broken shutter fasteners from siding can be tricky. Safety is the top priority. Taking the right precautions prevents injuries and damage. Small metal pieces and sharp tools are involved. Protecting yourself and the area is important.
Protective Gear
Wear safety glasses to protect your eyes from flying debris. Gloves guard your hands from sharp edges and splinters. Use sturdy shoes to protect your feet. Long sleeves and pants shield your skin from scratches. Proper gear keeps you safe during the task.
Work Area Preparation
Clear the area around the siding before starting. Remove any obstacles that may cause tripping. Place a drop cloth to catch falling debris. Keep children and pets away from the work zone. Good preparation helps maintain focus and safety.
Assessing The Fastener
Before removing broken shutter fasteners from siding, start by assessing the fastener itself. This step helps you understand what tools and methods work best. Careful assessment saves time and prevents damage to your siding or shutters. Take a close look at the fastener to plan your next steps.
Identifying Fastener Type
Fasteners come in different types such as screws, nails, or bolts. Each type needs a different removal approach. Screws usually have a head with slots or a cross for a screwdriver. Nails are smooth and do not turn. Bolts have a nut that you can loosen with a wrench.
Knowing the fastener type helps you choose the right tool. Use a screwdriver for screws. Pliers or a claw hammer work well for nails. A wrench or socket tool suits bolts. Identifying the fastener prevents damage during removal.
Checking Damage Level
Examine the fastener for rust, bending, or breakage. Rusty fasteners may be harder to remove. Bent or broken fasteners might need special tools. If the head is stripped or missing, standard tools may not grip well.
Assessing damage lets you plan carefully. Use penetrating oil for rusted fasteners. For stripped heads, try pliers or a screw extractor. Understanding fastener damage avoids extra damage to siding or shutters.
Removing Fasteners Without Damage
Removing broken shutter fasteners from siding requires care. The goal is to avoid damage to the siding surface. Using the right tools and techniques helps protect the siding while removing fasteners. Patience and gentle handling also make a big difference. Below are two common ways to remove fasteners safely.
Using Pliers And Screwdrivers
Start by gripping the fastener with pliers. Use needle-nose pliers for better control. Twist the fastener gently to loosen it. If the fastener has a head, use a flathead screwdriver to pry it up. Work slowly to avoid scratching the siding. Pull the fastener out carefully once it is loose. Repeat the process if the fastener resists.
Leveraging With A Pry Bar
A small pry bar can help lift stubborn fasteners. Place a thin piece of wood under the pry bar to protect the siding. Insert the pry bar tip under the fastener’s edge. Apply gentle pressure to lift the fastener. Move the pry bar side to side to ease removal. Take breaks to prevent siding damage. Once loose, pull the fastener out by hand or with pliers.
Dealing With Stubborn Or Rusted Fasteners
Removing broken shutter fasteners from siding can be tricky, especially when they are old or rusted. Stubborn fasteners stick tight and resist simple pulling. Rust makes metal parts swell and lock in place. These problems need special care to avoid siding damage. Use the right tools and methods to loosen them safely.
Applying Penetrating Oil
Penetrating oil helps loosen rusted fasteners by seeping into tight spaces. Spray the oil generously on the fastener and wait at least 15 minutes. The oil breaks down rust and lubricates the threads. Repeat the process if the fastener is very stuck. Use a wire brush to clean away rust before applying oil. This step makes removal easier and reduces damage risk.
Using Heat To Loosen Fasteners
Heat expands metal and can free stuck fasteners. Use a heat gun or propane torch carefully on the fastener. Warm the fastener for a few minutes, then try to turn it with pliers or a screwdriver. Avoid heating siding directly to prevent damage. Heat works best after applying penetrating oil. This method helps break rust bonds and loosens tight fasteners.

Credit: www.youtube.com
Extracting Broken Fasteners
Broken shutter fasteners can be tricky to remove. They often stay stuck in the siding, making repairs hard. Removing them carefully protects your siding from damage. Two common ways work well: drilling out the fastener or using a screw extractor. Both need patience and simple tools.
Start by checking how deep the fastener is. This helps decide the best removal method. Use safety glasses to protect your eyes during the process. Work slowly and avoid forcing tools to prevent harm to the siding.
Drilling Out Fasteners
Choose a drill bit slightly smaller than the broken fastener. This helps avoid drilling too wide a hole. Drill slowly at the center of the fastener. Keep the drill straight and steady to stay on target. Stop drilling once you reach the fastener’s end or the siding base.
After drilling, use a small screwdriver or pliers. Try to twist and pull out the loose fastener part. If it does not come out easily, drill a bit deeper. This method loosens the broken fastener without damaging the siding.
Using Screw Extractors
Screw extractors are special tools made to remove broken screws. Choose the right size extractor for your fastener. First, drill a small hole in the center of the broken fastener. Insert the extractor into the hole and turn it counterclockwise.
The extractor bites into the fastener. This helps pull it out as you turn. Use steady pressure and avoid rushing. Extractors work best with rusted or stuck fasteners. They provide a strong grip without widening the hole.
Repairing Siding After Removal
Removing broken shutter fasteners can leave your siding looking rough. Repairing siding after removal is important. It helps keep your home safe and looking good. Fixing the damage quickly stops water and pests from entering. The repair process has two main steps. Filling holes and cracks, and repainting to match the siding.
Filling Holes And Cracks
Start by cleaning the holes and cracks. Remove loose dirt and debris using a brush or cloth. Use exterior-grade wood filler or caulk to fill the holes. Apply the filler with a putty knife. Press it firmly into the holes for a tight seal. Smooth the surface to blend with the siding. Let the filler dry completely before moving on. Sand the filled areas gently for an even finish. This step prevents water damage and insect entry.
Repainting And Finishing
Choose paint that matches your siding color. Use exterior paint for durability against weather. Before painting, clean the area with a damp cloth. Apply a primer if the filler is a different color. Use a small brush for precision on the repaired spots. Paint in thin, even layers for better coverage. Allow each coat to dry well before adding another. A fresh coat of paint restores the siding’s look. It protects the surface and blends repairs seamlessly.
Preventing Future Issues
Preventing future problems with shutter fasteners helps save time and money. Proper care keeps shutters secure and siding safe. Choosing the right fasteners and installing them correctly makes a big difference. Small steps now avoid bigger issues later.
Choosing Durable Fasteners
Select fasteners made from rust-resistant materials like stainless steel. These last longer in wet or humid climates. Avoid cheap metals that bend or break easily. Choose sizes that fit your siding and shutters tightly. Durable fasteners reduce the risk of breaking or loosening.
Proper Installation Techniques
Drill pilot holes before inserting fasteners to prevent siding damage. Tighten fasteners just enough to hold shutters firmly. Too much force can crack siding or strip threads. Use a level to align shutters straight and avoid stress on fasteners. Correct installation improves shutter stability and fastener lifespan.

Credit: www.reddit.com
Frequently Asked Questions
How Do I Safely Remove Broken Shutter Fasteners?
Use a screwdriver or pliers to gently pry out the fasteners. Apply steady pressure to avoid damaging the siding. If stuck, use a lubricant to loosen the fasteners before removal.
What Tools Are Best For Removing Broken Shutter Fasteners?
A flathead screwdriver, needle-nose pliers, and lubricant are essential. These tools help loosen and extract fasteners without harming the siding.
Can I Repair Siding After Removing Broken Fasteners?
Yes, minor holes can be filled with exterior-grade wood filler or caulk. Sand and paint the area to match the siding for a seamless repair.
How Do I Prevent Shutter Fasteners From Breaking Again?
Use corrosion-resistant fasteners and avoid over-tightening. Regularly inspect and maintain shutters to ensure fasteners stay secure and intact.
Conclusion
Removing broken shutter fasteners from siding can be simple and quick. Use the right tools and take your time. Avoid damaging your siding by working carefully. Clean the area after removal to prepare for new fasteners. This helps keep your home looking neat and secure.
Regular checks can prevent future problems with shutters. Small repairs save big costs later. Keep your siding and shutters in good shape for lasting beauty.