
Are you ready to give your kitchen a fresh, new look without spending a fortune? Installing cabinet hardware is one of the easiest and most effective ways to transform your space.
But how do you make sure your new knobs and pulls fit perfectly and look just right? In this guide, you’ll discover simple, step-by-step instructions that anyone can follow. By the end, you’ll have the confidence to upgrade your kitchen cabinets like a pro—and enjoy the satisfaction of a job well done.
Keep reading to unlock the secrets to flawless cabinet hardware installation!
Tools And Materials Needed
Installing kitchen cabinet hardware is a simple task with the right tools and materials. Preparing before you start saves time and avoids mistakes. Gather everything needed to make the job smooth and efficient.
Essential Tools
Basic tools include a drill, screwdriver, measuring tape, and pencil. A drill helps make holes quickly and accurately. Screwdrivers secure the hardware tightly. Measuring tape ensures proper placement of handles and knobs. A pencil marks drilling spots clearly. A level tool keeps the hardware straight and neat. A ruler or square aids in precise measurements.
Choosing The Right Hardware
Pick hardware that fits your cabinet style and size. Handles and knobs come in many shapes and finishes. Match the hardware with your kitchen’s color and design. Check the screw length to fit your cabinet doors or drawers. Buying hardware sets helps keep a uniform look. Avoid hardware that is too big or small for your cabinets.
Preparing Your Workspace
Clear the area around the cabinets for easy access. Lay down a cloth or mat to protect surfaces. Have good lighting to see marks and holes clearly. Organize your tools and hardware within reach. Keep screws and small parts in a container to avoid loss. Work slowly and carefully to prevent damage to cabinets.
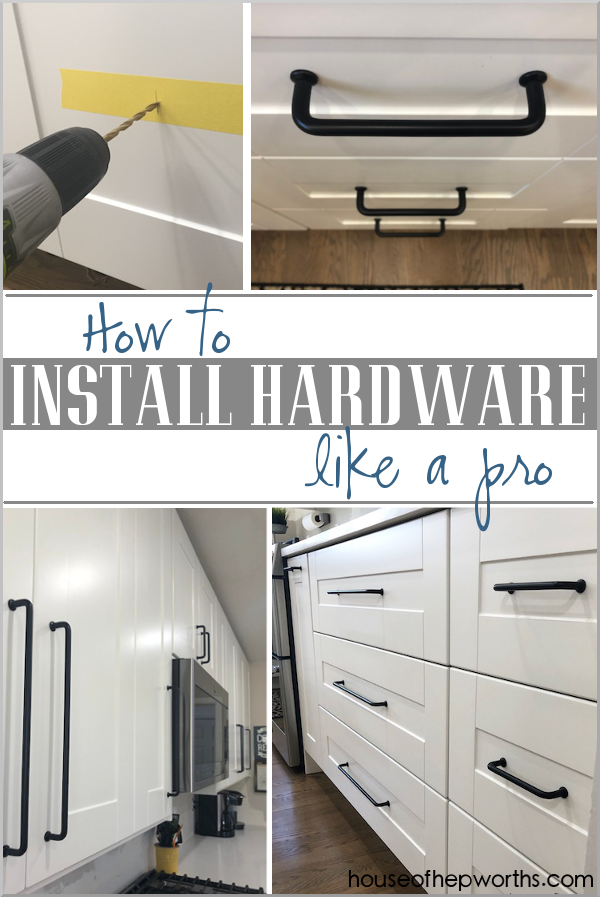
Credit: www.houseofhepworths.com
Measuring And Marking
Measuring and marking are key steps when installing kitchen cabinet hardware. Accurate measurements ensure handles and knobs sit correctly. Marking drill points carefully prevents mistakes and keeps your cabinets looking neat. Take time with these steps to achieve a professional finish.
Determining Handle Placement
Choose the right spot for each handle or knob. Usually, handles go near the cabinet edge or drawer center. Measure the distance from the top or side for uniform placement. Keep handles at the same height on all cabinets. Consistency makes your kitchen look balanced and tidy.
Marking Drill Points
Mark the exact spots for drilling holes using a pencil. Use a ruler or tape measure for accuracy. Double-check each mark before drilling. Avoid marking too close to cabinet edges to prevent damage. Clear marks help you drill straight and clean holes.
Using Templates For Consistency
Templates speed up marking and keep hardware placement even. Use a plastic or cardboard template matching your handle size. Place it on each cabinet and mark holes through the template. Templates reduce errors and save time. They are perfect for multiple cabinets or drawers.
Drilling Holes
Drilling holes is a key step when installing kitchen cabinet hardware. It allows you to attach handles and knobs firmly. Proper drilling ensures the hardware fits well and looks neat. Taking care in this step helps avoid damage to the cabinet doors or drawers.
Selecting The Correct Drill Bit
Choose a drill bit that matches the screw size of your hardware. Use a bit slightly smaller than the screw’s diameter. This helps the screw hold tight in the wood. For metal hardware, a high-speed steel bit works best. Wood bits are ideal for wooden cabinets. Check the drill bit for sharpness before starting.
Drilling With Precision
Mark the exact spot for each hole with a pencil. Use a ruler or measuring tape for accuracy. Place a piece of painter’s tape on the spot to prevent the drill from slipping. Hold the drill steady and start at a slow speed. Drill straight into the cabinet surface. Keep your hand firm to avoid wobbling. Stop drilling once you reach the right depth.
Avoiding Common Mistakes
Do not rush the drilling process. Drilling too fast can split the wood. Avoid using a drill bit that is too large. This causes loose hardware fitting. Do not drill without measuring twice. Misplaced holes are hard to fix. Always wear safety glasses to protect your eyes. Clean up wood dust before attaching hardware.
Attaching Cabinet Hardware
Attaching cabinet hardware is a key step in updating your kitchen look. It gives your cabinets a fresh and functional style. The process is simple but needs care to ensure handles and knobs fit well and work smoothly.
Start with clean cabinet surfaces. This helps the hardware sit properly. Use the right tools for a neat job. Follow each step closely for the best results.
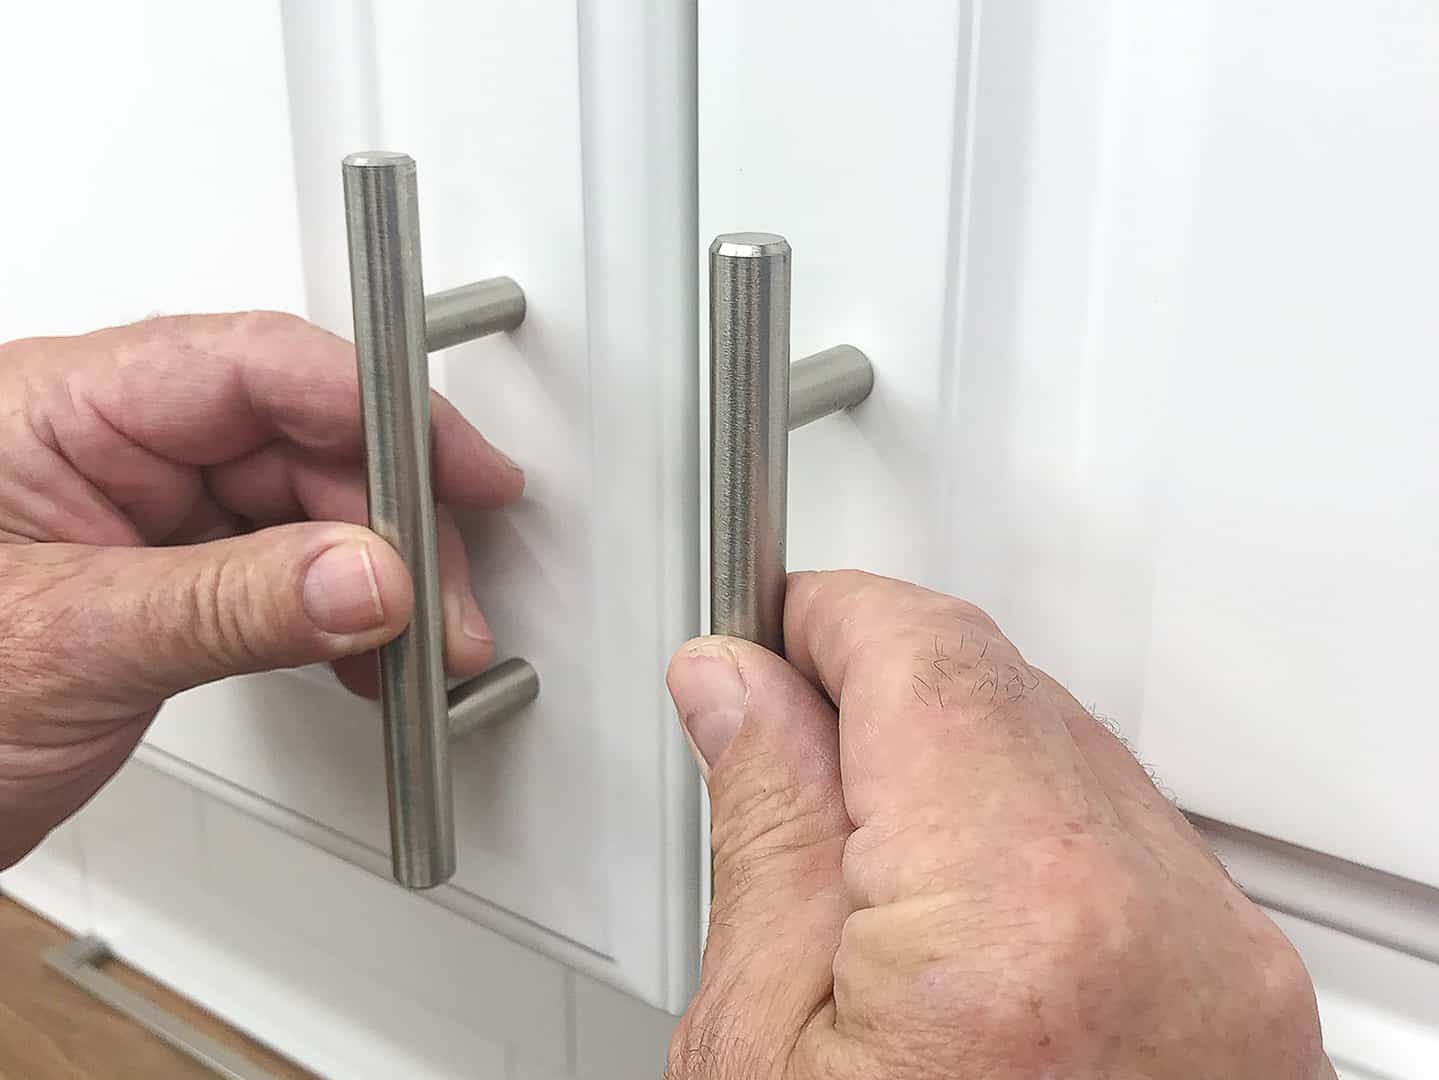
Aligning Handles And Knobs
Place the handles or knobs on the cabinet doors or drawers. Use a ruler or measuring tape to find the center point. Mark the spot with a pencil for drilling holes. Check that the hardware sits straight and matches on all doors. Consistent alignment gives a professional look.
Securing With Screws
Choose screws that come with the hardware or fit well. Insert screws through the back of the cabinet panel into the handle or knob. Tighten screws gently to avoid damaging the cabinet. Use a screwdriver for better control. Make sure screws are firm but not overly tight.
Checking For Stability
Test each handle and knob by pulling lightly. Check for any movement or looseness. If loose, tighten screws a bit more. Hardware should feel solid and steady. Proper stability makes daily use easy and safe.
Finishing Touches
Finishing touches make your kitchen cabinet hardware look perfect. This step ensures everything works well and looks clean. Small details create a big difference in your kitchen’s appearance and function.
Cleaning Up
Remove dust and fingerprints from the hardware. Use a soft cloth with mild soap and water. Avoid harsh chemicals that can damage the finish. Dry the hardware completely to prevent water spots. Clean the surrounding cabinet surfaces for a neat look.
Adjusting Hardware If Needed
Check if the handles or knobs are tight. Loose hardware can cause damage over time. Use a screwdriver to tighten any loose screws. Make sure the hardware aligns properly on the doors and drawers. Adjust as needed for smooth opening and closing.
Maintaining Your Cabinet Hardware
Regular cleaning keeps your hardware shiny and new. Wipe handles and knobs often to remove grease and dirt. Avoid using abrasive pads that scratch the surface. Check screws every few months to keep them secure. Proper care extends the life of your hardware.

Credit: www.homedepot.com
Credit: truepositiontools.com
Frequently Asked Questions
What Tools Do I Need To Install Kitchen Cabinet Hardware?
You need a drill, screwdriver, measuring tape, pencil, and level. A template or jig helps ensure accurate placement and alignment.
How Do I Measure For Cabinet Hardware Placement?
Measure from the edge or center of the cabinet door. Use consistent measurements for all hardware to maintain a uniform look.
Can I Install Cabinet Hardware Without Drilling?
You can use adhesive or magnetic hardware, but drilling is best for secure, long-lasting installation. Drilling ensures hardware stays firmly attached.
How Do I Avoid Mistakes When Installing Cabinet Hardware?
Mark measurements carefully and use a template or jig. Double-check alignment and level before drilling holes to prevent errors.
Conclusion
Installing kitchen cabinet hardware is simple with clear steps. Measure carefully and mark spots before drilling. Use the right tools for a smooth job. Take your time to align handles and knobs perfectly. A neat installation improves your kitchen’s look instantly.
Small changes make a big difference in style and function. Enjoy your refreshed kitchen with easy-to-use cabinets. Try this project yourself and see the results. It’s a small task that brings great satisfaction.


