
If you’ve ever struggled with installing cabinet hardware evenly and quickly, you’re not alone. Getting those holes perfectly aligned can be tricky, and one small mistake means re-drilling or uneven handles that just don’t look right.
But what if you could make a simple tool—a jig—that guarantees perfect placement every time? You’ll learn exactly how to make a jig for installing cabinet hardware that saves you time, reduces errors, and makes your project look professionally done.
Ready to take control of your cabinet installation and impress with flawless results? Keep reading, and you’ll be drilling like a pro in no time.
Credit: ourhomefromscratch.com
Materials And Tools Needed
Creating a jig for installing cabinet hardware needs the right materials and tools. This ensures accuracy and saves time. Gather everything before starting. Proper preparation makes the process smooth and efficient.
Essential Tools
- Drill with a set of drill bits
- Screwdriver or power driver
- Measuring tape or ruler
- Pencil or marking tool
- Clamps to hold the jig steady
- Square or combination square
- Sandpaper or sanding block
- Safety glasses
Recommended Materials
- Piece of hardwood or plywood (about 1/2 inch thick)
- Wood screws or small nails
- Wood glue (optional for extra strength)
- Masking tape for marking positions
- Template paper or cardboard (for layout)
Choosing The Right Jig Design
Choosing the right jig design is key to installing cabinet hardware accurately. The jig guides your drill and ensures each hole is placed perfectly. A well-designed jig saves time and keeps your work consistent. Picking the best jig depends on the type of hardware and your cabinet style. Understanding different jig designs helps you decide which one fits your project best.
Types Of Cabinet Hardware Jigs
There are several common jig types for cabinet hardware. A drilling jig uses fixed holes to guide the drill bit. It works well for handles and pulls with standard hole spacing. An adjustable jig lets you change hole positions for various hardware sizes. This type is useful if you install different pull styles. A template jig is a flat board with cutouts matching hardware shapes. It helps mark drilling spots quickly and accurately. Magnetic jigs attach to metal surfaces and hold the drill steady. These are less common but helpful for metal cabinets.
Factors Influencing Design Choice
Consider hardware type first. Handles with two holes need a jig with precise hole spacing. Knobs require only one hole, so a simple jig works well. Think about cabinet material. Softwoods may need a simpler jig to avoid splintering. Hardwoods allow more complex jig designs. Your skill level matters too. Beginners benefit from fixed-hole jigs for ease of use. Experienced users might prefer adjustable jigs for flexibility. Also, think about how many cabinets you will work on. Larger projects justify investing time in building a better jig. Smaller tasks may need a quick and simple solution.
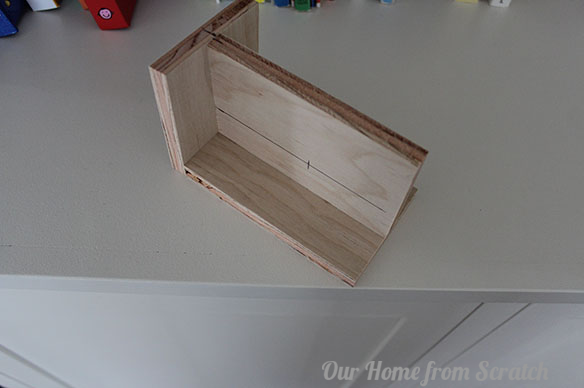
Preparing The Jig Base
Preparing the jig base is the first step to ensure precise cabinet hardware installation. A well-made base keeps your drill steady and holes aligned. This reduces mistakes and saves time during installation.
Focus on choosing the right material and marking accurate points. These details make the jig reliable and easy to use. Let’s explore how to prepare the jig base step-by-step.
Selecting The Base Material
Choose a sturdy and flat material for the jig base. Plywood, MDF, or hardwood are common choices. Avoid soft or warped materials that can bend or break. The base should resist wear from drilling holes. This keeps the jig accurate over many uses.
A thickness of about half an inch works well. It offers strength without being too heavy. Smooth the surface to prevent splinters and ensure clean drilling. Sanding the edges helps avoid damage to cabinet surfaces.
Measuring And Marking
Measure the exact placement for your cabinet hardware holes. Use a ruler and square for straight, even lines. Mark the drill points clearly on the jig base. Use a pencil to make fine, easy-to-adjust marks.
Double-check measurements before drilling the jig holes. Consistent hole spacing will guide your drill perfectly. Mark any reference edges on the base to align the jig on cabinets easily. Precise marking is key to uniform hardware installation.
Marking Drill Points
Marking drill points is a key step in making a jig for cabinet hardware installation. Precise marks ensure your holes line up perfectly every time. This saves time and prevents errors during drilling.
Accurate marking creates a professional look for your cabinets. It also helps avoid damage to the wood by placing holes in the wrong spots. Follow simple steps to get exact points before drilling.
Using A Square For Accuracy
A square tool helps keep your marks straight and even. Place the square along the edge of the cabinet door or drawer front. Use it to draw a straight line where the hardware will go.
Mark the drill points along this line at the correct height. This method prevents crooked or uneven holes. It also helps maintain consistent placement on all cabinet pieces.
Spacing And Hole Alignment
Measure the distance between holes carefully. Use a ruler or tape measure to set the spacing accurately. Mark the drill points at equal intervals along the line.
Check that the holes line up horizontally and vertically. Consistent spacing and alignment make the hardware look balanced. This step is essential for cabinet handles and knobs.
Drilling Jig Holes
Drilling jig holes is a key step in making a jig for installing cabinet hardware. Accurate holes ensure the hardware fits perfectly every time. A well-made jig speeds up your work and keeps your cabinets looking neat. Careful drilling reduces mistakes and saves material.
Use the right tools and techniques to create clean, precise holes. This section guides you through choosing drill bits and tips for clean holes. Follow these steps to improve your drilling accuracy and finish.
Choosing The Right Drill Bit
Select a drill bit that matches the hardware screw size. Use bits designed for wood to avoid splintering. A brad point bit works well for cabinet doors. It creates clean entry holes with less tear-out. Check the diameter twice before drilling. Using a bit too large will loosen the hardware. Too small, and the screw may split the wood.
Tips For Clean Holes
Start by making a small pilot hole to guide the larger bit. Drill slowly and keep the drill steady to avoid wandering. Place painter’s tape over the drill spot to reduce splintering. Back the wood with scrap material to prevent blowout on the exit side. Clear wood dust from the hole before inserting screws. These tips help maintain a smooth, professional finish on your cabinets.
Adding Alignment Features
Adding alignment features to your jig ensures precise and consistent placement of cabinet hardware. These features help guide your drill and keep everything in the correct position. With proper alignment, you reduce mistakes and speed up the installation process. Focus on simple yet effective ways to add these features.
Incorporating Viewing Windows
Viewing windows let you see the exact spot where you drill. Cut a small hole or slot in the jig aligned with the drilling point. This window helps you check the mark and the drill bit position before drilling. It prevents misalignment and avoids damaging the cabinet surface.
Make the window just large enough to see through clearly. Too big, and it may weaken the jig structure. Use clear tape over the window for extra strength and to keep dust out. This simple addition improves accuracy and makes your jig user-friendly.
Using Stops And Guides
Stops and guides control the jig’s position on the cabinet. Attach small blocks of wood or metal strips at key points on the jig. These pieces act as physical barriers that align the jig with cabinet edges or corners.
Stops ensure the jig does not slide or shift during drilling. Guides help position the jig at a consistent distance from the edge. Use screws or strong glue to fix these parts securely. Proper stops and guides make the process repeatable and reduce errors.
Testing And Adjusting The Jig
Testing and adjusting your jig is a key step in the cabinet hardware installation process. This ensures every hole is drilled accurately. Proper testing avoids costly mistakes on your actual cabinets. It also helps you find any design flaws early. Adjustments improve the jig’s fit and function. Take time to test and tweak the jig before starting on real work.
Trial On Scrap Wood
Begin by using scrap wood similar to your cabinet material. Clamp the jig firmly to the scrap piece. Mark the drill points using the jig’s guide holes. Drill carefully and check hole placement. Examine if holes line up with your hardware perfectly. Look for any slipping or misalignment. This trial run shows if your jig works as planned. Repeat on different scrap pieces for consistency.
Making Necessary Modifications
Note any issues found during the trial. Adjust the jig’s measurements if holes are off. Sand or trim areas that cause poor fit. Reinforce parts that flex or move too much. Add markings or guides for easier use. Test again after each change to verify improvements. Keep modifying until the jig produces perfect holes every time. A well-adjusted jig makes installation smooth and precise.

Credit: www.youtube.com
Using The Jig For Installation
Using the jig for installation makes the process easier and more accurate. The jig acts as a guide for drilling holes exactly where the cabinet hardware needs to go. This saves time and prevents mistakes that can ruin the look of your cabinets.
With the jig, you do not have to measure each hole separately. You simply position the jig on the cabinet and drill through the guide holes. This method keeps all handles and knobs aligned and consistent in height and spacing.
Positioning The Jig On Cabinets
Place the jig flat against the cabinet door or drawer front. Ensure it aligns with the edge or center, depending on your hardware style. Use clamps or hold it firmly to stop any movement.
Double-check the alignment before drilling. The jig should sit evenly without tilting. Adjust if needed to match your hardware’s placement plan.
Drilling Hardware Holes Precisely
Use a drill bit that matches the size of the hardware screws. Insert it into the guide holes on the jig. Drill straight through, applying steady pressure to avoid slips.
Drill slowly to keep control and prevent damage to the cabinet surface. Remove the jig after drilling and clean any dust. Now your cabinet is ready for hardware installation, with holes perfectly placed.
Maintaining And Storing The Jig
Maintaining and storing your cabinet hardware jig keeps it in top shape. A well-kept jig saves time and ensures precise installations every time. Proper care prevents wear and tear, extending the jig’s life.
Cleaning Tips
Clean the jig after each use to remove dust and debris. Use a soft cloth or brush to wipe off particles. Avoid harsh chemicals that can damage the wood or plastic. Lightly sand the surface if there are rough spots. Make sure the holes are clear by running a drill bit through them. Dry the jig completely before storing it to prevent moisture damage.
Storage Suggestions
Store the jig in a dry, cool place away from direct sunlight. Keep it flat to avoid warping or bending. Use a dedicated box or container to protect it from dust and accidental damage. Label the storage area for easy access during your next project. Avoid placing heavy objects on top of the jig. Regularly check for any signs of damage and fix them early.
Alternative Methods And Templates
Alternative methods and templates offer simple ways to install cabinet hardware accurately. These options save time and reduce errors during installation. They work well for both beginners and experienced DIYers. Choosing the right approach depends on your tools, skills, and project needs.
Printable Templates
Printable templates are easy to use and widely available online. You can download and print them on regular paper. These templates show exact hole placements for different hardware types. Align the template on the cabinet door or drawer front. Secure it with tape to prevent movement. Use a pencil or awl to mark the drilling spots. This method ensures consistent hole spacing and reduces guesswork. It works best for standard cabinet hardware sizes.
Commercial Hardware Jigs
Commercial hardware jigs are pre-made tools designed for cabinet hardware installation. They often come with adjustable guides to fit various hardware sizes. These jigs help drill holes in the correct spots every time. Using them improves speed and accuracy. They are made from durable materials like plastic or metal. Commercial jigs suit professional woodworkers and serious DIYers. They may cost more but offer long-term convenience and precision.

Credit: www.reddit.com
Frequently Asked Questions
What Materials Do I Need To Make A Cabinet Hardware Jig?
You need plywood or MDF, a drill, screws, a ruler, and a pencil. These materials help create a durable and precise jig for hardware installation.
How Do I Ensure Hole Placement Accuracy With A Jig?
Use a ruler and measure carefully before marking holes. Drill pilot holes in the jig for consistent hardware placement every time.
Can I Make A Jig For Different Cabinet Hardware Sizes?
Yes, design your jig with adjustable guides or multiple hole sizes. This flexibility allows you to install various pulls and knobs easily.
How Long Does It Take To Build A Cabinet Hardware Jig?
Building a simple jig usually takes 30 to 60 minutes. It saves time later by speeding up hardware installation and improving accuracy.
Conclusion
Making a jig for cabinet hardware saves time and ensures accuracy. It helps you drill perfect holes every time. Using simple materials, you can create a reliable tool easily. This jig reduces mistakes and makes your work look professional. Try building one before your next cabinet project.
It will make installing handles faster and neater. Keep your measurements consistent and enjoy better results. A little effort now leads to smoother installations later.

