Are you planning to update your cabinets but unsure how to measure the hardware correctly? Getting the right measurements is key to a smooth installation and a polished look.
Whether you’re replacing old handles or adding new pulls, knowing how to measure cabinet hardware saves you time, money, and frustration. In this guide, you’ll learn simple, foolproof steps to measure your cabinet knobs, pulls, and handles like a pro.
By the end, you’ll feel confident choosing the perfect hardware that fits perfectly and enhances your space. Let’s get started!
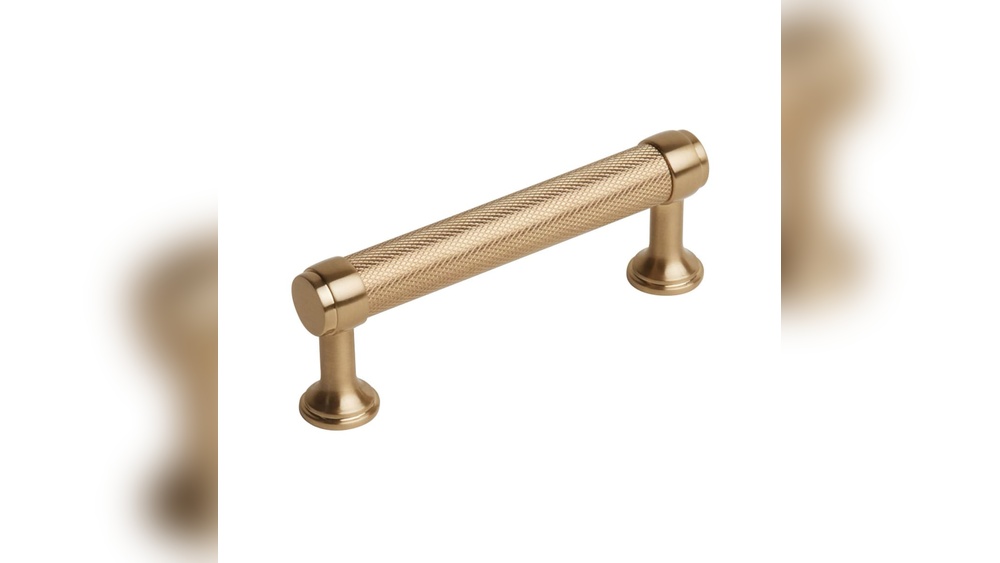
Credit: www.emtek.com
Center-to-center Measurement
Center-to-center measurement is the key to fitting cabinet hardware correctly. It refers to the distance between the centers of the two screw holes on a handle or pull. This measurement helps ensure the hardware matches existing holes on drawers or doors. Knowing this size prevents unnecessary drilling or damage.
Most cabinet handles have standard center-to-center sizes. Common measurements include 3 inches, 4 inches, or 5 inches. Measuring this distance accurately is simple and saves time during installation or replacement.
Measuring Between Screw Holes
Use a tape measure or ruler for this task. Place it from the center of one screw hole to the center of the other. Avoid measuring from the edges of the hardware. The center-to-center distance is always between the holes, not the full length of the handle.
Measure twice to be sure. Mark the exact points before buying new hardware. This method guarantees the new pulls fit perfectly without gaps or misalignment.
Importance For Replacement Hardware
Center-to-center measurement is crucial when replacing hardware. Cabinets often come with pre-drilled holes. Matching these holes saves effort and preserves the cabinet surface.
Choosing hardware with the same center-to-center size means no extra drilling. It keeps the cabinet looking neat and professional. It also avoids weakening the wood by adding new holes.
This simple step makes replacement easy and stress-free. It ensures the new hardware fits just like the old one.
Measuring Cabinet Pulls
Measuring cabinet pulls is an important step before buying new hardware. Accurate measurements ensure the pulls fit your cabinets perfectly. This avoids extra holes and mismatched sizes. Understanding key measurements helps you pick the right pulls with ease. Focus on two main dimensions: overall length and projection. Each affects how the pull looks and works on your cabinet.
Overall Length
Overall length is the total distance from one end of the pull to the other. Measure the entire pull, including any decorative ends. This size helps you see how much space the pull will cover on the cabinet. Keep in mind, overall length is different from center-to-center measurement. Center-to-center measures only the distance between screw holes. Knowing overall length helps you match the style and size to your cabinet doors or drawers.
Projection Or Depth
Projection refers to how far the pull sticks out from the cabinet surface. Measure from the base of the pull to its furthest point away from the door. This depth affects how easy the pull is to grasp. A larger projection gives more room for fingers but may catch on clothing. A smaller projection looks sleek but might be harder to use. Choose projection based on comfort and cabinet style.
Measuring Cabinet Knobs
Measuring cabinet knobs is a simple task that helps you find the right hardware for your cabinets. Accurate measurements ensure a perfect fit and easy installation. This process involves checking the placement of holes and selecting the right size for your knobs.
Single Hole Placement
Most cabinet knobs use a single hole for mounting. Measure the distance from the edge of the cabinet door to the center of the hole. This measurement tells you where to place the knob on new cabinets or replacement doors. Use a ruler or tape measure for accuracy. Mark the spot clearly before drilling any holes.
Choosing Knob Size
Knob size affects both function and style. Smaller knobs work well for narrow cabinet doors. Larger knobs offer a better grip on wider doors and drawers. Measure the diameter of the knob to match your cabinet’s size. Pick a size that feels comfortable to hold and fits your kitchen’s design.

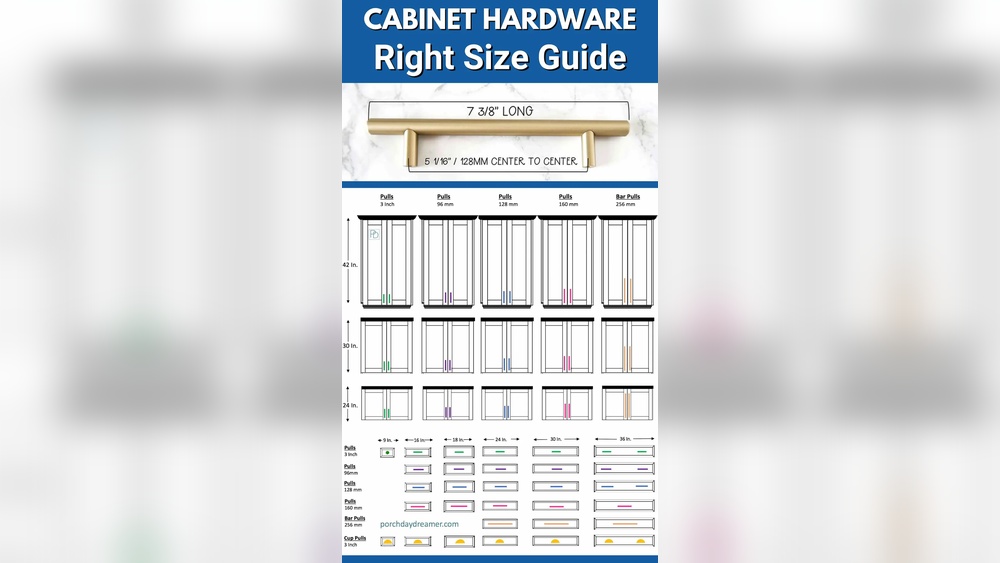
Credit: porchdaydreamer.com
Tools Needed For Measurement
Measuring cabinet hardware accurately is essential for a perfect fit and smooth installation. Using the right tools makes this task simple and precise. Two common tools help measure hardware: a tape measure and a ruler. Both provide reliable results and are easy to use. Understanding how to use these tools ensures you get correct measurements every time.
Using A Tape Measure
A tape measure is flexible and ideal for measuring cabinet pulls and knobs. It easily wraps around curved surfaces and edges. Start by placing the tape at one screw hole center. Stretch it straight to the other screw hole center. Read the measurement where the tape ends. This gives you the center-to-center distance, the key size for pulls and handles.
Choose a tape measure with clear, easy-to-read markings. Metric and imperial units help match hardware specifications. Keep the tape flat for accurate reading. Avoid bending or twisting, which can cause errors.
Using A Ruler
A ruler works well for small hardware or short distances. Place the ruler on a flat surface next to the hardware. Align the zero mark with one screw hole center. Note the measurement at the second hole center. This method suits knobs or small pulls with close screw holes.
Use a metal or plastic ruler with clear markings. Avoid wooden rulers that can warp over time. Keep the ruler steady to prevent slipping. This simple tool offers quick and precise measurement for cabinet hardware.
Measuring For New Installations
Measuring for new cabinet hardware installations starts with careful planning. Proper measurement ensures that handles and knobs fit perfectly and look balanced on your cabinets. Taking accurate measurements saves time and prevents mistakes during installation.
Focus on consistent placement. Measure each cabinet door or drawer carefully before marking drill points. Use the right tools to achieve precise results and a professional finish.
Determining Placement On Cabinets
Decide where the hardware will go on each cabinet. For drawers, placement is usually centered horizontally and vertically. For doors, the hardware often goes near the corner opposite the hinges.
Use a tape measure or ruler to mark the exact spot. Keep the measurements consistent across all cabinets for a uniform look. Think about how the hardware feels when you open the cabinet.
Marking Drill Points
After finding the right placement, mark the drill points clearly. Use a pencil to make small dots where screws will go. Double-check measurements before drilling.
Consider using a template or jig for even spacing. This tool helps keep holes aligned and prevents mistakes. Accurate drill points make installing hardware easier and faster.
Tips For Accurate Measurement
Measuring cabinet hardware accurately is key for a perfect fit. Small mistakes can cause big problems during installation. Follow these tips for precise measurements. They will help you choose hardware that fits well and looks great.
Double Checking Measurements
Always measure twice before buying hardware. Use a reliable ruler or tape measure. Check the center-to-center distance of existing holes carefully. Confirm the measurement by measuring from both ends. This reduces errors and ensures the hardware matches your cabinets exactly.
Considering Clearance And Comfort
Think about the space around the hardware. Make sure there is enough room for your fingers to grip pulls comfortably. Avoid hardware that is too close to edges or other fixtures. Proper clearance helps with ease of use and prevents damage to doors or drawers.
Common Measurement Terms
Understanding common measurement terms helps you choose the right cabinet hardware. These terms describe how pulls, knobs, and handles fit your cabinets. Knowing them makes measuring easier and more accurate. Below are key terms explained clearly.
Center-to-center Explained
Center-to-center measures the distance between screw holes. It is the space from the center of one hole to the center of the other. This measurement is vital for matching new hardware to existing holes. Pulls and handles often list this size in inches. For example, a 3-inch center-to-center means holes are 3 inches apart.
Projection And Length Definitions
Projection is how far the hardware sticks out from the cabinet surface. It affects how easy the handle is to grip. Length refers to the total size of the hardware from end to end. Pulls often have length larger than their center-to-center measurement. Both projection and length help you find hardware that fits well and looks balanced.

Credit: www.lowes.com
Troubleshooting Measurement Issues
Measuring cabinet hardware can be tricky. Errors often come from unusual hole spacing or cabinet styles. Fixing these problems ensures a perfect fit. This section helps you solve common measurement challenges for hardware installation. Clear, simple tips make your work easier and more accurate.
Handling Irregular Hole Spacing
Some cabinets have uneven or strange hole spacing. Measure from the center of one hole to the center of the next. Use a ruler or tape measure with clear markings. If holes are not aligned, mark their positions on paper. This helps find the right hardware size.
For odd spacing, choose hardware that covers the distance between holes. If no standard size fits, consider custom hardware. Avoid forcing pulls or knobs that do not match hole distances. Wrong hardware can damage cabinets or look unbalanced.
Adjusting For Cabinet Style
Different cabinet styles need different hardware sizes. For example, shaker cabinets often use small, simple pulls. Modern cabinets may require longer, sleek handles. Measure the cabinet face carefully to match the style.
Check if the cabinet door or drawer front has any curves or bevels. These shapes affect how hardware fits and looks. Select hardware that complements the cabinet style and size. Proper fit improves both function and appearance.
Frequently Asked Questions
How Is Cabinet Hardware Measured?
Measure cabinet hardware by finding the center-to-center distance between screw holes using a ruler or tape measure. For knobs, measure the hole’s center. Use existing hardware or desired placement to ensure accurate fit.
What Is The 1 3 Rule For Cabinet Hardware?
The 1-3 rule for cabinet hardware means placing knobs one inch from the edge and pulls three inches apart center-to-center. This ensures consistent, balanced hardware placement on cabinet doors and drawers.
How To Know What Size Cabinet Hardware To Buy?
Measure the center-to-center distance between screw holes using a ruler or tape measure. Match this size to existing hardware or desired placement. For knobs, measure the single hole location. This ensures proper fit and easy installation.
What Does 3 Inch Hole Center Mean?
A 3 inch hole center means the distance between two screw holes measures exactly three inches from center to center.
Conclusion
Measuring cabinet hardware is simple with the right steps. Always measure center to center for pulls. Use a ruler or tape measure for accuracy. Double-check your numbers before buying new hardware. Correct measurements help avoid mistakes and save time. This ensures your new cabinet hardware fits perfectly.
Taking your time leads to better results. Now, you can confidently choose and install your hardware.