Are you tired of looking at those stubborn marks and stains on your old cabinet hardware? Whether it’s tarnish, paint splatters, or years of grime, these blemishes can make your cabinets look worn and neglected.
But here’s the good news—you don’t have to replace your hardware to bring back that fresh, clean look. With some simple tools and easy techniques, you can remove those marks and restore your cabinet hardware to its original charm. Keep reading, and you’ll discover straightforward methods that save you time and money while giving your cabinets a makeover you’ll love.
Identify Hardware Material
Identifying the material of your old cabinet hardware is the first step to removing marks safely. Different metals and finishes react differently to cleaning methods. Knowing the exact type helps avoid damage and ensures effective cleaning.
This section explains common types of cabinet hardware and how to determine their metal type and finish. Use this knowledge to choose the right cleaning approach for your hardware.
Common Types Of Cabinet Hardware
Cabinet hardware usually includes knobs, pulls, and handles. These pieces come in various metals like brass, stainless steel, chrome, and zinc. Some may have painted or plated finishes. Older hardware might be solid metal or coated with a thin layer of another metal.
Brass hardware has a warm, yellowish tone. Stainless steel looks silver and does not rust easily. Chrome finishes are shiny and smooth. Zinc is often dull gray and lightweight. Painted hardware can chip or peel over time.
Determining Metal Type And Finish
Look closely for any markings or stamps on the hardware. These can indicate the metal type or brand. Use a magnet to test the metal. If it sticks, the hardware is likely steel or iron. If not, it could be brass, copper, or aluminum.
Check the color and texture. Brass feels smooth and has a warm tint. Stainless steel is cool to touch and shiny. Chrome is very reflective and smooth. Paint or plating can hide the base metal, so test a small hidden area first.
Understanding the metal and finish helps select safe cleaners. Avoid harsh chemicals on delicate finishes. Use gentle methods on painted or plated hardware. Proper identification protects your hardware while removing marks effectively.
Prepare Cleaning Supplies
Preparing your cleaning supplies is the first step to remove marks from old cabinet hardware. Having the right products and tools ready makes the process easier and faster. Clean supplies help protect the hardware and bring back its shine.
Essential Cleaning Products
Gather gentle cleaners like mild dish soap and white vinegar. Baking soda works well for tough stains. Use lemon juice for natural shine. Avoid harsh chemicals that can damage the finish. A small bottle of rubbing alcohol can help remove grease and sticky residue.
Tools For Scrubbing And Polishing
Use soft brushes like old toothbrushes to reach small details. A sponge or cloth works for general cleaning. Steel wool or fine steel pads help remove rust but use gently. Soft polishing cloths bring out the hardware’s shine. Gloves protect your hands during cleaning.
Remove Hardware Safely
Removing old cabinet hardware requires care and attention. Doing it safely prevents damage to both the hardware and your cabinets. Taking the right steps ensures the hardware can be cleaned or reused without harm.
Handle each piece gently. Avoid rushing the process. Keep your work area clean and organized to avoid losing small parts or causing scratches.
Tools For Removal
Use basic tools like a screwdriver, pliers, and a putty knife. Choose a screwdriver that fits the screws exactly. This helps avoid stripping them. Pliers can help loosen stuck screws carefully. A putty knife can gently pry hardware without scratching wood.
Keep a soft cloth nearby. It protects surfaces from accidental tool slips. Have a small container ready to hold screws and tiny parts. This prevents losing anything important.
Handling Delicate Pieces
Some hardware is fragile or antique. Handle these with extra care. Avoid using power tools on delicate pieces. They can cause cracks or breaks quickly.
Support the hardware firmly but gently. Hold it close to the cabinet surface. Take your time loosening screws or prying pieces off. Use padded gloves if necessary to improve grip without damage.
Label each piece if you plan to clean and reinstall them. This helps keep track and avoids mixing up parts. Treat every piece like it is valuable. This mindset keeps your project safe and smooth.
Clean Surface Marks
Cleaning surface marks from old cabinet hardware restores its charm and extends its life. Removing dirt, grime, and stains improves the hardware’s look. This process requires gentle methods to protect the metal finish. Simple household items can work wonders without harsh chemicals.
Soaking Methods
Soaking helps loosen dirt and stains on hardware. Use warm water mixed with mild dish soap for best results. Submerge hardware for 10 to 15 minutes to soften grime. For stubborn marks, soak in a vinegar and water solution. Avoid soaking delicate pieces for too long to prevent damage.
Scrubbing Techniques For Stains
Use a soft toothbrush or cloth to scrub marks gently. Scrubbing removes dirt in crevices and textured areas. Apply light pressure to avoid scratching the surface. For tougher stains, try fine steel wool carefully. Always test a small area first to check for scratches or discoloration.
Using Natural Cleaners Like Lemon And Baking Soda
Lemon juice acts as a natural cleaner and brightener. Combine lemon juice with baking soda to form a paste. Apply the paste to stained areas and let it sit for 10 minutes. Scrub gently with a soft brush or cloth. Rinse thoroughly and dry with a soft towel to prevent water spots.
Tackle Tough Stains
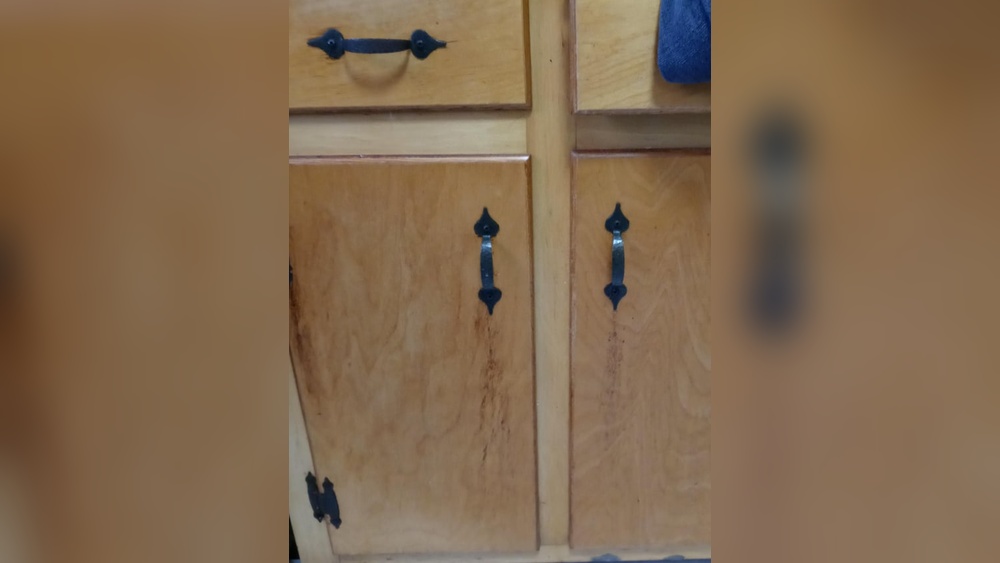
Old cabinet hardware often has stubborn marks that simple cleaning cannot remove. Tough stains like rust, paint, and grime require extra care and the right tools. Using the proper methods helps restore hardware without damage. This section covers effective ways to tackle these hard-to-remove stains safely.
Using Specialized Cleaners Like Barkeeper’s Friend
Barkeeper’s Friend is a popular cleaner for metal stains. It removes rust and tarnish gently. Apply a small amount on a damp cloth or sponge. Rub the hardware in circular motions. Let it sit for a few minutes on heavy stains. Rinse with warm water and dry thoroughly. Avoid using too much pressure to keep the finish intact.
Applying Steel Wool And Toothbrushes Carefully
Steel wool helps scrub away tough grime and rust. Use the finest grade, like 0000, to avoid scratching. Gently rub stained areas with steel wool. A toothbrush works well for detailed parts and crevices. Dip the brush in cleaner or soapy water. Brush softly to lift dirt without damaging the surface. Rinse and dry completely after cleaning.
Removing Paint And Rust Spots
Paint spots can stick firmly on hardware. Use a plastic scraper or fingernail to lift loose paint. For stubborn paint, apply rubbing alcohol or nail polish remover on a cotton ball. Dab carefully until paint softens. Rust spots require a mix of lemon juice and baking soda paste. Apply paste, let it sit for 10 minutes, then scrub gently. Rinse well and dry to prevent new rust.

Credit: www.reddit.com
Rinse And Dry Hardware
Rinsing and drying cabinet hardware properly is a key step after cleaning. This step removes cleaning residues and prepares the hardware for reuse or storage. Proper rinsing ensures no leftover chemicals cause damage. Thorough drying prevents moisture from causing rust or corrosion. Follow careful rinsing and drying techniques for the best results.
Best Practices For Rinsing
Use clean, warm water to rinse hardware after cleaning. Avoid harsh sprays that can damage delicate pieces. Gently move each item in the water to wash away residue. For stubborn spots, repeat the cleaning then rinse again. Avoid soaking hardware too long to protect finishes. Use a soft brush under running water if needed. Make sure all cleaning paste or soap is fully removed.
Drying To Prevent Rust
Dry each piece immediately after rinsing to stop rust. Use a soft, absorbent cloth to pat hardware dry. Avoid air drying alone as it can leave moisture behind. For best results, dry in a warm, dry room. Use cotton swabs to reach small crevices and holes. Ensure no water remains in joints or grooves. Proper drying keeps metal bright and prevents future marks.
Polish And Restore Shine
Polishing and restoring shine is a crucial step in removing marks from old cabinet hardware. It brings back the original beauty and makes the hardware look new. This process smooths out surface imperfections and enhances the metal’s natural glow. Proper polishing also protects the hardware from future tarnish and damage. Below are simple techniques and tips to polish your cabinet hardware effectively.
Buffing Techniques
Start with a clean, dry piece of hardware. Use a soft cloth or a microfiber towel for gentle buffing. Move the cloth in small, circular motions over the surface. For deeper scratches, use a fine steel wool pad carefully to avoid damage. Apply light pressure to avoid scratching the metal further. Use a rotary tool with a soft buffing wheel for larger or stubborn pieces. Always keep the tool moving to prevent heat build-up. Finish by wiping off any residue with a clean cloth. Buffing removes dullness and helps restore a bright shine.
Choosing Polish Products
Select a polish made for the metal type of your cabinet hardware. Brass, chrome, and nickel require different formulas. Use a non-abrasive polish to avoid damaging the finish. Cream or paste polishes work well on most metals. Avoid harsh chemicals that can strip off protective coatings. Natural options like lemon juice mixed with baking soda can also brighten metal safely. Test the polish on a small hidden area first. Apply polish with a soft cloth and follow product instructions. Proper polish selection ensures a lasting shine and protection.
:max_bytes(150000):strip_icc()/how-to-clean-wood-kitchen-cabinets-0123-2000-641e7e2dcbdc4518a80417c66e2e9194.jpg)
Credit: www.marthastewart.com
Protect And Seal Finish
Protecting and sealing the finish on old cabinet hardware is essential to keep it looking fresh and prevent future marks. After cleaning and restoring, a protective layer adds durability. This layer guards against moisture, dirt, and daily wear. It also enhances the hardware’s shine and color. Choose the right product for your type of hardware to achieve the best result.
Applying Protective Oils
Protective oils help nourish metal and prevent rust. Use oils made for metal, like mineral or tung oil. Apply a small amount with a soft cloth. Rub gently over the entire surface. Let the oil soak in for a few minutes. Wipe off any excess to avoid sticky residue. Reapply oil every few months for long-lasting protection.
Using Clear Lacquer Sprays
Clear lacquer sprays create a hard, protective coating. Select a spray designed for metal surfaces. Work in a well-ventilated area. Hold the can about 8-10 inches from the hardware. Apply a light, even coat to avoid drips. Allow the lacquer to dry completely before handling. Multiple thin coats work better than one thick coat. This finish resists tarnish and fingerprints.
Optional Finishing Touches With Waxes Or Rubs
Waxes and rubs add a soft shine and extra protection. Choose a paste wax or a metal-specific rub. Use a clean, soft cloth to apply a thin layer. Buff the hardware gently in circular motions. This seals the surface and smooths out small imperfections. Waxes need reapplication over time but keep hardware looking polished and cared for.
Handle Non-removable Hardware
Old cabinet hardware often has marks and stains that spoil its look. Removing these marks is easier if the hardware is removable. But what if you cannot take the hardware off? Handling non-removable hardware requires careful methods to avoid damage to both the hardware and the cabinet surface.
Use gentle cleaning and paint removal techniques that work without needing to remove the hardware. These methods help restore the hardware’s shine while protecting the surrounding wood or paint.
Cleaning With Paste And Plastic Wrap
Make a thick paste using baking soda and white vinegar. Apply this paste directly on the hardware marks. Cover the area with plastic wrap to keep the paste moist. Let it sit for several hours or overnight.
The paste loosens dirt and stains without harsh scrubbing. After waiting, remove the plastic wrap and wipe the paste away with a soft cloth. Repeat if needed. This method cleans gently while protecting the cabinet finish.
Scraping Paint Safely
Old paint may stick to hardware edges and cause marks. Use a plastic scraper or a credit card to lift paint gently. Avoid metal tools that can scratch the hardware or wood.
Work slowly and carefully. Soften the paint first by applying a small amount of warm water or a mild paint remover safe for wood. This helps the paint lift easier. Clean the area with a damp cloth to remove paint bits after scraping.
Maintain Hardware Regularly
Maintaining cabinet hardware regularly keeps it looking fresh and prevents damage. Old marks and corrosion appear when dirt and moisture build up over time. A simple routine can protect your hardware and extend its life. Regular care stops stains from setting and hardware from losing shine.
Check hardware often for dust, grime, or spots. Clean gently to avoid scratches. Dry hardware completely after cleaning to prevent rust. Small efforts made consistently save time and keep your cabinets attractive.
Routine Cleaning Tips
Use a soft cloth to wipe hardware weekly. Mild soap mixed with warm water works well for light dirt. Avoid harsh chemicals that can damage finishes. For tougher stains, a paste of baking soda and water gently lifts marks.
Use a soft toothbrush to reach crevices and details. Rinse with clean water and dry thoroughly with a microfiber cloth. Repeat this process monthly to keep hardware spotless and shiny.
Preventing Future Marks And Corrosion
Apply a thin coat of clear wax or mineral oil after cleaning. This creates a protective layer against moisture and dirt. Avoid touching hardware with dirty or oily hands to reduce stains. Fix leaks or moisture problems near cabinets promptly.
Use cabinet liners to prevent scratches inside drawers. Store cleaning products away from hardware to stop chemical damage. These small steps reduce marks and keep hardware looking new longer.
Credit: www.kilz.com
Frequently Asked Questions
How To Remove Stains From Cabinet Hardware?
Soak hardware in warm, soapy water or vinegar solution. Scrub stains with a toothbrush and baking soda paste. Rinse, dry, then polish with a soft cloth. Apply protective oil or clear lacquer to prevent rust. Avoid harsh scrubbing on brass plating to preserve finish.
How To Clean Old Vintage Hardware?
Soak vintage hardware in warm, soapy water or vinegar solution. Scrub gently with a toothbrush or steel wool. Use baking soda paste for stubborn stains. Rinse thoroughly, dry completely, and polish with a soft cloth. Apply protective oil or clear lacquer to prevent rust.
Handle brass-plated pieces carefully.
How To Bring Old Hardware Back To Life?
Soak old hardware in warm, soapy water or a vinegar and baking soda paste. Scrub with a toothbrush or steel wool gently. Rinse thoroughly and dry completely. Polish with a soft cloth to restore shine. Apply protective oil or clear lacquer to prevent rust and maintain finish.
How To Clean Old Rusty Hardware?
Soak rusty hardware in vinegar or baking soda paste. Scrub with a toothbrush or steel wool. Rinse, dry, then polish. Apply protective oil or lacquer to prevent future rust.
Conclusion
Removing marks from old cabinet hardware restores its charm and extends its life. Simple cleaning methods like soaking, scrubbing, and polishing work best. Use gentle tools such as toothbrushes and soft cloths to avoid damage. Natural cleaners like baking soda and vinegar safely remove stains without harsh chemicals.
Regular care keeps hardware looking fresh and maintains your cabinets’ beauty. Try these easy steps to refresh your old hardware today. Small efforts bring noticeable results. Your cabinets will thank you with a brighter, cleaner look.