Are you struggling to make the most of your Ikea cabinets’ corners? Installing corner hardware can transform those tricky, awkward spaces into smooth, accessible storage areas.
But if you’re not sure where to start or worried about making mistakes, you’re not alone. This guide will walk you through every step, using simple language and clear instructions, so you can confidently upgrade your cabinets and enjoy easy access to all your kitchen essentials.
Keep reading—you’re just moments away from mastering corner hardware installation and unlocking the full potential of your Ikea cabinets.
Preparing Your Workspace
Preparing your workspace is the first step to install corner hardware in Ikea cabinets. A clean, organized area helps you work faster and avoid mistakes. It also keeps tools and parts easy to find. Setting up your space right makes the project smoother and more enjoyable.
Gathering Necessary Tools
Start by collecting all tools needed for the installation. Common tools include a screwdriver, drill, measuring tape, and a pencil. Check the corner hardware package for any special tools required. Having everything ready prevents interruptions during work. It saves time and reduces frustration.
Clearing The Installation Area
Clear the cabinet and surrounding area before starting. Remove items inside and around the cabinet doors. Wipe surfaces clean to remove dust and dirt. A tidy area gives you space to move and work safely. It also protects your items from damage during installation.
Credit: erinzubotdesign.com
Choosing The Right Corner Hardware
Choosing the right corner hardware for Ikea cabinets is important. The right hardware makes doors and drawers work smoothly. It also fits well and lasts long. Picking the right type helps avoid problems during installation and daily use.
Corner hardware comes in different styles. Each style fits certain cabinet types. Some hardware improves space use, while others focus on door movement. Knowing the options helps you pick hardware that matches your needs.
Types Of Corner Hardware For Ikea Cabinets
There are several types of corner hardware for Ikea cabinets. The most common are lazy susans, pull-out trays, and blind corner hinges. Lazy susans rotate to give easy access to corner space. Pull-out trays slide out completely for better reach. Blind corner hinges allow doors to open wide without hitting walls.
Other options include swing-out shelves and corner drawers. Swing-out shelves fold out in an arc. Corner drawers use the corner space as a drawer instead of a cabinet. Each type suits different kitchen layouts and storage needs.
Selecting Based On Cabinet Model
Ikea cabinets have unique sizes and designs. Not all hardware fits every model. Measure your cabinet carefully before choosing hardware. Check the cabinet’s depth, width, and door style. Use this information to find hardware that fits perfectly.
Some hardware is designed for specific Ikea cabinet series. These options match the cabinet’s shape and mounting system. Using hardware made for your cabinet model ensures easy installation and better performance. Always confirm compatibility to avoid costly mistakes.
Removing Existing Components
Removing existing components from your Ikea cabinets is the first step to install corner hardware. This process makes the cabinet ready for new parts. It helps avoid damage and ensures a smooth installation. Start carefully to keep all pieces in good condition.
Taking Off Cabinet Doors
Open the cabinet doors fully. Use a screwdriver to remove the screws from the hinges. Hold the door firmly while unscrewing to prevent it from falling. Gently lift the door away from the cabinet. Place the doors on a soft surface to avoid scratches. Keep the screws and hinges in a small container for later use.
Clearing Out Interior Shelves
Empty all items from inside the cabinet. Remove the shelves by lifting them up and pulling out gently. Some shelves may have pins or supports; take these out carefully. Clean the inside space to remove dust and debris. Clearing the shelves creates space to install the corner hardware easily and safely.

Credit: www.ikea.com
Marking Hardware Placement
Marking hardware placement is an important step in installing corner hardware in Ikea cabinets. Precise marks help avoid mistakes and ensure the hardware fits properly. Take time to mark carefully. This saves effort and keeps the cabinet looking neat. Two main methods help mark the spots: measuring the correct positions and using templates.
Measuring Correct Positions
Start by measuring the spots where the hardware will go. Use a tape measure or ruler. Measure from the cabinet edges or corners. Note the distance carefully. Mark these points with a pencil. Check measurements twice to avoid errors. Accurate measuring makes hardware fit well and work smoothly.
Using Templates For Accuracy
Templates help mark hardware placement fast and accurately. Some hardware comes with paper or plastic templates. Place the template on the cabinet corner. Align it with the edges. Trace the holes with a pencil. Templates reduce mistakes and save time. They ensure the hardware is level and straight every time.
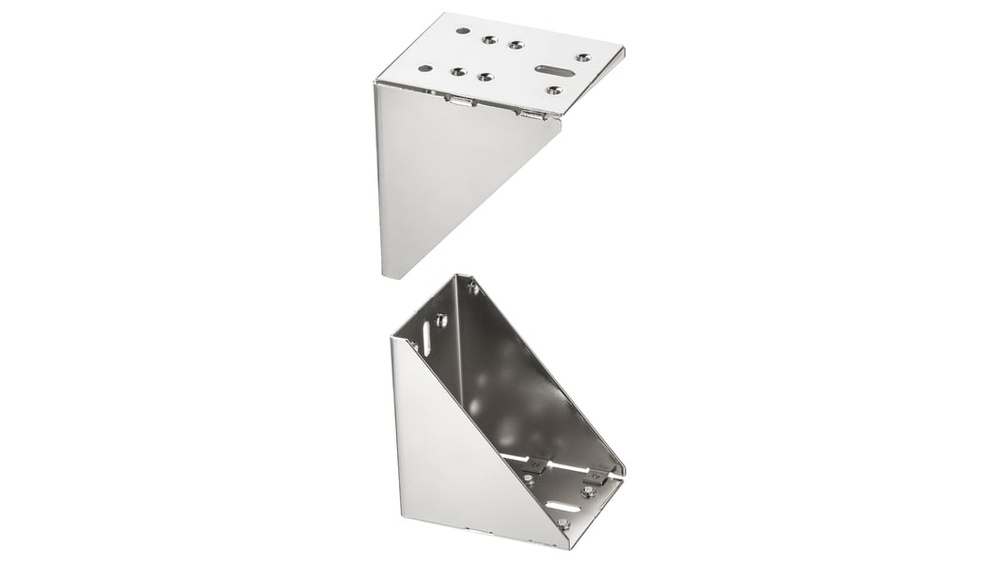
Installing Corner Hardware
Installing corner hardware in Ikea cabinets helps use space well. This hardware makes cabinet doors open smoothly and fit tightly. The process is simple but needs care. Follow steps to attach parts correctly for strong support.
This guide covers attaching hinges and mounts, then securing with screws. Each step ensures the hardware works well and lasts long.
Attaching Hinges And Mounts
Start by placing the hinge on the cabinet door. Match the hinge holes with the pre-drilled spots. Next, align the mount inside the cabinet corner. Hold the hinge and mount steady. Check if they move easily without gaps.
Make sure the hinges face the right direction. They must open and close the door properly. Adjust the mounts to fit snugly. This prevents the door from sagging or swinging.
Securing With Screws
Use the screws that came with the hardware set. Insert screws into the hinge holes first. Tighten them enough to hold the hinge firmly. Do not over-tighten; this can damage the cabinet.
Next, fasten screws into the mounts inside the cabinet. Double-check the screws are secure and flush. Test the door by opening and closing it slowly. The door should move smoothly and stay in place.
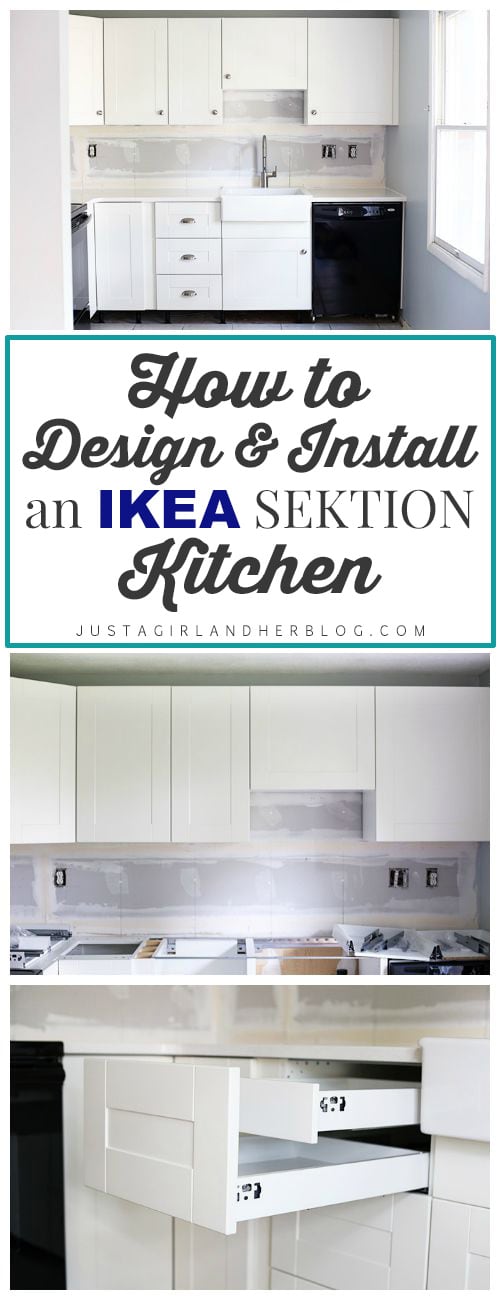
Credit: justagirlandherblog.com
Adjusting And Testing Hardware
After installing corner hardware in Ikea cabinets, adjusting and testing the hardware is crucial. This step ensures the cabinet doors open and close smoothly. It also helps maintain the cabinet’s durability and appearance. Proper adjustment avoids misalignment and hardware damage over time.
Take your time to check every part of the hardware. Small tweaks can make a big difference in how your cabinet functions. Testing the hardware several times will confirm its stability and ease of use.
Aligning Doors For Smooth Operation
Start by checking the door alignment. The doors should sit evenly and close without gaps. Use the adjustment screws on the hardware to move the doors up, down, left, or right.
Adjust slowly and test often. Open and close the doors to see if they move smoothly. Proper alignment reduces wear on the hinges and prevents doors from hitting each other.
Ensure both doors line up with the cabinet frame. This improves the look and function of your Ikea cabinet.
Ensuring Stability And Functionality
Once the doors align well, check the hardware stability. Tighten all screws firmly but avoid overtightening. Loose screws can cause doors to sag or fall off.
Test the hardware by opening and closing the doors multiple times. The movement should feel natural without sticking or noise. If you hear any creaks, check the screws and hinges again.
Good stability ensures long-lasting cabinet performance. It also protects your investment in Ikea furniture.
Finishing Touches
Finishing touches are key to completing your Ikea cabinet corner hardware installation. These steps ensure your cabinet looks neat and works well. Small efforts here make a big difference in the final result.
Reinstalling Shelves And Accessories
Put the shelves back carefully to avoid damage. Check that all hardware is tight before placing shelves. Slide them in gently and make sure they fit well. Reattach any accessories like racks or holders securely. Test the movement of doors and drawers to confirm smooth operation.
Cleaning Up The Workspace
Clear away tools and leftover parts to keep the area safe. Wipe down cabinet surfaces to remove dust and fingerprints. Dispose of packaging and scraps responsibly. A clean workspace helps you enjoy your new cabinet without clutter or mess.
Frequently Asked Questions
What Tools Are Needed To Install Corner Hardware In Ikea Cabinets?
You need a drill, screwdriver, measuring tape, pencil, and the corner hardware kit. These tools ensure accurate and secure installation of corner hardware in Ikea cabinets.
How Do I Align Corner Hardware Correctly In Ikea Cabinets?
Measure cabinet corners precisely and mark drill points with a pencil. Align hardware with these marks for a perfect fit and smooth operation.
Can I Install Corner Hardware On Existing Ikea Cabinets?
Yes, you can retrofit corner hardware on existing Ikea cabinets. Just remove doors, measure carefully, and follow the installation steps for a seamless upgrade.
How Long Does It Take To Install Corner Hardware In Ikea Cabinets?
Installation typically takes 30 to 60 minutes per cabinet. Time varies based on experience, tools, and cabinet size but is generally quick and straightforward.
Conclusion
Installing corner hardware in Ikea cabinets improves both function and space. Follow each step carefully to avoid mistakes. Use the right tools and measure twice before drilling. Take your time to ensure a secure fit. This small upgrade can make a big difference in your kitchen.
Enjoy easier access to cabinet corners every day. Practice makes perfect, so don’t rush the process. Soon, your cabinets will look neat and work better. Simple changes like this save time and reduce frustration. Try it yourself and see how smooth your cabinets become.