Have you ever wished you could control one light from two different switches? A 3-way light switch lets you do exactly that, adding convenience and flexibility to your home lighting.
If you’re thinking about installing one yourself but feel unsure where to start, you’re in the right place. This guide will walk you through each step clearly and simply, so you can confidently tackle the job. By the end, you’ll know exactly how to set up a 3-way switch and enjoy better control over your lights.
Ready to get started? Let’s dive in!
Tools And Materials Needed
Starting a 3 way light switch project needs the right tools and materials. Having these ready makes your work easier and safer. Below are the key items to gather before you begin.
Essential Tools
- Screwdriver set: flathead and Phillips
- Wire stripper and cutter
- Voltage tester
- Needle-nose pliers
- Electrical tape
- Flashlight or work light
- Drill with bits (optional for new holes)
Required Materials
- Two 3 way switches
- 14/3 or 12/3 electrical wire (depending on circuit)
- Wire nuts
- Wall plates
- Electrical boxes (if new boxes are needed)
- Light fixture or bulbs
How A 3 Way Switch Works
Understanding how a 3 way switch works helps you control lights from two spots. It adds convenience in hallways, stairs, or big rooms. The system uses two switches linked to one light. Each switch can turn the light on or off. This setup needs special wiring and parts.
Basic Wiring Concept
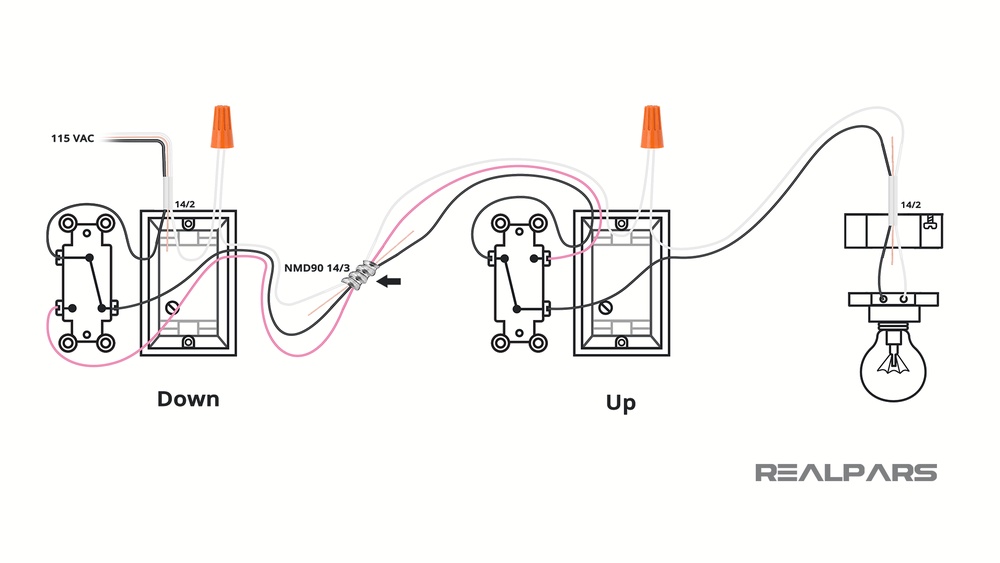
A 3 way switch uses three wires between two switches. These wires are called travelers. They carry electricity back and forth. One wire brings power to the switches. Another wire connects to the light. The switches change the path of electricity.
Each switch has three terminals. Two terminals connect to traveler wires. The third connects to the power or the light. The position of the switch moves electricity from one traveler to the other. This action turns the light on or off.
Switch Functionality
Each switch works like a gate for electricity. It can open or close the path. When both switches connect the same traveler, the light turns on. When they connect different travelers, the light turns off. You can flip either switch to change the light’s state.
This design lets two people control one light. It saves running extra wires. The switches work together to control power flow. The light responds to the combined switch positions.
Safety Precautions
Working with electrical switches can be dangerous. Safety is the first step before starting any wiring task. Taking precautions helps prevent shocks and accidents. Follow these safety tips carefully to protect yourself.
Power Shutoff
Turn off the power at the circuit breaker. Do not rely on the switch to cut power. Use a voltage tester to confirm no electricity flows. Double-checking reduces the risk of electric shock. Keep the power off until the work finishes.
Protective Gear
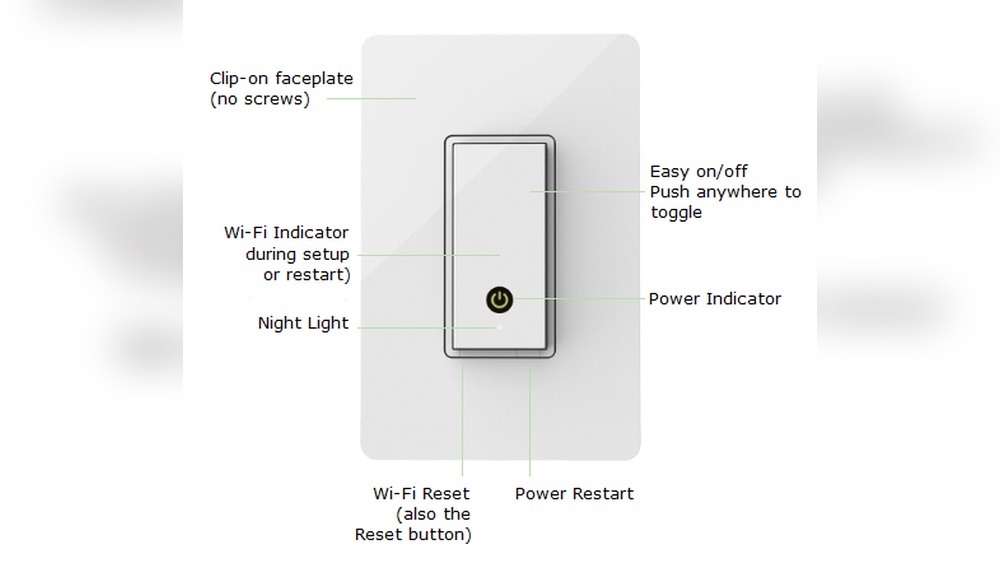
Wear insulated gloves to protect your hands from electricity. Safety goggles guard your eyes from sparks or dust. Use tools with insulated handles for added safety. Avoid loose clothing that can catch wires or tools. Proper gear keeps you safe and focused on the job.

Credit: nassaunationalcable.com
Preparing The Work Area
Preparing the work area is the first important step in installing a 3 way light switch. A clean and organized space helps you work safely and efficiently. It also makes the process smoother and faster. Take your time to get the area ready before starting any electrical work.
Clearing The Space
Remove any furniture or objects near the switch location. This gives you enough room to move and use your tools freely. Clear the floor and wipe dust off surfaces. Proper lighting is important too. Use a portable lamp if needed to see the wires clearly.
Checking Existing Wiring
Turn off the power at the circuit breaker. Use a voltage tester to confirm no electricity flows to the switch box. Open the switch box carefully and look at the wires inside. Identify the common wire, traveler wires, and ground wire. Note their colors and positions. This step prevents mistakes and keeps you safe during the installation.
Step-by-step Wiring Guide
Wiring a 3-way light switch may seem tricky. This guide breaks it down into clear steps. Follow along to connect the wires and switches safely. Each step focuses on one part of the process for easy understanding.
Identifying Wires
Turn off the power before touching any wires. Check the wires in the switch box. Look for a black wire, two traveler wires, and a white neutral wire. The black wire is usually the power source. Traveler wires connect the two switches. The white wire carries the current back to the light. Label each wire to avoid confusion.
Connecting The First Switch
Attach the black power wire to the common terminal on the first switch. Connect the two traveler wires to the traveler terminals. Tighten the screws securely. Wrap the ground wire around the green screw. Make sure no wires touch each other. Push the wires gently into the box and mount the switch.
Wiring The Second Switch
At the second switch, connect the traveler wires to the traveler terminals. Attach the black wire from the light to the common terminal. Connect the ground wire to the green screw. Check that all connections are tight. Carefully place the wires back into the box. Secure the switch with screws.
Testing The Circuit
Restore power at the breaker. Test the switches by flipping each one on and off. The light should turn on and off from both switches. If it does not work, turn off the power and check connections. Fix any loose wires or incorrect terminals. Test again until the circuit works properly.
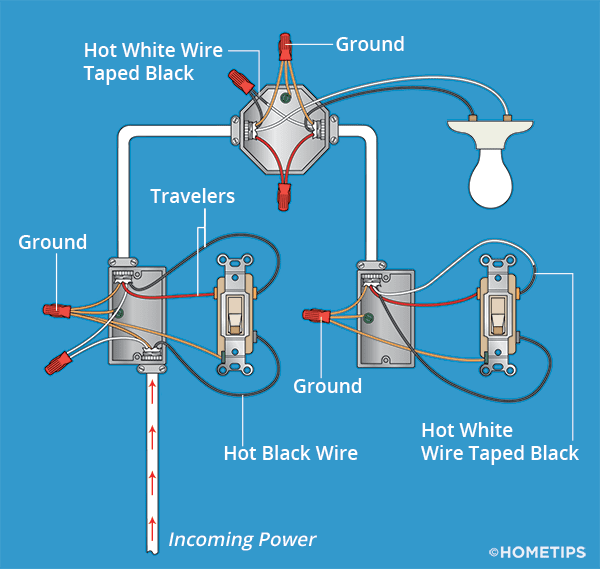
Credit: www.hometips.com
Troubleshooting Common Issues
Troubleshooting common issues with a 3 way light switch helps keep your home safe and your lights working well. Small problems can stop the switch from working right. Fixing these issues quickly saves time and avoids bigger repairs later.
Many problems happen because of wiring or switch wear. Knowing how to spot and fix these issues makes the job easier. Let’s explore common problems and how to deal with them safely.
Switch Not Working
A switch that does not work might have a loose wire or a broken part inside. Start by turning off the power at the breaker. Check if the switch feels loose or stuck. Tighten any screws holding wires in place.
Sometimes the switch itself is faulty. Replacing the switch with a new one often solves the problem. Test the new switch before putting the cover back.
Light Flickering
Flickering lights often mean a bad connection or a faulty bulb. First, replace the bulb with a new one. If flickering continues, check the switch wiring. Loose or damaged wires cause flickers.
Use a voltage tester to find any weak connections. Secure all wire nuts and terminals. Flickering can also be a sign of a poor ground connection.
Loose Connections
Loose connections are dangerous and cause many switch problems. Turn off power before handling wires. Look for wires that move easily or are not wrapped tightly.
Use a screwdriver to tighten all terminal screws. Make sure wire nuts fit snugly over wire ends. Loose wires create sparks and can damage the switch or light fixture.
Tips For A Neat Installation
Installing a 3 way light switch can be tricky without neat wiring. A clean setup helps avoid shorts and makes future fixes easier. Follow simple tips to keep your work tidy and safe.
Organizing Wires
Separate wires by function before connecting. Use wire nuts to group similar wires together. Coil extra wire length neatly inside the box. Avoid tight bends or twists that may damage wires. Label wires with tape for easy identification.
Securing Switches
Mount switches firmly in the box to prevent movement. Use the right screws and tighten them properly. Push wires carefully inside without pinching or cutting. Check switch alignment before attaching the cover plate. A steady switch feels reliable and looks professional.

Credit: mepacademy.com
Frequently Asked Questions
What Is A 3 Way Light Switch And How Does It Work?
A 3 way light switch allows control of one light from two locations. It uses two switches connected by traveler wires. Flipping either switch toggles the light on or off, providing flexible lighting control in rooms or hallways.
Can I Install A 3 Way Switch Myself Safely?
Yes, you can install a 3 way switch safely with basic electrical knowledge. Always turn off power at the breaker before starting. Follow wiring diagrams carefully and use a voltage tester to ensure no current flows during installation.
What Tools Do I Need For 3 Way Switch Installation?
You need a voltage tester, screwdriver, wire stripper, electrical tape, and 3 way switches. Having a wiring diagram helps. These tools ensure safe, accurate installation and proper connection of traveler and common wires.
How Do I Identify Traveler And Common Wires In 3 Way Switch?
The common wire connects to the black screw on the switch. Traveler wires connect to the brass screws. Use a voltage tester to confirm wires. Proper identification ensures correct wiring and switch functionality.
Conclusion
Doing a 3 way light switch is easier than it seems. Follow the steps carefully and take safety first. Double-check your wiring before turning power back on. This switch lets you control lights from two places. It adds convenience and saves effort in daily life.
Practice patience and do not rush the process. Soon, you will enjoy better lighting control at home. Keep learning and improving your DIY skills. Every small project builds your confidence and knowledge.