Are you ready to make your home smarter and more convenient? Connecting your TP Link light switch might seem tricky at first, but with the right steps, you can do it quickly and easily.
Imagine controlling your lights with just a tap on your phone or a simple voice command. In this guide, you’ll discover clear, step-by-step instructions to get your TP Link light switch up and running without frustration. Keep reading, and you’ll have smart lighting working in your home before you know it.
Prepare For Installation
Preparing for the installation of your TP Link light switch is important. It helps ensure a smooth and safe process. Before starting, gather all the necessary tools and take safety steps. This preparation saves time and prevents errors.
Check Required Tools
Get the right tools ready before you begin. You will need a screwdriver, a voltage tester, wire strippers, and electrical tape. Having these tools close by makes the job easier. Double-check the tools are in good condition to avoid delays.
Turn Off Power Supply
Safety is key when working with electrical devices. Turn off the power at the circuit breaker. This step prevents electric shock while installing the switch. Use a voltage tester to confirm the power is off before touching any wires.
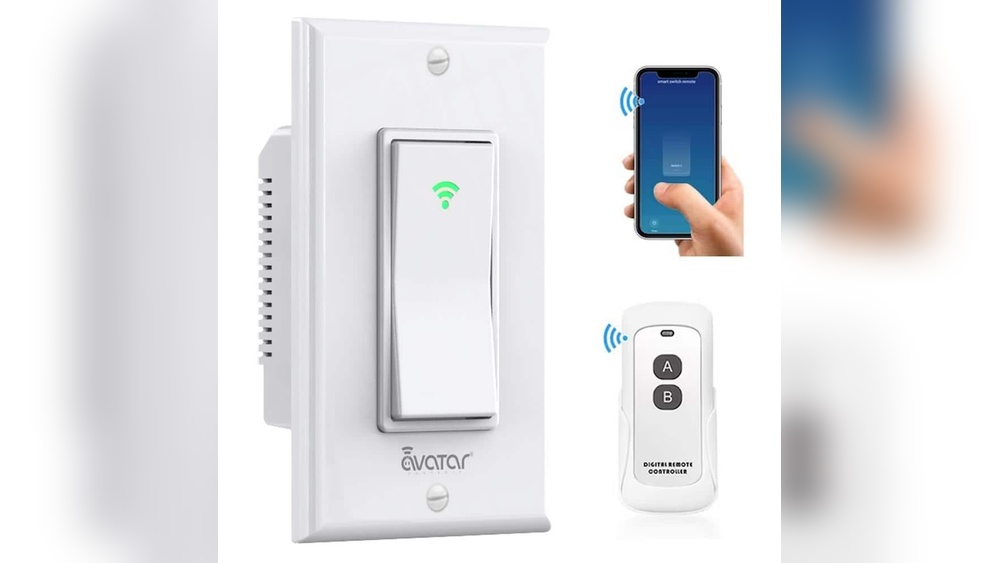
Credit: www.tp-link.com
Remove Existing Switch
Removing the existing light switch is the first step in connecting your TP Link light switch. It allows you to safely access the wiring behind the switch. Take your time and work carefully to avoid damage or injury.
Unscrew Wall Plate
Start by turning off the power at the circuit breaker. Use a screwdriver to remove the screws holding the wall plate. Keep the screws safe for later use. Gently pull the wall plate away from the wall. This reveals the switch and wiring behind it.
Disconnect Wires
Next, check the wires attached to the switch. Use a screwdriver to loosen the screws holding each wire. Carefully detach each wire from the switch. Remember how the wires were connected to match them later. Wrap the wire ends with electrical tape for safety. Now, the old switch is ready to be replaced.
Identify Wires
Identifying wires is the first step to connect your TP Link light switch safely. Knowing each wire type helps avoid mistakes and keeps you secure. This step prepares you to connect the switch correctly.
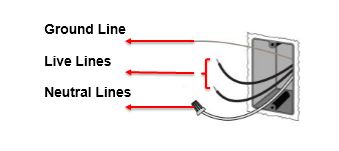
Find Live, Neutral, And Ground Wires
Look inside the switch box for three main wires. The live wire carries power and is usually black or red. The neutral wire completes the circuit and is often white or blue. The ground wire is green or bare copper and protects against shocks. Label each wire to keep track.
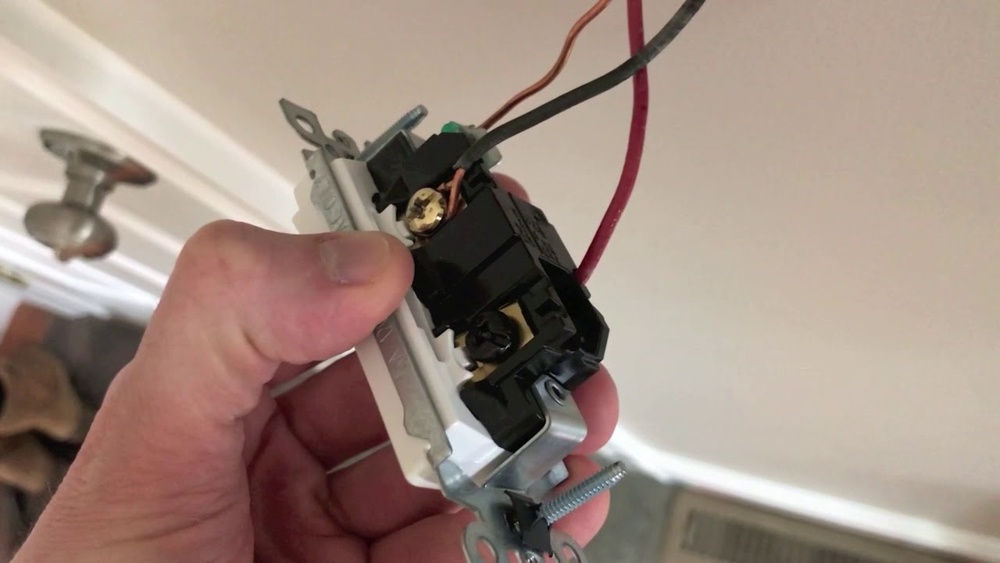
Use A Voltage Tester
Use a voltage tester to check which wire is live. Touch the tester to each wire carefully. The tester lights up or beeps on the live wire. Confirm no power in neutral or ground wires. Always double-check for safety before touching wires.
Credit: www.youtube.com
Connect Tp Link Switch
Connecting your TP Link light switch is a simple process. It involves attaching wires correctly and securing the switch in its place. This guide helps you complete these steps safely and easily.
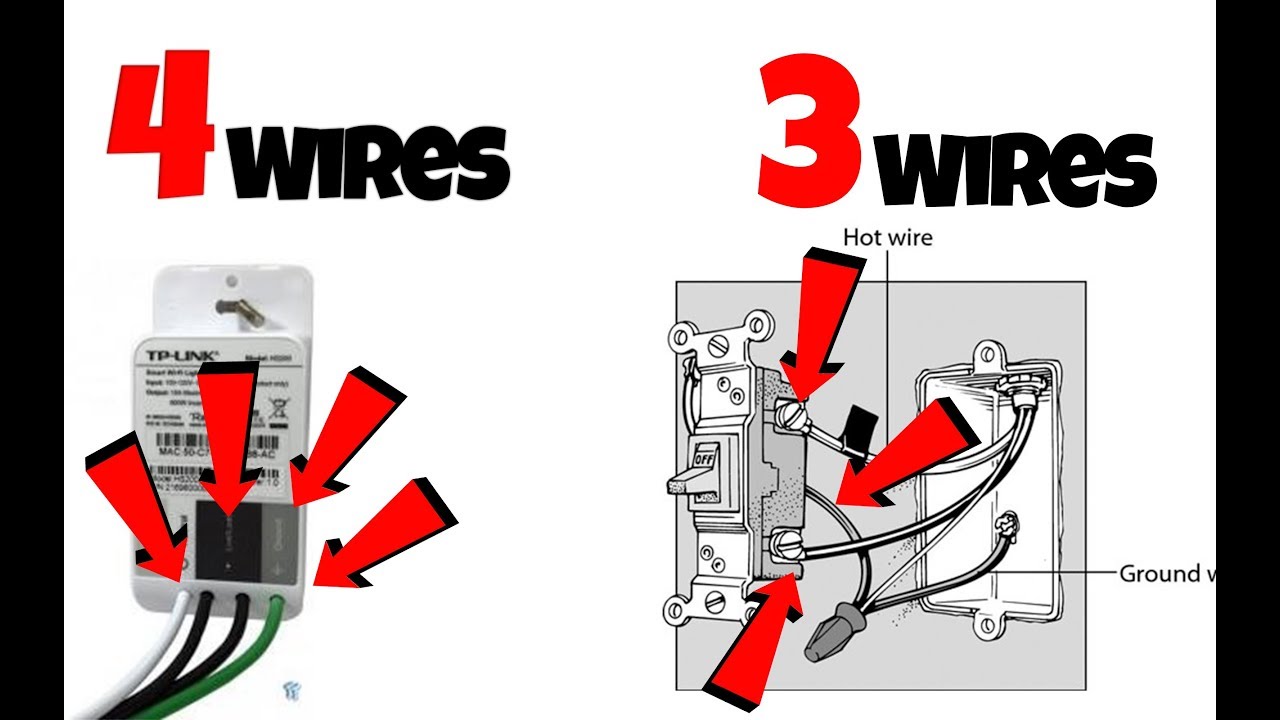
Attach Wires To Switch Terminals
First, turn off the power from the circuit breaker. This prevents electric shock. Identify the wires in your wall box: live, neutral, and ground. Match these wires to the switch terminals. Usually, live wires connect to the terminal marked “L”. Neutral wires go to the “N” terminal. Attach the ground wire to the green terminal or grounding screw. Use a screwdriver to tighten the screws firmly. Loose wires can cause poor connection or sparks.
Secure The Switch In Wall Box
After wiring, gently push the wires back into the wall box. Align the switch with the mounting holes. Use the screws provided to fix the switch to the box. Tighten the screws but avoid over-tightening. Over-tightening can crack the switch or wall plate. Finally, attach the faceplate by snapping or screwing it into place. Restore the power from the circuit breaker. Your TP Link switch is now ready for setup.
Restore Power And Test
After wiring your TP-Link light switch, restoring power is the next step. This lets you check if the switch works correctly. Testing ensures safety and proper function before regular use.
Turn On Circuit Breaker
Locate the circuit breaker that controls your light switch. Flip the breaker switch to the ON position. This will restore electricity to the switch and connected lights. Ensure the breaker stays in place and does not trip again.
Check Switch Functionality
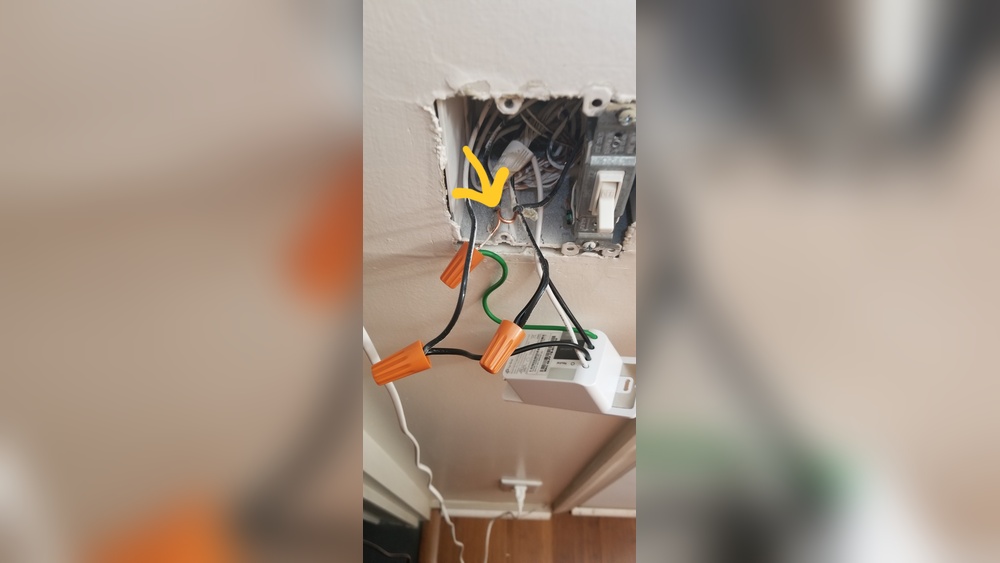
Press the TP-Link light switch to turn the lights on and off. Confirm the lights respond to each press. Use the TP-Link app to test remote control features. Make sure the switch connects to Wi-Fi and operates smoothly.

Credit: www.youtube.com
Configure Via Kasa App
Configuring your TP Link Light Switch through the Kasa App is simple and fast. This app lets you control your switch from anywhere using your phone. It also helps you set schedules and customize the switch to fit your needs. Follow these steps to get started with the Kasa App.
Download And Install App
Search for “Kasa Smart” on your phone’s app store. It is free to download. Tap “Install” or “Get” to add the app to your device. Open the app once the installation is complete. Create an account or log in if you already have one. The app is user-friendly and ready to guide you through the setup.
Connect Switch To Wi-fi
Plug in your TP Link Light Switch and ensure it is in setup mode. The app will detect the switch automatically. Select your home Wi-Fi network and enter the password. The switch will connect to your Wi-Fi in seconds. Make sure your phone stays close to the switch during this process.
Customize Settings
After connecting, you can name your switch for easy control. Set timers or schedules to turn the light on or off automatically. Adjust the settings to match your daily routine. The app also lets you share control with family members. Explore the options to make your switch work best for you.
Troubleshooting Tips
Troubleshooting your TP Link light switch can solve many common problems fast. Most issues come from simple causes. Knowing how to check and fix these helps you save time and avoid frustration.
Follow these clear steps for common problems like unresponsive switches, Wi-Fi troubles, and reset needs. Each fix is easy to do at home.
Switch Not Responding
First, check the power supply to the switch. Make sure the breaker is on and wires are connected tightly. Loose wiring can stop the switch from working.
Look at the switch’s LED light. No light means no power or a faulty switch. If the LED blinks, it may indicate a connection error.
Try pressing the switch manually. If it does not respond, it could be damaged or need resetting.
Wi-fi Connection Issues
Check your Wi-Fi network strength near the switch. Weak signals cause connection drops. Move your router closer if possible.
Ensure your router is set to a 2.4 GHz band. TP Link switches do not support 5 GHz networks.
Confirm the switch is within range and no walls or metal block the signal. Restart your router to refresh the connection.
Resetting The Switch
Locate the reset button on your TP Link switch. Usually, it is a small hole that needs a pin to press.
Press and hold the reset button for about 10 seconds. Release when the LED blinks fast. This resets the switch to factory settings.
After reset, set up the switch again using the app. This clears errors and fixes most connection problems.
Frequently Asked Questions
How Do I Connect A Tp Link Light Switch To Wi-fi?
To connect, turn off power first. Use the Kasa app to add the switch. Follow in-app instructions to link it to your Wi-Fi network quickly.
What Are The Steps To Install A Tp Link Light Switch?
Turn off power, remove old switch, connect wires to TP Link switch. Secure it to the wall, restore power, and configure via the Kasa app.
Can I Control Tp Link Light Switches Remotely?
Yes, TP Link switches work with the Kasa app. You can control lights from anywhere using your smartphone or voice assistants.
What Wi-fi Frequency Does Tp Link Light Switch Support?
TP Link light switches support 2. 4 GHz Wi-Fi only. Ensure your router broadcasts 2. 4 GHz for proper connection.
Conclusion
Connecting your TP Link light switch is simple and quick. Follow the steps carefully for a safe setup. Double-check all wires before turning the power back on. Test the switch to ensure it works properly. Enjoy the convenience of smart lighting in your home.
With a little patience, anyone can do it. Keep your home bright and energy-efficient easily. Now, your smart switch is ready to use.