Are you struggling to get your plastic light switch covers to fit just right? Whether you’re upgrading your home or fixing a tricky spot, cutting these covers perfectly can make all the difference.
You might think it’s a hassle, but with the right steps, you can do it quickly and safely. Keep reading, and you’ll learn simple tips that save you time and frustration—turning a tricky task into a smooth, easy fix. Your home deserves that clean, professional look, and you’re just a few cuts away from achieving it!

Credit: www.doodlecraftblog.com
Tools Needed
Cutting plastic light switch covers is a simple task with the right tools. Choosing proper tools makes the job easier and safer. Prepare all needed items before starting.
Essential Cutting Tools
A utility knife works well for thin plastic covers. It offers control and clean cuts. For thicker covers, a fine-toothed saw or rotary tool is better. A ruler or measuring tape helps mark exact cut lines. Use a pencil to draw cutting guides clearly.
Safety Equipment
Wear safety glasses to protect your eyes from plastic shards. Gloves keep your hands safe from sharp edges and tools. Use a dust mask if using power tools to avoid inhaling plastic dust. Work in a well-lit area to see cuts clearly and reduce mistakes.
Preparing The Work Area
Preparing the work area is the first step to cut plastic light switch covers safely and accurately. A clean, well-lit space helps you focus on the task. It also keeps your tools and materials organized. Taking time to prepare reduces mistakes and speeds up the work.
Clearing The Space
Remove any clutter or items from the work surface. A clear area gives you room to move and cut without interruptions. Use a sturdy table or workbench. Make sure the surface is flat and stable. This prevents slips and uneven cuts. Keep only the tools and materials you need nearby.
Setting Up Lighting
Good lighting is key for precise cuts. Natural light works well during the day. If not available, use bright lamps or LED lights. Position lights to avoid shadows on the switch cover. A well-lit area helps you see cutting lines clearly. This reduces the chance of errors and accidents.
Measuring The Cover
Measuring the plastic light switch cover is the first step in cutting it correctly. Accurate measurements help avoid mistakes and ensure a perfect fit. Take your time and be precise. A small error can make the cover useless or cause it to look uneven.
Taking Accurate Dimensions
Use a ruler or tape measure to get the exact size of the cover. Measure the length and width carefully. Also, note the position of the screw holes and switch openings. Measure twice to be sure the numbers are right. Write down all measurements clearly on paper.
Marking Cut Lines
After measuring, mark the cut lines on the plastic cover. Use a pencil or fine-tip marker for clear, visible lines. Draw straight lines following your measurements. Check that the lines do not interfere with screw holes or the switch. These lines guide your cutting and keep your work neat.

Credit: www.youtube.com
Cutting Techniques
Cutting plastic light switch covers needs the right technique. The right tool makes the job easier and safer. Choose a tool that fits the cut you want. Here are simple ways to cut plastic covers cleanly and safely.
Using A Utility Knife
A utility knife works well for thin plastic covers. Score the plastic firmly along the cut line. Make several light passes instead of one deep cut. Bend the cover gently to snap it along the score. Always cut away from your body for safety.
Using A Rotary Tool
A rotary tool with a cutting wheel is good for detailed cuts. Hold the cover steady on a flat surface. Guide the tool slowly along the marked line. Use light pressure to avoid melting the plastic. Wear safety glasses to protect your eyes.
Using A Hacksaw
A small hacksaw blade cuts thicker plastic covers well. Secure the cover in a clamp or vise. Saw gently along the line with steady strokes. Keep the blade straight to avoid rough edges. Smooth the cut edges with sandpaper after cutting.
Smoothing The Edges
After cutting plastic light switch covers, the edges often feel rough and sharp. Smoothing these edges is important for safety and a clean look. It also helps the cover fit better on the wall.
Use simple tools like files and sandpaper to smooth the edges. Take your time and work gently. This process makes the plastic safe to handle and gives a neat finish.
Filing Down Rough Areas
Start by using a small metal file on the cut edges. Move the file back and forth in one direction. Do not press too hard to avoid cracking the plastic.
Focus on any sharp or uneven spots. Filing removes these rough bits step by step. Check the edge often to see your progress.
Sanding Tips
After filing, use fine-grit sandpaper to smooth the edges more. Wrap the sandpaper around a small block for better control.
Sand gently in a circular motion until the edge feels smooth. Wipe away dust with a soft cloth. Repeat if needed for a polished finish.
Credit: www.wallplates.com
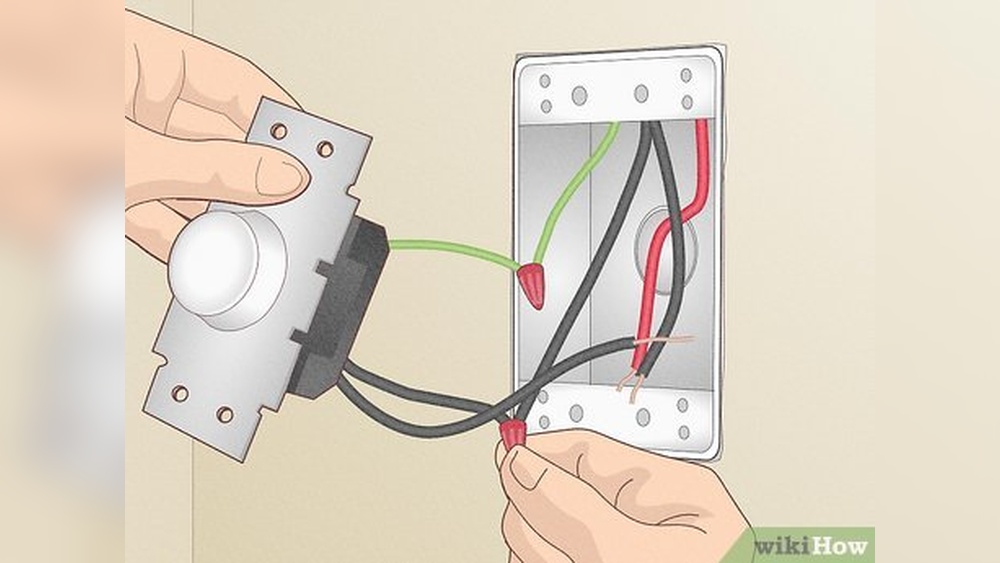
Fitting The Cover
Fitting the plastic light switch cover is a key step. It ensures a neat look and proper protection. This step requires care and some patience. The cover must fit snugly around the switch and the wall.
Testing The Fit
Place the cover over the switch plate. Check if it sits flat against the wall. Make sure the screw holes line up well. The cover should not block the switch’s movement. Try turning the switch on and off. Confirm the cover does not catch or stick. If the cover moves or feels loose, it needs adjustment.
Making Adjustments
Mark areas where the cover is tight or uneven. Use a small file or sandpaper to smooth these spots. Remove small amounts of plastic carefully. Test the cover again after each adjustment. Avoid cutting too much at once. The goal is a perfect, firm fit. Keep the edges smooth to avoid damage or injury. Repeat until the cover fits well and looks good.
Safety Tips
Cutting plastic light switch covers requires care and attention. Safety should be your top priority. Follow these tips to protect yourself and handle tools correctly.
Handling Tools Safely
Use the right tools for cutting plastic covers. A sharp utility knife or a small saw works well. Check tools before use to ensure they are in good condition. Hold tools firmly to avoid slips. Cut slowly and steadily. Avoid rushing the process. Keep your workspace clean and free of clutter. Store tools safely after use to prevent accidents.
Protecting Yourself
Wear safety glasses to protect your eyes from plastic shards. Use gloves to shield your hands from cuts. Wear a dust mask if plastic dust forms during cutting. Work in a well-lit area to see clearly. Keep children and pets away from your work area. Take breaks if you feel tired. Stay focused to avoid mistakes and injuries.
Frequently Asked Questions
How Do I Safely Cut Plastic Light Switch Covers?
Use a fine-toothed saw or utility knife for clean cuts. Wear safety goggles and gloves to protect from plastic shards. Score the plastic gently before cutting to avoid cracking.
What Tools Are Best For Cutting Switch Covers Precisely?
A rotary tool with a cutting wheel or a fine-toothed hacksaw works best. These tools offer control and accuracy for neat edges. Sand edges smooth after cutting to prevent roughness.
Can I Cut Plastic Switch Covers Without Cracking Them?
Yes, score the plastic deeply before cutting. Use slow, steady pressure and avoid forcing the blade. This reduces the risk of cracking or splintering the cover.
How To Measure Plastic Covers Before Cutting Accurately?
Measure the space carefully using a ruler or tape measure. Mark the cutting line with a pencil or masking tape. Double-check measurements before cutting to ensure a perfect fit.
Conclusion
Cutting plastic light switch covers is simple with the right tools. Take your time and measure carefully before cutting. Use a sharp blade or saw to make clean cuts. Smooth rough edges with sandpaper to avoid injuries. Always work in a well-lit space and wear safety gear.
Following these steps helps you get the perfect fit every time. Now, you can update your switches easily and safely. Keep practicing to improve your skills and confidence. Small projects like this save money and add a personal touch to your home.