Is your light switch button stuck, loose, or just not working right? It’s frustrating when something as simple as turning on a light becomes a hassle.
But don’t worry—you don’t need to call an electrician just yet. You’ll learn easy and effective steps to fix your light switch button yourself. By the end, you’ll save time, money, and the stress of sitting in the dark. Ready to get your lights working perfectly again?
Let’s dive in!
Tools And Materials Needed
Fixing a light switch button is easier with the right tools and materials. Having everything ready saves time and avoids frustration. You do not need many items to complete this simple task.
Gathering these tools helps you work safely and efficiently. Below are the basic items needed to fix a light switch button.
Tools Required
A screwdriver set is essential for removing the switch cover and screws. Use both flathead and Phillips screwdrivers for different screws.
A voltage tester or multimeter checks if the power is off before you start. Safety first.
Needle-nose pliers help in handling small wires and making tight bends. They give better control.
A wire stripper removes insulation from wires without damaging them. This tool is useful for reconnecting wires.
Materials Needed
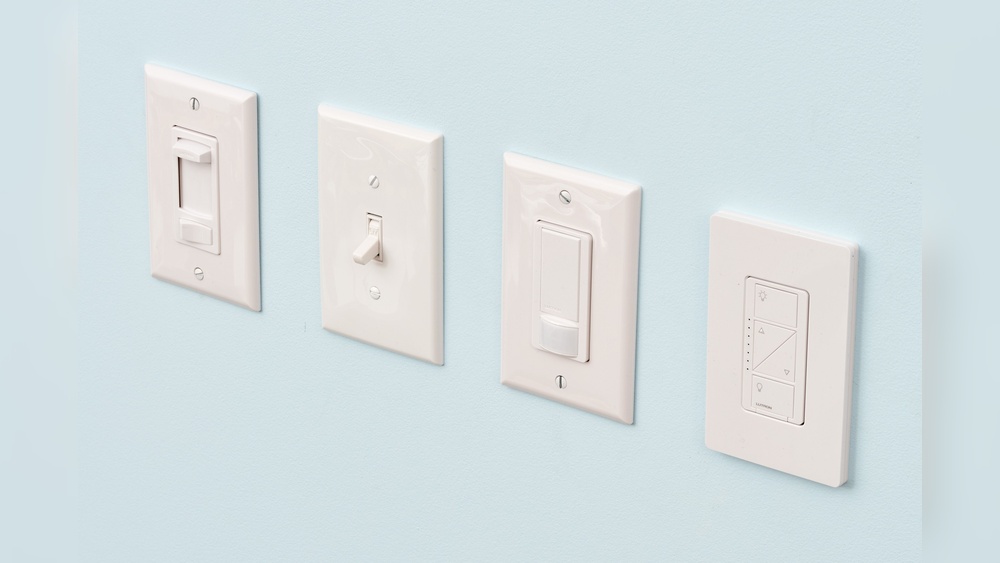
Replacement light switch buttons come in various styles. Choose one that fits your existing switch.
Electrical tape helps secure wire connections safely and prevents shorts.
Wire nuts connect wires together securely. They are safer than twisting wires alone.
Optional: A flashlight or headlamp provides light if you need to work in a dark room.

Credit: www.youtube.com
Safety First
Fixing a light switch button requires care and attention. Safety comes first to avoid electric shocks or injuries. Always prepare well before starting the repair. Follow simple steps to protect yourself and others around you.
Turn Off The Power
Switch off the electricity at the main circuit breaker. Do not rely on the wall switch alone. This step stops electric current from flowing to the switch. Use a tester to confirm the power is off.
Use Insulated Tools
Choose tools with insulated handles. They protect you from electric shocks. Never use metal tools without insulation. Keep tools dry and clean during the repair.
Wear Safety Gear
Wear rubber-soled shoes to prevent grounding. Use safety goggles to protect your eyes from dust. Gloves add extra protection against accidental shocks.
Work In A Dry Area
Ensure the repair area is dry and clean. Water increases the risk of electric shock. Avoid fixing switches near wet surfaces. Use a dry cloth to clean the area first.
Identifying The Problem
Fixing a light switch button starts with finding the exact problem. Knowing what causes the switch to fail helps you fix it faster. This section explains simple steps to identify the issue safely and clearly.
Check For Loose Switch
First, see if the switch feels loose or wobbly. A loose switch can stop working properly. Gently press the button and notice any unusual movement. Tighten the switch screws if needed. This might solve the problem quickly.
Test The Electrical Circuit
Next, test the electrical circuit connected to the switch. Turn off the main power before testing. Use a voltage tester or multimeter to check for current. No power means a circuit problem, not the switch itself. This step ensures safety and accuracy.
Look For Visible Damage
Finally, check the switch and wires for visible damage. Look for cracks, burn marks, or broken parts. Damaged wires or switch parts need replacement. This visual check saves time and prevents future hazards.
Turning Off The Power
Turning off the power is the first step to fix a light switch button safely. Electricity can cause shocks and injuries. Always stop the power before you touch the switch. This step protects you from harm and helps avoid damage.
Never try to fix a light switch without cutting the power first. It is dangerous and can lead to electric shock. Safety must come first in every repair task.
Locate The Circuit Breaker
Find the main electrical panel in your home. It is usually in the basement or a utility room. Open the panel door to see the circuit breakers. Each switch controls power to a different area.
Identify The Correct Breaker
Look for the breaker that controls the light switch you want to fix. It may be labeled. If not, test by turning off breakers one by one. Check if the light switch stops working.
Switch Off The Power
Flip the correct circuit breaker to the off position. This stops the flow of electricity to the switch. Make sure the breaker stays in the off position during the repair.
Test The Switch For Power
Use a voltage tester or a simple light bulb to check. The tester should show no electricity at the switch. If power is still there, recheck the breaker or stop and get help.
Removing The Switch Cover
Removing the switch cover is the first step to fix a light switch button. It gives you access to the switch inside. This process is simple and needs only a few tools. Always ensure the power is off to avoid shocks. Safety comes first.
Gathering The Right Tools
Start by preparing a screwdriver. Usually, a flathead or Phillips screwdriver works. Have a flashlight ready to see better if needed. Keep a small container nearby to hold screws. This prevents losing any small parts.
Locate your home’s circuit breaker panel. Turn off the power for the switch you will work on. Test the switch to confirm the power is off. Use a voltage tester if available. This step protects you from electric shock.
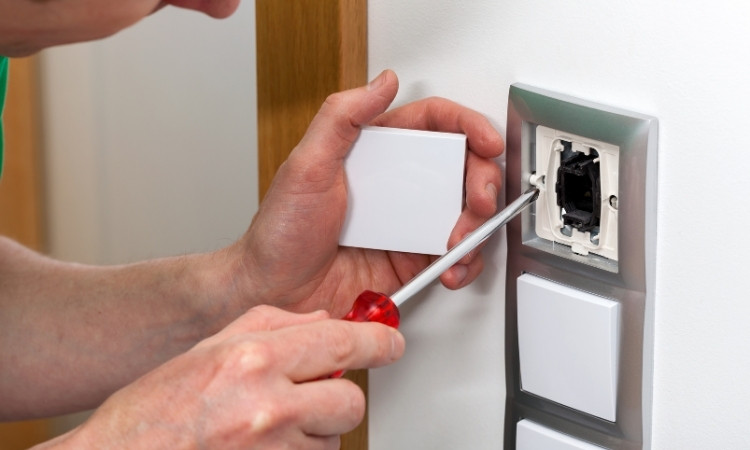
Removing The Screws
Find the screws on the switch cover plate. They are usually on the top and bottom edges. Use the screwdriver to turn them counterclockwise. Keep the screws safe in the container. Avoid dropping or misplacing them.
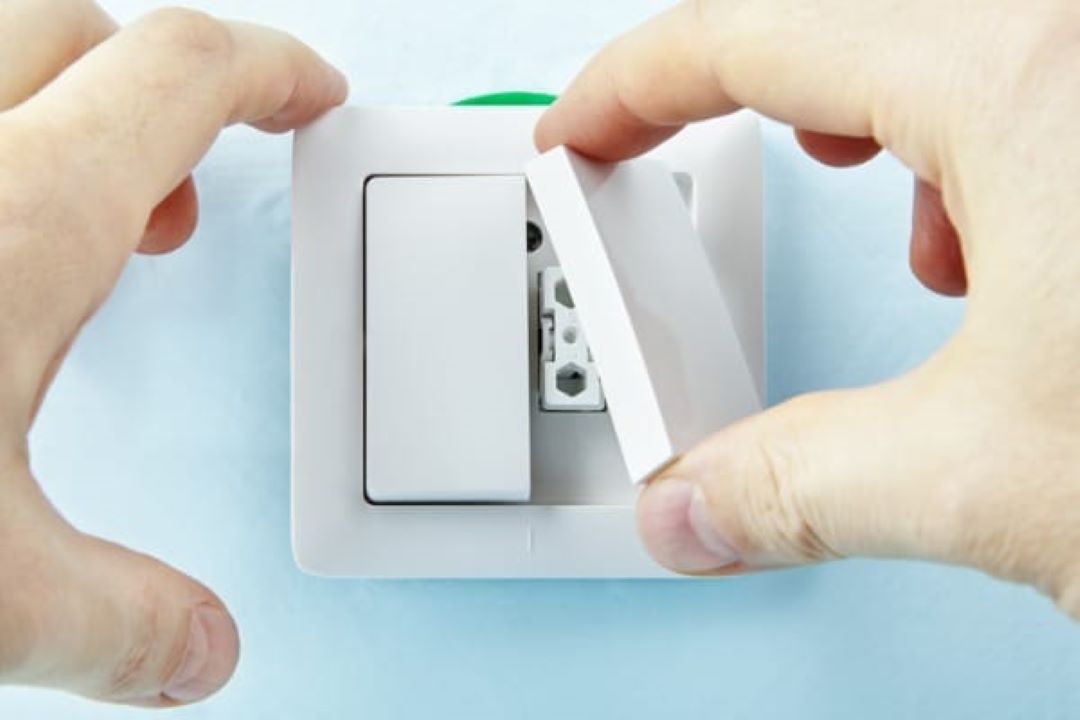
Taking Off The Switch Cover
Gently pull the cover plate away from the wall. Sometimes it may stick due to paint or dirt. Use a flathead screwdriver to pry it carefully if needed. Avoid using too much force to prevent damage. Set the cover plate aside safely.
Credit: www.litoelectrical.com
Inspecting The Switch Mechanism
Inspecting the switch mechanism is the first step to fix a light switch button. This helps find the cause of the problem. A careful check can reveal if the button or wiring is faulty. Safety is important, so always turn off the power before starting.
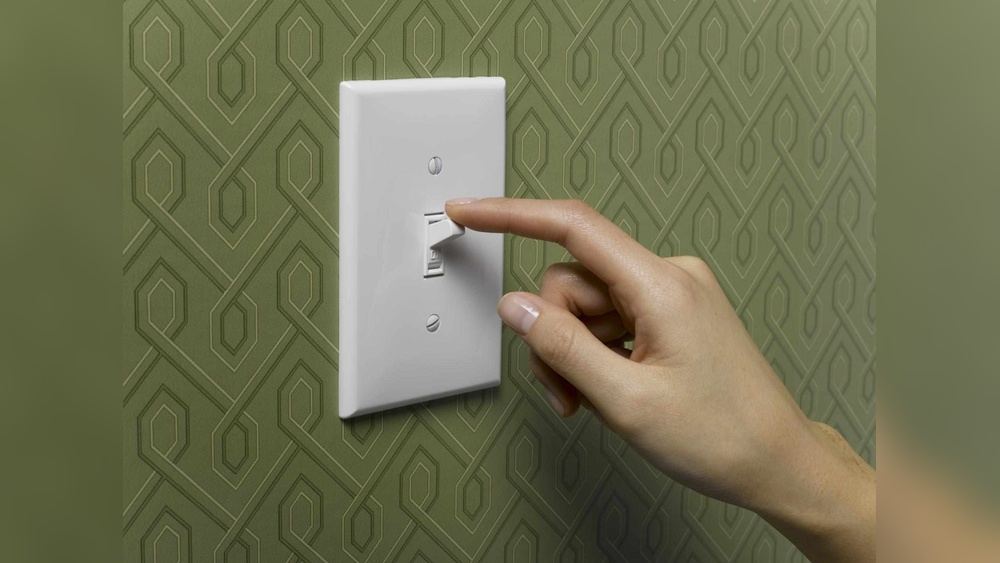
Examine The Switch Button
Look closely at the switch button itself. Check if it feels loose or stuck. Press the button several times to test its movement. If it does not click or move smoothly, the button might be broken. Dirt or debris can also block the button. Clean the area gently with a dry cloth.
Check Wiring Connections
Remove the switch cover to see the wires inside. Make sure all wires are tightly connected to the terminals. Loose wires can cause the switch to fail. Look for any damaged or frayed wires. Replace any wires that look worn out. Tighten screws to secure the wires firmly. Proper wiring ensures the switch works safely and correctly.
Fixing Loose Or Disconnected Wires
Loose or disconnected wires cause light switches to fail. Fixing these wires can restore proper function. It requires basic tools and safety precautions. This guide helps identify and fix wire issues quickly.
Turn Off Power Before Starting
Always switch off the power at the circuit breaker. This prevents electric shock. Double-check the switch is off using a tester. Safety first.
Remove The Switch Cover Plate
Unscrew the cover plate gently. Use a flathead screwdriver if needed. Set screws and plate aside carefully.
Inspect Wires For Damage Or Looseness
Look for wires that are loose or disconnected. Check for frayed or broken ends. Tighten any screws holding the wires. Replace damaged wires if necessary.
Reconnect Or Tighten Wires Securely
Push wires firmly into their terminals. Tighten terminal screws with a screwdriver. Ensure no bare wire is exposed. Proper connection prevents future problems.
Test The Switch After Repair
Replace the cover plate and screws. Turn power back on at the breaker. Test the switch to confirm it works. Repeat steps if the switch still fails.
Replacing The Switch Button
Replacing the switch button is a common fix for a faulty light switch. It can restore proper function quickly. The process is simple and safe with the right steps. Basic tools and a little care are all you need.
Follow these steps to replace your light switch button smoothly and safely.
Turn Off The Power
Start by turning off the power at the circuit breaker. This step is crucial. It prevents electric shock while working on the switch.
Use a voltage tester to confirm the power is off before touching the switch.
Remove The Old Switch Button
Unscrew the switch cover plate carefully. Then, remove the screws holding the switch in place.
Gently pull out the switch to access the wiring. Note the wire positions before disconnecting them.
Connect The New Switch Button
Attach the wires to the new switch terminals. Match the wires to the correct screws.
Make sure the connections are tight and secure to avoid loose wires.
Reassemble And Test
Push the new switch back into the wall box. Screw it firmly in place.
Replace the cover plate and restore power at the breaker. Test the switch to ensure it works properly.
Reassembling The Switch
Reassembling the switch is the final step in fixing a light switch button. It requires care and attention to make sure everything fits correctly. Taking your time here prevents future problems and keeps your switch working well.
Preparing The Switch Components
Start by arranging all parts on a clean surface. Check each piece for damage or dirt. Clean any dust or grime gently with a dry cloth. This step helps the switch work smoothly once reassembled.
Aligning The Internal Mechanism
Place the internal parts back in the correct order. Make sure the button and spring fit tightly. Press lightly to check if the button moves up and down easily. Proper alignment is key to a working switch.
Securing The Switch Cover
Put the switch cover back over the internal parts. Align it so screw holes match perfectly. Use a screwdriver to tighten screws firmly but not too hard. This keeps the cover in place without cracking it.
Testing The Reassembled Switch
Turn the power back on and test the switch. Press the button several times to check its function. The light should turn on and off smoothly. If it feels stiff or loose, repeat the steps carefully.
Testing The Repair
Testing the repair is an important step after fixing a light switch button. It helps confirm the switch works correctly and safely. Careful testing prevents future problems and ensures the repair is complete.
Turn The Power Back On
After fixing the switch, restore power at the circuit breaker. This step allows electricity to flow to the switch. Make sure to switch it on carefully to avoid shocks.
Check The Switch Operation
Press the switch button several times. The light should turn on and off smoothly. If the switch feels loose or does not click, the repair may need review.
Observe The Light Fixture
Watch the light bulb while using the switch. It should light up without flickering. Flickering may signal a loose connection or faulty wiring.
Test Multiple Times
Press the switch repeatedly over a few minutes. Consistent operation shows the repair is stable. Inconsistent results suggest further checking is required.
Use A Voltage Tester
A voltage tester can check if electricity reaches the switch. Place the tester on the switch terminals. A reading confirms proper electrical flow and safety.
When To Call A Professional
Fixing a light switch button can be a simple task. Some problems you can solve yourself. Other times, calling a professional is the safest choice. Knowing when to get expert help protects your home and your safety.
Signs Of Electrical Problems
Burning smells or sparks near the switch need expert attention. Flickering lights or switches that feel hot also show trouble. These signs mean electrical issues that must not be ignored.
Complex Wiring Issues
Old or tangled wiring can cause switch problems. If you see many wires or unsure how they connect, stop. A professional electrician has the tools and knowledge to fix complex wiring safely.
Repeated Switch Failures
Fixing the same switch often is a warning sign. It could mean deeper electrical faults inside the wall. A professional can find the root cause and provide a lasting fix.
Uncertainty About Safety
Feeling unsure about your electrical skills means call a professional. Mistakes with electricity can cause shocks or fires. It’s better to be safe and hire an expert.
Credit: www.electriciansingapore.org
Frequently Asked Questions
How Do I Fix A Light Switch Button That Won’t Click?
First, turn off the power at the circuit breaker. Remove the switch cover and check for loose wires. Tighten any loose connections. If the button is broken, replace the switch. Always ensure safety by using a voltage tester before working.
What Tools Do I Need To Fix A Light Switch Button?
You will need a flathead screwdriver, a Phillips screwdriver, wire strippers, and a voltage tester. These tools help you safely remove the switch cover and handle wiring. Having electrical tape on hand is also useful for securing wires after repair.
Can I Fix A Light Switch Button Without An Electrician?
Yes, you can fix a light switch if you follow safety steps and understand basic wiring. Always turn off the power first. If unsure, consult a professional to avoid risks. Simple fixes like tightening screws or replacing the switch are manageable for beginners.
Why Does My Light Switch Button Feel Loose Or Wobbly?
A loose or wobbly switch button usually means screws or mounting brackets are loose. Over time, normal use can loosen these parts. Tightening the screws on the switch plate and the switch itself often solves the problem quickly.
Conclusion
Fixing a light switch button can save time and money. Always turn off power before starting work. Use basic tools and follow safety steps carefully. Check connections and replace parts if needed. A working switch improves home comfort and safety.
Small repairs build your confidence for future tasks. Stay patient and work slowly to avoid mistakes. This simple fix is easy with clear instructions. You can handle it yourself without calling a pro. Keep your home bright and safe with this skill.