Is your basement wall showing signs of bowing or cracking? If so, you’re not alone, and there’s a solution that can help protect your home’s foundation.
Installing basement wall anchors might sound complicated, but with the right steps, you can do it yourself and save money. In this guide, you’ll learn exactly how to install basement wall anchors safely and effectively. Keep reading—your basement’s stability depends on it.
Signs Of Wall Bowing
Bowed basement walls can cause serious problems in your home. Recognizing the signs early helps prevent costly repairs. Wall bowing happens when soil pressure pushes the wall inward. This can weaken the structure and cause cracks or leaks. Watch for these signs to catch wall bowing in time.
Visible Cracks On Walls
Cracks appear on the interior or exterior walls. These cracks are often vertical, horizontal, or stair-step shaped. Horizontal cracks near the middle of the wall are a strong warning. Large or growing cracks show the wall is under pressure.
Walls Leaning Inward
Bowed walls lean toward the inside of the basement. You may notice the wall is not straight anymore. Even small inward bends mean the soil is pushing hard against it. Use a level or straight edge to check for leaning walls.
Doors And Windows That Stick
Doors and windows near a bowed wall may not open or close easily. The misalignment is caused by the wall shifting. Gaps or tight spots around frames are a sign of movement. This affects the function and security of your home.
Water Leaks Or Dampness
Water can seep through bowed walls due to cracks or gaps. Damp spots or mold may appear on the walls or floor. Moisture increases the risk of damage and health issues. Check basements regularly for signs of leaks or wetness.
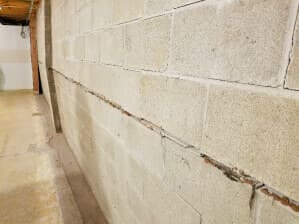
Credit: acculevel.com
Choosing The Right Anchors
Choosing the right anchors is a key step in securing basement walls. The right anchors hold the wall firmly and prevent damage. Different anchors work best for different wall types and problems. Knowing which anchor to use helps save time and money. It also ensures the repair lasts longer.
Types Of Wall Anchors
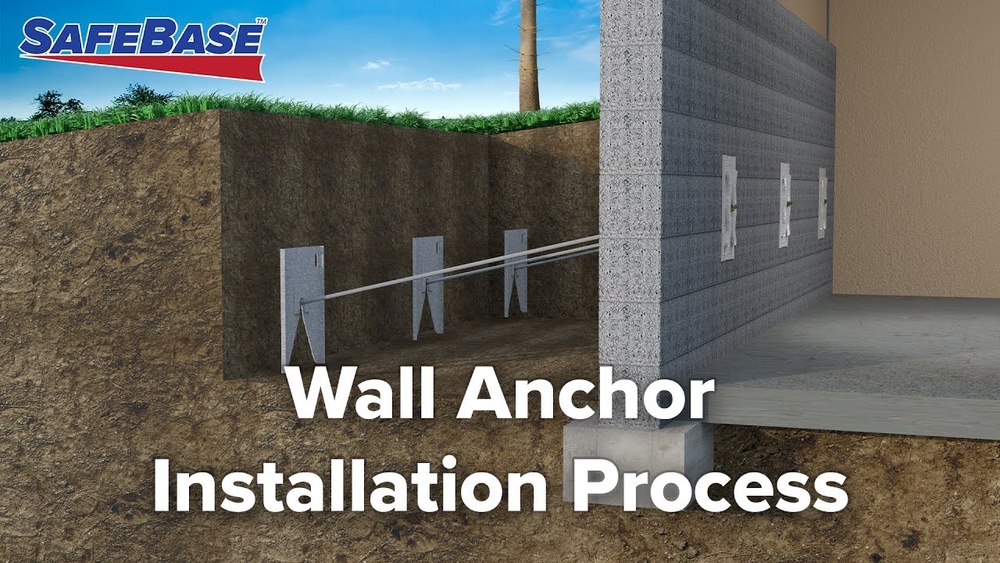
There are several types of wall anchors. Plate anchors use a steel plate outside the wall and a rod inside. Helical anchors screw into the soil to pull the wall back. Push anchors push a plate into the soil and tighten the wall. Each type suits different wall problems and soil conditions. Choose one that fits your wall’s need.
Materials And Sizes
Anchors come in different materials like steel and galvanized steel. Steel is strong but may rust if not coated. Galvanized steel resists rust and lasts longer. Anchors also come in various sizes. Bigger anchors hold more weight but cost more. The size depends on how much pressure the wall has. Pick the right material and size for safety and durability.
Tools And Materials Needed
Installing basement wall anchors requires specific tools and materials. Having the right items makes the job easier and safer. This section lists all essentials for a smooth installation process.
Basic Hand Tools
You will need a hammer, tape measure, and pencil. A level helps keep anchors straight. A wrench or socket set tightens bolts securely. These tools assist in precise and safe work.
Drilling Equipment
A power drill with a masonry bit is necessary. The bit size depends on anchor specifications. Drilling creates holes in concrete or brick walls. This step is critical for anchor placement.
Wall Anchors And Hardware
Purchase anchors designed for basement walls. Anchors include plates, rods, and bolts. Use hardware made of rust-resistant materials. This ensures durability and long-term support.
Safety Gear
Wear safety glasses to protect your eyes. Use gloves to avoid hand injuries. Dust masks prevent inhaling concrete dust. Safety gear keeps you protected during work.
Additional Supplies
Have a bucket or container for debris. A shop vacuum helps clean dust and dirt. Marking tape can identify anchor spots. These items improve work area cleanliness and organization.

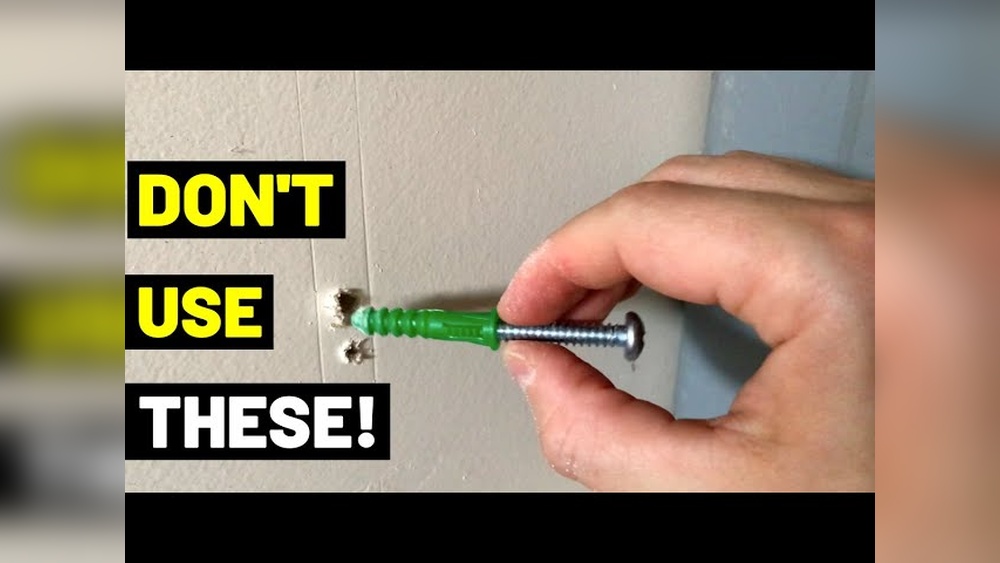
Credit: www.youtube.com
Preparing The Wall
Preparing the wall is the first step to install basement wall anchors correctly. This step ensures the anchors hold firmly and work well. A clean and clearly marked wall makes installation smoother and safer. Follow these simple steps to get your wall ready.
Cleaning The Surface
Start by removing dust and dirt from the wall. Use a stiff brush to scrub the surface. Clear away any loose paint, mold, or debris. A clean wall helps the anchor stick better and last longer. Wipe the wall with a damp cloth to remove fine dust. Allow the wall to dry completely before moving to the next step.
Marking Anchor Points
Measure the wall to find the best spots for anchors. Use a pencil to mark these points clearly. Space the marks evenly for balanced wall support. Check the marks twice to avoid mistakes. Accurate marking saves time and effort during installation. These marks guide you where to drill and place the anchors.
Drilling Anchor Holes
Drilling anchor holes is a crucial step in installing basement wall anchors. Proper holes ensure strong support and long-lasting results. This step demands attention to detail and the right tools. Drilling mistakes can weaken the anchor’s hold and cause problems later.
Drill Bit Selection
Choose a drill bit that matches the anchor size. Use a masonry bit for concrete or brick walls. A bit too small will block the anchor; too large will loosen it. Check the anchor packaging for recommended bit size. Sharp bits make clean holes and reduce dust. Replace dull bits to avoid damage to walls.
Hole Depth And Angle
Drill the hole deep enough for the full anchor length. Mark the drill bit with tape to measure depth. A shallow hole can cause the anchor to fail. Keep the drill angle straight, at 90 degrees to the wall. Angled holes weaken the anchor’s grip and cause shifting. Steady hands and slow drilling help maintain the correct angle.

Credit: www.frontierbasementsystems.com
Installing The Anchors
Installing basement wall anchors strengthens your foundation and stops wall movement. This process requires careful steps to secure the anchors properly. Follow the instructions closely for best results.
Inserting The Anchor
Begin by drilling a hole through the basement wall at the marked spot. The hole should be slightly larger than the anchor size. Next, insert the anchor carefully into the hole. Push it until the anchor plate rests flush against the wall surface. Make sure the anchor fits tightly without gaps.
Securing The Plate
Attach the wall plate to the anchor by tightening the bolt. Use a wrench to turn the bolt slowly. This action pulls the anchor deeper into the soil outside the wall. Keep tightening until the plate pulls the wall gently but firmly. Check the plate is flat against the wall and does not wobble.
Tightening The Anchors
Tightening the anchors is a key step in securing basement walls. Proper tension keeps the wall stable and stops further movement. This part needs care and the right tools to avoid damage.
Using The Right Tools
Use a wrench or a ratchet to tighten the anchors. These tools give good grip and control. Avoid using pliers or makeshift tools. They can slip and cause injury or damage.
Make sure your tool fits the anchor nut size perfectly. This helps apply steady force without rounding the nut edges. Check the tool condition before starting. A worn tool can make the job harder.
Applying Proper Tension
Turn the anchor nut slowly and evenly. Tighten just enough to pull the wall straight. Too much force can crack the wall or bend the anchor.
Stop tightening once the wall stops moving inward. The goal is to hold, not crush. Check the wall after tightening. Small adjustments may be needed for best results.
Monitoring Wall Movement
Monitoring wall movement is an important part of installing basement wall anchors. It helps you see if the wall is still shifting or if the anchors are holding it steady. Watching the wall closely can prevent bigger problems later.
Checking the wall regularly lets you catch small changes fast. This way, you can act before cracks get worse or the wall leans more. Careful monitoring keeps your basement safe and strong.
How To Use Crack Monitors
Crack monitors are small tools placed over wall cracks. They show if the crack is growing or staying the same size. Attach them carefully across the crack and check them each week.
Write down any changes you see. If the crack widens, it means the wall is moving. This signals a need for further action or adjustment of anchors.
Using A Plumb Line For Wall Movement
A plumb line helps check if a wall leans inward or outward. Hang the line from the ceiling near the wall. Measure the gap between the wall and the line at the bottom.
Repeat the measurement weekly. A growing gap means the wall is moving. This helps track how well the anchors work over time.
Documenting Wall Changes
Keep a simple log of your wall checks. Note the date, type of measurement, and results. Photos help show changes clearly.
Regular records give a clear history of wall movement. Share this information with a contractor if needed for repairs.
Maintenance Tips
Maintaining basement wall anchors is key to keeping your walls strong. Regular care helps catch problems early. It also extends the life of your anchors. Here are simple tips to keep them in good shape.
Check For Rust And Corrosion
Look at the anchors often for rust spots. Rust weakens the metal and can cause damage. Use a wire brush to clean off any rust you see. Apply a rust-resistant paint to protect the metal.
Inspect Tightness Of Anchors
Make sure the anchors stay tight against the wall. Loose anchors can reduce support. Use a wrench to tighten any that feel loose. Check them every few months for safety.
Clear Debris Around Anchors
Remove dirt and debris near the anchors. Debris can trap moisture, leading to rust. Keep the area clean and dry. This prevents moisture buildup and keeps anchors in good condition.
Monitor Wall Movement
Watch your basement walls for any movement or cracks. Anchors help stop walls from bowing or shifting. If walls move, anchors may need adjustment. Catching this early avoids bigger repairs.
Schedule Professional Inspections
Hire a professional to inspect anchors yearly. Experts spot issues you might miss. They can recommend repairs or replacements if needed. Regular checks keep your basement safe and stable.
Frequently Asked Questions
What Tools Are Needed To Install Basement Wall Anchors?
You need a drill, anchor kit, wrench, tape measure, and safety gear. These tools ensure precise drilling and secure anchor installation.
How Long Does Basement Wall Anchor Installation Take?
Installation typically takes 3 to 5 hours depending on wall size and condition. Proper preparation and teamwork can speed up the process.
Can I Install Basement Wall Anchors Myself?
Yes, with basic DIY skills and proper tools, you can install anchors. However, professional help is recommended for complex or large projects.
How Do Basement Wall Anchors Prevent Wall Movement?
Anchors stabilize walls by applying outward pressure, counteracting soil pressure. This prevents bowing and structural damage effectively.
Conclusion
Installing basement wall anchors strengthens your walls and prevents damage. Follow each step carefully to ensure proper placement and safety. Use the right tools and materials for best results. Regularly check the anchors to keep your basement secure. Taking action now saves costly repairs later.
Keep your home safe and stable with this simple fix.