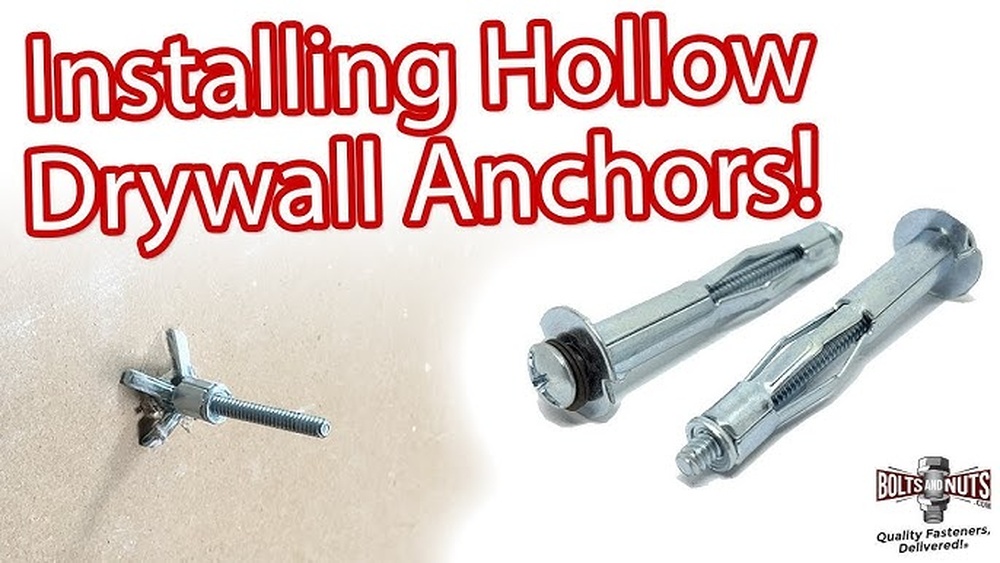
Are you struggling to hang shelves, pictures, or fixtures on hollow walls without worrying about them falling? Installing hollow wall drive anchors can be the simple solution you need.
You’ll discover an easy, step-by-step video guide that shows exactly how to install these anchors securely and quickly. By the end, you’ll have the confidence to tackle your wall projects like a pro—and avoid costly mistakes. Keep reading to unlock the secret to strong, reliable wall fixings that hold fast every time.
Credit: segurosarb.com
Choosing The Right Anchor
Choosing the right hollow wall drive anchor is key for a strong hold. The anchor must fit the wall type and the weight of the object. Using the wrong anchor can cause damage or failure. This section helps you pick the best anchor for your project.
Types Of Hollow Wall Anchors
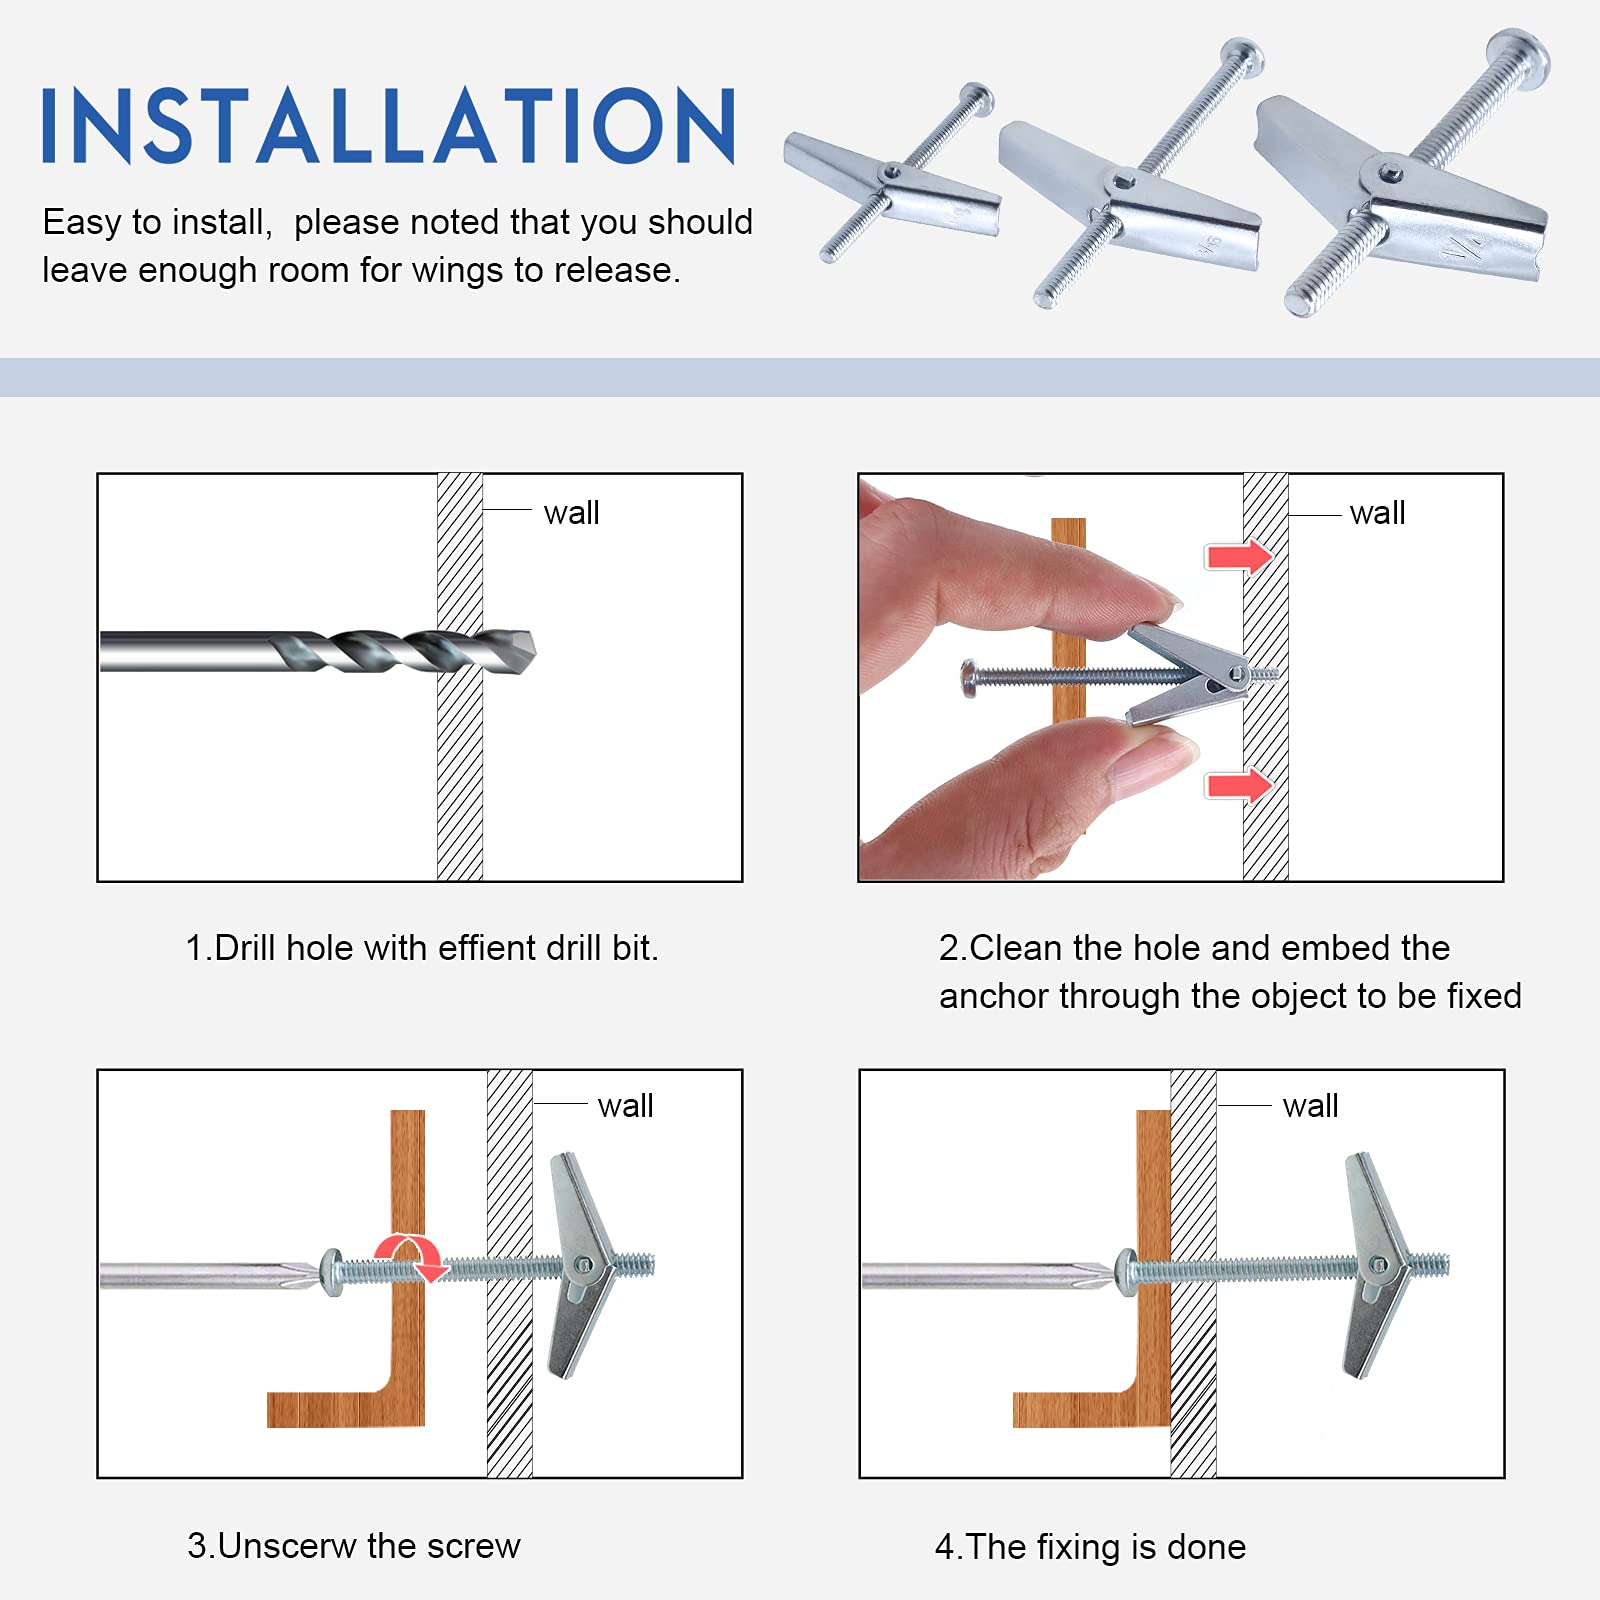
There are several types of hollow wall anchors. Plastic expansion anchors work well for light items like picture frames. Metal drive anchors offer more strength and grip better in drywall. Toggle bolts have wings that open behind the wall for heavy loads. Choose the type based on the wall and item weight.
Materials And Weight Capacity
Anchors come in plastic, zinc, or steel. Plastic anchors suit light loads up to 10 pounds. Zinc anchors hold medium weights of about 20 to 50 pounds. Steel anchors support heavy items over 50 pounds. Check the weight capacity on the package before buying. The right material ensures safety and durability.
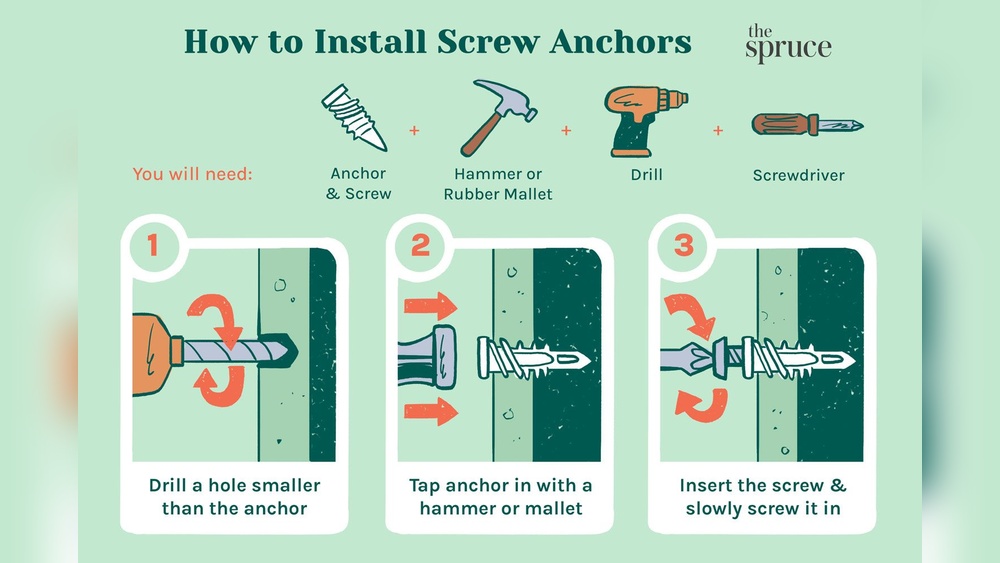
Tools And Materials Needed
Installing hollow wall drive anchors is simple with the right tools. Using proper materials helps the anchor hold tight and keeps your wall safe. Gather everything before you start to make the job smooth and fast.
Anchor Selection
Choose anchors made for hollow walls like drywall or plaster. Pick the right size based on the weight you want to hang. Plastic or metal anchors work well for light to medium loads. For heavier items, use metal anchors for more strength.
Drill And Drill Bits
A drill is needed to make holes for the anchors. Use a drill bit that matches the anchor size. Too big or too small holes can cause weak holding. A cordless drill is handy and easy to use for this task.
Screwdriver And Screws
Use a screwdriver to drive screws into the anchors. Match screws to the anchor size for a tight fit. A power screwdriver can speed up the work, but a manual one works fine too. Choose screws that fit your hanging item properly.
Preparing The Wall
Preparing the wall is an important step before installing hollow wall drive anchors. It ensures the anchor holds firmly and safely. Take time to prepare the wall carefully for the best results. Proper preparation also helps avoid damage to the wall and makes the installation smooth.
Locating The Anchor Spot
Choose a spot on the wall where you want to install the anchor. Avoid places near electrical wires or pipes. Tap the wall gently to find a hollow area behind the surface. The hollow spot is where the anchor will grip best.
Use a stud finder if available. It helps find safe hollow spots. Mark the chosen spot clearly with a pencil. This mark will guide you for drilling.
Marking And Drilling The Hole
Use a pencil to mark the exact drilling point on the wall. Check the mark twice before drilling. Select a drill bit size that matches the anchor diameter. A bit that is too large or small affects the hold.
Drill slowly and straight into the wall at the marked spot. Keep the drill steady to avoid making a big hole. Clear any dust or debris from the hole before inserting the anchor. This makes sure the anchor fits tightly.
Installing The Anchor
Installing the anchor is a key step in using hollow wall drive anchors. It ensures your item stays firmly in place. This part requires care and attention to get it right. Follow these simple steps to secure the anchor properly.
Inserting The Anchor
Start by pushing the anchor into the hole you drilled. Use gentle pressure to avoid damaging the wall. The anchor should fit snugly without forcing it too hard. If it feels loose, check the hole size again.
Setting The Anchor Securely
Use a hammer to tap the anchor lightly until it sits flush with the wall. This action spreads the anchor inside the wall cavity. It creates a strong grip that holds tight under weight. Avoid hitting too hard to prevent wall damage.
Securing The Fixture
Securing the fixture is a key step after installing hollow wall drive anchors. This step ensures your item stays firmly in place. Proper securing prevents damage and keeps everything safe.
Follow the right method to attach screws and test the fixture’s stability. This will help you avoid loose or falling objects on your wall.
Attaching Screws
Start by choosing screws that fit the hollow wall anchors. Insert the screws into the anchors carefully. Turn the screws slowly using a screwdriver. Stop when the screw is tight but avoid over-tightening.
Over-tightening can damage the anchor or wall. The screw should hold the fixture snugly without movement. This step is simple but important for a strong hold.
Testing Stability
After attaching screws, check the fixture’s stability. Gently pull or push the item to see if it moves. A firm fixture means the anchors and screws work well.
If the fixture feels loose, tighten the screws a little more. Test again until the item feels secure. Proper testing keeps your wall safe and the fixture steady.

Credit: www.youtube.com
Common Installation Mistakes
Installing hollow wall drive anchors seems simple but many make common mistakes. These errors affect anchor strength and wall safety. Avoid these to ensure a secure and lasting fix. Learn about the most frequent problems and how to fix them.
Incorrect Drill Size
Choosing the wrong drill bit size is a common error. Too large a hole makes the anchor loose. Too small a hole stops the anchor from fitting. Always match the drill bit to the anchor size. This ensures the anchor holds tightly and works well.
Over-tightening Screws
Over-tightening screws can damage the anchor and wall. It can crack the anchor or strip the threads. Tighten screws just enough to hold the item firmly. Stop once you feel resistance. This keeps the anchor stable and the wall safe.
Maintenance Tips
Maintaining hollow wall drive anchors is key for lasting support. Proper care keeps your walls strong and secure. Regular checks help spot problems early. This saves time and effort later.
Checking Anchor Stability
Test each anchor by gently pulling on the attached item. If it moves or feels loose, the anchor may need attention. Look for cracks around the anchor hole. These signs show the anchor is weakening. Tighten screws if possible to improve grip.
Replacing Worn Anchors
Remove any loose or damaged anchors carefully. Use a drill or screwdriver to take them out. Choose new anchors that fit your wall type and weight needs. Install them according to the package instructions. Ensure they are secure before hanging items again.
Credit: d365academy.net
Frequently Asked Questions
What Tools Do I Need To Install Hollow Wall Anchors?
You need a drill, screwdriver, measuring tape, and hollow wall drive anchors. These tools ensure accurate and secure anchor installation.
How Do Hollow Wall Drive Anchors Work?
They expand behind the wall when driven in, creating a strong grip. This holds items securely on hollow walls like drywall.
Can I Install Hollow Wall Anchors Without A Drill?
Using a drill is recommended for precision and ease. Manual installation may damage the wall or weaken the anchor hold.
What Weight Can Hollow Wall Drive Anchors Support?
Weight capacity varies by anchor size and type. Generally, they support light to medium loads up to 50 pounds safely.
Conclusion
Installing hollow wall drive anchors is simple with the right steps. Follow the video guide carefully for best results. Choose the correct anchor size for your wall type. Drill the hole cleanly and insert the anchor firmly. Tighten the screw to secure the anchor in place.
This method holds items safely on hollow walls. Practice a few times to gain confidence. Now, you can hang shelves, pictures, or hooks easily. Use these tips to complete your home projects with ease.