Are you tired of your old, worn-out light switch that just doesn’t feel right anymore? Changing it to a new one can instantly refresh the look of your room—and it’s easier than you might think.
Imagine flipping a switch that feels smooth and looks modern every time you enter your space. You’ll discover simple steps to replace your old light switch safely and quickly, even if you have little to no experience. Keep reading, and by the end, you’ll have the confidence to upgrade your home lighting with ease.

Credit: www.dummies.com
Tools And Materials Needed
Changing an old light switch requires a few basic tools and materials. Preparing these items before starting makes the job easier and safer. Each tool has a specific role in the process.
Gathering everything ahead saves time and avoids interruptions. Use tools designed for electrical work to ensure safety. Always choose materials that match your switch type and home wiring.
Essential Tools
- Screwdriver (flathead and Phillips) – to remove and attach screws
- Voltage tester – to check if the power is off
- Wire stripper – to remove insulation from wires
- Needle-nose pliers – to bend and hold wires
- Flashlight – to see inside dark switch boxes
Materials Needed
- New light switch – choose single-pole or three-way as required
- Wire nuts – to connect wires safely
- Electrical tape – for extra insulation
- Wall plate – to cover the switch
- Replacement screws – in case old ones are worn out
Safety Precautions
Changing an old light switch involves dealing with electricity. Safety is the top priority. Taking the right precautions prevents accidents and injuries. Always prepare properly before starting the work.
Turn Off The Power
Switch off the power at the circuit breaker. Do not rely on just the light switch. Use a tester to confirm no electricity flows to the switch. This step stops electric shocks during the job.
Use Proper Tools
Choose tools with insulated handles. This protects against electric shocks. Avoid using damaged or worn tools. Keep tools close to avoid distractions and accidents.
Wear Safety Gear
Wear rubber-soled shoes to reduce shock risk. Use safety glasses to protect your eyes. Gloves designed for electrical work add extra safety. Dress in clothes that cover your skin fully.
Check The Work Area
Make sure the area is dry. Water and electricity do not mix. Remove any loose wires or clutter. Good lighting helps you see clearly. A clean area reduces the chance of mistakes.
Turn Off Power Supply
Turning off the power supply is the first step in changing an old light switch. It keeps you safe from electric shocks. Always treat electrical work with care. Never assume the power is off without checking.
Before you start, find the right circuit breaker. This breaker controls the power to your light switch. Switching it off cuts the electricity to the switch and the connected light.
Locate The Circuit Breaker Panel
Find the circuit breaker panel in your home. It is usually in the basement, garage, or a storage area. The panel has many switches, each for different parts of your home.
Identify The Correct Breaker
Look for the breaker labeled for the room with the old light switch. If it is not labeled, turn off the main breaker to stop all power. This is less convenient but safe.
Switch Off The Breaker
Flip the breaker switch to the off position. This stops the flow of electricity to the switch. It may feel stiff but push firmly until it stays off.
Test The Power Is Off
Use a voltage tester or a simple light bulb to check. Touch the tester to the wires in the switch box. If the tester shows no electricity, it is safe to proceed.
Remove The Old Switch
Removing the old light switch is the first step in upgrading to a new one. It requires care and attention to avoid damage or injury. Follow simple steps to take out the old switch safely.
Unscrew The Switch Plate
Start by turning off the power at the circuit breaker. This keeps you safe from electric shock. Use a screwdriver to remove the screws on the switch plate. Keep the screws in a safe place for later. Gently pull the plate away from the wall. This reveals the switch and the wires behind it.
Disconnect Wires
Check that the power is off by testing the switch. Use a voltage tester if available. Next, loosen the screws holding the wires on the switch. Carefully disconnect each wire one at a time. Note the position of each wire for the new switch. Do not let the wires touch each other. Pull the old switch out completely.
Prepare The New Switch
Start by turning off the power to the switch at the circuit breaker. Gather the new switch and necessary tools before beginning the replacement. Make sure the new switch matches the old one’s type and voltage.
Identify Terminal Screws
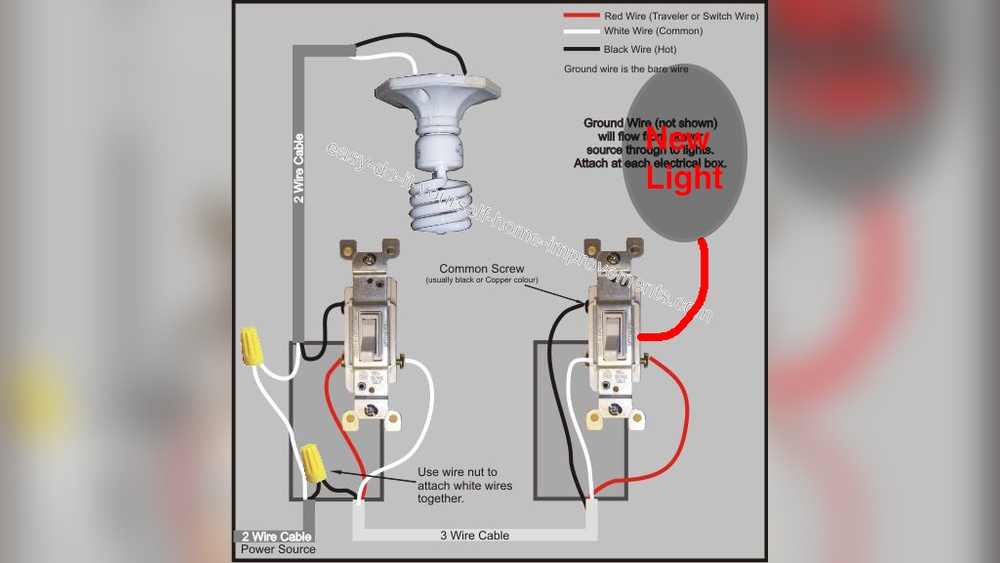
Start by examining your new light switch closely. Notice the terminal screws on its sides. These screws connect the wires and carry electricity to the switch. Typically, there are two or three screws. One or two are for the wires carrying power, and one might be for grounding. The screws often come in different colors. Brass or gold screws usually hold the live wires. A green screw is for the ground wire. Knowing these helps you connect the right wires safely. Take time to recognize each screw before wiring.
Match Wire Types
Next, look at the wires coming from your wall. Usually, there are black, white, and green or bare copper wires. The black wires carry current to the switch. White wires often return current or serve as neutral. Green or bare copper wires are for grounding. Match the wires to the correct terminal screws on your new switch. Connect black wires to brass screws. Attach green or bare wires to the green screw. White wires might not connect to the switch but to the wire nuts in the box. Matching wires correctly ensures the switch works safely and properly.
Connect Wires To New Switch
Connecting wires to your new light switch is a key step. It ensures the switch works safely and correctly. Take your time and follow each step carefully. Double-check everything before moving on.
Attach Ground Wire
First, find the ground wire. It is usually green or bare copper. Attach it to the green screw on the switch. Tighten the screw firmly. The ground wire protects you from electrical shocks.
Connect Hot And Neutral Wires
Next, identify the hot wire. It is often black or red. Connect it to the brass-colored screw on the switch. Then, find the neutral wire, usually white. Attach it to the silver screw if your switch needs it. Tighten all screws securely. Proper connection keeps the switch working well.
Secure The Switch And Plate
Securing the switch and plate is a key step in changing an old light switch to a new one. This step keeps everything in place and ensures safety. Properly securing the switch prevents it from moving or coming loose over time.
It also gives a clean, finished look to your work. Tightening the switch and plate makes sure the electrical parts stay covered. This prevents dust, dirt, and accidental contact with wires.
Align The Switch Properly
Check the switch position before securing it. Make sure it sits straight in the electrical box. The switch should line up with the screw holes on the box. This helps avoid a crooked or loose switch.
Tighten The Switch Screws
Use a screwdriver to tighten the screws on the switch. Turn each screw until the switch feels firm. Avoid overtightening to prevent cracking the switch or box. The switch must not wiggle or move after tightening.
Attach The Wall Plate
Place the wall plate over the switch carefully. Align the plate holes with the switch screws. Insert the plate screws and tighten them gently. The plate should fit snugly against the wall without gaps.
Check For Stability
Test the switch to see if it feels secure. Try moving the switch gently to check firmness. The plate should not wobble or shift. A stable switch and plate ensure safety and a neat look.
Restore Power And Test
After installing a new light switch, restoring power and testing are key steps. These steps confirm that the switch works correctly and that everything is safe. Never skip this part to avoid any electrical issues.
Turn On The Circuit Breaker
Find your home’s main electrical panel. Look for the breaker that controls the light switch. Flip the breaker switch back to the ON position. This will restore electricity to the switch and the connected light.
Test The New Light Switch
Go to the light switch and flip it ON. Check if the light turns on. Flip the switch OFF to make sure the light turns off. This simple test confirms the switch works properly.
Check For Any Issues
Look for flickering lights or unusual sounds. A steady light means the wiring is secure. If the light does not work, turn off the breaker and check your connections again.
Troubleshooting Common Issues
Troubleshooting common issues helps ensure your new light switch works safely. Problems might happen during or after installation. Knowing how to fix these issues saves time and keeps your home safe.
Switch Not Working
Check if the power is off before starting. Test the switch with a voltage tester. Make sure wires connect tightly to the switch terminals. Replace the switch if it feels loose or broken. Sometimes, the breaker might be off. Reset the breaker and test the switch again.
Sparks Or Flickering
Sparks or flickering indicate a bad connection or old wiring. Turn off the power immediately. Inspect the wires for damage or exposed copper. Tighten any loose screws on the switch. Use a switch rated for your electrical load. Replace the switch if sparks continue after fixes.
Loose Connections
Loose connections cause the switch to fail or spark. Turn off power before touching wires. Tighten all terminal screws firmly. Use wire nuts to secure wire joins. Make sure no wires are frayed or broken. Double-check that wires stay in place when the switch moves.

Credit: www.youtube.com
Tips For Choosing A New Switch
Choosing a new light switch is important for safety and style. The right switch fits your needs and room design. Consider the type, energy use, and look before buying. These tips help you pick a switch that works well and looks good.
Types Of Switches
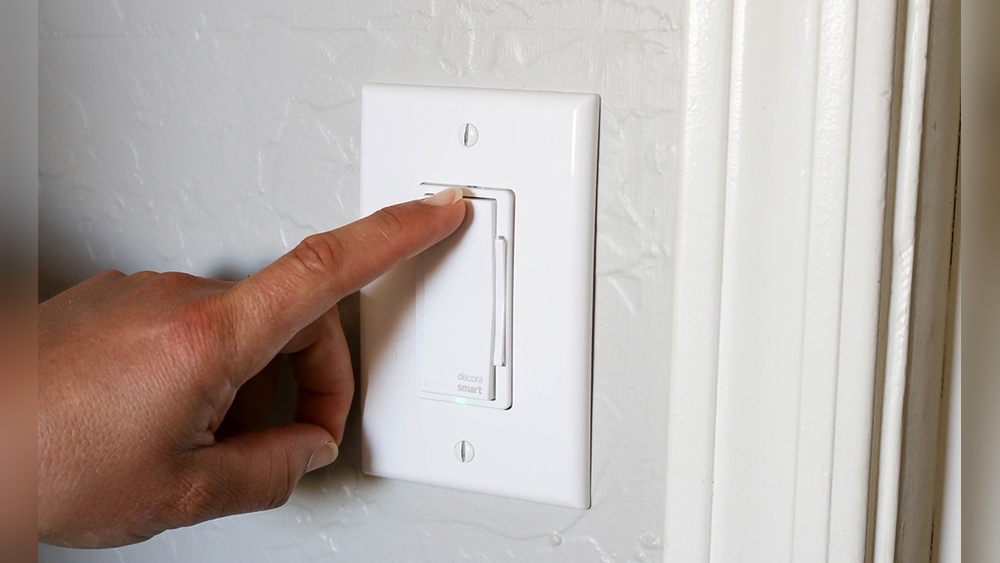
There are many types of switches. The common toggle switch moves up and down. Rocker switches press on a flat surface. Dimmer switches let you adjust light brightness. Some switches work with smart home devices. Pick a type that suits your daily use.
Energy Efficiency
Energy-saving switches reduce electricity use. Dimmer switches can lower power by adjusting light levels. Some smart switches turn off lights automatically. These switches help save money on bills. Choose switches that support energy-efficient bulbs like LEDs.
Aesthetic Considerations
Switches come in different colors and styles. Match your switch color to your walls or decor. Modern switches have sleek, simple designs. Vintage styles fit older homes better. The switch should blend well with the room’s look.

Credit: www.reddit.com
Frequently Asked Questions
How Do I Safely Turn Off Power Before Changing A Switch?
Always turn off the circuit breaker linked to the switch. Use a voltage tester to confirm no power flows. This ensures safety and prevents electric shocks while you work.
What Tools Do I Need To Replace An Old Switch?
You need a screwdriver, voltage tester, wire stripper, and new switch. These tools help you safely remove the old switch and install the new one correctly.
Can I Replace A Light Switch Without Professional Help?
Yes, if you follow safety steps and understand wiring basics. Turn off power, test wires, and carefully connect the new switch. If unsure, consult a licensed electrician.
How Do I Identify The Wires On My Old Light Switch?
Typically, black or red wires are hot, white is neutral, and green or bare is ground. Use a voltage tester to confirm wire functions before disconnecting them.
Conclusion
Changing an old light switch to a new one is simple and safe. Turn off the power first to avoid accidents. Follow the steps carefully and use the right tools. A new switch can improve your home’s look and function.
Take your time and double-check your work. Enjoy the fresh, updated feel in your room. This small change makes a big difference. Try it yourself and gain confidence in home projects.