Are you struggling to remove your Kwikset deadbolt and can’t find the screws? You’re not alone.
Many people get stuck because the screws are cleverly hidden, making the process confusing and frustrating. But don’t worry—removing your Kwikset deadbolt is easier than you think once you know the right steps. In this guide, you’ll discover simple, clear instructions that will save you time and effort.
Keep reading to unlock the secret to removing your deadbolt quickly and without damage.

Credit: www.reddit.com
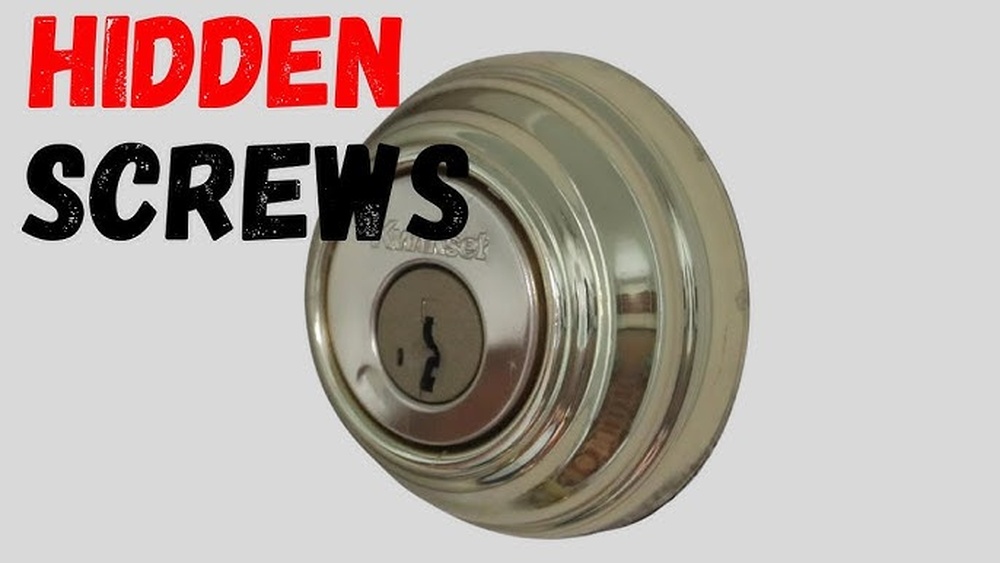
Identify Hidden Screws
Identifying hidden screws is the first step to remove a Kwikset deadbolt. These screws keep the lock in place but are often concealed. Finding them requires careful observation and the right tools. This section explains how to spot these screws quickly and safely.
Locate The Deadbolt Cover Plate
Start by examining the deadbolt cover plate closely. It usually covers the screws that hold the lock. Look for small gaps or seams around the plate edges. These gaps can hint where screws hide beneath. Gently try to lift or slide the cover plate. Some models have snap-on plates that come off easily. If it feels stuck, do not force it. Use a flat tool to pry it gently. Removing the cover plate reveals the hidden screws underneath.
Use Tools To Reveal Screws
Use a flathead screwdriver or a plastic pry tool to remove the cover plate. These tools help avoid damage to the door or lock. Shine a flashlight on the lock to see better. Hidden screws often sit deep inside the lock’s cavity. A magnifying glass can help spot very small screws. Once screws are visible, use the correct screwdriver size. Turning screws counterclockwise will loosen and remove them. Keep screws safe to reinstall the lock later.

Credit: diy.stackexchange.com
Gather Required Tools
Before removing a Kwikset deadbolt with hidden screws, gather all necessary tools. Having the right tools makes the job easier and safer. It helps avoid damage to the lock or door. Preparing tools ahead saves time and frustration.
Select Screwdrivers
Start with screwdrivers. A Phillips screwdriver fits most Kwikset screws. A flathead screwdriver might be needed for prying or adjusting. Choose screwdrivers with comfortable handles for better grip. Use the correct size to avoid stripping screws.
Additional Helpful Tools
A small flashlight helps see hidden screws clearly. A thin putty knife or plastic card can pry off covers without damage. Needle-nose pliers assist in holding small parts. Keep a cloth nearby to protect the door surface from scratches.
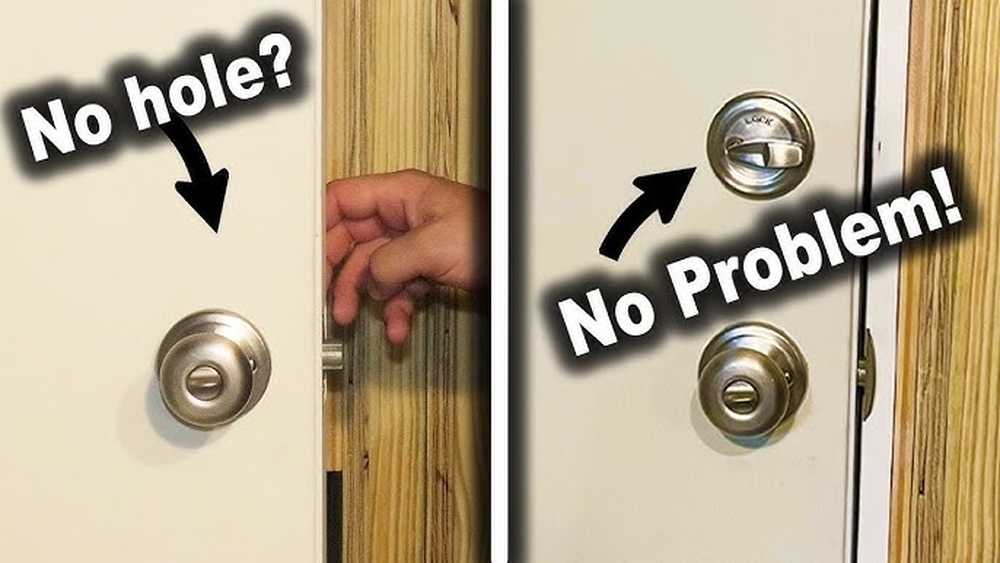
Remove Exterior Knob Or Lever
Removing the exterior knob or lever on a Kwikset deadbolt with hidden screws is the first step. This part covers the screws and holds the lock in place. Understanding how to release it safely makes the process easier.
Release Mechanism For Hidden Screws
Kwikset uses a hidden release mechanism to keep screws out of sight. Look closely at the base of the exterior knob or lever. You might find a small hole or slot. Insert a thin tool like a flathead screwdriver or paperclip into this hole. Press gently to release the internal catch. This action frees the knob or lever from the lock body.
Detach Exterior Components
Once the release mechanism is activated, pull the knob or lever straight off. Avoid twisting as this can damage the lock. After removing the knob or lever, the hidden screws underneath become visible. Use a screwdriver to unscrew these fasteners. This allows you to remove the exterior lock plate and access the deadbolt mechanism.
Unscrew The Deadbolt Assembly
Unscrewing the deadbolt assembly is the next step in removing a Kwikset deadbolt with hidden screws. This process requires careful handling to avoid damage to the door. Take your time and follow each step closely for a smooth removal.
Remove Screws From Interior Plate
Start by locating the interior plate on the door. The screws are usually hidden under a small cover or cap. Gently pry off the cover with a flat tool or your fingernail. Use a screwdriver to remove the screws from the plate. Keep the screws safe; you will need them later.
Separate Deadbolt From Door
Once the screws are out, gently pull the interior plate away from the door. This will expose the deadbolt mechanism. Hold the exterior part of the lock and pull it outward. The deadbolt assembly should come free from the door easily. If it feels stuck, check for any missed screws. Set the deadbolt assembly aside carefully.
Extract The Deadbolt Latch
Extracting the deadbolt latch is a key step in removing a Kwikset deadbolt with hidden screws. This part controls the locking action, so it must come out carefully. Follow simple steps to take it out without damage. Clear understanding helps avoid common mistakes and saves time.
Unscrew Faceplate
Start by locating the faceplate on the door edge. The faceplate covers the latch mechanism. Use a screwdriver to remove the screws holding the faceplate. Keep screws safe for reinstallation. Removing the faceplate exposes the latch inside the door. No force needed here, just gentle unscrewing.
Pull Out Latch Mechanism
After removing the faceplate, grab the latch mechanism firmly. Pull it straight out from the door edge. Sometimes it slides out easily, other times a slight wiggle helps. Avoid using sharp tools to pry it out. Check for any stuck debris and clear it. The latch should come out cleanly, ready for replacement or repair.
Troubleshooting Common Issues
Troubleshooting common issues can save time and reduce frustration when removing a Kwikset deadbolt with hidden screws. Small problems often block progress. Knowing how to handle these issues helps you finish the task smoothly. This section covers two main challenges: stuck screws and jammed deadbolt parts.
Dealing With Stuck Screws
Stuck screws are a common problem. They can be rusty or over-tightened. Use a screwdriver that fits perfectly to avoid stripping the screw head. Apply a small amount of penetrating oil to loosen rust. Let it sit for a few minutes. Turn the screw slowly and gently. Avoid forcing it, as this may damage the lock.
Handling Jammed Deadbolt Parts
Jammed parts inside the deadbolt can block removal. Dirt or debris might cause the jam. Spray a lubricant inside the lock mechanism to ease movement. Work the key gently in and out to free stuck parts. If the deadbolt still resists, tap lightly with a small hammer to loosen it. Take care not to break any components.
Tips For Reinstallation Or Replacement
After removing a Kwikset deadbolt with hidden screws, reinstallation or replacement needs care. Proper steps ensure the lock works well and stays secure. Taking time on these details can save future problems.
Check Alignment And Fit
Make sure the deadbolt fits the door hole perfectly. The bolt must slide smoothly without sticking. Align the faceplate with the door edge so it sits flush. Check the latch and strike plate line up correctly. Misalignment can cause the lock to jam or fail.
Secure Screws Properly
Use the right screws for the lock and door type. Tighten screws firmly but do not over-tighten. Loose screws can make the lock feel shaky. Over-tightening might damage the lock or door. Hidden screws need special care to keep the lock steady and safe.

Credit: www.youtube.com
Frequently Asked Questions
How Do You Locate Hidden Screws On Kwikset Deadbolts?
Hidden screws on Kwikset deadbolts are usually under the decorative faceplate. Gently pry off the faceplate using a flathead screwdriver. This reveals the screws securing the lock. Always check both sides before attempting removal.
What Tools Are Needed To Remove Kwikset Deadbolts?
You need a flathead screwdriver, Phillips screwdriver, and possibly a hex wrench. A flathead helps pry off the faceplate. Phillips is used to unscrew the hidden screws. Having these tools ensures smooth removal without damage.
Can I Remove A Kwikset Deadbolt Without Damaging The Door?
Yes, by carefully prying the faceplate and unscrewing hidden screws, you avoid damage. Use gentle pressure and the right tools. Avoid forcing parts to prevent scratches or dents. Proper technique ensures door and lock remain intact.
How Long Does It Take To Remove A Kwikset Deadbolt?
Removing a Kwikset deadbolt with hidden screws typically takes 5 to 10 minutes. Experience and the right tools can speed up the process. Carefully follow steps to avoid mistakes that could add time.
Conclusion
Removing a Kwikset deadbolt with hidden screws is simple with the right steps. Start by locating and removing the screws carefully. Keep track of all parts to avoid confusion. Take your time and use basic tools for safety. This guide helps you save money and effort.
Now, you can handle the task without stress or extra help. Try it yourself and see how easy it can be.