Are you tired of losing your keys or digging through clutter every time you need to leave the house? Making a key hook for your wall is a simple, smart way to keep your keys organized and easy to find.
Imagine having a stylish spot right by the door where your keys hang neatly every day. In this guide, you’ll discover how to create a key hook that fits your space and style without spending a fortune. Keep reading, and you’ll have a handy, personalized key holder ready in no time.

Credit: www.esseg.eu
Materials Needed
Making a key hook for your wall is a simple and fun project. Gathering the right materials is the first step. This ensures your key hook is strong, useful, and looks good. You need some basic tools, the right type of hooks, and suitable wood. Each part helps build a sturdy and attractive key holder.
Basic Tools
Start with common tools. A saw cuts the wood to size. Sandpaper smooths rough edges. A drill makes holes for screws or hooks. A screwdriver helps fix hooks into the wood. A measuring tape keeps your work precise. These tools are easy to find and use.
Types Of Hooks
Choose hooks that fit your style and needs. Metal hooks are strong and last long. Wooden pegs give a rustic look. Decorative hooks add charm and personality. Small hooks hold keys well. Larger hooks can hold bags or hats. Pick hooks based on what you want to hang.
Choosing The Right Wood
Wood choice affects the look and strength of your key hook. Pine is soft and easy to work with. Oak is hard and very durable. Cedar smells nice and resists moisture. Select wood that matches your room style. Also, choose wood that fits your skill level.

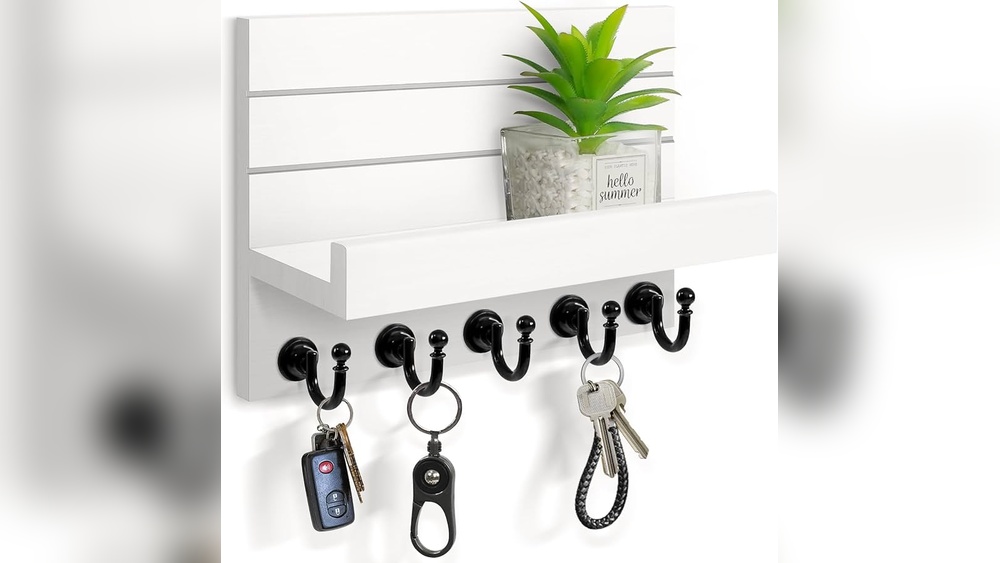
Credit: www.amazon.com
Design Ideas
Designing a key hook for your wall can be fun and creative. It helps keep keys organized and adds style to your space. Choose a design that matches your room’s look and your personal taste.
Try simple designs for a clean and neat look. Or use natural materials for a warm, cozy feel. Modern styles work well for a fresh, sleek appearance.
Minimalist Styles
Minimalist key hooks use clean lines and simple shapes. Use small wooden blocks or metal strips. Paint them in neutral colors like white or gray. This style fits well in small spaces. It keeps the wall looking tidy and calm.
Rustic Looks
Rustic key hooks use wood with natural textures. Old branches, reclaimed wood, or rough planks work great. Add simple metal hooks for hanging keys. This style brings warmth and charm to any room. It’s perfect for farmhouse or country decor.
Modern Touches
Modern designs mix materials like metal, glass, and wood. Use geometric shapes or bold colors. Add shiny hooks or magnetic strips for keys. This style looks fresh and stylish. It suits contemporary homes and adds a cool vibe.
Step-by-step Guide
Creating a key hook for your wall is simple and fun. Follow these steps to make a strong and pretty key holder. This guide breaks down the process into easy parts. You can do it with basic tools and materials.
Preparing The Wood
Choose a wooden board that fits your space. Sand the wood to make it smooth. Remove any dust with a dry cloth. Decide the size and shape you want. Mark where you will place the hooks. This step makes the work neat and safe.
Attaching The Hooks
Pick hooks that match your style and needs. Use screws or nails to fix the hooks on the wood. Make sure each hook is straight and steady. Space the hooks evenly for a balanced look. Tighten everything so the hooks hold well.
Finishing Touches
Apply paint or stain to protect the wood. Let it dry fully before use. Add a hanger on the back if needed. Check that the key hook holds weight well. Your key hook is now ready to use and show off.
Mounting Tips
Mounting your key hook on the wall needs care and attention. A well-mounted hook stays firm and lasts longer. This section shares easy tips to help you fix your key hook securely. Follow these guidelines for a neat and strong setup.
Wall Types
Different walls need different tools and methods. Drywall is common and easy to drill into. Use anchors for extra support on drywall. Concrete or brick walls require a drill with a masonry bit. Wooden walls allow screws to go directly in. Identify your wall type before starting the mounting process.
Secure Fastening
Use the right screws and anchors for strong holding. Choose anchors that fit the screw size. Screw the hook tight but avoid over-tightening. Over-tightening can damage the wall or hook. Check the hook’s stability by gently pulling it after mounting.
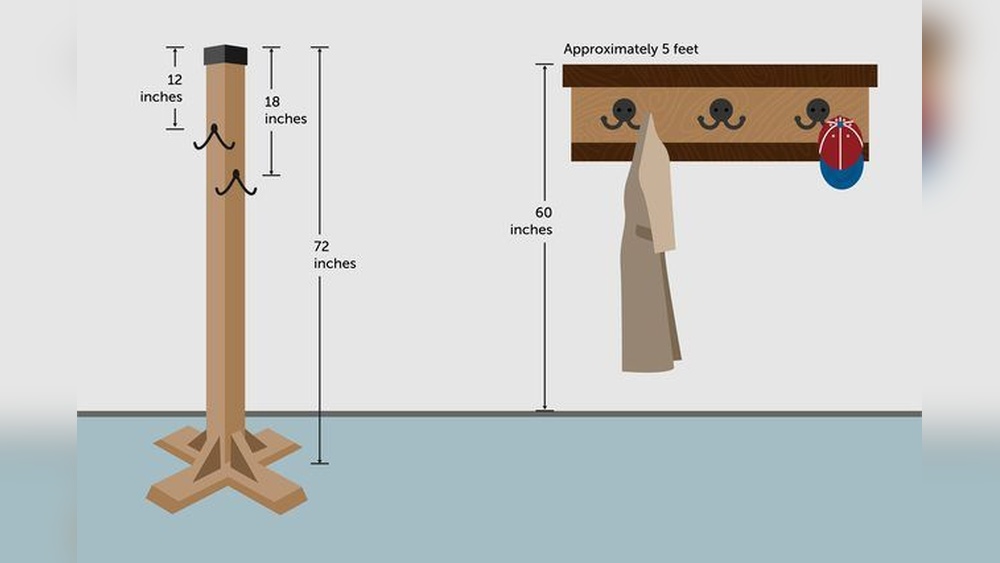
Placement Advice
Place the key hook near the door or entryway for easy access. Keep it at a comfortable height for all users. Avoid placing the hook where it may block movement. Ensure enough space around the hook for multiple keys. Good placement makes daily use simple and quick.
Creative Variations
Creative variations make your key hook unique and fun. You can use simple ideas to change the look and feel of your hook. These changes also let you reuse old things and add a personal touch. Small details can turn a plain key hook into a stylish wall piece.
Using Recycled Materials
Old wood, metal scraps, and bottle caps can become part of your key hook. Recycled materials save money and help the environment. You can make a rustic hook from worn wood or use metal pieces for a modern look. These materials add texture and interest to your design.
Adding Decorative Elements
Decorations bring charm and style to your key hook. Paint bright colors or patterns on the base. Attach small items like beads, buttons, or shells for a unique touch. Even simple ribbons or stickers can change the look. Choose decorations that match your room’s style.
Personalizing Your Hook
Make your key hook special by adding names or quotes. Use stencils or write freehand with paint pens. Personal messages make the hook meaningful and easy to find. You can also add small photos or charms that remind you of happy moments. Personal touches make everyday items feel special.

Credit: www.totalplumbingfl.com
Maintenance Tips
Maintaining your key hook keeps it looking good and working well. Simple care helps your wall hook last longer. Follow easy steps to clean and protect it from damage. These tips also help keep your hook strong over time.
Cleaning Methods
Dust the key hook regularly with a soft cloth. Use a damp cloth for sticky spots. Avoid harsh chemicals that can damage the finish. Mild soap and water work best for cleaning. Dry the hook completely after wiping to prevent rust or stains.
Preventing Damage
Do not overload the key hook with heavy items. Check screws and mounts often to keep them tight. Avoid hanging wet keys or items that can cause rust. Keep the hook away from direct sunlight to prevent fading. Use gentle pressure when placing or removing keys.
Long-term Care
Inspect the hook monthly for signs of wear or rust. Tighten any loose screws to keep the hook steady. Apply a thin layer of wax or oil to metal hooks to stop rust. Replace damaged parts quickly to avoid bigger issues. Proper care ensures your key hook stays useful for years.
Frequently Asked Questions
What Materials Do I Need To Make A Wall Key Hook?
You need wood, hooks, screws, a drill, sandpaper, and paint or stain. Choose durable materials for long-lasting use. Safety gear like gloves is also recommended during the process.
How Do I Mount A Key Hook On The Wall Securely?
Use a drill to make holes and insert wall anchors if needed. Screw the key hook base tightly to ensure stability. Check alignment before final tightening.
Can I Customize The Design Of My Key Hook?
Yes, customize by painting, staining, or adding decorative elements. You can also choose different hook styles and wood shapes. Personalization makes the key hook unique and stylish.
How Long Does It Take To Make A Key Hook For The Wall?
It usually takes about 30 minutes to 1 hour. Time depends on design complexity and drying time if painting or staining. Preparation and mounting add to the total time.
Conclusion
Making a key hook for your wall is simple and fun. You only need a few tools and materials. This project helps keep your keys organized and easy to find. Plus, it adds a personal touch to your space. Try different designs to match your style.
Small efforts like this make daily life smoother. Start creating your own key hook today and enjoy a tidier home.