If you need to remove a Kwikset deadbolt lock, you’re in the right place. Whether you’re upgrading your door hardware, fixing a jammed lock, or simply changing your security setup, knowing how to take off a Kwikset deadbolt can save you time and frustration.
This guide will walk you through each step clearly and easily, so you don’t have to worry about complicated tools or confusing instructions. By the end, you’ll feel confident handling your lock like a pro. Let’s get started and make this simple for you.

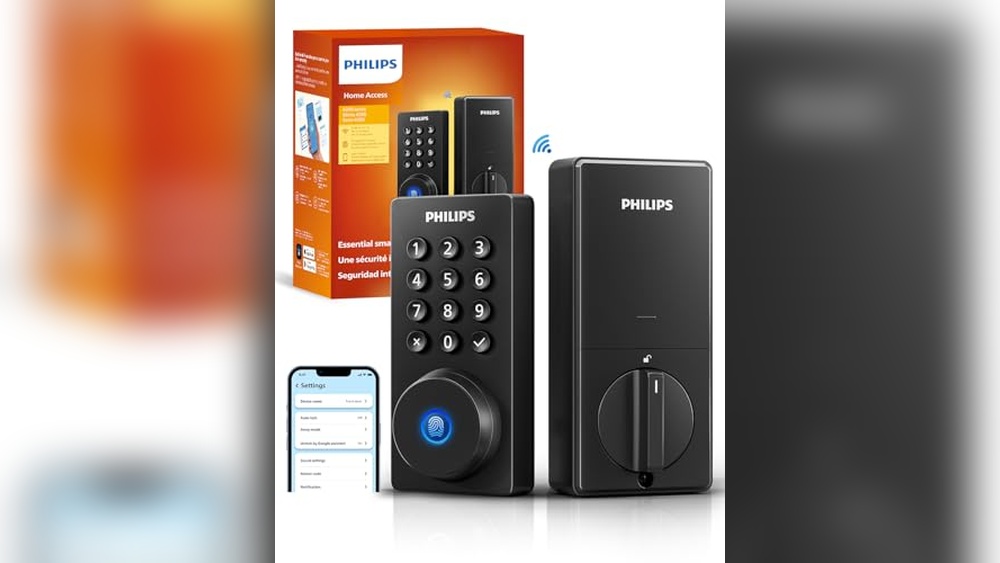
Credit: www.youtube.com
Tools Needed
You will need a screwdriver, usually a Phillips head, to remove the screws. A flathead tool might help to pry off the lock cover gently. Having these basic tools ready makes the process smoother.
Removing a Kwikset deadbolt lock requires a few simple tools. These tools help you work quickly and safely. Having the right tools ready makes the job easier and avoids damage to your door.
Below are the main tools you will need to take off a Kwikset deadbolt lock.
Screwdriver
A screwdriver is the most important tool for this task. Most Kwikset deadbolts use Phillips head screws. A standard Phillips head screwdriver fits well. Sometimes, a flathead screwdriver may be needed for some parts.
Tape Measure
A tape measure helps you check the lock size. Knowing the size helps if you plan to replace the lock. It also helps confirm you are removing the correct lock model.
Utility Knife
A utility knife can be useful to cut any paint or seal around the lock. This makes it easier to remove the lock without damage. Use it carefully to avoid scratching the door.
Small Container
A small container or bowl holds screws and small parts. Keeping these parts safe prevents loss. It makes reassembly or replacement faster and less frustrating.

Credit: diy.stackexchange.com
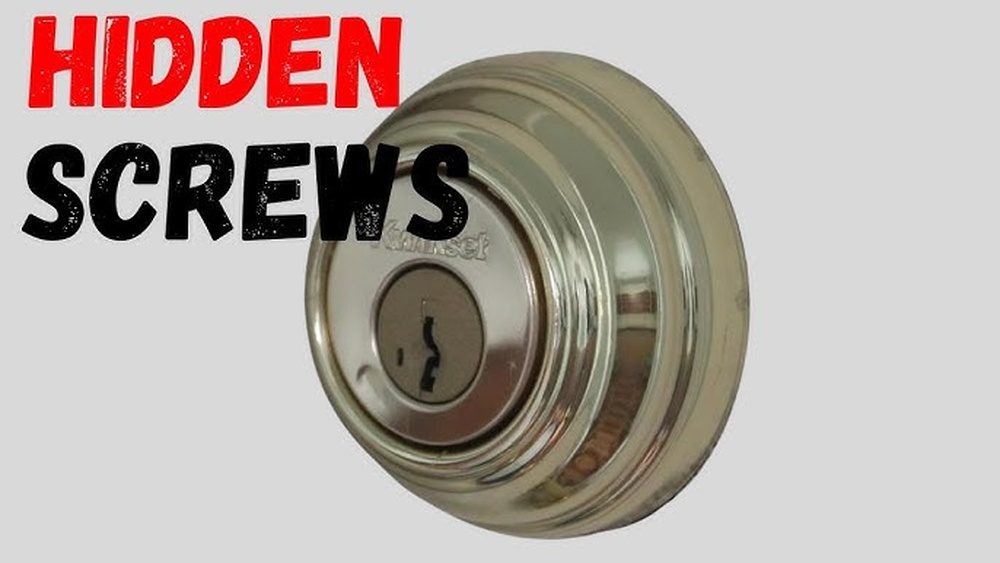
Locate The Screws
Locating the screws is the first step in removing a Kwikset deadbolt lock. These screws hold the lock in place on the door. Without finding them, you cannot take the lock apart safely.
Most Kwikset deadbolts have visible screws on the interior side of the door. These screws attach the lock’s interior assembly to the exterior part. Identifying their exact position helps in quick removal.
Check The Interior Side Of The Door
Look closely at the inside part of the door. You will see a round or oval plate. The screws are usually on this plate, holding the lock’s interior piece.
Sometimes, the screws are hidden under a cover. Gently pry off the cover to reveal them. Use a flathead screwdriver to remove the cover without damage.
Locate The Screws On The Exterior Side
The outside part of a Kwikset deadbolt often has no visible screws. The exterior assembly fits tightly against the door.
After removing interior screws, the exterior part should come off easily. If it does not, check for tiny screws or clips along the edge of the lock.
Use Proper Tools For Screw Removal
Use a screwdriver that fits the screws well. A Phillips head screwdriver works for most Kwikset deadbolt screws.
A wrong tool can strip the screw heads. Stripped screws make removal difficult. Take time to select the correct screwdriver.
Remove Interior Plate
The interior plate holds the Kwikset deadbolt’s inner parts together. Removing it is a key step to take off the lock. This plate covers the screws and the lock mechanism inside the door. Careful removal helps avoid damage to the door or lock.
Before starting, gather a screwdriver that fits the screws well. A flathead or Phillips screwdriver usually works. Make sure the door is open to access the interior plate easily.
Locate The Screws On The Interior Plate
Look closely at the interior plate. You will see two or more screws holding it in place. These screws keep the plate attached to the door. Note their size and type for the right screwdriver choice.
Unscrew The Interior Plate Carefully
Turn each screw counterclockwise to loosen. Keep the screws safe for reassembly or replacement. Remove all screws before trying to pull off the plate. Avoid forcing it to prevent damage.
Remove The Interior Plate From The Door
Gently pull the plate away from the door surface. It may need a slight wiggle to come off. Check for any wires or parts attached and disconnect them if needed. Set the plate aside in a safe place.

Credit: diy.stackexchange.com
Take Out The Deadbolt
Taking out the deadbolt from a Kwikset lock is a key step in removing the entire lock. This part secures your door and must come out carefully. Removing the deadbolt lets you access the inner parts of the lock. It is easier than it sounds. Follow clear steps for a smooth process.
Locate The Deadbolt Faceplate
Open the door fully. Look at the edge where the lock is installed. You will see a metal plate with screws. This is the faceplate that holds the deadbolt in place. Find the screws and prepare to remove them.
Remove The Faceplate Screws
Use a screwdriver that fits the screws well. Turn each screw counterclockwise to remove it. Keep the screws safe for later use. Do not force the screws out quickly. Take your time to avoid stripping them.
Pull The Deadbolt Out
After removing the screws, pull the deadbolt out from the door edge. It should slide out smoothly. If it feels stuck, wiggle it gently. Avoid using too much force to prevent damage. Now, the deadbolt is free from the door.
Detach Exterior Lock
Detaching the exterior part of a Kwikset deadbolt is the first step in removal. This piece sits on the outside of your door and holds the keyhole or keypad. Removing it carefully prevents damage to the lock and door.
Follow these simple steps to detach the exterior lock smoothly. Keep your tools ready and work patiently for the best results.
Locate The Mounting Screws
Look at the edge of your door where the deadbolt is installed. You will see screws holding the exterior lock in place. These screws usually go through the door into the interior part of the lock.
Use a flashlight if needed to see clearly. Identifying these screws is essential before removal.
Remove The Mounting Screws
Use a screwdriver that fits the screws well. Turn the screws counterclockwise to loosen them. Keep the screws safe; you will need them later.
Do not force the screws out if they are hard to turn. Try using a little oil to loosen them gently.
Pull The Exterior Lock Away
Hold the exterior lock firmly. Gently pull it away from the door. If it feels stuck, check for any hidden screws or clips.
Be careful not to drop the lock. Set it on a soft surface to avoid scratches.
Handle Stuck Screws
Stuck screws can stop you from removing a Kwikset deadbolt lock easily. These screws hold the lock handle tightly. Rust, dirt, or old paint can cause screws to stick. Patience and the right tools help free them safely.
Identify The Stuck Screws
Look closely at the screws on the lock handle. Check if any screw is rusty or painted over. Sometimes screws look fine but feel tight when you try to turn them. Mark these screws to focus on them first.
Use Penetrating Oil
Apply a small amount of penetrating oil on the stuck screws. Let it sit for 10 to 15 minutes. The oil seeps into the threads and loosens the rust. This makes turning the screw easier and safer.
Select The Right Screwdriver
Pick a screwdriver that fits the screw head exactly. A wrong size can strip the screw, making it harder to remove. Use a Phillips or flathead screwdriver depending on the screw type.
Apply Gentle Pressure
Press the screwdriver firmly into the screw head. Turn slowly and steadily. Avoid jerking or forcing it. Applying too much force can damage the screw or handle.
Try Heat For Stubborn Screws
Heat can expand metal and loosen stuck screws. Use a hairdryer or heat gun on low heat near the screw. Heat for a minute or two. Then try unscrewing again carefully.
Use A Screw Extractor As Last Resort
If screws strip or break, a screw extractor can help. This tool grips the damaged screw and twists it out. Follow instructions carefully to avoid damage to the lock or door.
Tips For Reassembly
Reassembling a Kwikset deadbolt lock requires patience and care. Doing it right ensures the lock works smoothly and keeps your home secure. Follow these tips to put the lock back together correctly.
Organize Parts Before You Start
Lay out all screws and pieces in order. Keep small parts in a container. This stops you from losing anything important. It also makes the process faster and easier.
Match Pieces To Their Original Spots
Put each part back exactly where it came from. Check the shape and size to be sure. This helps the lock fit well and work without trouble.
Tighten Screws Firmly But Gently
Use a screwdriver to tighten screws. Do not force them too hard. Over-tightening can strip the threads or break parts. Tighten until secure and snug.
Test The Lock After Assembly
Turn the key or thumb turn to check the lock. It should move smoothly without sticking. Test several times to confirm good function before final installation.
Frequently Asked Questions
How Do I Remove A Kwikset Deadbolt Lock?
To remove a Kwikset deadbolt, first unscrew the interior knob and exterior plate. Then, carefully pull the lock apart. Finally, unscrew the latch from the door edge and take out the entire lock assembly.
What Tools Are Needed To Remove Kwikset Deadbolt?
You only need a Phillips screwdriver and sometimes a flathead screwdriver. These help remove screws on the interior knob and latch plate. No advanced tools are required for Kwikset deadbolt removal.
Can I Remove Kwikset Deadbolt Without A Key?
Yes, you can remove the lock without a key by unscrewing the interior side. The key is not needed for disassembly unless you want to unlock the deadbolt first.
How Long Does It Take To Remove Kwikset Deadbolt?
Removing a Kwikset deadbolt usually takes 5 to 10 minutes. It depends on your familiarity with the lock and if screws are easy to access.
Conclusion
Removing a Kwikset deadbolt lock is simple with the right steps. Follow each part carefully to avoid damage. Keep your tools ready and stay patient. This process helps you replace or fix locks fast. Practice makes the task easier over time.
Stay safe and double-check your work. Now, you can handle your Kwikset lock removal with confidence.